
Insights, Analog Love & Creative Stories

Mamiya M645 Review (2026): The Best Entry into Medium Format?
Thinking about jumping to medium format? My honest Mamiya M645 review covers what shooting this camera actually feels like, why 645 is worth it over 35mm, and how it stacks up against the legendary RB67.

The Mamiya M645
The Mamiya M645 in a way democratized the medium format SLR in 1975. Back then, if you wanted to shoot medium format, you either had to get a compact consumer folding camera, a TLR, or go with the super bulky Pentax 67 or the RB67, which was introduced in 1970. So the M645 was the first professional-grade but portable solution.
Why I Ended Up Buying a Mamiya M645
Is Medium Format Actually Worth It?
Mamiya M645 Specifications and System Overview
Waist-Level Finder vs Prism: Two Very Different Shooting Experiences
What It’s Like to Shoot the Mamiya M645
Sekor C 80mm f/2.8 Review: My Everyday Lens
Using the M645 for Portraits, Street and Travel Photography
Buying a Mamiya M645 in 2026: What to Check Before You Buy
Mamiya M645 vs RB67: Which One Fits You Better?
Why I Ended Up Buying a Mamiya M645
When the film photography bug bites you, there is no going back. So, after three months of shooting with my Canon P (find out why i as a glasses wearing person love it here), I knew I wanted to try medium format. I, of course, landed on the typical candidates: the Mamiya 7, RB67, RZ67, Pentax 67, Rolleiflex, and many more. The problem was, I wanted to try it without going broke. Any of the cameras I mentioned go well above €1,000 if you want one in good condition.
So, I did some more digging and stumbled across the Mamiya 645. Yes, it does not have the rotating back like its bigger brothers, but it is cheaper to get and you can shoot more pictures than on a 6x7. Some folks in forums claim it's not worth it, as the size upgrade coming from 35mm would be disappointing. But is it? Let's find out!
Is Medium Format Actually Worth It?
Yes it’s worth it
Before getting into the Mamiya M645 specifically, let’s talk about medium format in general, and specifically the 645 format. If you are coming from normal 35mm film, you might wonder why anyone would bother carrying around a heftier camera just to get fewer shots.
To put it simply: yes, it absolutely is. The negatives are massive compared to 35mm, and the quality is just completely different.
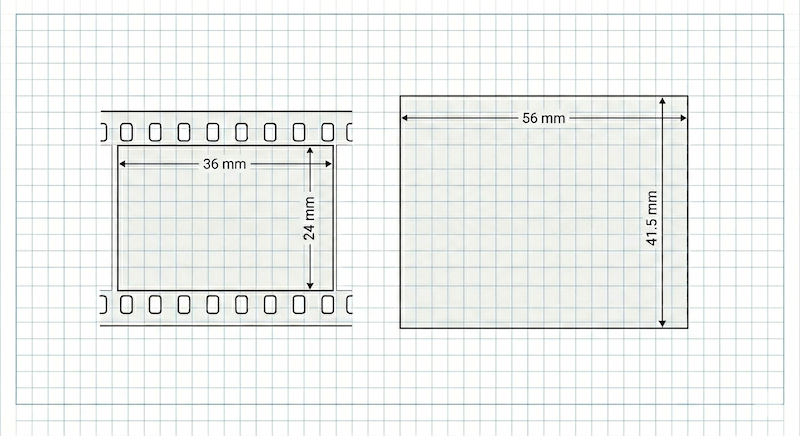
When you look at the dimensions, the difference doesn't sound that huge. But when you look at the actual surface area, it's a completely different story:
35mm Full Frame: 36mm x 24mm = 864mm²
645 Medium Format: 56mm x 41.5mm = 2324mm²
The Result: The 645 negative has almost exactly 2.7 times the surface area of a normal 35mm frame. This means with every single shot, you are capturing nearly three times as much image information, detail, and fine tonal gradations.
You can really enlarge these pictures and they still look great. Since you are using longer lenses, like an 80mm that acts like a standard 50mm on 35mm film, you get a creamy background and a look that you just can't really replicate on smaller formats.
Moving from 35mm to 645 completely forces you to slow down. You get less shots per roll. But that's exactly why 645 hits the sweet spot. It gives you that specific high-end medium format look, but it's still way more portable and cheaper to shoot than bigger 120 formats like 6x7. For me, it is absolutely worth the trade-off.
Mamiya M645 Technical Specifications
Mirror Lock Up Lever And Lower Shutter Button
Just to be clear: throughout this article, I am talking about the original, first-generation Mamiya M645 built between 1975 and 1987. If you are looking to buy one today, you will find that Mamiya actually made seven different manual-focus models over the years, divided into two distinct generations.
While they all share the exact same lenses and film inserts, accessories like viewfinders and grips don't always cross-communicate between the two eras.
Here is the quick version of how they differ:
First Generation (M645, 1000S, M645J): The original model shoots up to a 1/500s shutter speed, the 1000S pushes that to 1/1000s, and the M645J is a stripped-down version. None of these models allow you to change film magazines mid-roll.
Second Generation (Super, Pro, Pro-TL, 645E): These moved to a molded plastic shell design. The Super, Pro, and Pro-TL added removable film backs, allowing you to insert a dark-slide and swap film mid-roll. The 645E was the later entry-level exception, built with a fixed back and a fixed viewfinder.
Technical Specifications
| Feature | Specification |
|---|---|
| Film Format | 120 film (15 exposures) / 220 film (30 exposures) |
| Frame Size | 6 x 4.5 cm (actual image area: 56 x 41.5 mm) |
| Lens Mount | Mamiya M645 bayonet mount |
| Shutter Type | Electronically controlled cloth focal-plane shutter |
| Shutter Speeds | 8 seconds to 1/500 second, plus Bulb |
| Flash Sync | X-sync at 1/60 second |
| Viewfinder Options | Interchangeable, Waist-Level Finder, Prism Finder, Metered Prism |
| Focusing Screens | Interchangeable, Split-image, Microprism, Matte |
| Film Advance | Manual winding crank or winding knob |
| Battery Requirement | 1x 6V 4LR44 / PX28 battery (Required to operate the shutter) |
| Weight | Approx. 945g (Body only) / ~1.5kg with 80mm lens and Prism |
Why the 645 Format Just Works
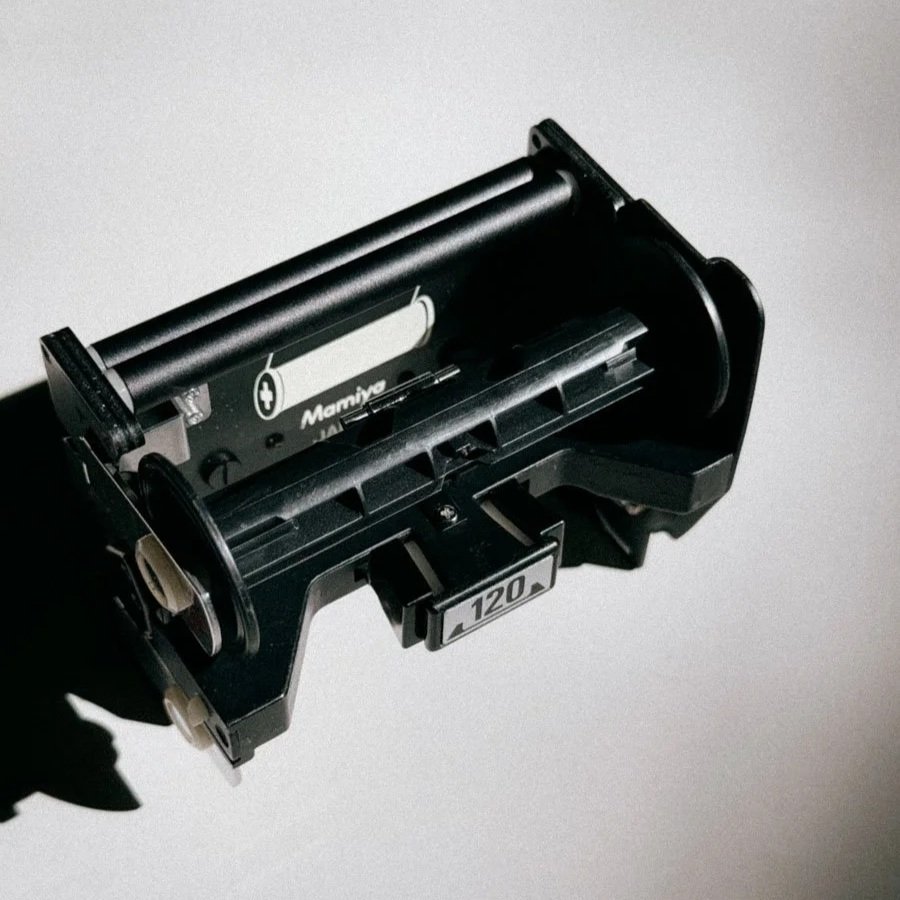
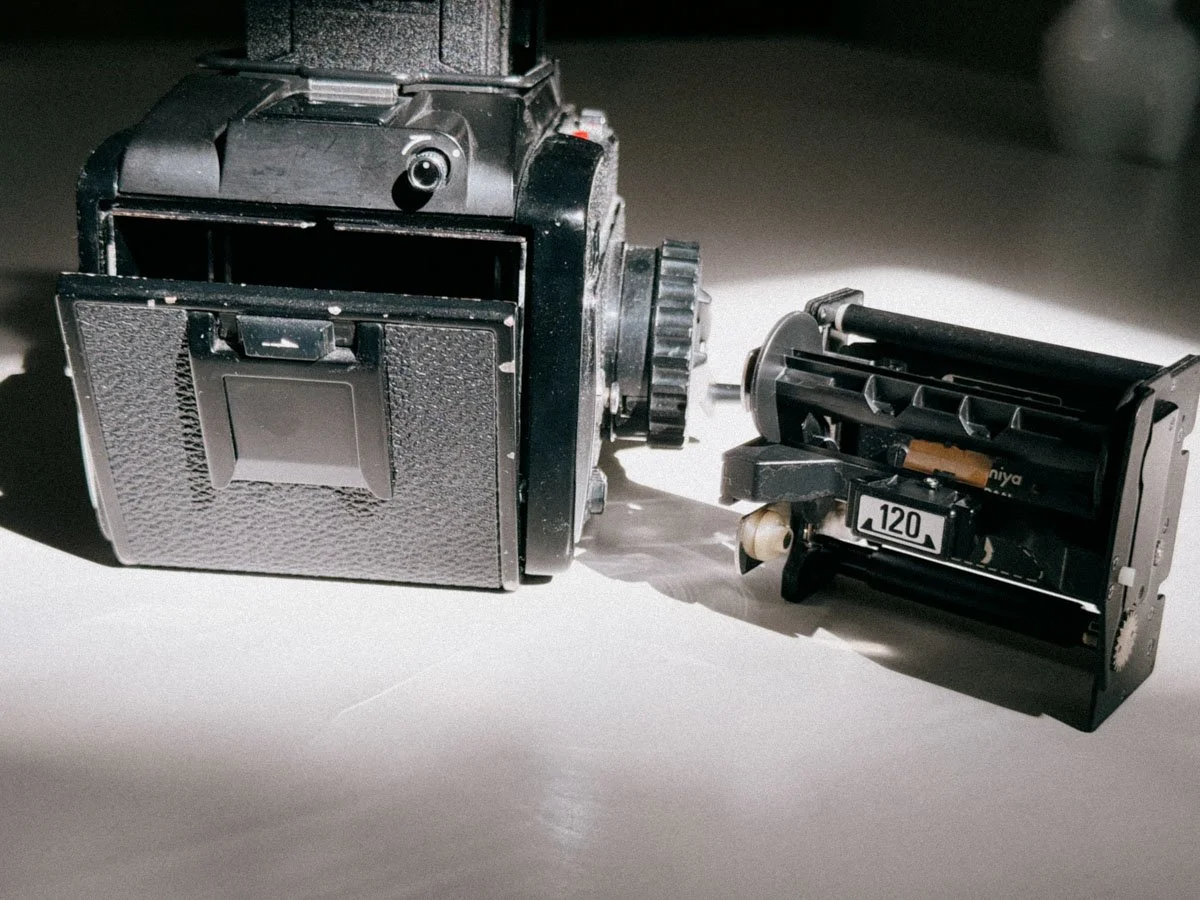
The 120 Magazine
The doorbell rang and I pretty much ripped the package out of the postman's arms. There it was, my first medium format camera! The Mamiya M645 with its standard 80mm f/2.8 lens and metered prism! I was surprised. It was actually a lot smaller than I imagined. The prism gives the camera a bulky look, so I ordered a waist-level viewfinder right away.
The test roll was Ilford HP5. Upon receiving the scans, I was actually disappointed. Why? Check out the picture below. The camera had light leaks, even though the "trusty" seller on eBay Kleinanzeigen said he had just replaced them. Being the handyman I am, I knew I had to give that camera a proper second try. So, I got a guide on how to replace the seals and went ahead. It was actually quite an easy job. Still, the camera was not off to a great start, to say the least.

Notice The Horizontal Line?
During our honey moon trip to Italy things started to come together. With new light seals, I was in for a treat. The depth of field and overall resolution were just different and a definitive upgrade from the 35mm I had shot so far. So, the camera was with me on many photo walks and holidays from that point on.

Kodak Ektachrome Just Rules - Especially in 120
And that is where the 6x4.5 format shines in terms of practicality. If you shoot a 6x7, you are constantly swapping rolls after just 10 frames, which gets annoying when you are just walking around. ‘Cause believe me, you will need some time to adapt to that whole “less shots per role thing” But with the 645, you don't feel stressed about wasting film, but you still get a big negative. Plus, the standard rectangular aspect ratio just works for normal prints without any awkward cropping.
As I only had and still have one lens, it is actually very compact considering the fact that you are shooting proper medium format 120 film. Having it around my shoulder does not feel much different than my Nikon F or F2 (I love both, if you can’t decide which one is right for you, here you go). So, the more I shot with it, the happier I got that I got the camera in the first place.
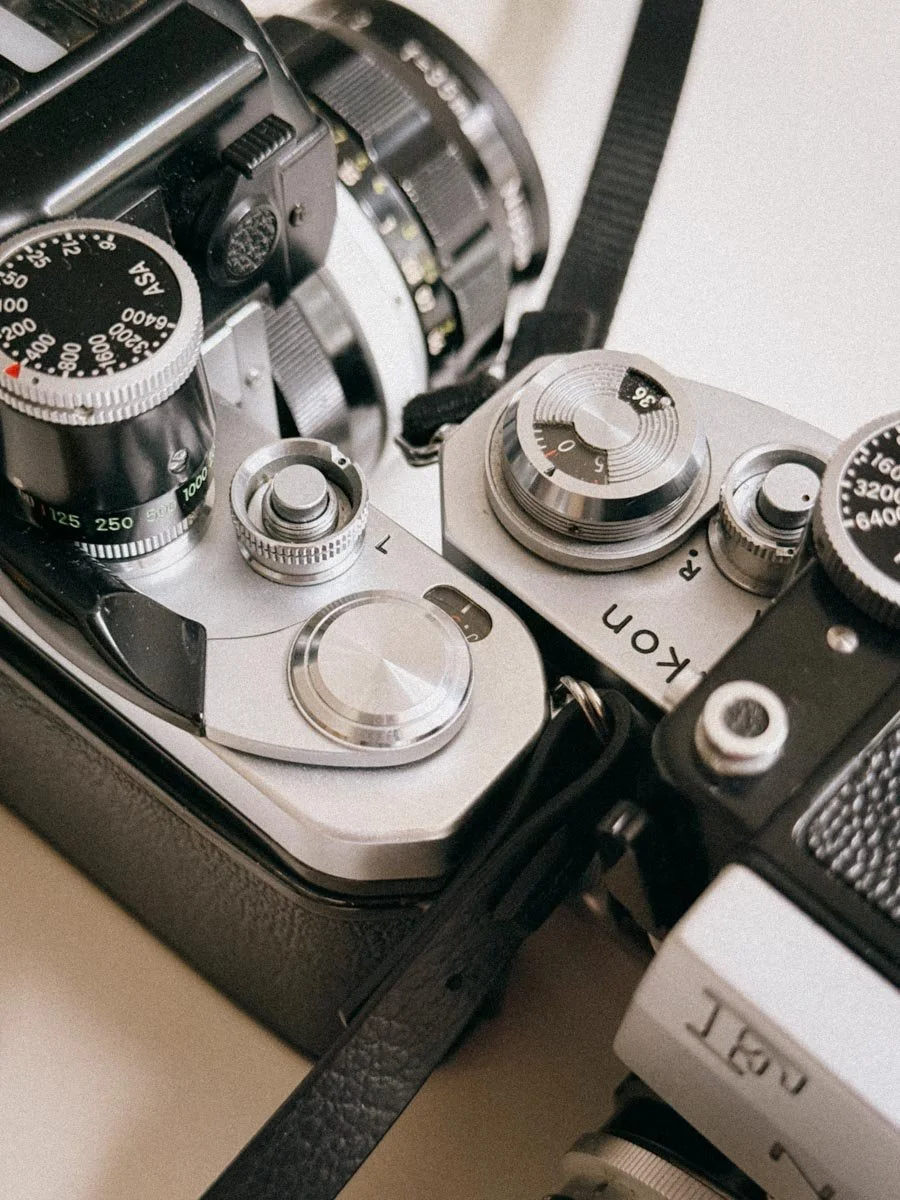
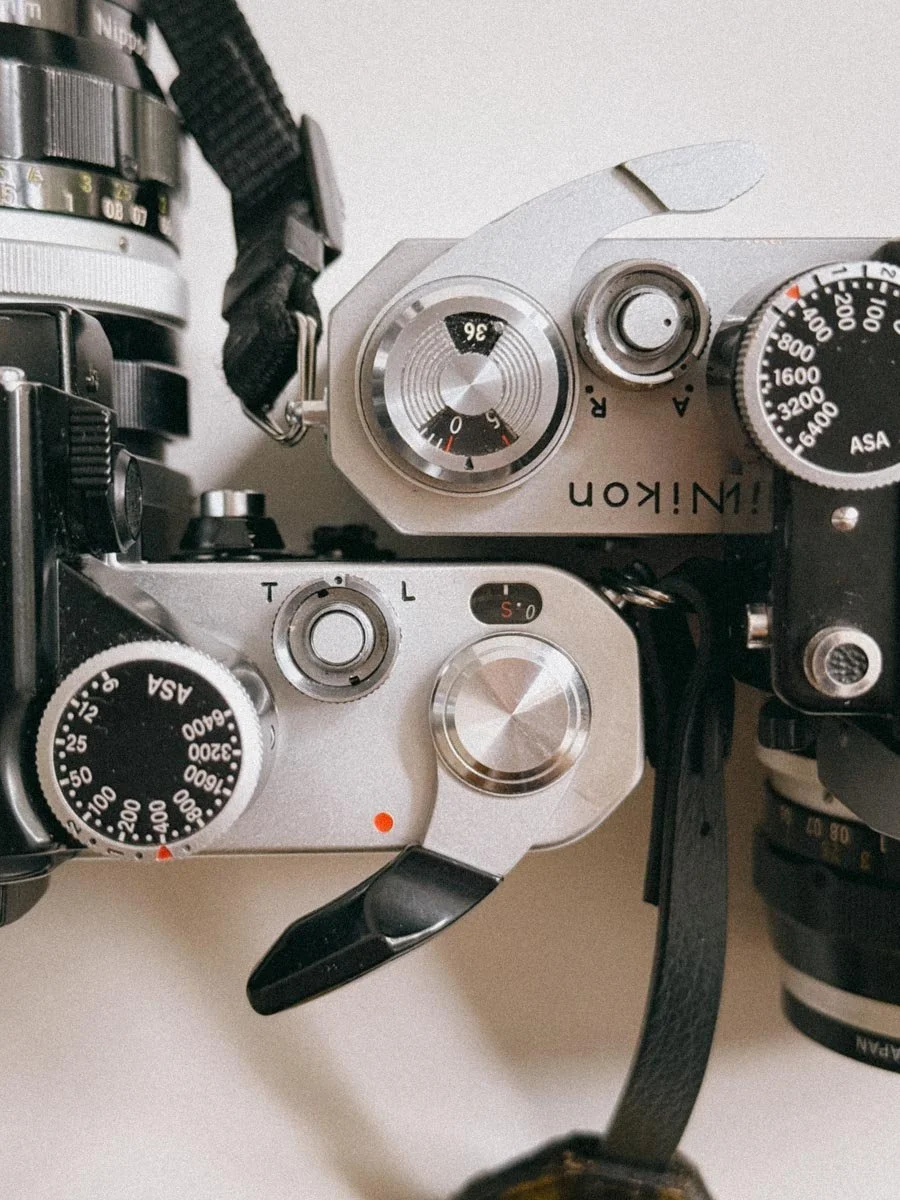
Waist-Level Finder vs Prism: Two Very Different Shooting Experiences

The Waist-Level Finder is a lot smaller
While my camera came with the metered prism finder, I actually got it because of the waist-level finder. Having seen that on Instagram and countless YouTube videos, I just wanted to try it for myself, but I was in for a surprise—again.

Underexposed Flowers
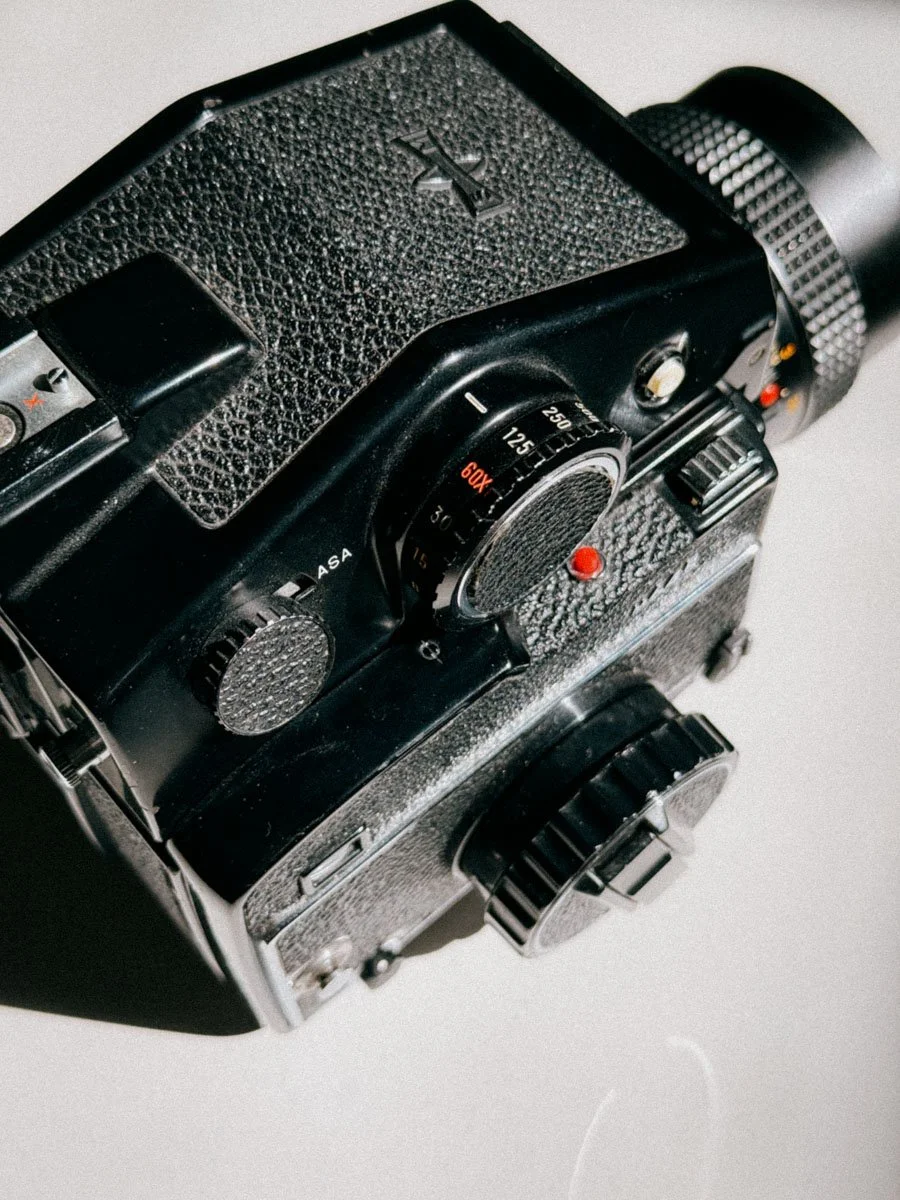
With the metered prism attached, it actually feels quite normal to use and very similar to most SLR cameras. You get a meter needle, and the shutter dial is now on the prism. Since the Canon P comes without a meter and the one built in here seems to work, that was quite nice for a change. One thing to watch out for: you really have to make sure to set the dial on the body to the red dot so the camera knows the dial on the finder is now in charge. This is indeed a bit strange, as you might accidentally move the shutter dial on the body and then ruin the exposure.
The beefy metered Prism Finder
It is quite a heavy finder and makes the camera look a bit bulky and less “agile”
The waist-level viewfinder is a joy to use. Once you get used to it. Yes, it absolutely takes some time to get the hang of it, as left and right are switched. This is not a big problem when shooting in landscape orientation. If you want to shoot portraits, well, you are in for a surprise. You now have to stand at a 90-degree angle to your subject and try to frame it, whilst up has now become down. Not very intuitive, but it can be done. It's a challenge nonetheless.

The uncluttered “Analog Dispaly”
Critical focusing is actually easier than I imagined, thanks to the magnifying glass that flips out when pushing the silver button. This is well worth the learning curve, as framing your picture with an analog display is just so cool! Also the lower position of the camera relative to your subject is quite a inspiring perspective!
For studio and commercial use where you might want to shoot a lot in portrait orientation, it's very handy to have both. While traveling, I usually only bring the waist-level finder with me.
So, If you are looking to buy an M645 yourself, really think about what kind of shooting experience you are after, because your choice of viewfinder completely changes how the camera feels.
What It’s Like To Shoot The Mamiya M645

It is a hefty camera, no matter what finder you are using. The overall build is also great. Very un-plasticky and super sturdy.
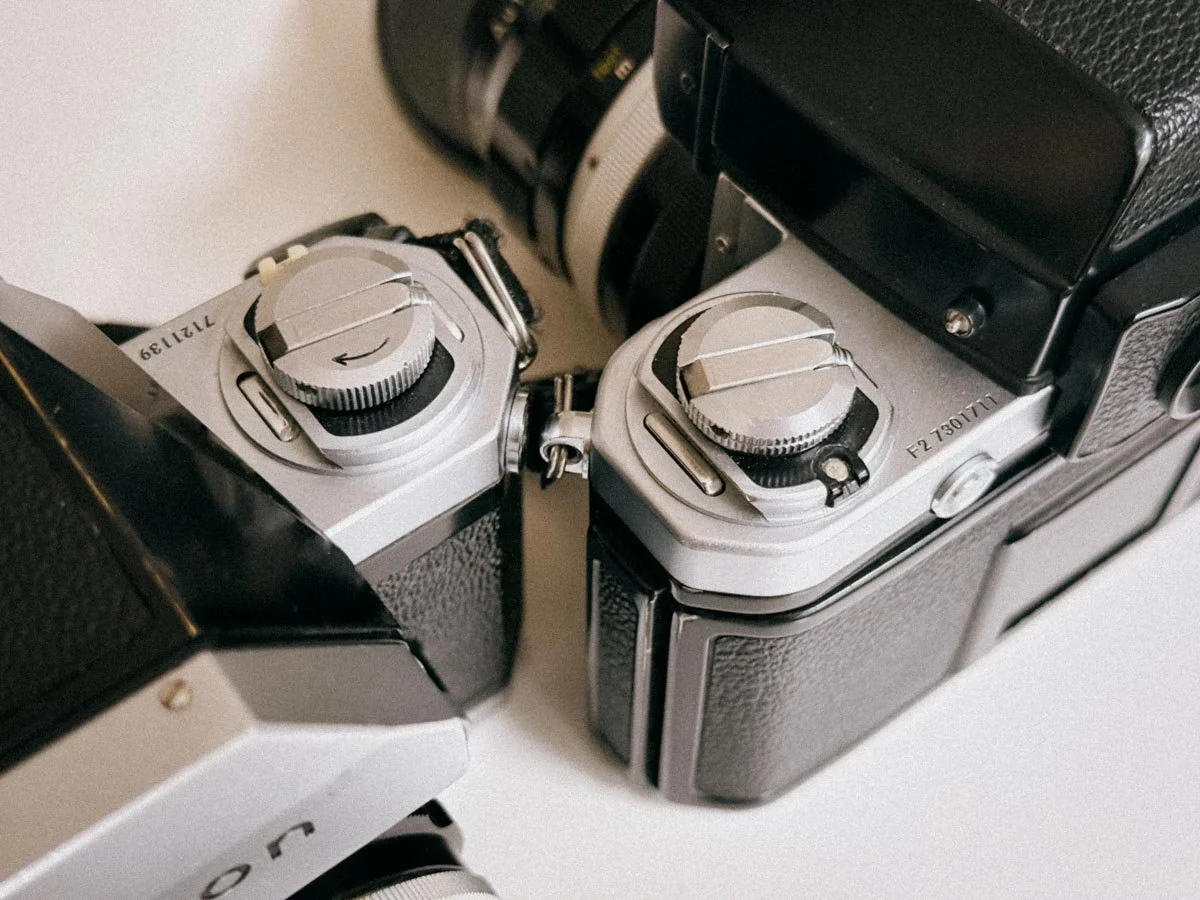
Loading the film is also super easy. Open the back, extract the magazine, load the film. Just make sure the emulsion side is facing the shutter curtain. (Yes, I managed to screw that one up once and got black scans.) Turn the film advance, or extract the crank for even faster winding, till it stops and you are good to go! It’s now at your disposal.
Having only 15 frames instead of the usual 36 on a 35mm roll changes how you take pictures. It forces you to slow down even more and be very selective with your composition. You actually stop, think, and make sure everything is perfect before hitting the shutter, because every frame counts. I found myself walking away from a scene not taking the picture quite often. That being said, compared to other medium format systems, it is still incredibly fast. You don't have to swap rolls after just 10 frames like on a 6x7, and the handling is quick enough that you can easily keep up with the action if you need to.
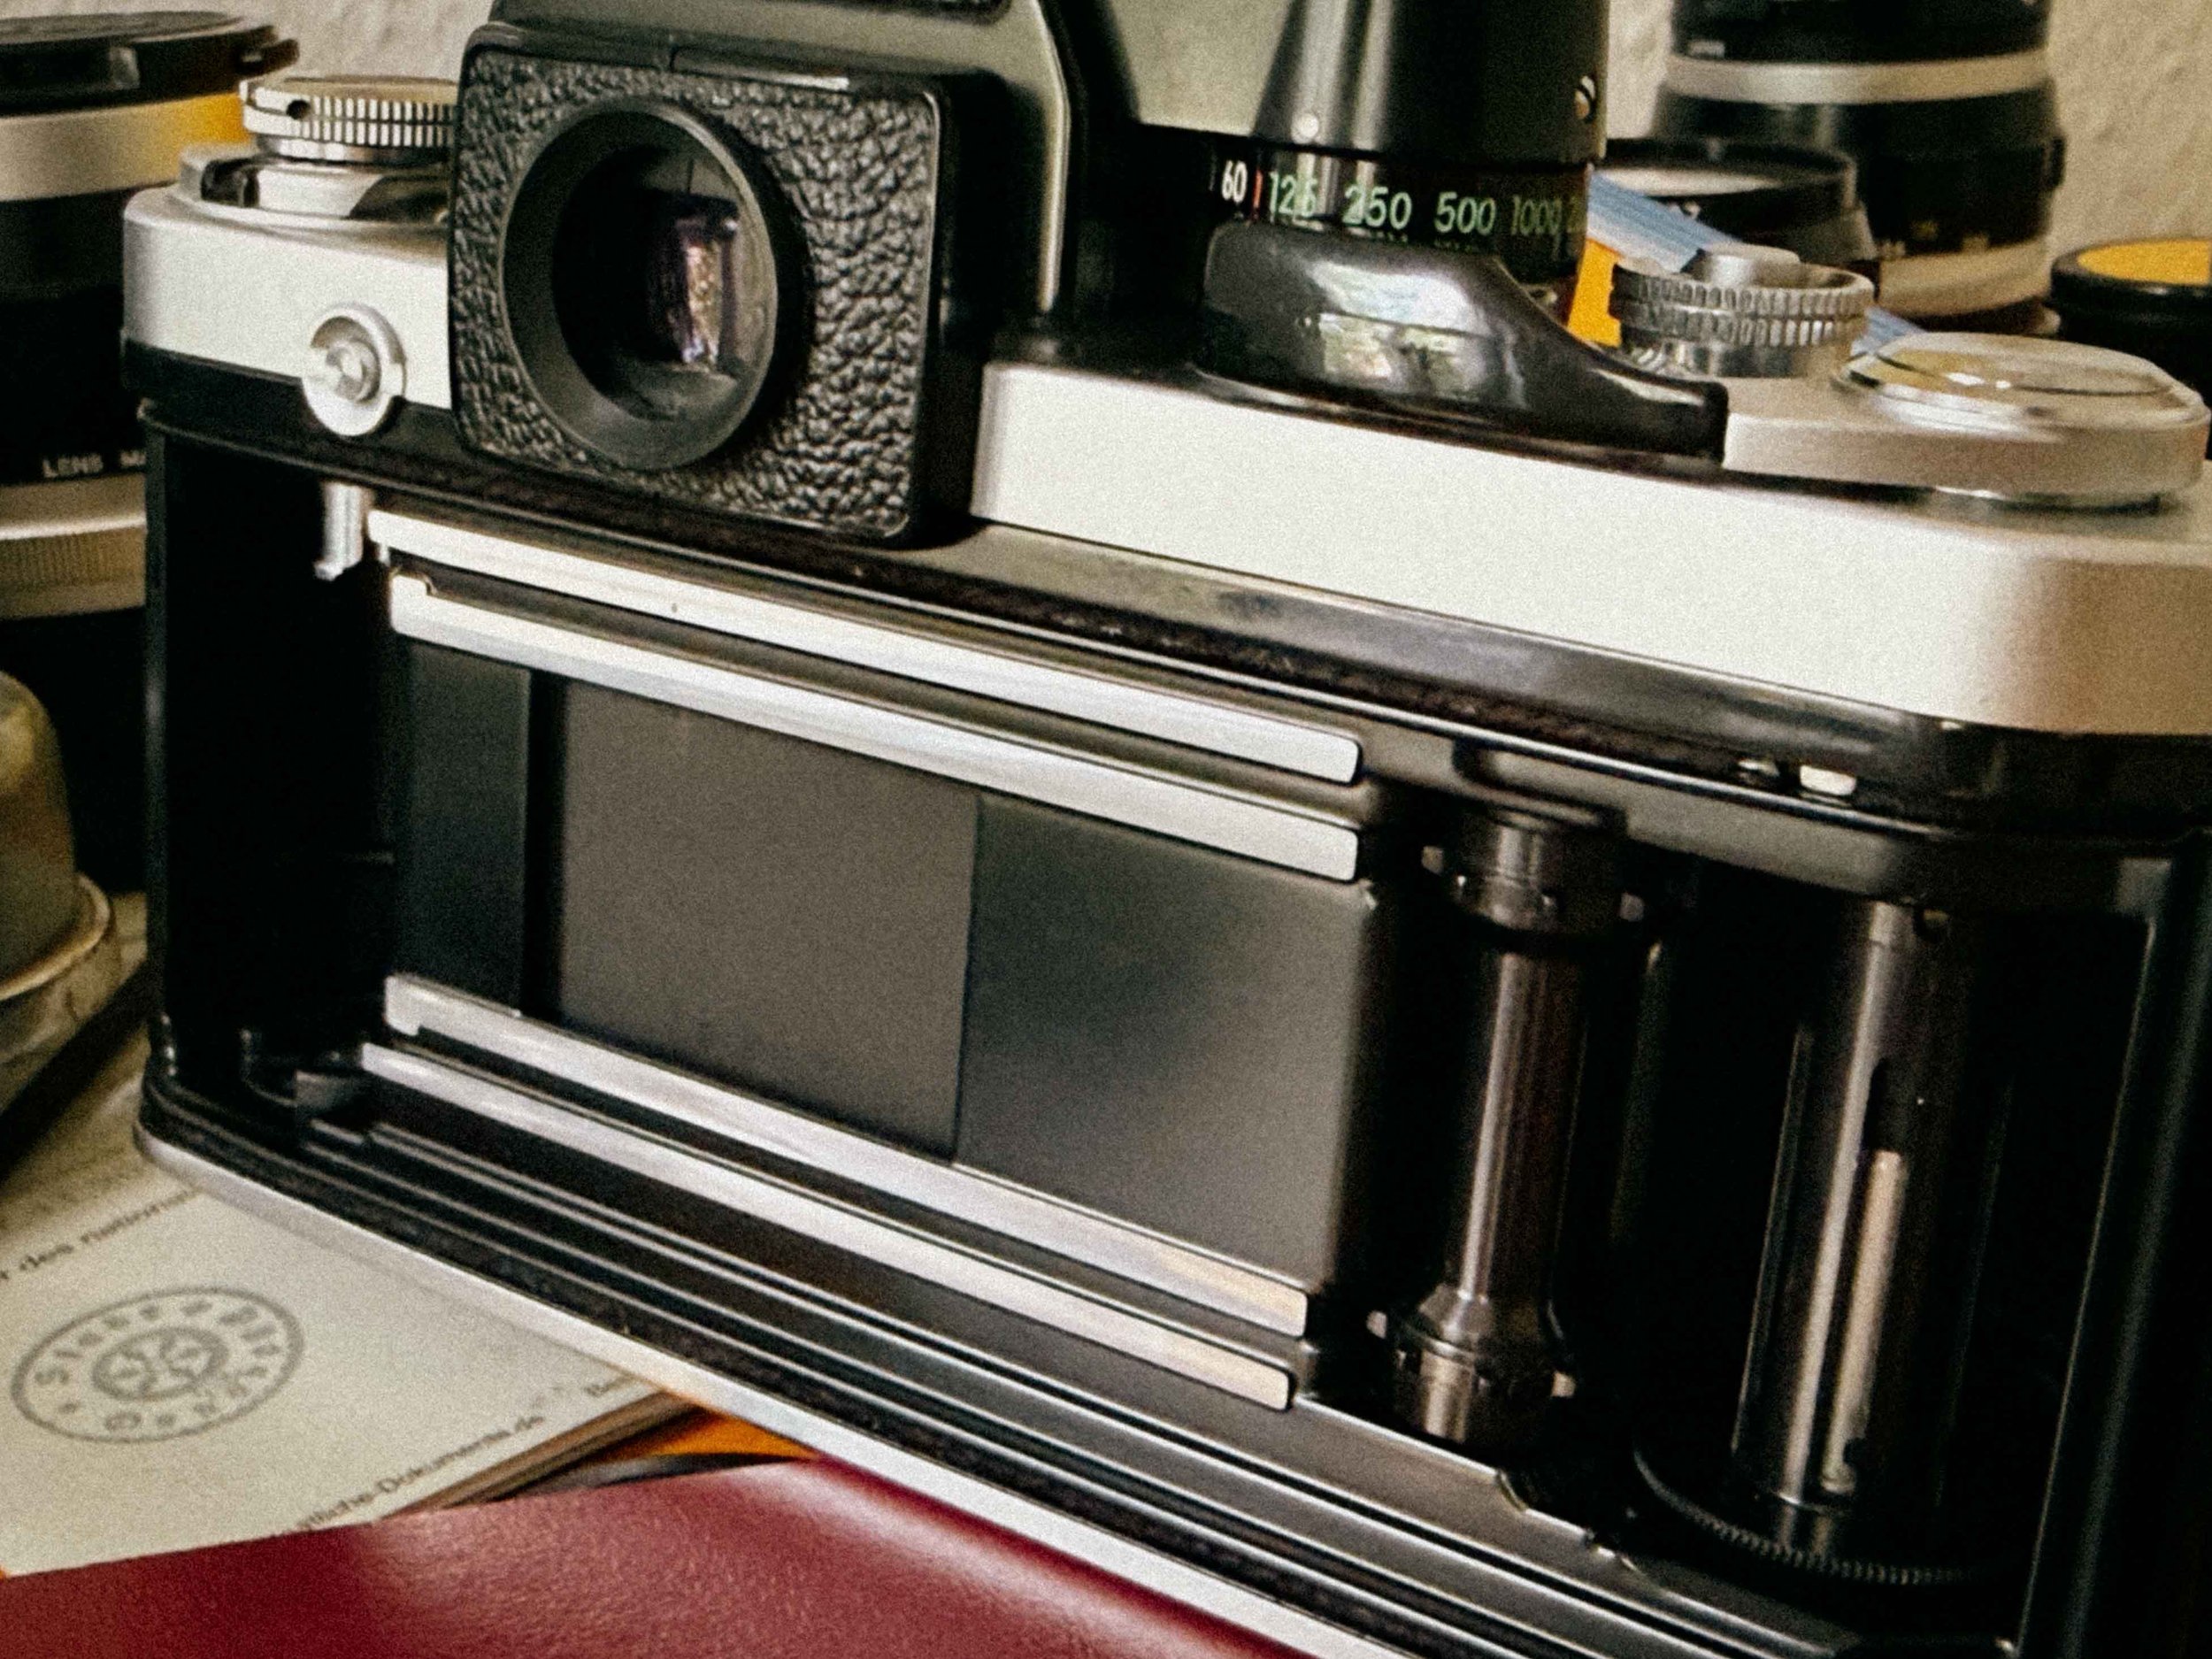
Magazine unloaded
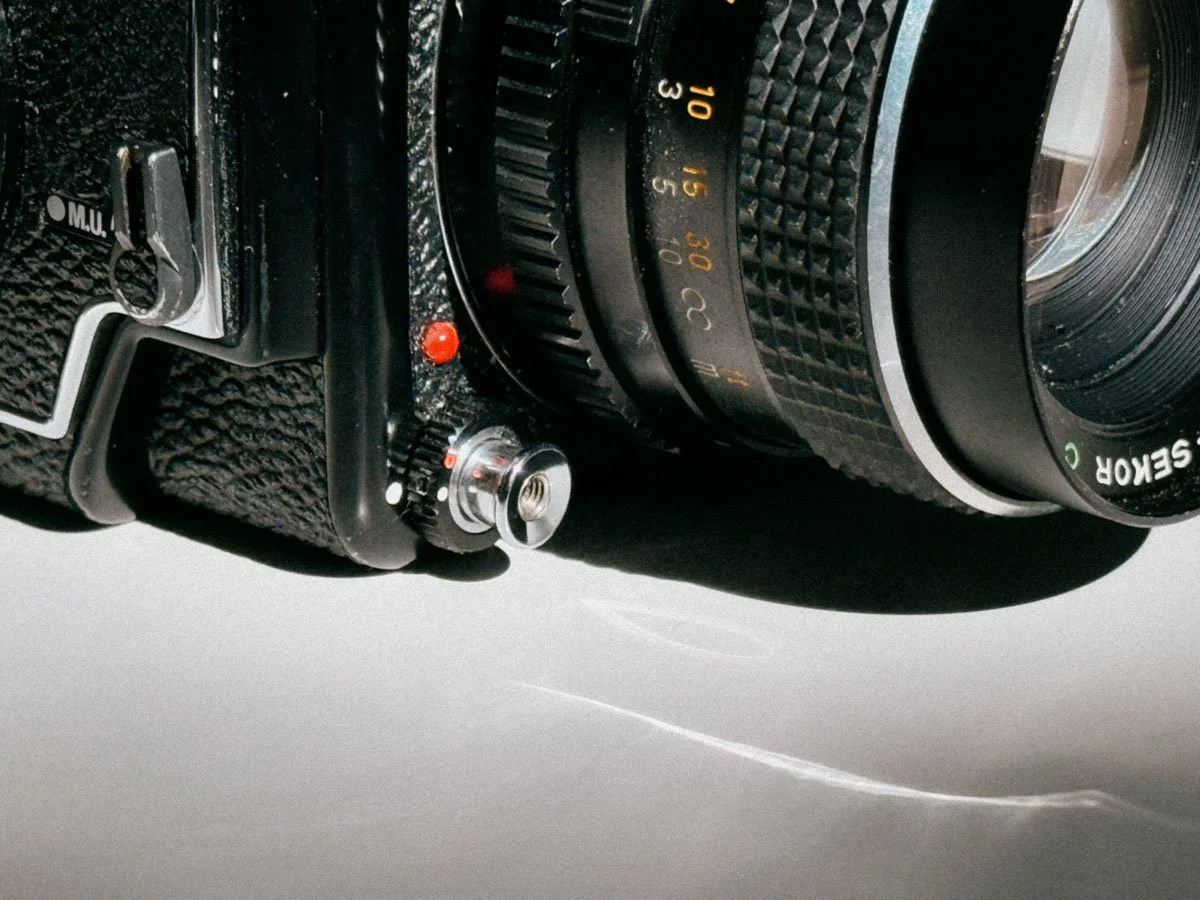
The shutter speed dial on the left is self-explanatory, but what isn't are the two shutter buttons. Don't get me wrong, it's great to have the two, as the one on the top is perfect for the waist-level finder and the one on the front is great for the prisms. BUT again, this needs some time to get used to. And you will absolutely fire that thing unintentionally. You've got a mirror lock-up on the front, as well as the double exposure lever on the right-hand side next to the film advance.
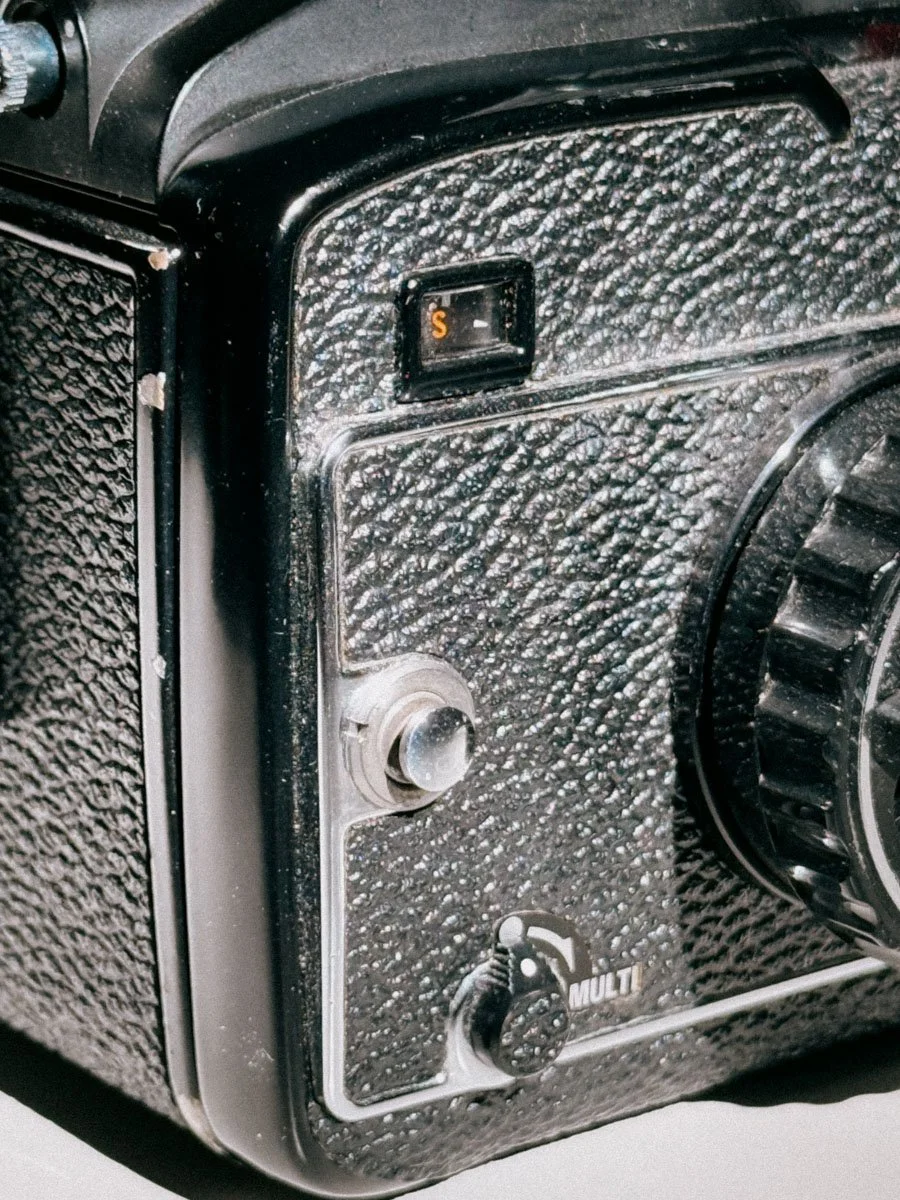
One thing that freaked me out and made me think my camera was broken: without having a film loaded, you MUST engage the multi-exposure switch in order to check the camera. Otherwise, it will not fire the shutter!
If you managed to read this far, there was a lot of getting used to. And that's just the plain truth. But I found it enjoyable, as it forced me to "learn" a new camera system. It's nothing major, but it is a different design than a standard 35mm camera. Dials and switches are just in different places. But again, it's not that hard, and I found it easy to adapt and get used to it.
The thing I love most about it is its size. And even though it's a bit tricky to set up, once the film is advanced and the exposure is set, even amateurs, newbies or friends without analog photography knowledge will be able to snap a picture.
Sekor C 80mm f/2.8 Review: My Everyday Lens

The Standard 80mm Lens
This is a great lens, and don't get confused: due to the different format, it is equivalent to roughly a 50mm f/1.8 on 35mm film. Lots of people struggle with that standard focal length. I did too, but when shooting this lens from the hip with the waist-level viewfinder, it just clicks. It looks very natural and beautiful. The bokeh is very creamy, and it's easy to separate your subject from the background.
Another practical plus is the common 58mm filter thread, which makes finding cheap filters or a replacement lens cap incredibly easy. Also, while a lot of people in forums rave about the faster 80mm f/1.9, that lens is a lot bigger, heavier, and way more expensive. This f/2.8 version keeps the camera lightweight and perfectly balanced. It is plenty sharp wide open, but once you stop it down to f/5.6 or f/8, the details are absolutely insane.
The build quality is great, and overall, it is just an awesome lens to walk around with.
Using the M645 for Portraits, Street and Travel Photography
As already mentioned, it is a very portable camera and definitely capable of street photography when using zone focusing. Again, here is where the waist-level finder comes in handy. You don't have the camera in front of your face, but down at your waist. Especially in crowded places, I was able to catch some candid scenes because people didn't notice the camera. Is it quiet? No.
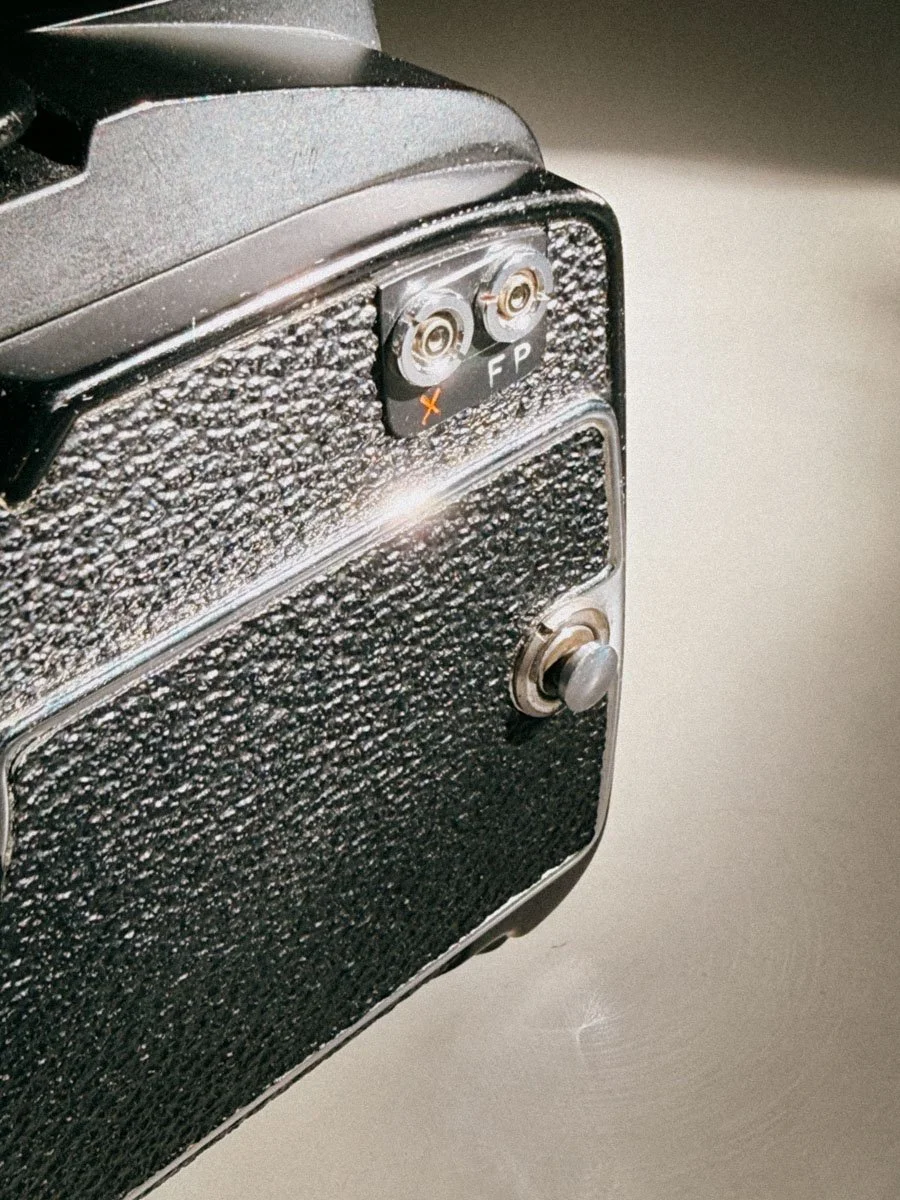
The M645 also features flash sync ports making it easy to use with modern flashes.
For traveling, it is absolutely perfect, but I still notice that I would not take it as my only camera. One thing to keep in mind: since this camera needs a battery to operate, it can be tricky, especially in cold conditions. My shutter quit working on me twice, either because of the battery not delivering the power in the cold or it might have also been because of the fact that the lubricants are older and my example is need of a CLA.
Buying a Mamiya M645 in 2026: What to Check Before You Buy

The Shutter Speed Dial
As I mentioned earlier, it is always best to buy from trusted sellers or, even better, test the camera out in person if you get the chance. These cameras are decades old, and "tested and working" can mean very different things on eBay or Kleinanzeigen.
If you are hunting for an M645, here is a quick checklist of what you should absolutely double-check before handing over your money:
The Light Seals and Mirror Bumper: Don't just trust the description. Ask the seller directly if they have been replaced, or budget around €15 and an hour of your time to do it yourself. Check the seal around the door and the foam pad where the mirror hits the top of the body.
The "Prism Line" (De-silvering): If you are buying a camera with a prism finder, ask the seller if there is a line across the viewfinder. Over time, the glue inside the prism degrades, causing a horizontal line right through your view. It doesn’t affect the photos, but it is incredibly annoying to look at.
Battery Compartment & Electronics: Since the M645 is electronically controlled, it is a paperweight without a working battery. Open the battery door on the bottom and check for corrosion or leaked acid. Also, make sure the battery check button (the little green light) actually lights up.
Sticky Slow Shutter Speeds: As I found out the hard way in the cold, old lubricants can freeze up the shutter. Fire the camera at 1 second or 2 seconds and listen closely. Does it sound like a crisp, steady second, or does the shutter hang open for too long?
Oily Aperture Blades on the Lens: Take the Sekor C lens off, look through the glass, and flick the aperture preview lever. The blades should snap open and shut instantly. If you see a shiny, dark residue on the blades, it’s oil, which will slow down the lens and ruin your exposures.
Frame Spacing: If you can test it in person, bring an old, developed roll of 120 film. Load it into the insert and wind it through. Make sure the frame counter advances correctly and the winding crank stops exactly when it's supposed to. Faulty spacing can lead to overlapping pictures.
Mamiya M645 vs RB67: Which One Fits You Better?

The 645 With The Metered Prism Finder Attached
When looking into Mamiya medium format, you always end up comparing the M645 to the RB67. They are completely different. The RB67 gives you those huge 6x7 negatives and that rotating back, but it's basically a giant, heavy studio camera that you almost always need a tripod for.
If you're on the fence about which one to get, starting with the M645 just makes a lot of sense. It's a great way to dip your toes into medium format and see if you even like the workflow. You get the better depth of field and resolution without the crazy weight and learning curve of a 6x7 system.
Plus, you can always upgrade later. If you realize you want those massive negatives, you can just sell the M645 and get an RB67. The market is pretty steady, so you won't really lose money anyway. But honestly, a lot of people think the 645 is just a stepping stone, only to find out it's their perfect sweet spot. It's portable enough for travel, gives you more shots, and is much cheaper to shoot over time.
Mamiya M645 Sample Images
Here are some images for you. Portra, B&W, Slidefilm as well as expired Ektachrome. (I am a sucker for the latter. if you want to know more about how i edit slide film, here you go)


Final Verdict: Is the Mamiya M645 Still Worth It in 2026?
I love my M645. By now, you’ve probably realized that it takes some time to adapt to, but that’s just part of the game with analog photography. Each camera is different, feels different, and will absolutely influence the way you shoot. I am by no means a believer in the "camera body doesn’t matter" crowd.
I might send mine in to get a CLA (Clean, Lubricate, Adjust) soon, though. As I mentioned, it tends to freeze up a bit in the cold, but maybe that’s a little unfair of me, since I’m pretty spoiled in terms of reliability with my fully mechanical Nikons.
If you have to choose one camera to start your medium format journey, the M645 is definitely the go to choice. For me, it probably is the easiest and most approachable entry into medium format. The balance between image quality, portability and price is just hard to beat. So if you're on the fence, give it a try!
Mamiya M645 FAQ
1. Is the Mamiya M645 good for beginners?
Yes, definitely. It takes a bit of time to get used to, especially if you are coming from 35mm, but compared to cameras like the RB67 or Pentax 67, the M645 feels surprisingly approachable. Film loading is simple, the controls are easy to understand.
2. Does the Mamiya M645 need a battery to work?
Yes. The original M645 uses an electronically controlled shutter, so without a battery the camera will not fire. Luckily it only needs a common 6V PX28 / 4LR44 battery, which is still easy to get today.
3. How many pictures do you get on a roll of 120 film?
You get 15 shots on a standard roll of 120 film. That is one of the reasons why the 645 format feels so practical. Compared to 6x7 cameras with only 10 exposures per roll, the M645 feels much less limiting for travel or everyday shooting.
4. Is the waist-level finder hard to use?
At first, yes. Especially when shooting vertically. Left and right are reversed, and once you turn the camera for portraits your brain needs a moment to adapt. But after a few rolls it starts feeling surprisingly natural. The built-in magnifier also helps a lot with focusing.
5. What is the best lens for the Mamiya M645?
For most people, probably the Sekor C 80mm f/2.8. It is sharp, relatively compact, affordable, and gives you that classic medium format look with very smooth background separation. A lot of people chase the 80mm f/1.9, but the f/2.8 is much smaller, lighter, and honestly easier to carry around.
6. Does it work with regular straps?
No, you need a dedicated Mamiya strap due to the attachements.
Enjoyed this? You might also like:
If you found this article helpful, check out my other deep dives into the world of expired emulsions and color recovery:
How to Edit Expired Slide Film: A Technical Guide to Rescuing E-6 (Ektachrome 64T)
Nikon F Review (2026): Shooting the Indestructible 35mm Legend
FPP Retrochrome 400 Review: Shooting High-Speed Surplus Slide Film
422 Meters of Frozen Gold: The Expired Ektachrome Heist Part I
422 Meters of Frozen Gold: The Expired Ektachrome Heist Part II
Embrace the Blues: Why Ektachrome shifts cooler and how to handle it
Minolta SR-101 (SRT 101) Review: The Ultimate Mechanical SLR in 2026?

How to Edit Expired Slide Film: A Technical Guide to Rescuing E-6 (Ektachrome 64T)
Shooting 20-year-old Kodak Ektachrome 64T is a gamble—especially when the winter light of Venice turns everything into a violet, tungsten-shifted haze. But don't throw those "ruined" rolls away just yet.
In this guide, I break down my surgical workflow for saving expired slide film. Moving beyond simple white balance, I show you how to use individual RGB channel stretching and manual black-and-white point mapping to reclaim dynamic range from aged emulsions. It’s a collaboration between the chemistry of the past and the digital darkroom of today.

Kodak’s Ektachrome 64 - Raw scan (left) - corrected (right)
Let’s be real: shooting expired Kodak Ektachrome 64T is a gamble. It’s a tungsten-balanced film, meaning it’s designed for the warmth of studio lights. I was lucky to spent the a couple of days around new year 2026 in Venice and shot it under the misty, winter light. It delivers a heavy blue cast that, combined with 20 years of expiration and not ideal storage, can make your scans look like a cold, cinematic dream or a complete purple blueish disaster.
But don't throw those rolls away. Saving expired slide film is all about understanding how to manipulate the color shifts in post-production. (And a bit of courage and luck) Here is my workflow for turning crazy shifted slides into something more “normal”.
Venice meets Tungsten: Blue on Blue
Venice’s haze and the reflection of the water already create a cool color tone. Using a tungsten film like 64T without an 85B filter meant I was expecting very blue results. As the film ages, the yellow layer weakens, leading to a massive shift toward magenta in the shadows. Maybe the filter might have helped, maybe not. We will never know. Its hard to predict things when you’re shooting expired slide film. Which is also the reason why it’s so exciting.


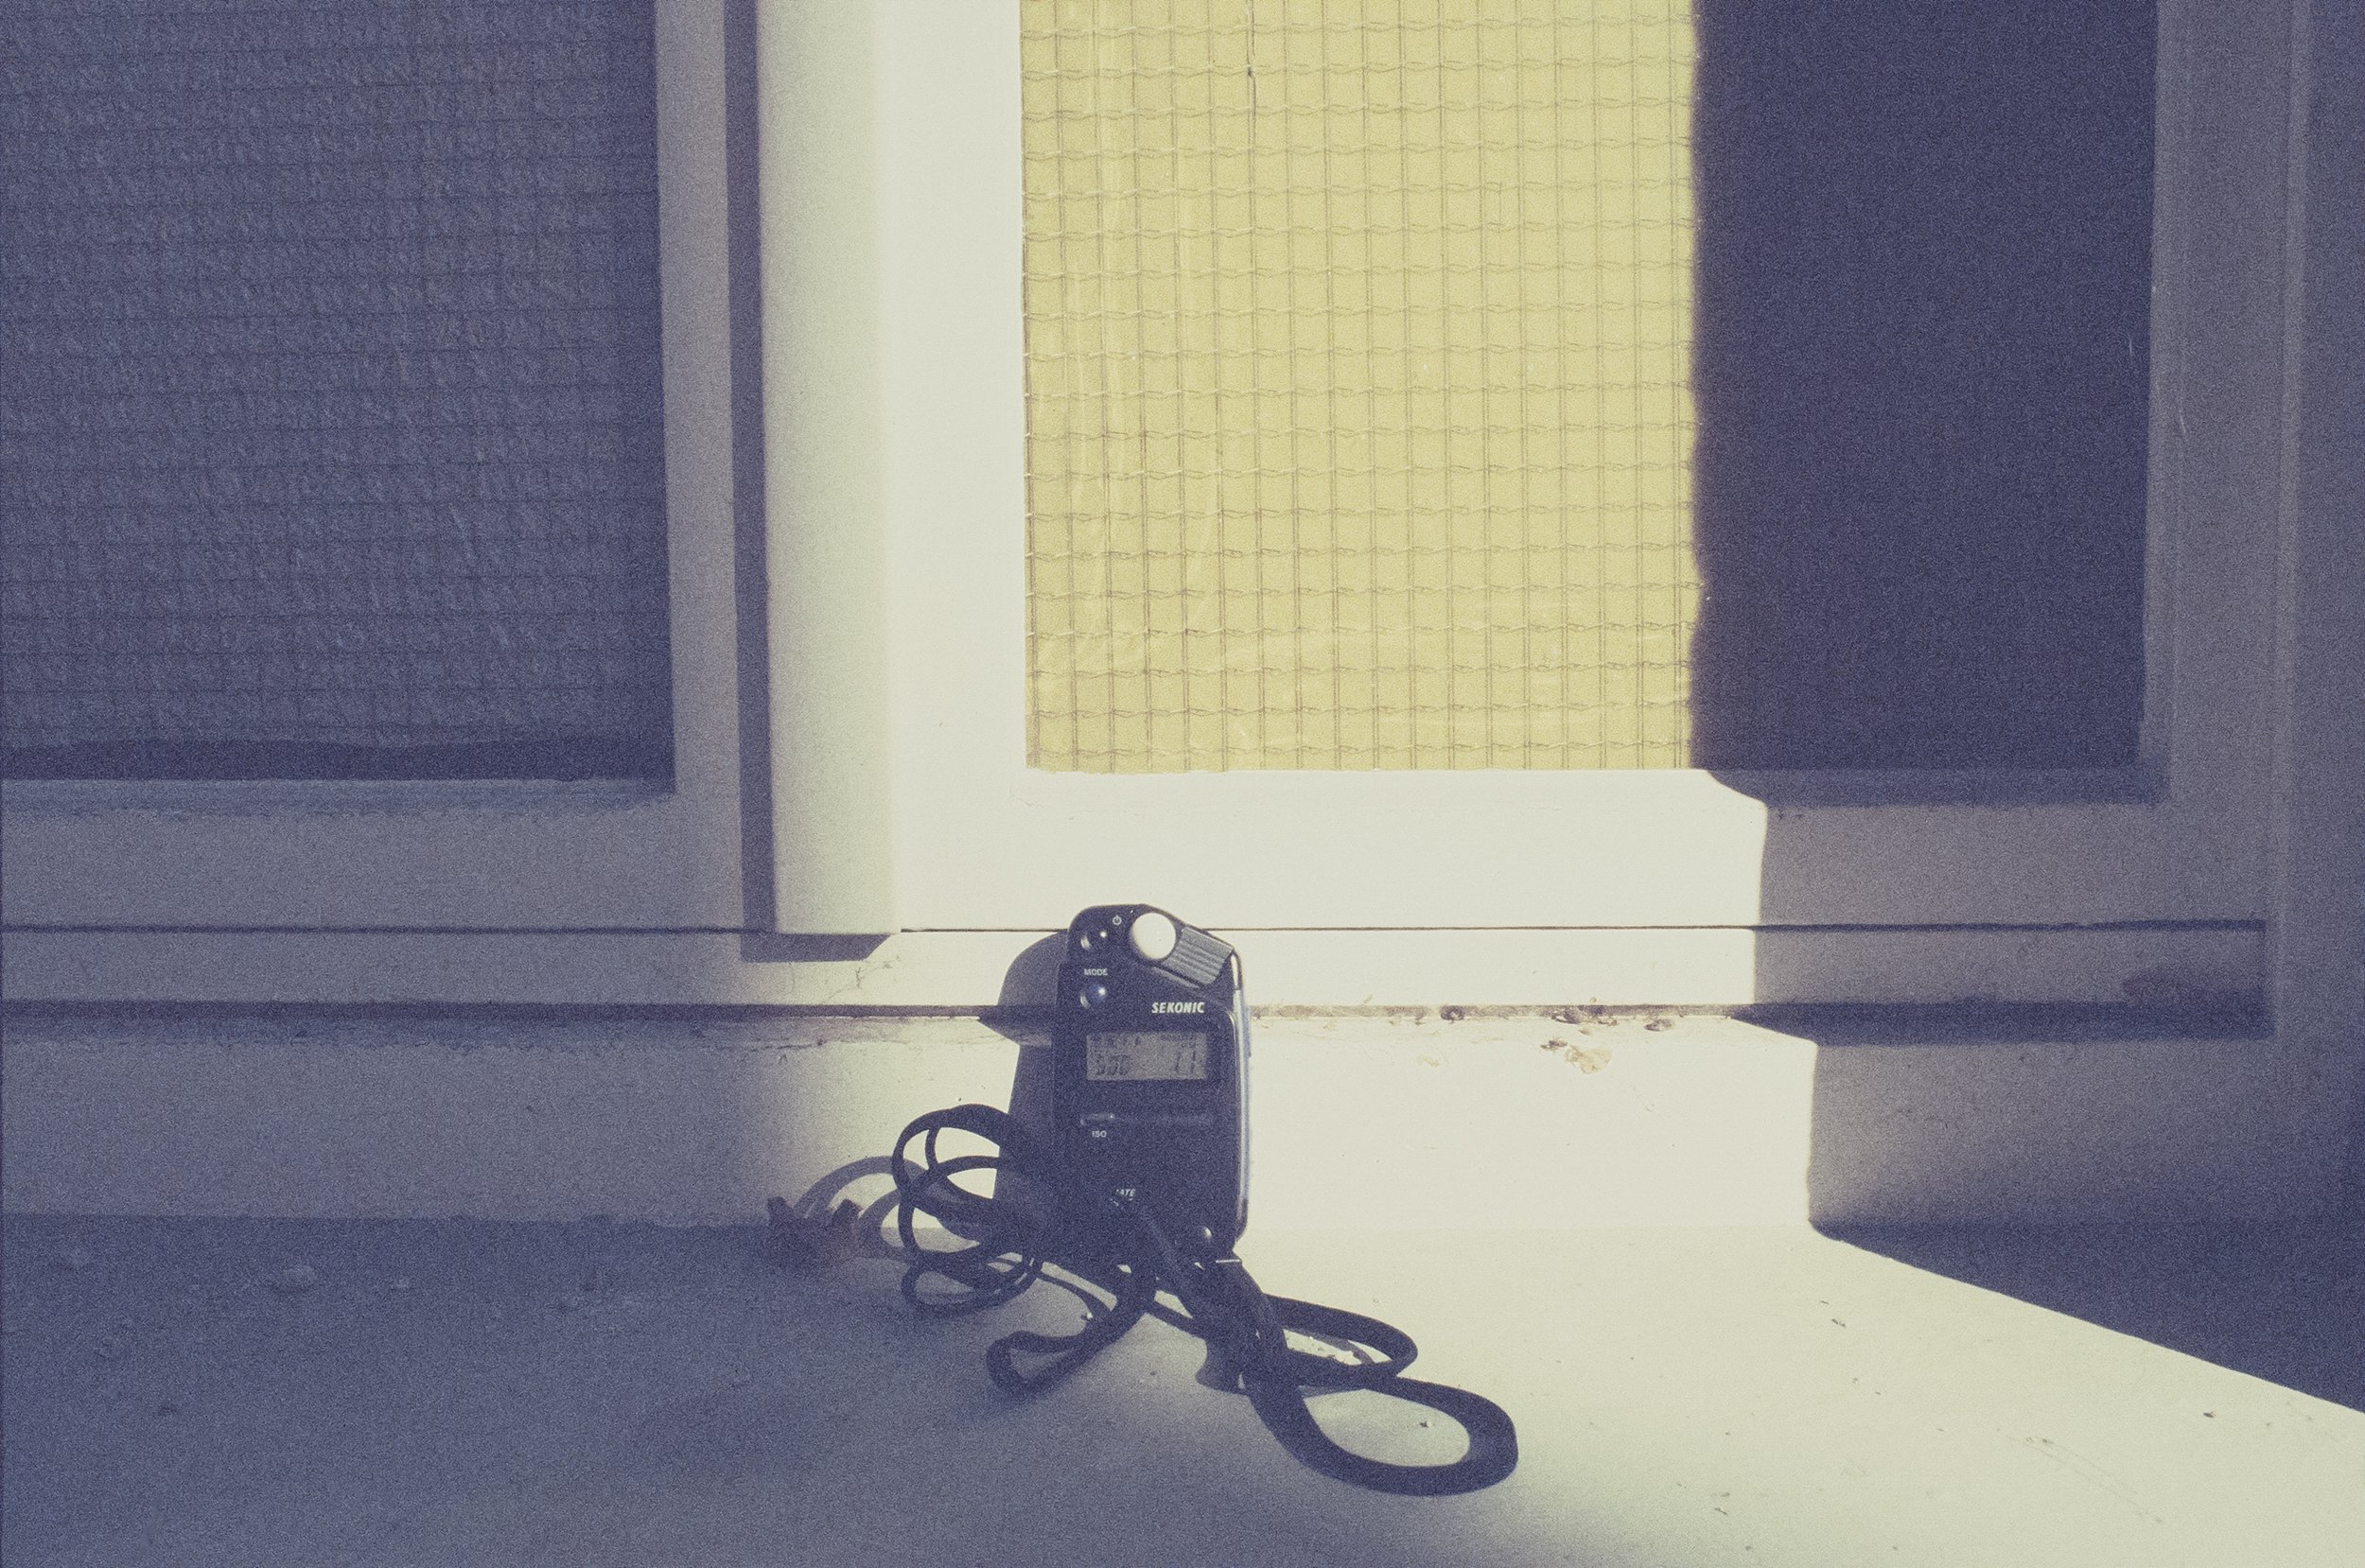
Metering
These were my first rolls of this batch, so i used my trusty Sekonic L-308X in incident mode, metering the film at box speed ISO64.
The Strategy: Stretching the Histogram
Forgett "Auto" the auto correct button as well as the regular white balance dials. A global white balance fix would have just shifted the problem. We’re dealing with something more severe here. To save this shot of a Venetian facade, I had to treat each color channel like a separate patient, performing a manual black-and-white point adjustment for each individual channel, essentially stretching the histrogram using the RGB Curves.

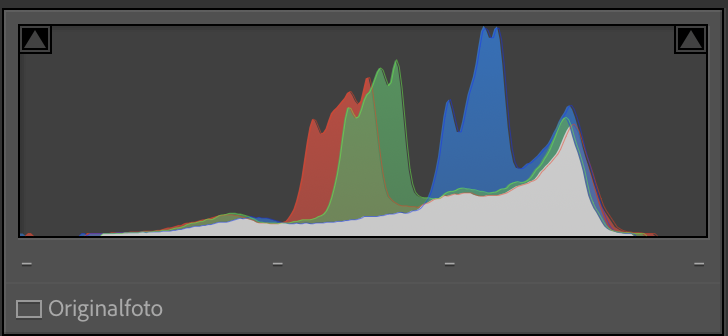
By "stretching" the histogram of each color, I forced the film to reclaim its dynamic range.
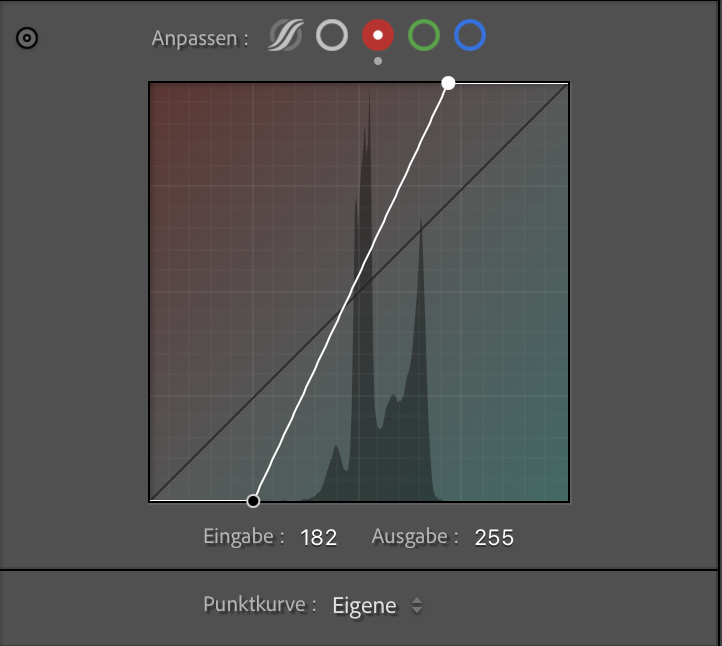
The Raw Scan
The original scan is overwhelmed by a heavy violet/blue cast. Because Ektachrome 64T is tungsten-balanced and shot here in January daylight, the blue channel is "overflowing," while the expired chemistry has pushed the shadows deep into the magenta territory.


Red Channel:
My red data started very late in the shadows. By dragging the Black Point almost to the actual beginning of the curve data, I forced the deepest red values to become a deep black (removing the milky purple fog). I then did the same for the White Point, pulling it in from 255 to 182, ensuring that the warmest tones in the Istrian stone were properly represented as highlights.

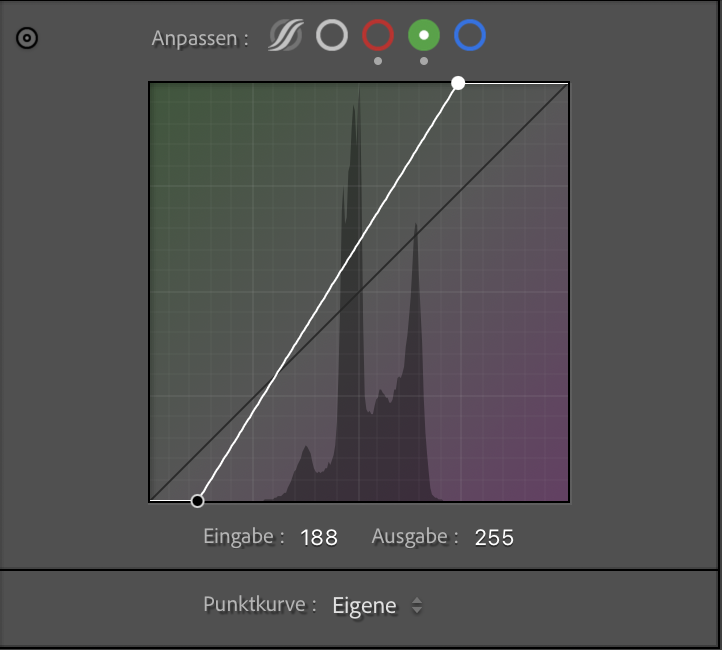
Green Channel:
I repeated the process. Again, setting the Black Point is essential, (checking your histogram to match each channel is a great help here) but it was the White Point adjustment (Input: ~188) that allowed me to pull the green values into the highlights. This neutralizes the magenta cast that can "stain" the pale buildings, making them look white instead of pink.

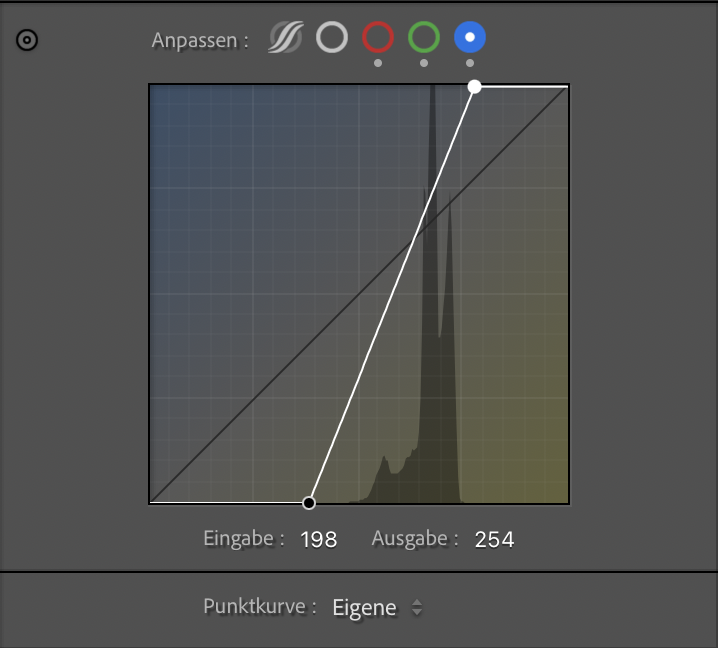
Blue Channel:
This is the tungsten-correcting step. The blue histogram had empty space at both ends. I set the Black Point (Input: ~198) and, most importantly, pulled in the White Point to make the winter sky over Venice crisp blue like i remembered it.

Final Polish: Contrast & Sharpness
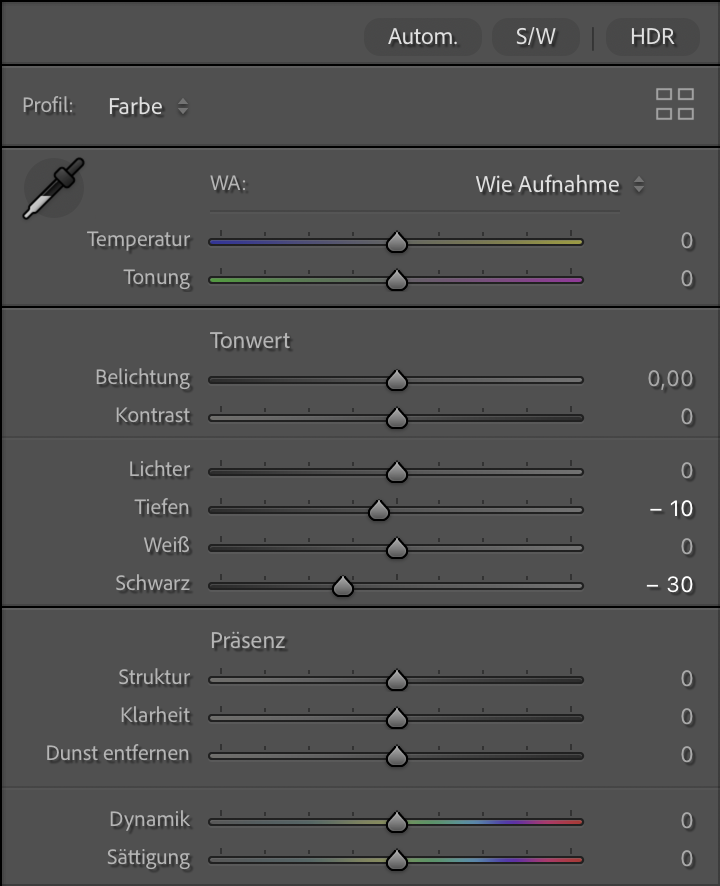
Once the color channels were re-aligned, the image was technically "correct," but it still had a bit of that expired-film haziness. I applied three final steps:
Global Black Point & Contrast: I dropped the global Blacks and slightly adjusted the Shadows. This anchors the image a bit more.
The Tone Curve: A subtle blackpoint touch on the RGB master channel adds that characteristic slide film punch. It increases the perceived dynamic range by making the shadows "deeper."
Controlled Sharpening: Expired film grain can be erratic. To enhance the architectural details without making the grain look digital and "crunchy," I used High Masking (90).
The Goal: Sharpen only the hard edges of the sculptures and columns while leaving the smooth sky and the organic film grain untouched.
Shorcut tip: Hold the option key (Mac) while draggin the masking slider to see where the sharpening is actually applied.


Final Thoughts
At the end of the day, even with all the histogram surgery and digital recovery, the question remains: Is it worth the effort? In my opinion, absolutely. While the "expired look" can be extreme, it has a creative justification that fresh film simply cannot replicate. Kodak Ektachrome 64T, even 20 years past its prime, remains a beautiful emulsion. It possesses a unique duality, simultaneously sharp in its detail and soft in its transitions. Whether you choose to leave the heavy color shifts for a surreal atmosphere or apply this RGB-mapping method for a more natural look, the result is always "old school" in the best way possible.
The real magic of shooting expired slide film, however, is the lack of total control. You never truly know what you’ll get. This workflow gives you the power to rescue your vision, but it leaves enough room for the film to tell its own story. It’s a collaboration between you, an emulsion of the past, and the light of the present.


Enjoyed this? You might also like:
If you found this article helpful, check out my other deep dives into the world of expired emulsions and color recovery:
Mamiya M645 Review (2026): The Best Entry into Medium Format?
Nikon F Review (2026): Shooting the Indestructible 35mm Legend
FPP Retrochrome 400 Review: Shooting High-Speed Surplus Slide Film
422 Meters of Frozen Gold: The Expired Ektachrome Heist Part I
422 Meters of Frozen Gold: The Expired Ektachrome Heist Part II
Embrace the Blues: Why Ektachrome shifts cooler and how to handle it
Minolta SR-101 (SRT 101) Review: The Ultimate Mechanical SLR in 2026?

Nikon F vs F2: Why I Own Both And You Should Too
The Nikon F feels raw, heavy and mechanical in the best possible way, while the F2 smooths out almost every annoyance without losing the soul of the original. After shooting both, the differences became a lot bigger than I expected.
Son and Father
The Nikon F changed everything in 1959, but it wasn’t exactly perfect either. That's why, only 12 years later, Nikon introduced the F2 in 1971 (and still kept manufacturing the F up until March 1972). Both are classics in their own right, but even though they are so similar and two of the most reliable 35mm cameras you can shoot today, they feel so vastly different.
Quick Summary: Nikon F or F2?
The Vibe: The F is a child of the 50s (and a bit clunky). The F2 is the perfected version of it.
The Changes: The F2 finally has a hinged back door, a 1/2000s shutter speed and more accessoires.
Daily Use: Both use the same lenses, but the F2 feels more ergonomic and compact.
The Choice: Get the Nikon F if you want a rougher, unfiltered feel. Get the Nikon F2 if you want to go out and shoot professionally without getting annoyed by 1950s ergonomics.
Why I Have Both

Well, Nikon already knew back in the day, one Nikon was not enough.
Like many others, I shot my first roll after hunting the "analog look" on digital (disclaimer: I was of course not successful) on a gifted, rather cheap SLR. In my case, it was a Carena CX-500 with a quite nice Ricoh 50mm f/1.7 lens. After I received my scans, I was hooked and fell for the rangefinder hype. I got the Canon P (full review here), which I still really like, but it is far from ideal if you are wearing glasses. So after some missed shots, I was searching for a different shooting experience.
Being into movies like Apocalypse Now and seeing Dennis Hopper hauling around several Nikon F (Deep dive here) bodies was what sold me on the Nikon F. When my Photomic FTN arrived from Japan, I was in for a surprise. Before my eyes could even see through the finder, I noticed it was heavy. It was very heavy. Overall, the camera felt super industrial and rough with that thick 50mm f/1.4 Pre-AI lens mounted on it. I was not expecting that, but I was and still am really enjoying that ruggedness.
So why did I get the F2 as well?
The truth is, it was exactly because of the rough feel of the F. As much as I love it, there are days where I am not as tough as this camera and in need of something that feels more accessible. That’s where the F2 comes into play. After some shopping at Nikon Classics, the F2 arrived and it was exactly what I was lusting for. (Full Nikon F2 review here) It keeps the toughness of the F but feels way less stubborn in daily use. Not only that, it is also mechanically more refined. It was instantly clear that I will not part with either of them. Why? Let's find out!
Technical Differences Between The Nikon F And The F2
On paper the two cameras may appear very similar, before we look into how they feel its important to know where they differ. The F2 offers more features than the F. This might be what you are looking for or quite the opposite.
The back door
Ready to roll
This is probably the visually biggest change Nikon implemented. On the F, you have to remove the whole back to load a roll. The F2 changed this to a standard hinged back door. But to be honest, loading a roll of film into the F is not half as bad as many people make it appear. Yes, it is faster and more modern on the F2, but the F-way has its own charm.
The Shutter
The Nikon F tops out at 1/1000s, which is fine for almost any situation, but the F2 has an extra stop with 1/2000s. It also features a stepless shutter between 1/80s and 1/2000s. This gives you more precision for nailing exposures, for example when shooting slide film. You could also use the lens to go in between, but if you want to strictly stay at a certain aperture, the F2 is the way to go. Both cameras use titanium foils for the shutter curtains so they are incredibly durable. Interestingly, the shutter sound of my Nikon F is quieter and softer than the shutter of my F2.
Shutter Button placement
Notice the difference?
Another thing you will notice is the shutter button placement. Unlike the Nikon F2, the button on the original F is located further back on the top plate. For many, this feels unnatural at first. Again, I do not seem to be bothered by that and like both positions.
One understated feature of the F2 is the collar around the shutter button. It has two very practical modes.
First, there is the "T" mode for long exposures. If you ever forget your cable release, you just rotate the collar to T, press the button, and the shutter stays open until you rotate it back. It is a simple fail-safe.
Then there is the "L" position, which stands for Lock. This physically blocks the shutter button. It prevents you from accidentally firing a shot while the camera is bouncing around in your bag or you are constantly toying with your camera like myself.
The Film Advance Lever
The Levers
On the F, the film advance is where you really notice its age. If the lever is in its "ready" position, you will notice it has a bit of play or "wiggle" before it actually starts to tension the shutter and wind the film.
On the F, the film advance is where you really notice its age. If the lever is in its "ready" position, you will notice it has a bit of play or "wiggle" before it actually starts to tension the shutter and wind the film.
At first I thought mine was broken. This stand-off position allows you to hook your thumb behind the lever for rapid-fire shooting. The slight play ensures that you do not accidentally put tension on the internal gears while walking around with your thumb on the lever. However, if the lever feels very loose or does not advance smoothly, your camera may need a proper CLA. This has been changed on the F2. Advancing the film feels smooth and silky in the best way imaginable. It also has a shorter stroke with only 120 degrees. This is where the Nikon F2 just hands down feels better right away. Normalizing that slightly loose film advance on the F took me quite some time. It was only settled once I got it back from CLA and it was just as "loose" as before.
Other Small Changes
The battery cavity on the F2 is now accessed via the bottom plate, whereas the F had the batteries located inside the individual metered finders. Nikon also strengthened the mounts for the finders on the F2 compared to the original F. Last but not least, mounting a motor drive like the MD-1 on the F2 is a lot easier. However, with film prices being what they are, I do not think that many people see this as a deciding factor anymore. (Even though i am sometimes dreaming of blasting through a roll with a motor drive)
Nikon F vs F2: How They Feel
The F2 is noticeably smoother
This is where the debate usually gets heated. Even though they look like close relatives and take the same lenses, the shooting experience is quite different.
The Nikon F I already drew the comparison in another blog post to an old Jeep. With the Nikon F, another comparison that is more tool-related comes to mind: a sledgehammer. Simply holding it feels super rewarding. The unrounded edges, the leathering, and the all-metal advance that feels like the gear shift lever of an old tractor all contribute to this. Also, the film changing part makes you feel more connected since you are literally taking the camera apart to do it. All this does not mean it is not precise. The viewfinder with 100% coverage is great, and the swappable finders and focusing screens allow for a significant amount of customization. I love it.
The F2 Here things get different. Precision comes to mind while simply looking at it. The F2 is the first camera I could carry 8 hours without getting annoyed, but due to its weight, you will never forget that you have a camera in your hand. The shutter is loud and satisfying, even louder than on the F. That is the last bit of “bruteness” where you can tell it is the son of the F. Everything else is engineering perfection: sturdy but silky. From the advance to swapping finders, it is a camera that never gets in your way.
When Do I Use The Nikon F?

A casual night out on heavily expired Fuji Superia 1600
I find myself reaching for the F more often in the last couple of weeks. Maybe because its behavior and how I interact with it is the most uncompromising way of getting away from screens. I also noticed it is a matter of the clothes I am wearing. This may sound stupid, but on a hot summer day with a tank top and a light retro shirt, that outfit simply calls for the F from a style point of view. I have also used the camera alongside the F2 for professional commissioned work and it will get the job done with ease. No questions asked. But for me, this camera shines in recreational shooting or in a project-based sense. In my opinion analog photography is is not just about taking the photo; for me it is also about the; how did i feel taking the photo.
When Do I Reach For The Nikon F2?

The Nikon F2 and I on site - Shot on Ilford HP pushed to 1600
Let's get it out of the way. For commissioned work, I hands down prefer the Nikon F2 over the F. When holding a camera in your hand for long hours, you start to appreciate those rounded edges more than you would ever have thought possible. Yes, the faster film loading comes in handy here too. Besides that, with its ability to do self-timed long exposures without a cable release, it is also a great travel companion. To be honest, I have not used the 1/2000s shutter speed that often, but probably only because I shoot a lot of low ISO film. I also choose it when I do not want to think about which camera to pick for a photowalk, because I know it will never bother me and will always deliver. Which leads me to my next point.
Why You Need Both

Gotta have them all!
Choosing between the Nikon F and the F2 is not a matter of which camera is better, but rather which experience you are looking for. Both are overbuild and will very likely outlast us all, especially after a good CLA.
If you are like me and you can enjoy the raw, mechanical ritual of photography, you will love the Nikon F. It is the choice for those days when you want to slow down and feel intentional or inspired. It might be less ergonomic and a bit slower to load, but it feels more direct. If you want a camera that makes a statement, has tons of swag, and doubles as a piece of industrial art, the F is the one.
On the other hand, if you need a reliable tool for commissioned work that disappears in your hands, go for the Nikon F2. It is the perfected version of the F and is comfortable to use for hours on end. For travel, work, or those days when you just want a camera that works without any quirks, the F2 is my go-to all-mechanical SLR.
Realistically, you might find yourself in the same position as I am. You start with one because of the history or the look, only to realize that you want the other as well. Whether it is the rebellious soul of the F or the engineering perfection of the F2, both are great honestly. Or, if you are like me, you just keep both. One for the swagger and one for the work.
Make sure to read both of my deep dives if you are looking for more detailed infos and manuals on both the Nikon F and Nikon F2.
Nikon F & F2 Buying Guide
Fresh out of the oven
Buying a Nikon F or F2 today is always a bit of a gamble. Don’t forget, these cameras are sixty years old and they have seen some stuff. Here is what you actually need to check.
The Viewfinder: Prism Rot Look through the finder. If you see a dark horizontal line, "black snow," or cloudy patches at the bottom, that is desilvering. The original foam inside the finder has turned into a chemical mess over the decades and eaten the silver coating. This is irreparable. It is also the reason why clean "Eye-Level" prisms now cost more than the actual camera bodies. If you find a clean one, get it serviced immediately to remove that old foam before the rot starts.
The Focusing Screen The screens are interchangeable, which is a blessing because they are often scratched to hell from decades of bad cleaning. A scratch won't affect your photo, but it will drive you crazy while focusing. Check for deep marks. The good news is you can swap them in seconds, the bad news is that clean ones are getting expensive.
The Titanium Shutter Nikon used titanium foil for the curtains. It is tough as nails, but not invincible. Open the back and look at the curtains. They should be flat. If they look like crumpled kitchen foil or have "ripples," be careful. Also, hold the camera up to a light (without a lens) and check for pinholes. You want to see total darkness.
Slow Speeds and Sticky Mirrors Fire the camera at 1 second. If the "clunk" takes three seconds or if the mirror stays up for a moment before coming down, the old grease has turned into glue. This is the clearest sign that the camera is crying for a CLA. It is not a dealbreaker, but you should factor the service cost into the price.
The Photomic Meter To be honest, in 2026, most of these meters are either dead, "jumping," or just straight up lying to you. Plus, the original mercury batteries are gone. Many people like myself just use the bulky Photomic finders for the look and use a phone app or a small external meter for actual exposure. If you want a working internal meter, make sure it has been calibrated for modern batteries.
The "Impact" Check The Nikons is made of thick brass. It takes a lot of force to dent it. Check the corners and the baseplate. If you see deep dents, the camera has taken a serious fall. This could mean a cracked internal prism or, even worse, a lens mount that is no longer perfectly parallel. A few scratches are fine (that is called character), but avoid the ones that look like they were used as a hammer.
Enjoyed this? You might also like:
If you found this article helpful, check out my other deep dives into the world of expired emulsions and color recovery:
Mamiya M645 Review (2026): The Best Entry into Medium Format?
How to Edit Expired Slide Film: A Technical Guide to Rescuing E-6 (Ektachrome 64T)
Nikon F2 Review (2026): Is This the Best Mechanical 35mm Camera?
Nikon F Review (2026): Shooting the Indestructible 35mm Legend
FPP Retrochrome 400 Review: Shooting High-Speed Surplus Slide Film
422 Meters of Frozen Gold: The Expired Ektachrome Heist Part I
422 Meters of Frozen Gold: The Expired Ektachrome Heist Part II
Embrace the Blues: Why Ektachrome shifts cooler and how to handle it
Minolta SR-101 (SRT 101) Review: The Ultimate Mechanical SLR in 2026?

FPP Retrochrome 400 Review: Shooting High-Speed Surplus Slide Film
FPP Retrochrome 400 Review: Why shooting at box speed (ISO 400) is the secret to saving highlights on this discontinued Kodak film. Expert metering tips & scans.

It’s hard to express how much i love this film stock.
Finding a high-speed slide film nowadays has become super hard. With most high-speed options from Kodak and Fuji long gone, FPP Retrochrome 400 has popped up and sparked tons of interest for photographers who need speed (and/or love Grainydays aka Jason Kummerfeld) but want that E-6 aesthetic. But let’s be clear: this isn't fresh, neutral film. Retrochrome is government surplus Kodak Ektachrome that’s been cold-stored and re-spooled by the Film Photography Project.
Quick Answer: What is FPP Retrochrome 400?
To be exact, FPP Retrochrome 400 is expired Kodak Ektachrome 2253, a high-speed color reversal (slide) film originally manufactured for government and industrial surveillance. Respooled by the Film Photography Project, it is known for its grain, warm 1970s cinematic color palette, and narrow dynamic range. For the best results, rate it at box speed (ISO 400) and meter carefully for the highlights using an incident light meter.
FPP Retrochrome 400: Technical Specifications
Before we dive into the look and feel, here are the hard facts you need to know about this specific surplus stock:
| Feature | Specification |
|---|---|
| Film Type | Color Reversal (Slide / Positive Film) |
| Original Stock | Kodak Ektachrome 2253 (Industrial / Government Surplus) |
| Box Speed (ISO) | 400 (Shoot at box speed, meter for highlights) |
| Format | 35mm (Respooled from bulk reels by FPP) |
| Development Process | Standard E-6 Chemicals |
| DX Coded | No (You must set your ISO manually!) |
| Dynamic Range | Very narrow (Prone to blown-out highlights if overexposed) |
| Key Characteristics | Crunchy grain, warm/golden color shift, cinematic 70s vibe |
How to Meter Expired Slide Film: My Retrochrome 400 Metering Suggestion
This is where most people get nervous. It’s "expired" surplus, but it’s also slide film, a medium notorious for its thin latitude. If you look online, opinions are all over the place: some say rate it at ISO 400, some swear by ISO 200, and others land at ISO 320.
When shooting expired color positive film, the most common mistake is overexposing like you would with film stocks such as Portra or Fuji Pro400H.
But here is what gets me: No one really tells you how they meter. Shadows, mids, highlights? Reflective or incident?
Here’s how i go about it.
I typically stick with the base ISO and use incident mode of my Sekonic L-308X (pointing the Lumisphere toward the camera from the subject's position) metering specifically for the highlights.
In the comparison images below, you can see the results of three different approaches:


Metered for the Highlights: The colors are saturated, and the bright parts are perfectly preserved. This is my preferred method.
Metered for the Midtones: A balanced look (the lightmeter thought otherwise), but you risk losing that highlight information.
Metered for the Shadows: The image falls apart. The highlights blow out, and the film's age starts to show in a messy way.
Portugal - October 2025
I took one roll of Retrochrome 400 to Portugal during my fall vacation, and the light was nothing short of ideal, warm, and low-hanging. I shot about four rolls of film in my Nikon F2 (My Canon P stayed at home - full review here) in total during that week and this is FPP Retrochrome turned out to be my absolute favorite.
Being a respooled film, Retrochrome gives you those beautiful, unpredictable "first-of-the-roll" (second and third of a roll too) light leaks and film burns.
Embracing Light Leaks: The Lo-Fi Aesthetic of Respooled Expired Slide Film
Some people hate light leaks; they see them as a technical failure. But for me? The more, the merrier. If you wanted perfection, you’d be shooting digital or any other fresh filmstock. Isn't that unusual, artsy, and "lomo-esque" look exactly why we hunt for expired slide film in the first place? It’s the visual soul of the medium.


A Note on the files
The images shown here have been edited. (Except the last one) Even with the ideal Portuguese light. I applied slight RGB curve tweaks, black point anchoring, and minor saturation adjustments to make them look as close to the projected image as possible.
To pull as much detail as possible out of the dense shadows of this expired slide film, I highly recommend using a high-end scanner. You can read my full breakdown on why I use the Hasselblad Flextight X5 for expired Ektachrome here.
Believe me when I say that the projected images, the way they were meant to be seen, really pop in color. Retrochrome has a unique way of responding to contrast; it manages to feel sharp and gritty at the same time.
Retrochrome 400 Color Profile & Grain Structure
Don’t expect a polished Porta 400 look here. If you are looking for that vintage 70s film look, Retrochrome delivers it instantly without filters.
The Warmth: Retrochrome leans heavily into yellow and golden tones.
The Shadows: You’ll see cool, blueish-green undertones in the darker areas, creating a beautiful color contrast that looks "edited" even when it’s straight out of the scanner.
The Grain: Expect texture. At ISO 400, the grain is prominent and "crunchy." It adds to the lo-fi, documentary feel of the images.
Tips for Shooting FPP Retrochrome 400
Shooting Retrochrome 400 isn't like shooting modern negative film where you can just "overexpose and hope for the best." This is a high-speed, expired reversal stock. You need a strategy.
1. Avoid Backlit Scenes (Unless you want Silhouettes)
Retrochrome 400 has a very narrow dynamic range. If you shoot directly into the sun or have a bright sky behind your subject, the film simply cannot handle the contrast. You’ll end up with a blown-out sky or a subject that is nothing but a grainy, dark shadow. Try to keep the light behind you or hitting your subject from the side.
2. Identify Your Object—And Expose for It!
Before you press the shutter, ask yourself: What is the actual object of this picture?
Is it the face of the person in the shadow?
Expose for that specific object. If you try to compromise and "meter for the whole scene," you’ll likely lose both the highlights and the shadows. Slide film requires you to make a choice. If the wall is the hero, let the rest fall into darkness. Or don’t take the picture.
Here are some pictures to show you those characteristics.


Final Verdict: Is FPP Retrochrome 400 Worth Shooting in 2026?
Retrochrome 400 is not for everyone. If you want the ultra-fine grain of Ektachrome E100, you’ll be disappointed. But if you want a film that has soul, character, and speed, this is it. It’s unpredictable, addictive, and delivers a vintage look that no Lightroom preset can truly mimic. It truely reminds me of the Artist Stefanie Schneider. She shot tons of expired Polaroids. Retrochrome has a similar aura. Dreamy, colorful, joyful and slighly crazy.
That’s exactly why i love it. So if you can get your hands on a roll. DO IT!
I still have four rolls in my freezer and was already settling on the thought that I would never shoot it again once my stock ran dry.
But, i got incredibly lucky and found some reels of Ektachrome 2253 which have been in the freezer for over 20 years. (There is a little story on that, Part I, and Part II here as well) Yes it’s hard to believe. I know. So now my fridge is packed with that stuff.
FPP Retrochrome 400: Frequently Asked Questions
Can I develop FPP Retrochrome 400 in C-41 (Cross-Processing)? Yes, you can cross-process Retrochrome 400 in C-41 chemicals. This will result in high-contrast negatives with wild color shifts (usually leaning towards greens and yellows) and even more pronounced grain. However, for the intended "1970s cinematic" slide look, standard E-6 development is recommended.
Does FPP Retrochrome 400 have a DX code? No, Retrochrome 400 is re-spooled from industrial bulk rolls into recycled canisters. It does not have a DX code. You must manually set your camera's ISO to 400. If your camera doesn't allow manual ISO selection, it will likely default to ISO 100, which will overexpose this slide film by two stops.
How should I store FPP Retrochrome 400? Since this is expired government surplus film, it is highly sensitive to heat. You should keep it in the freezer or refrigerator until the day you shoot it. Cold storage is the only way to preserve the remaining color sensitivity of the Ektachrome emulsion.
Is FPP Retrochrome 400 the same as Kodak Ektachrome E100? No. While both are Ektachrome stocks, Retrochrome 400 is based on Kodak 2253, an industrial/high-speed surveillance stock. It has much larger grain and a completely different color science compared to the modern, fine-grained Ektachrome E100.
What happens if I overexpose FPP Retrochrome 400? Unlike color negative film (like Portra), Retrochrome (slide film) has very little highlight latitude. Overexposing will lead to "blown-out" highlights where all detail is lost. It is always safer to meter for the highlights to keep the colors saturated and the details intact.
Enjoyed this? You might also like:
If you found this technical breakdown of FPP Retrochrome 400 helpful, check out my other deep dives into the world of expired emulsions and color recovery:
Mamiya M645 Review (2026): The Best Entry into Medium Format?
Nikon F2 Review (2026): Is This the Best Mechanical 35mm Camera?
Nikon F Review (2026): Shooting the Indestructible 35mm Legend
422 Meters of Frozen Gold: The Expired Ektachrome Heist Part I
422 Meters of Frozen Gold: The Expired Ektachrome Heist Part II
Embrace the Blues: Why Ektachrome shifts cooler and how to handle it
Minolta SR-101 (SRT 101) Review: The Ultimate Mechanical SLR in 2026?
Nikon F2 Review (2026): Is This the Best Mechanical 35mm Camera?
The Nikon F2 is often called the greatest mechanical 35mm SLR ever built. In this 2026 review, I break down its real-world performance, lens compatibility, and why it still outperforms many modern film cameras.
The Famous Nikon F2
Reading Time: 7 Minutes
While the original Nikon F changed 35mm photography. The Nikon F2 feels like Nikon went back and fixed everything that wasn’t perfect yet. Introduced in 1971, many still see it as the peak of fully mechanical SLR design.
Built to handle real-world use, from war zones to brutal expeditions, the F2 wasn’t designed for comfort. It was built to keep working when everything else failed. With its stepless titanium shutter, fully manual operation, and the long-standing Nikon F-mount, it remains one of the most capable film cameras you can still shoot in 2026.
TL;DR: Nikon F2 at a Glance
Camera Type: Fully mechanical 35mm SLR
Launch Year: 1971 (the pinnacle of mechanical SLR design)
Lens Mount: Nikon F-mount (Compatible with 60+ years of Nikkor lenses)
Key Features: All-metal modular build, 1/2000s titanium shutter, hinged back door, 100% viewfinder
Power: No battery needed (metering requires LR44/silver-oxide batteries in the Photomic finder)
Best For: Enthusiasts, & professional film photographers
Not For: Casual shooters, beginners, or weight-conscious travelers
The Upgrade: Why I Switched to the Nikon F2 (From the Nikon F)
It all started with the F
As you might know, I was instantly hooked as soon as I got my hands on the Nikon F (full review here). The rugged feel and the incredible selection of lenses, something my trusty Canon P simply didn’t offer, completely pulled me in. It didn’t take long before I started looking for its successor, the equally legendary Nikon F2.
CLA Service & Long-Term Reliability
I just had a full CLA (clean lubricate adjust) done on it by Kamera Service Hoffmann in Stuttgart, not because something was defect, solely out of love for the camera. I want to enjoy it for many more years to come. So, strap on your boots for this Nikon F review.
Quick Summary: Nikon F2 Pros & Cons in 2026
| Pros | Cons |
|---|---|
| Fully Mechanical: Stepless titanium shutter that works without batteries. | Significant Weight: It’s a solid block of brass and steel, weighing nearly 1kg with a standard lens. |
| Improved Ergonomics: Features a hinged back door, making film loading much faster than the original Nikon F. | Bulk: The metered viewfinders make the camera noticeably top-heavy. |
| 1/2000s Shutter Speed: One of the few mechanical cameras offering high-speed performance for wide-open shooting. | Battery Dependency for Metering: While the camera is mechanical, the light meter requires SR44 batteries. |
| The "Universal" F-Mount: Compatible with almost 60 years of Nikkor lenses (Pre-AI, AI, and AIS lenses). | No Standard Hot Shoe: Like the F, it requires a special Nikon AS-1 adapter to use standard flashes. |
| 100% Viewfinder Coverage: What you see in the finder is exactly what ends up on your 35mm negative. | Price Tag: Because of its "cult" status, a clean, serviced F2 remains a significant investment in 2026. |
| Modular Versatility: Easily interchangeable prisms, focusing screens, and motor drives for any assignment. | Complex Metering: Older Photomic finders often suffer from "ring resistor" jumpiness if not serviced. |
Nikon F2 Review Contents (Quick Navigation)
Nikon F2 Technical Specifications (Quick Overview)
Build Quality: Why the Nikon F2 Feels Indestructible
The Titanium Shutter: 1/2000s and What Makes It Special
Handling and Ergonomics: What It’s Like to Shoot the Nikon F2
Nikon F2 in the Field: War, Expeditions and Real-World Use
Viewfinders and Focusing Screens: How Modular the Nikon F2 Really Is
Nikon F-Mount Lenses: What Works on the Nikon F2
The Ultimate Pre-AI Lens Kit for the Nikon F2
Accessories and Motor Drives: Expanding the Nikon F2 System
Nikon F2 Sample Images (Film Examples and Results)
The Verdict: Is the Nikon F2 Still Worth Buying in 2026?
Buying a Nikon F2 in 2026: What to Look For
Nikon F vs Nikon F2: Which One Should You Buy?
Nikon F2 FAQ: Common Questions Answered
Nikon F2 Technical Specifications (Quick Overview)
Nikon F2 Blueprint
To understand why the Nikon F2 is often called the "Last Great Mechanical SLR," you have to look at the refinements. In 1971, these specs weren’t just competitive, they were overkill for a fully mechanical camera.
| Feature | Specification |
|---|---|
| Camera Type | Nikon F2 35mm SLR camera, fully mechanical professional film camera |
| Introduction Year | 1971 (Produced until 1980/81, peak era of mechanical SLR design) |
| Lens Mount | Nikon F-Mount system (compatible with 60+ years of Nikkor F mount lenses: Pre-AI, AI, AI-S) |
| Shutter Type | Horizontal-travel, focal-plane mechanical shutter (professional SLR system) |
| Shutter Material | Titanium blade shutter (ultra-durable design for professional use and expedition photography) |
| Shutter Speeds | 2 seconds to 1/2000 sec + Bulb (B mode) for long exposure photography |
| Flash Sync Speed | 1/80 sec X-sync via PC sync terminal (compatible with studio flash systems) |
| Viewfinder Coverage | Approx. 100% frame coverage with interchangeable Nikon Photomic prisms |
| Interchangeable Viewfinders | DP-1, DP-2, DP-3, DP-11, DP-12 Photomic meters + waist-level finder + action finder |
| Focusing Screens | Fully modular system with 20+ interchangeable focusing screens (Type A, B, E, K, etc.) |
| Film Advance System | Single-stroke mechanical film advance lever (compatible with MD-1 / MD-2 / MD-3 motor drives) |
| Motor Drive Compatibility | Professional Nikon MD-1 / MD-2 / MD-3 motor drive system for high-speed shooting |
| Mirror Lock-Up | Mechanical mirror lock-up function (reduces vibration for long exposure photography) |
| Self-Timer | Mechanical delay timer (approx. 2–10 seconds) for tripod and studio use |
| Depth of Field Preview | Yes, mechanical DOF preview lever on lens mount for manual exposure control |
| Film Loading System | Hinged back door design (faster and more reliable than Nikon F removable back system) |
| Dimensions (Body Only) | Approx. 152 x 105 x 65 mm (classic professional SLR body size) |
| Weight (Body Only) | Approx. 730g (varies depending on Photomic finder and configuration) |
Why these specs still matter today
The Nikon F2 refined everything that made the original Nikon F great and removed its operational compromises.
The 1/2000s Shutter:
A major leap over the Nikon F, allowing more flexibility in bright light and faster action shooting without ND filters.
Modular Viewfinder System:
Unlike most cameras of its era, the F2’s entire exposure system lives in the prism. This means you can switch from a basic waist-level finder to a fully metered Photomic head in seconds.
Improved Ergonomics:
The hinged back door alone makes film loading significantly faster and easier compared to the original Nikon F’s removable back design.
Professional System Design:
The F2 was built from day one as a system camera for press, expedition, and war photographers, meaning every component is serviceable, replaceable, and overbuilt for decades of use.
Top View of the Nikon F2
Build Quality: Why the Nikon F2 Feels Indestructible
Where the original Nikon F feels raw and industrial, the Nikon F2 comes across as less brutal, more refined, but still every bit as indestructible. This latter was especially important for the war correspondents and photojournalists of the 70s who relied on the F-system's ruggedness in the most extreme environments.
There is still absolutely no plastic in the places that matter. The F2 feels like it was machined from a solid block of brass rather than assembled. It’s heavy in the best possible way, providing an sense of stability the moment you lift it to your eye.
The Titanium Shutter: 1/2000s and What Makes It Special
The Titanium Shutter
The heart of the Nikon F2 is its titanium shutter. Like its predecessor, it uses titanium foil instead of cloth, making it extremely durable and resistant to the dreaded sun-burn holes that often affect older vintage cameras. But the F2 pushes this design even further.
First of all: it’s fast. Very fast. Back in 1971, achieving a 1/2000s shutter speed in a fully mechanical SLR was serious high-precision engineering. Even today, that extra stop gives you real freedom, especially when shooting fast Films like Portra 800 in bright daylight.
The Secret Feature: Stepless Exposure Control
What really sets the Nikon F2 apart is its stepless shutter speed control between 1/125s and 1/2000s.
If your light meter lands between two standard values, say around 1/750s, you don’t have to compromise. You can simply set the shutter speed dial to an in-between position, and the system will follow accordingly.
For slide film (E-6), this is a huge advantage. Even half a stop can decide whether highlights hold or completely blow out.
Handling and Ergonomics: What It’s Like to Shoot the Nikon F2

Smooth lines
Coming from the Nikon F, the moment I picked up the Nikon F2, it felt like home but alos stepping into a more refined era of analog photography. It still carries the same DNA as its predecessor, but everything feels polished, and more mature. Nikon took every minor complaint from their customers of the 1960s and didn’t try to reinvent the SLR, they perfected it.
A More Refined and Ergonomic Mechanical SLR
The once sharp, edges of the Nikon F have been softened into more rounded, ergonomic contours. In the hand, the Nikon F2 immediately feels better balanced and more comfortable, especially during longer shooting sessions. It’s still a fully mechanical Nikon film camera, but one that clearly reflects years of refinement.
Film Advance and Shutter Feel: Where the Nikon F2 Truly Evolves
Advancing the film and firing the shutter is where the difference becomes most obvious. The Nikon F2 feels smoother, more controlled, and noticeably, almost silky in operation. Some people even say Leica-esque. Granted, this impression comes from a properly serviced example, but even beyond maintenance, the precision of the F2 is unmistakable.
Improved Film Advance Lever and Handling Experience
The film advance lever has also been redesigned for better ergonomics. With its plastic-covered grip, it feels more secure and natural under the thumb, especially during fast-paced shooting. It’s a subtle upgrade, but one that significantly improves the overall handling of this camera.
Faster Film Loading with Hinged Back Design
Film loading is another area where the Nikon F2 clearly improves on the original Nikon F. The hinged back door replaces the older removable back system, making loading faster, easier, and far more intuitive in real-world use. It’s a and valuable practical upgrade.
The Shutter Collar: More Than Just a Lock

The hidden gem
One of the most understated yet brilliant features of the F2 is the collar surrounding the shutter release button. It’s not just there for protection; it also has a function:
The "T" Mode: By rotating the collar to the "T" (Time) position, the shutter will stay open indefinitely after you press it. To close it, you simply rotate the collar back. It’s the fail-safe for long exposures when you've forgotten your cable release.
The "L" (Lock) Mode: Rotating the collar to the "L" position physically blocks the shutter button. Nowadays, when every frame of film is an investment, this is a life-saver. It prevents accidental shots while the F2 is bouncing around in your bag or hanging from your shoulder. It’s a simple, robust solution that ensures you only fire when you intend to.
Mechanical Genius: The Self-Timer as a "Long Exposure Computer"
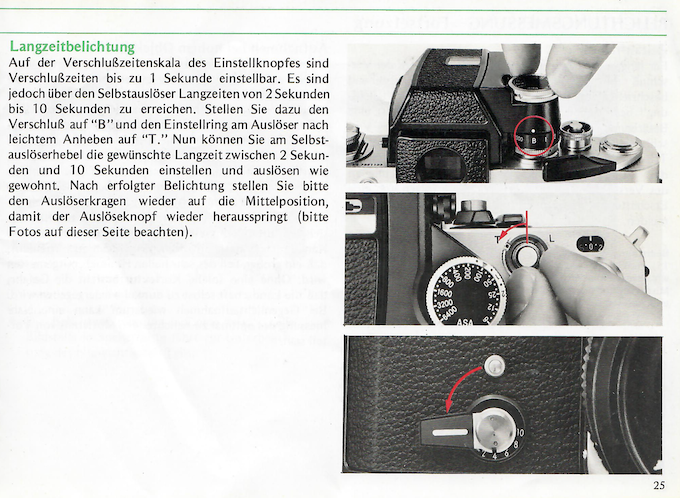
Excerpt from the German manual
The best "Easter Egg" of the Nikon F2 is the dual-purpose nature of the self-timer lever. In an era before digital timers, Nikon engineered a way to achieve long exposures using only springs and gears.
10-Second Mechanical Timing: If you set your shutter speed dial to B (Bulb) and move the shutter collar to the T position, the self-timer lever transforms into a countdown for long exposures.
The Workflow: You wind the self-timer lever to the number corresponding to the seconds you need (from 2 up to 10). When you fire the shutter, the camera uses the self-timer's internal clockwork to hold the shutter open for that exact duration before closing it.
The "Nikon Shuffle"
If you are using a Photomic finder, remember the "Nikon Shuffle." Every time you change a lens, you have to twist the aperture ring all the way to the left and then all the way to the right to "index" the lens.
The Nikon F2 doesn’t feel like a different camera from the Nikon F. It feels like the moment the system finally reached its perfect form.
Nikon F2 in the Field: War, Expeditions and Real-World Use
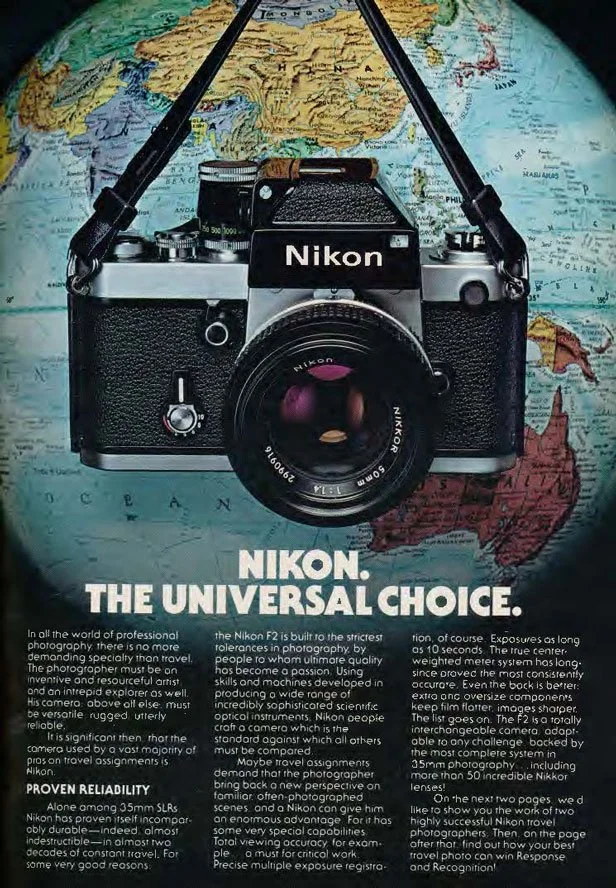
The Universal Choice
The Nikon F2 arrived in 1971 at a time when photojournalism was being defined in real conflict zones, extreme environments, and fast-moving global events. Building on the legacy of the original Nikon F, the F2 quickly became one of the most trusted 35mm SLR cameras for war photography and expedition use.
This was the era of the Vietnam War and the peak of analog press photography. The Nikon F2 earned its reputation exactly where it mattered most: in the great outdoors. It was used by war correspondents, documentary photographers, and expedition teams who needed a camera that would not fail under pressure, no matter the conditions.
From conflict zones in Southeast Asia to extreme environments documented by photographers working with publications like National Geographic, the Nikon F2 became THE camera of modern visual history. Arctic cold, desert heat, rain, dust, and constant travel – this camera was built to survive it all.
In 2026, the Nikon F2 still holds its place as one of the most reliable SLRs ever made – a camera designed for real-world use.
Viewfinders and Focusing Screens: How Modular the Nikon F2 Really Is
Nikon F2 with DP1 Metered Finder
The true genius of the Nikon F2 system lies in its modular design. Just like its predecessor, the F2 was built to adapt. No matter what the occasion was, Nikon offered a dedicated viewfinder for almost every situation.
This level of flexibility is also what makes the Nikon F2 slightly confusing for newcomers today. The camera’s “name” is not always fixed – it actually changes depending on which viewfinder (prism) is mounted on top of the body. In other words: the Nikon F2 is not just one camera, but an entire system built around interchangeable finders.
The Compatibility Trap: Matching Finders to Lenses

Not all finders work with all lenses. This is the most critical part of buying an F2 in 2026. If you want to use vintage Pre-AI glass (the ones with the solid metal "rabbit ears"), you have to be careful. Using the wrong lens on the wrong finder can, in some cases, even lead to jams or damage to the coupling lever.
The "name" of your Nikon F2 actually changes depending on which prism is mounted on the body. This table helps you match the right finder to your lens collection:
| Model Name | Finder | Metering / Display | Native Lens Compatibility | Key Feature |
|---|---|---|---|---|
| Nikon F2 | DE-1 | No Meter | All F-Mount Lenses | Sleekest profile. Fully mechanical and battery-independent. |
| F2 Photomic | DP-1 | CdS / Needle | Pre-AI (Non-AI) | The 70s classic. Requires the "Nikon Shuffle" (Rabbit Ears). |
| F2S | DP-2 | CdS / LED | Pre-AI (Non-AI) | LED arrows instead of a needle. Better for low-light work. |
| F2SB | DP-3 | Silicon (SBC) / LED | Pre-AI (Non-AI) | Fast-reacting SBC sensor. Rare and highly professional. |
| F2A | DP-11 | CdS / Needle | AI & AI-S Lenses | Modern "Automatic Indexing." No more Rabbit Ears needed. |
| F2AS | DP-12 | Silicon (SBC) / LED | AI & AI-S Lenses | Top-tier SBC tech with AI convenience. |
Critical Compatibility Warning:
- Pre-AI Finders (DP-1, 2, 3): These require lenses with the metal "Rabbit Ears" to communicate the aperture to the meter.
- AI Finders (DP-11, 12): These use a small coupling lever that sits against the lens's aperture ring.
- Pro Tip: Mounting an unmodified Pre-AI lens on an AI finder (DP-11/12) can physically damage the coupling lever. Always ensure your lens is "AI-compliant" before mounting it to an F2A or F2AS.
The World through the Finder: Precision Focusing Screens
Overview of available Focusing Screens
The modularity of the Nikon F2 doesn’t stop at the prism. While other cameras of the era required a trip to a technician to change a focusing screen, the Nikon F2, like its predecessor, was designed to be customized by the photographer in seconds.
By 1971, Nikon had expanded the system to 19 different types of focusing screens (later growing even further). These weren't just generic alternatives; they were specialized tools for specific photographic disciplines. Just as with the finders, Nikon had a screen for every job.

View through the Nikon F2 DP1 Finder with A Screen
Standard (Type A ): Most bodies come with Type A (horizontal split-image) or the more modern Type K (split-image plus a microprism ring). These are excellent for 95% of general photography.
Architecture (Type E): As you can see it’s a plain matte screen but with an etched grid. It’s perfect for architectural shots, keeping horizons perfectly level in street photography, and the "Rule of Thirds."
Portrait (Type P) not shown above: Known as the "Apollo" screen, it features a 45° diagonal split-image. This is genius for portraits because you can focus on vertical and horizontal lines (like eyelashes or glasses) without needing to tilt the camera.
Low Light & Telephoto (Type B): If you use "slower" lenses like the 28mm f/3.5 in low light, a split-image can often "black out" on one side. The Type B (plain matte) is much brighter and easier to use in dim conditions or with long telephoto lenses.
Buying Tip: When browsing eBay or local shops, check which screen is installed. A scratched Focusing Screen isn't a dealbreaker. Swapping them is effortless: Remove the viewfinder, press the release button, flip the camera over, and the screen drops right out.
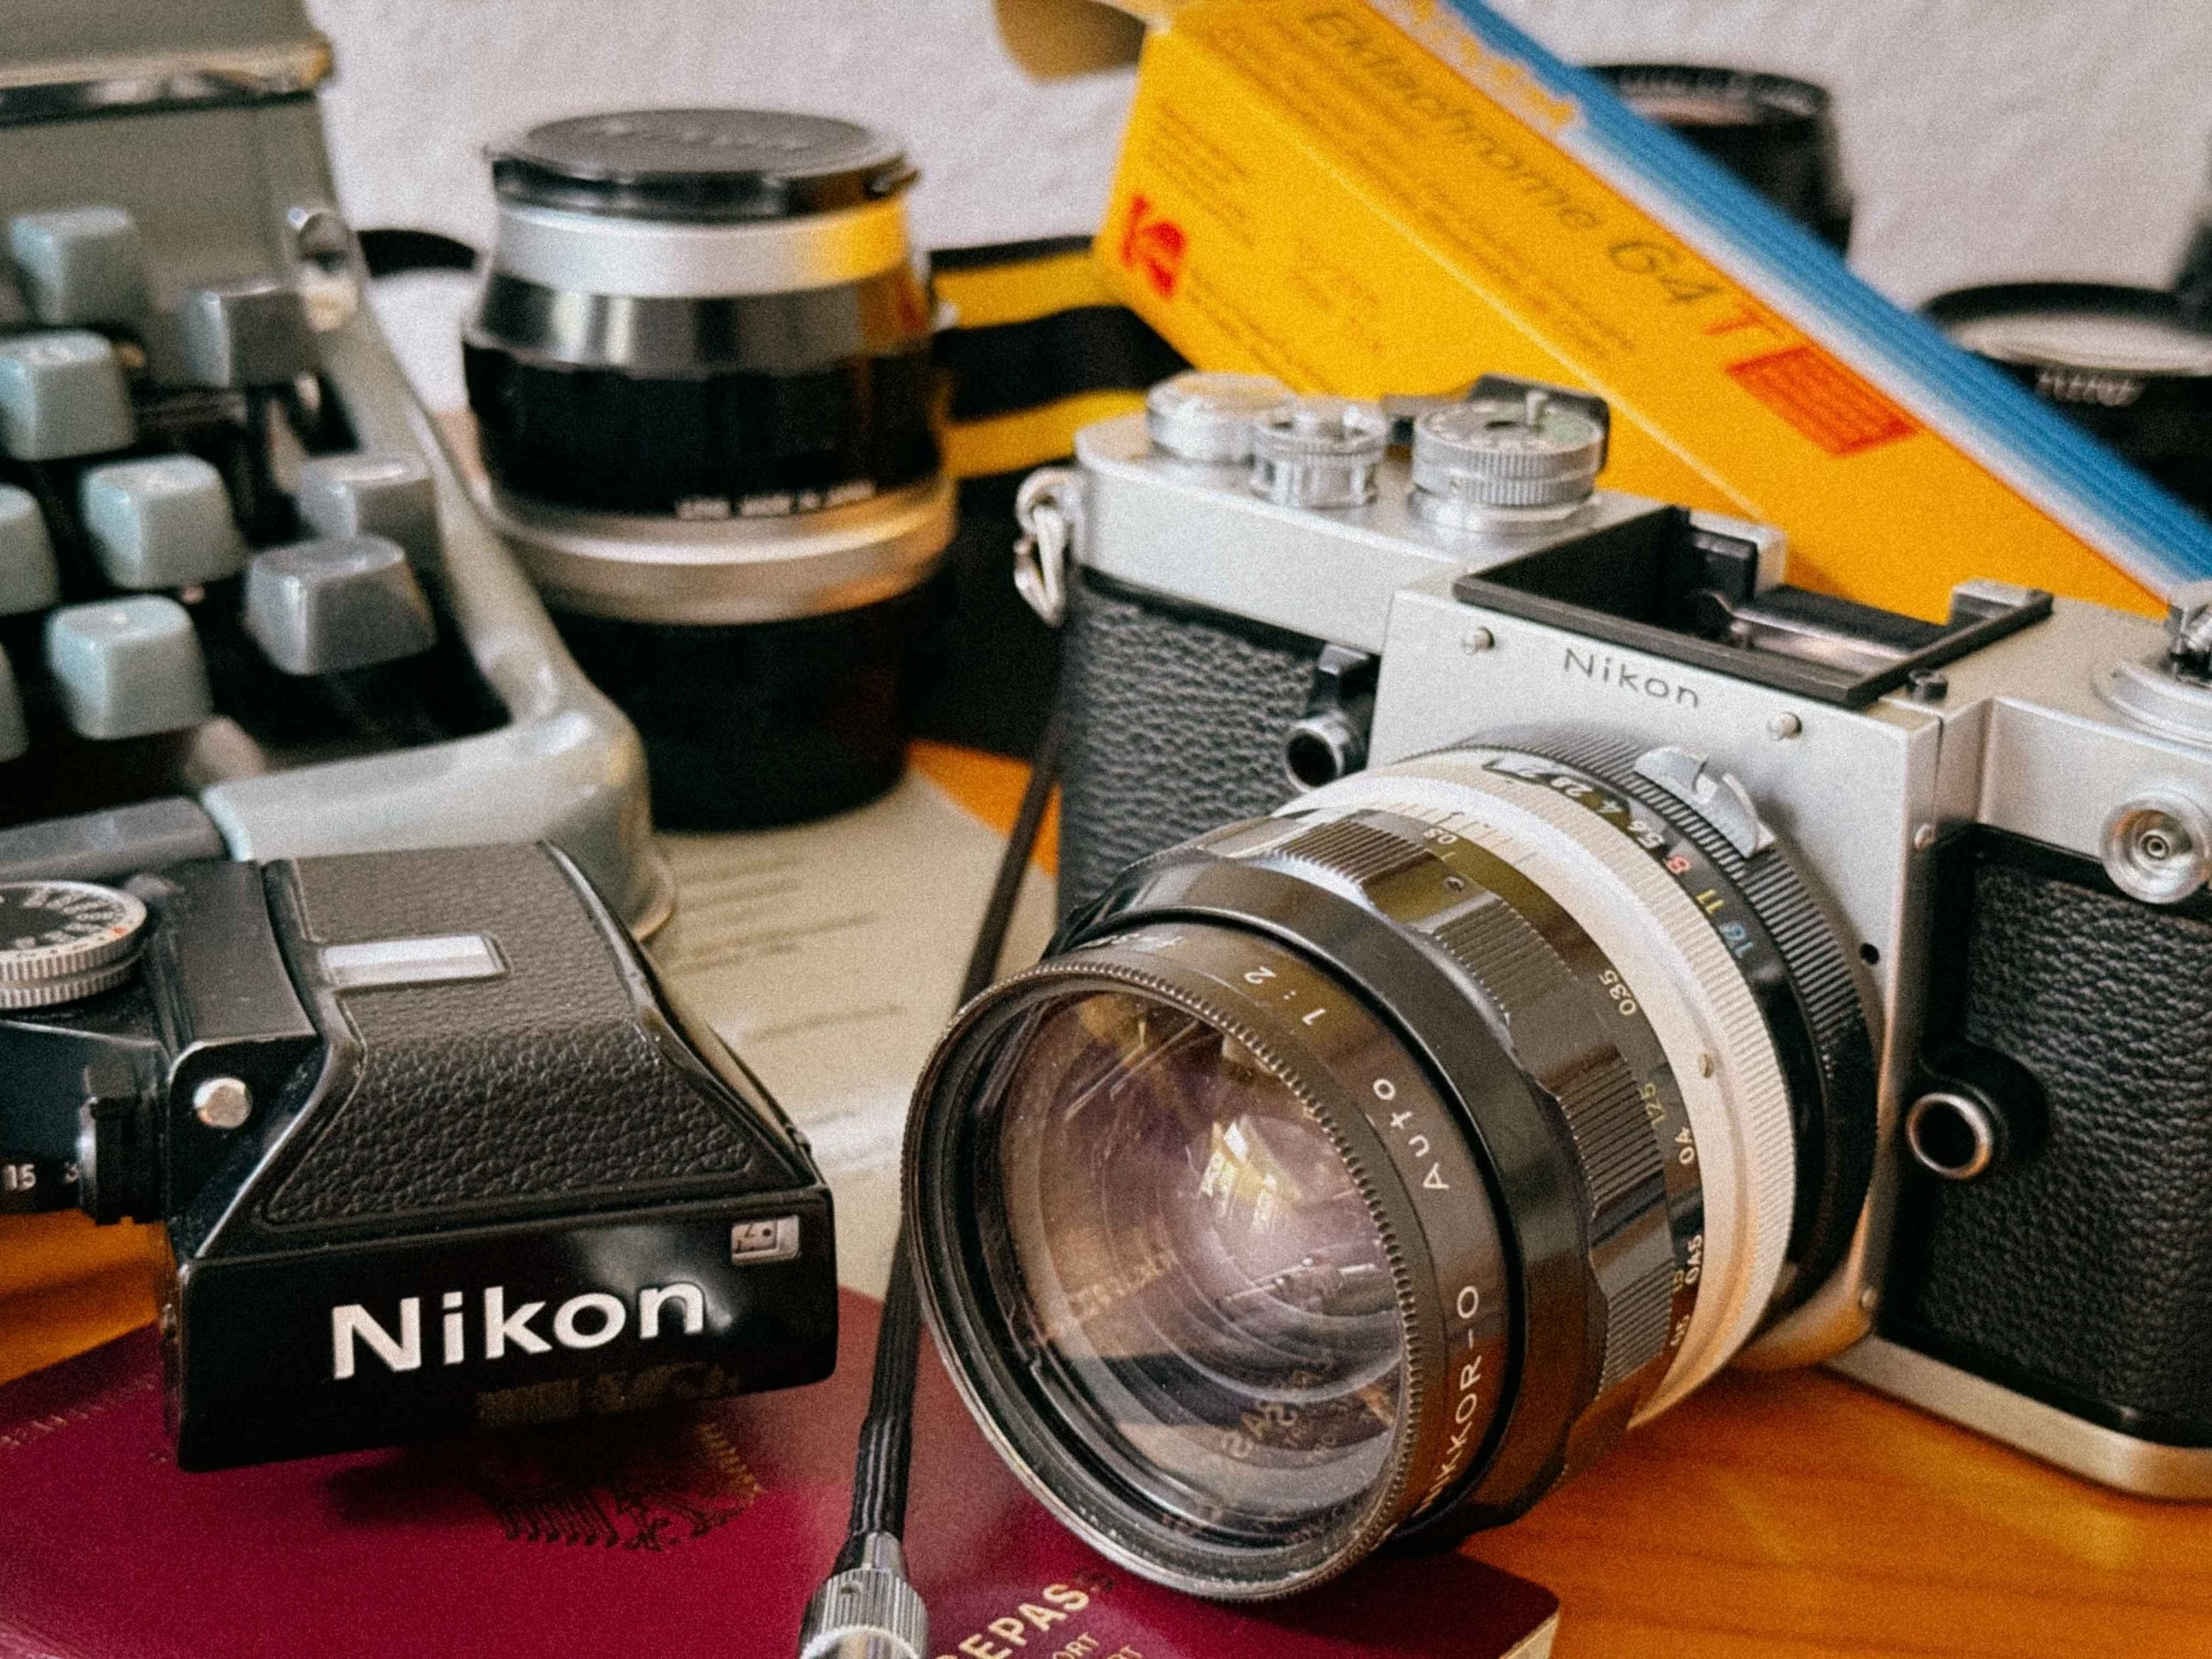
Nikon F-Mount Lenses: What Works on the Nikon F2
Vintage Lense Ad
One of the most significant advantages of the Nikon F2 is its role as a bridge between two eras of optical history. However, this is also where you need to pay the most attention to the interface between your lens and your finder.
The "Non-AI" Advantage
My Nikon F2, equipped with the DP-1 Finder, has one massive benefit: it lacks the fixed auto-indexing (AI) tab found on almost all later Nikon bodies. Which is great cause i can use my “Non-AI” lenses on the Nikon F as well as on my F2.
On the later Nikon F2 models, specifically the F2A (DP-11) and F2AS (DP-12), you have to be extremely careful. These finders feature a delicate AI-indexing tab that can be physically bent or damaged by older, unmodified "Non-AI" glass. If you want to use the vast and affordable library of early 1960s Nikkor lenses without permanently altering them, the DP-1, DP-2, and DP-3 finders are your safest and most versatile options.
Understanding the "Rabbit Ears"
To get a meter reading on these earlier finders, you rely on the iconic "Rabbit Ears" (the metal coupling prongs) on the lens.
The Ritual: When you mount a lens, you engage the pin on the finder into the prongs of the lens and perform the "Nikon Shuffle" (turning the aperture ring to its minimum and maximum).
The Reward: This tactile connection allows you to use almost any F-mount lens made between 1959 and 1977 with full TTL (through-the-lens) metering.
The Ultimate Pre-AI Lens Kit for the Nikon F2
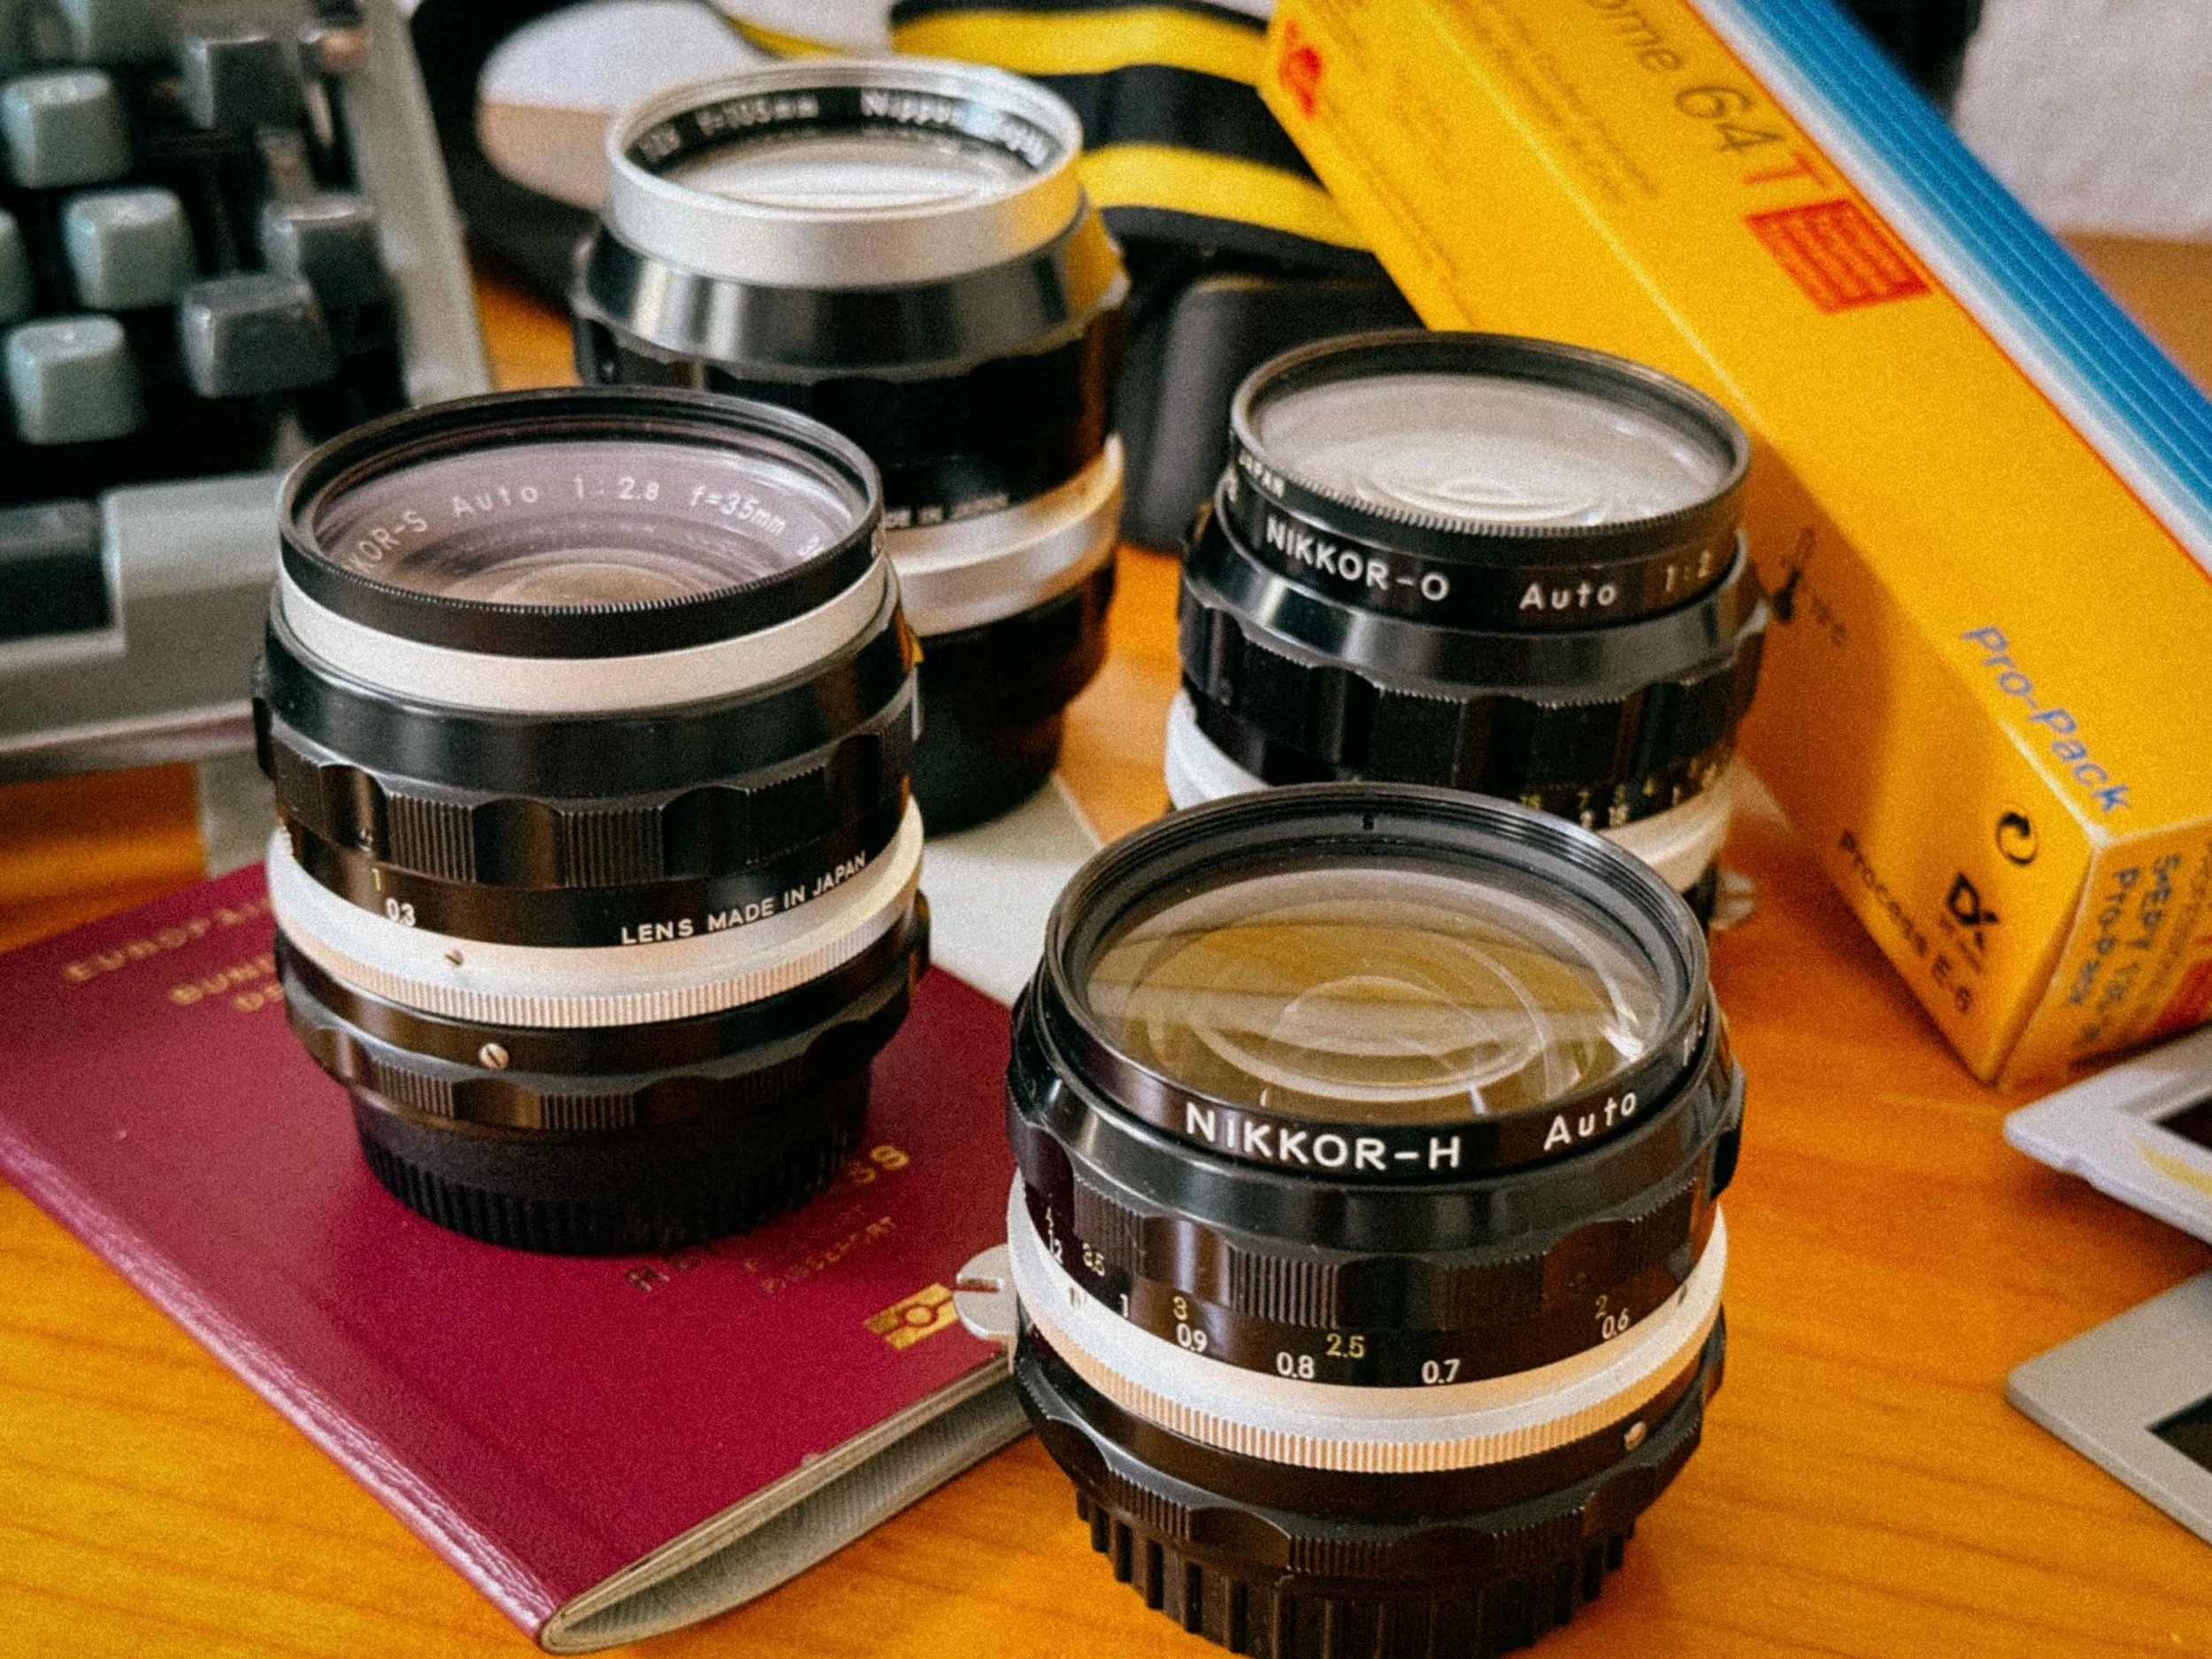
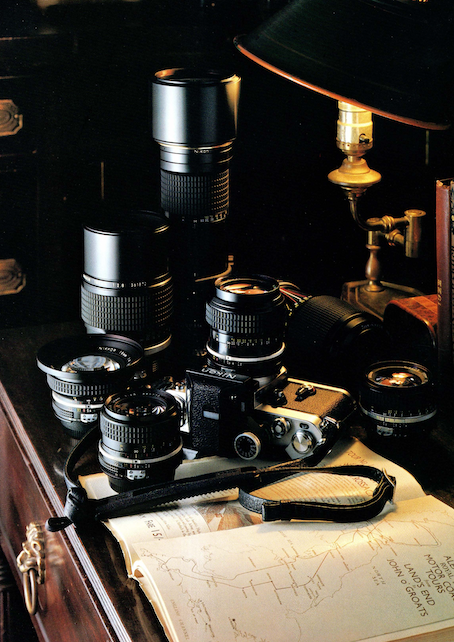
My Favorite Lense Line up
If you want to experience the Nikon F2 without breaking the bank, you don't need a dozen lenses. What you need is a curated kit, a small selection of glass that covers everything from the frantic pace of street photography to the quiet focus of an intimate portrait.
I can’t stress enough how well-built these vintage Nikkor lenses are. We are talking about milled brass, precision-ground glass, and a feel that makes modern plastic lenses feel like disposable toys.
But it’s not just about the construction. These vintage Nikkors have a specific character that combines a nostalgic, cinematic look with a level of resolution that is still surprising in 2026. If you haven't noticed by now, I am a massive fan of this era of optics.
Here is my recommended lineup for the ultimate F2 kit:
1. The Wide-Angle: Nikkor-H 28mm f/3.5
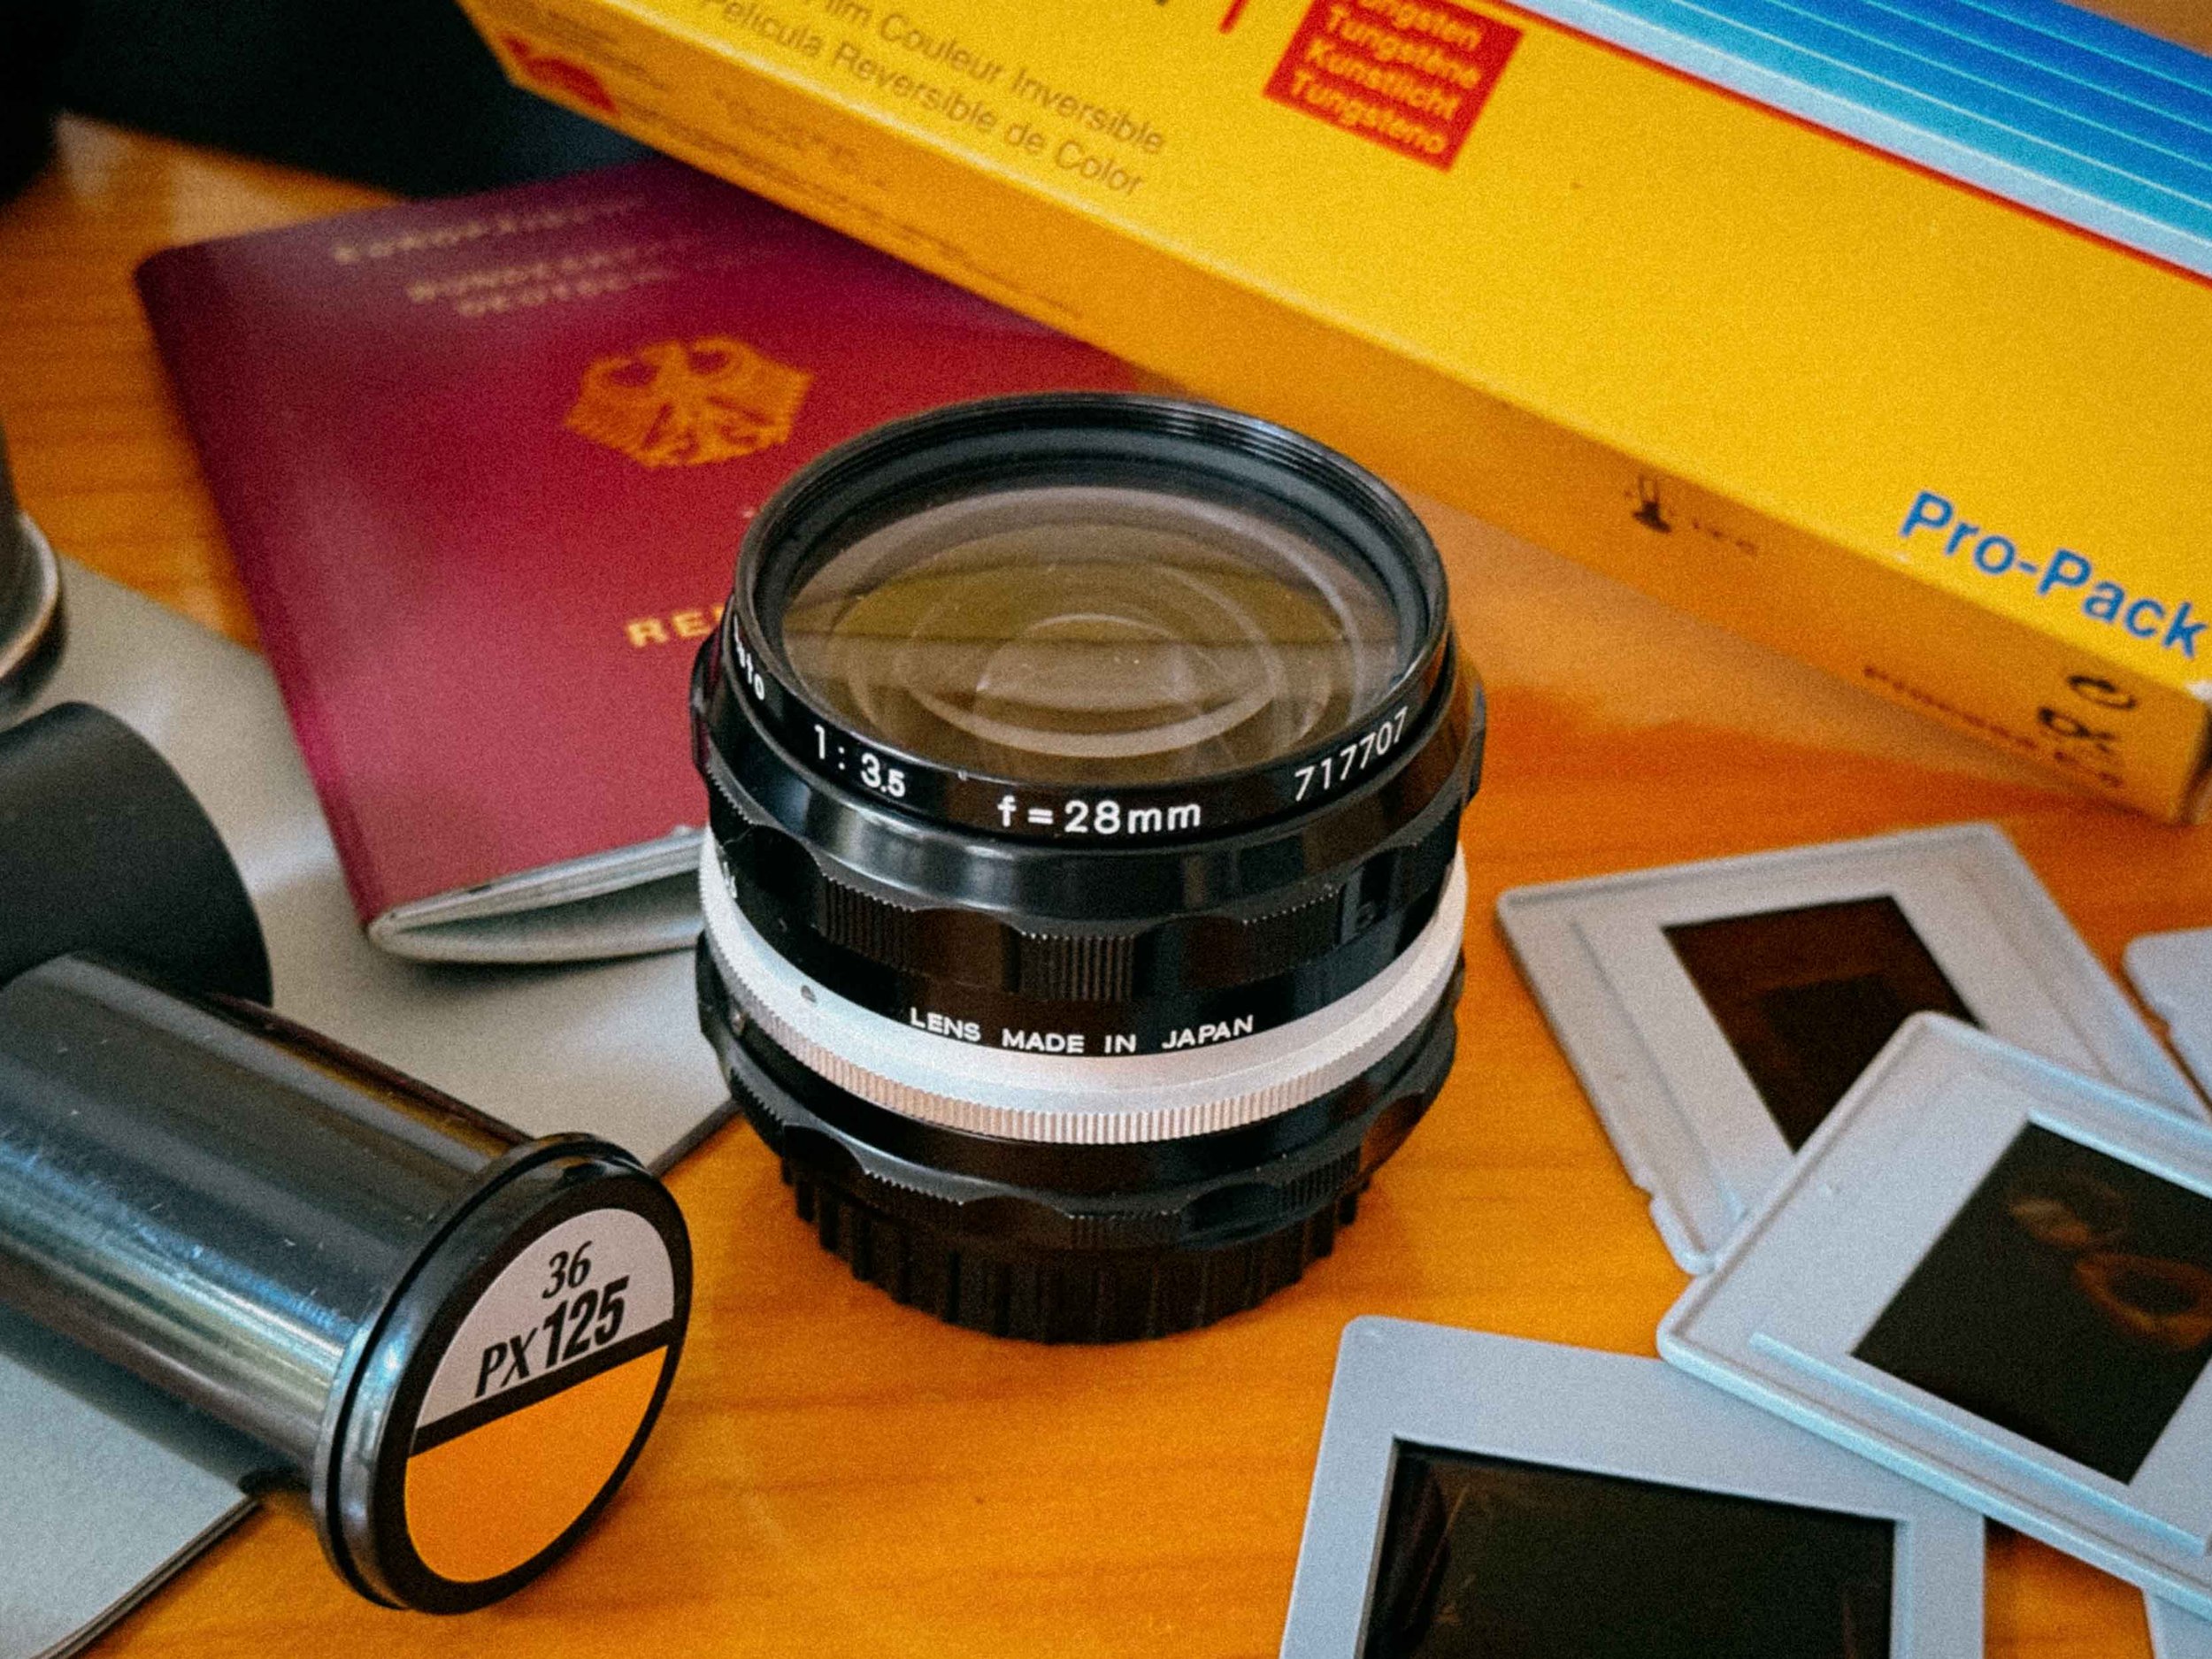
Nikkor-H 28mm F/3.5
Don’t be discouraged by the f/3.5 maximum aperture. This lens is a masterclass in optical correction, celebrated for its corner-to-corner clarity and virtually non-existent distortion. Its remarkably slim profile provides a much-needed counterweight to the F2's massive brass body. You can still find these for under $100. It’s the ideal lens for landscapes, though you’ll want to reach for something faster once the sun dips below the horizon.
2. The Documentary Choice: Nikkor-O 35mm f/2
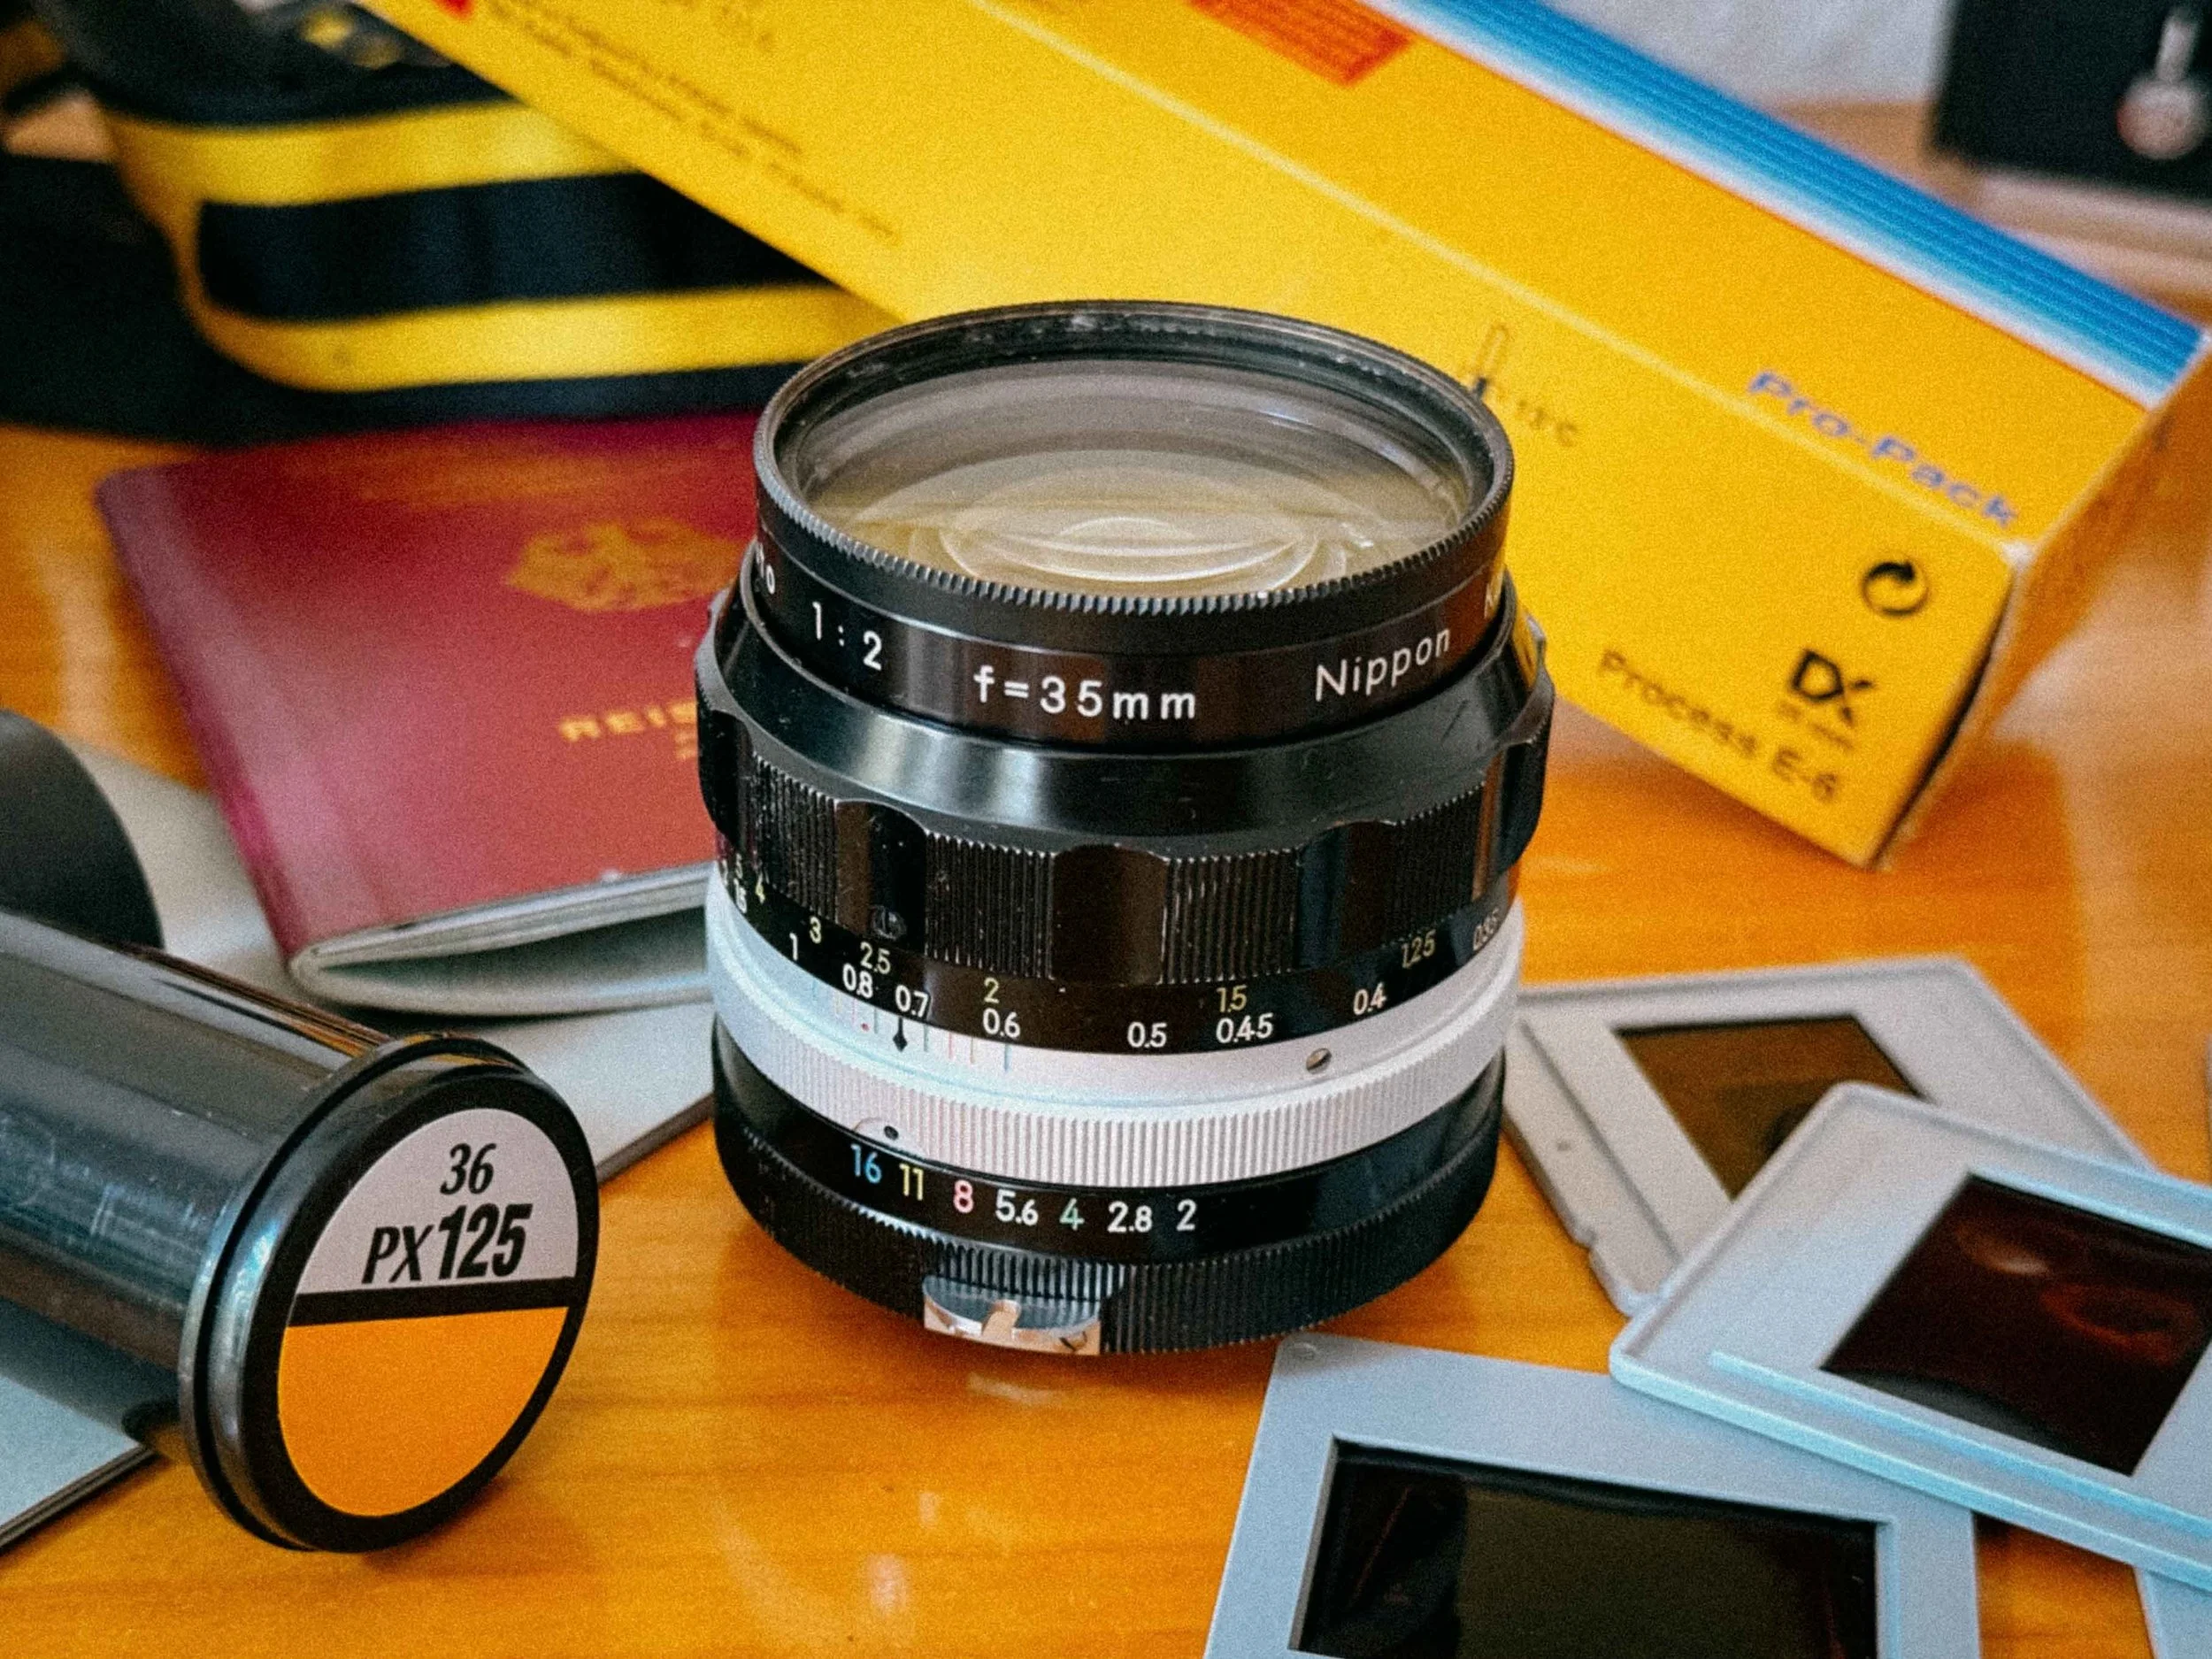
Nikkor-O 35mm F/2.0
If I were stranded on a desert island with only one piece of glass, this would be it. The 35mm f/2 is the such a great lens. It’s fast enough to handle moody interiors and possesses a signature "glow" at f/2 that melts into surgical sharpness by f/4. I shot most of the sample images below with it.
3. The Workhorse: Nikkor-S 50mm f/1.4
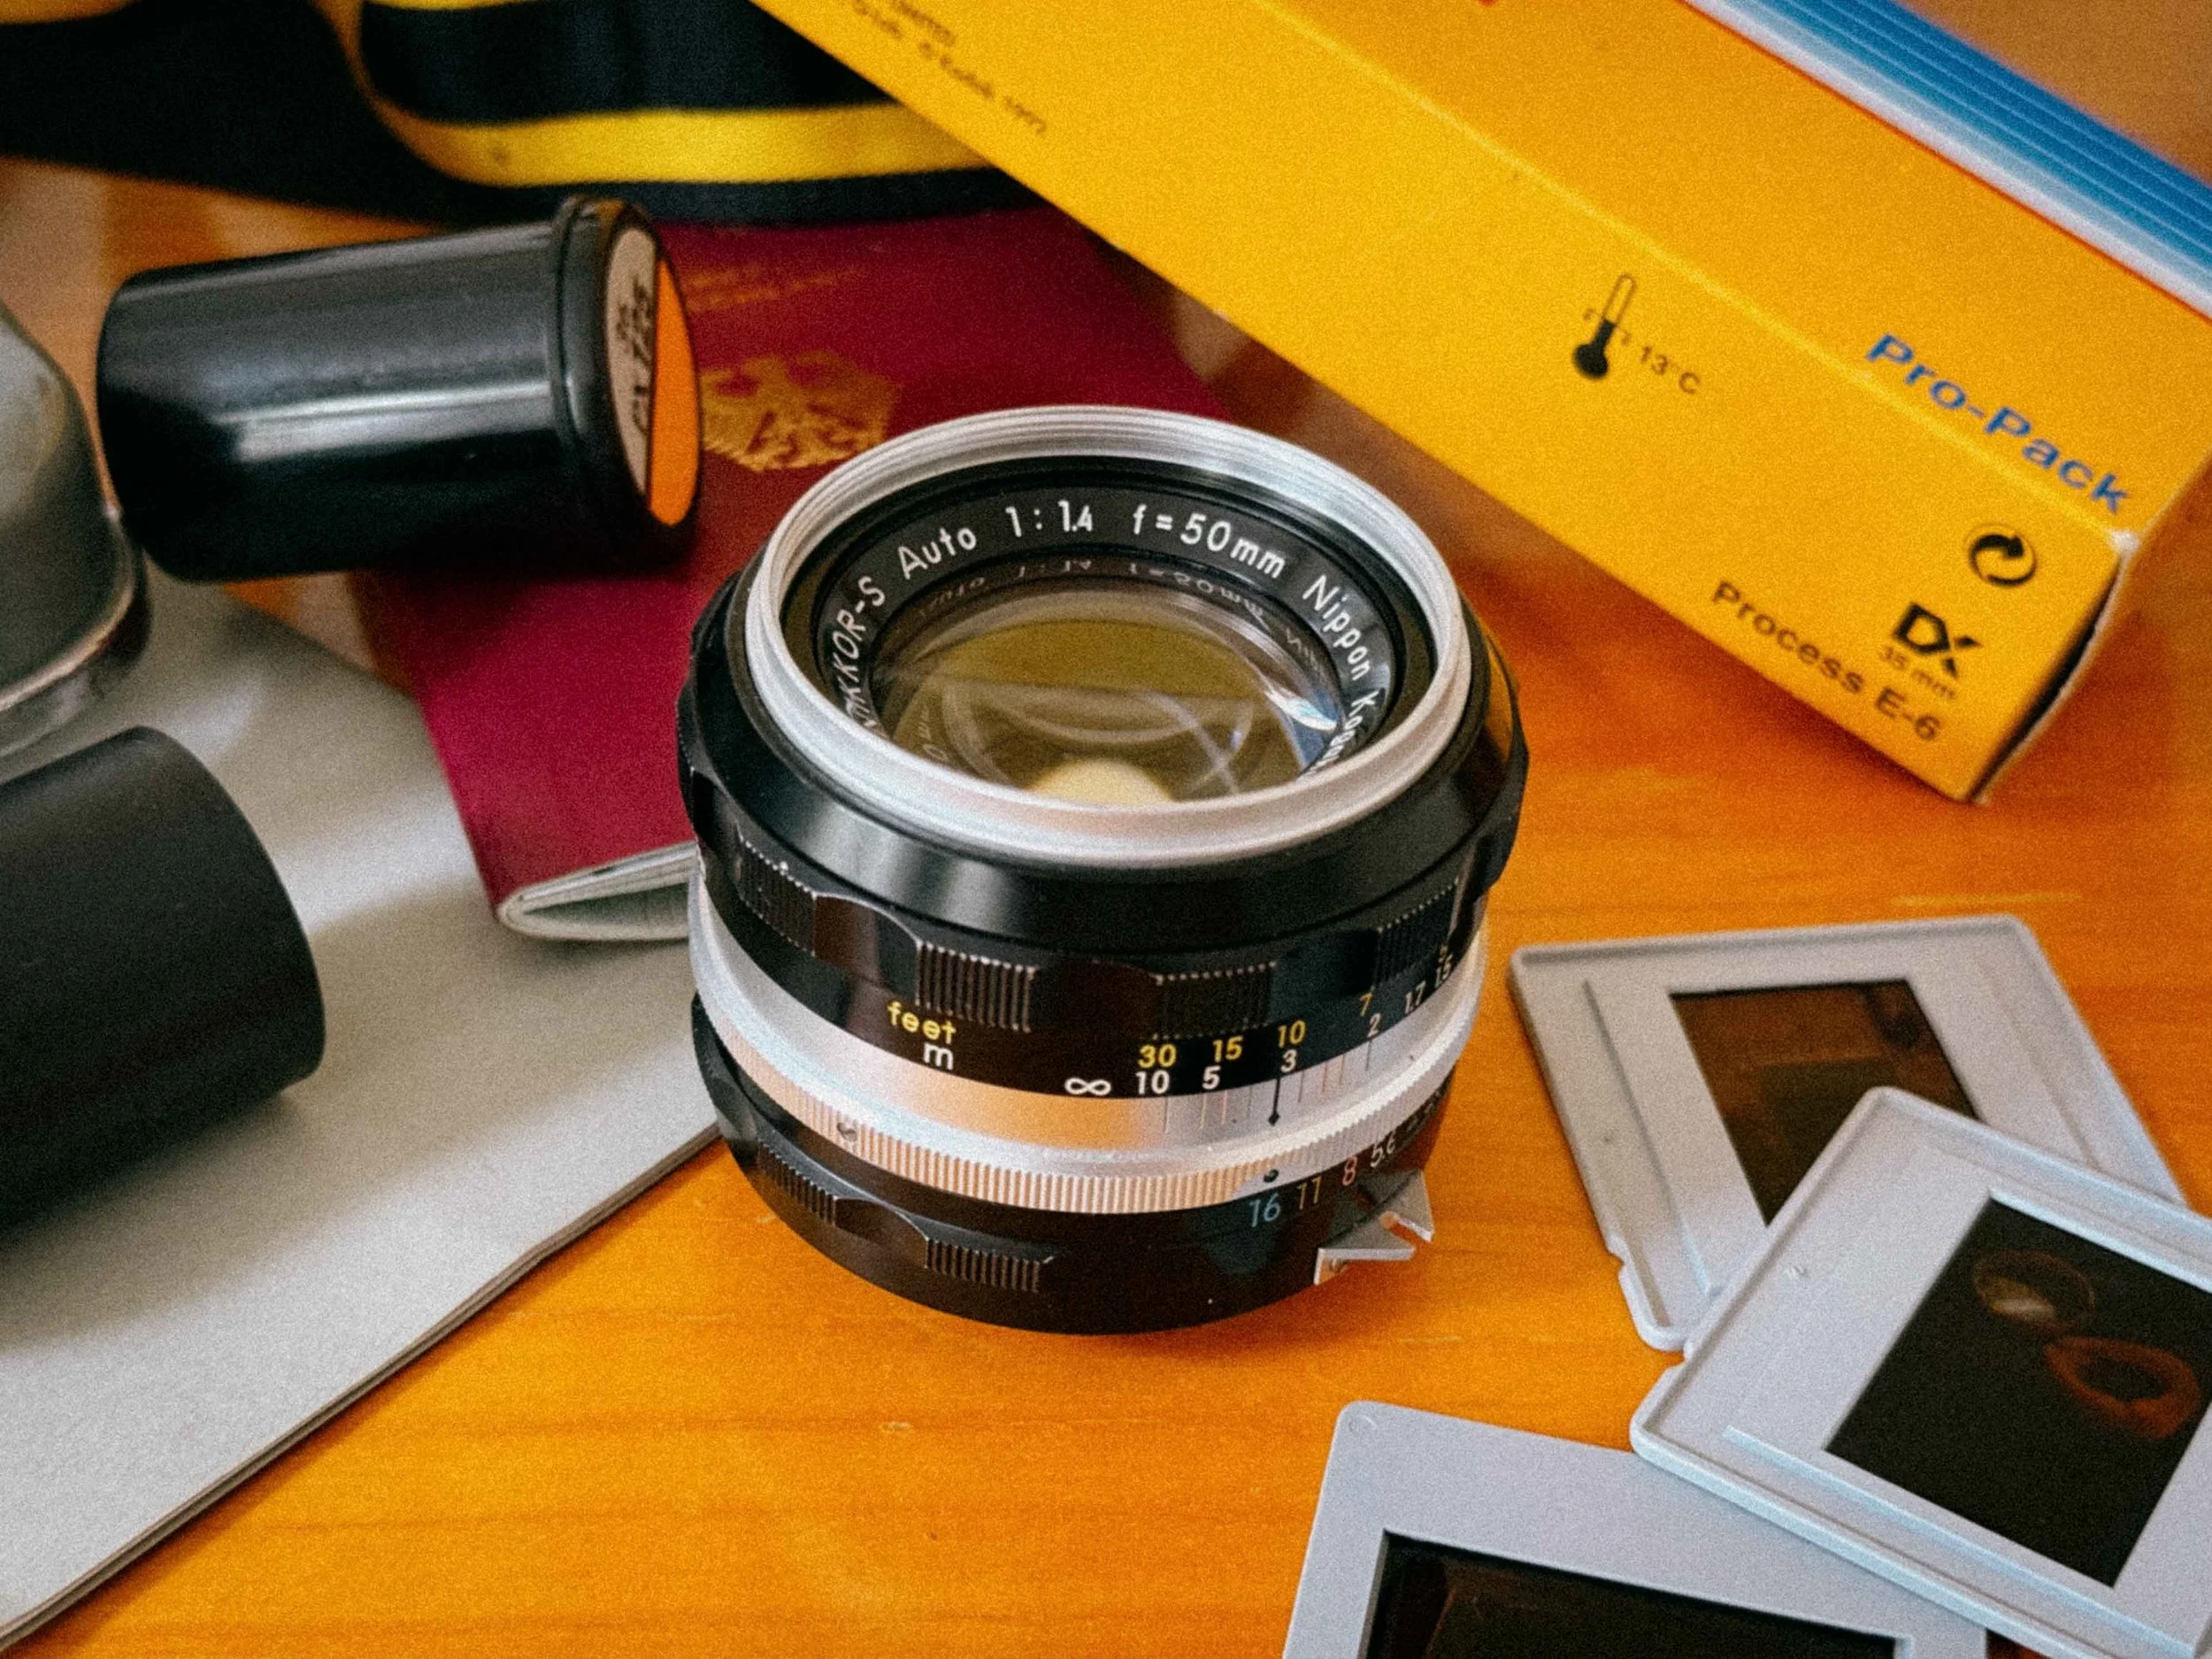
Nikkor-S 50mm F/1.4
This is the quintessential "Standard" nifty fifty. The "S" stands for Septem (seven elements), and it is a lens with two distinct personalities. Wide open, it creates a dreamy, atmospheric aesthetic that is great for cinematic portraits. Stop it down to f/5.6, and it becomes a modern, high-contrast performer.
4. The Portrait Master: Nikkor-P 105mm f/2.5
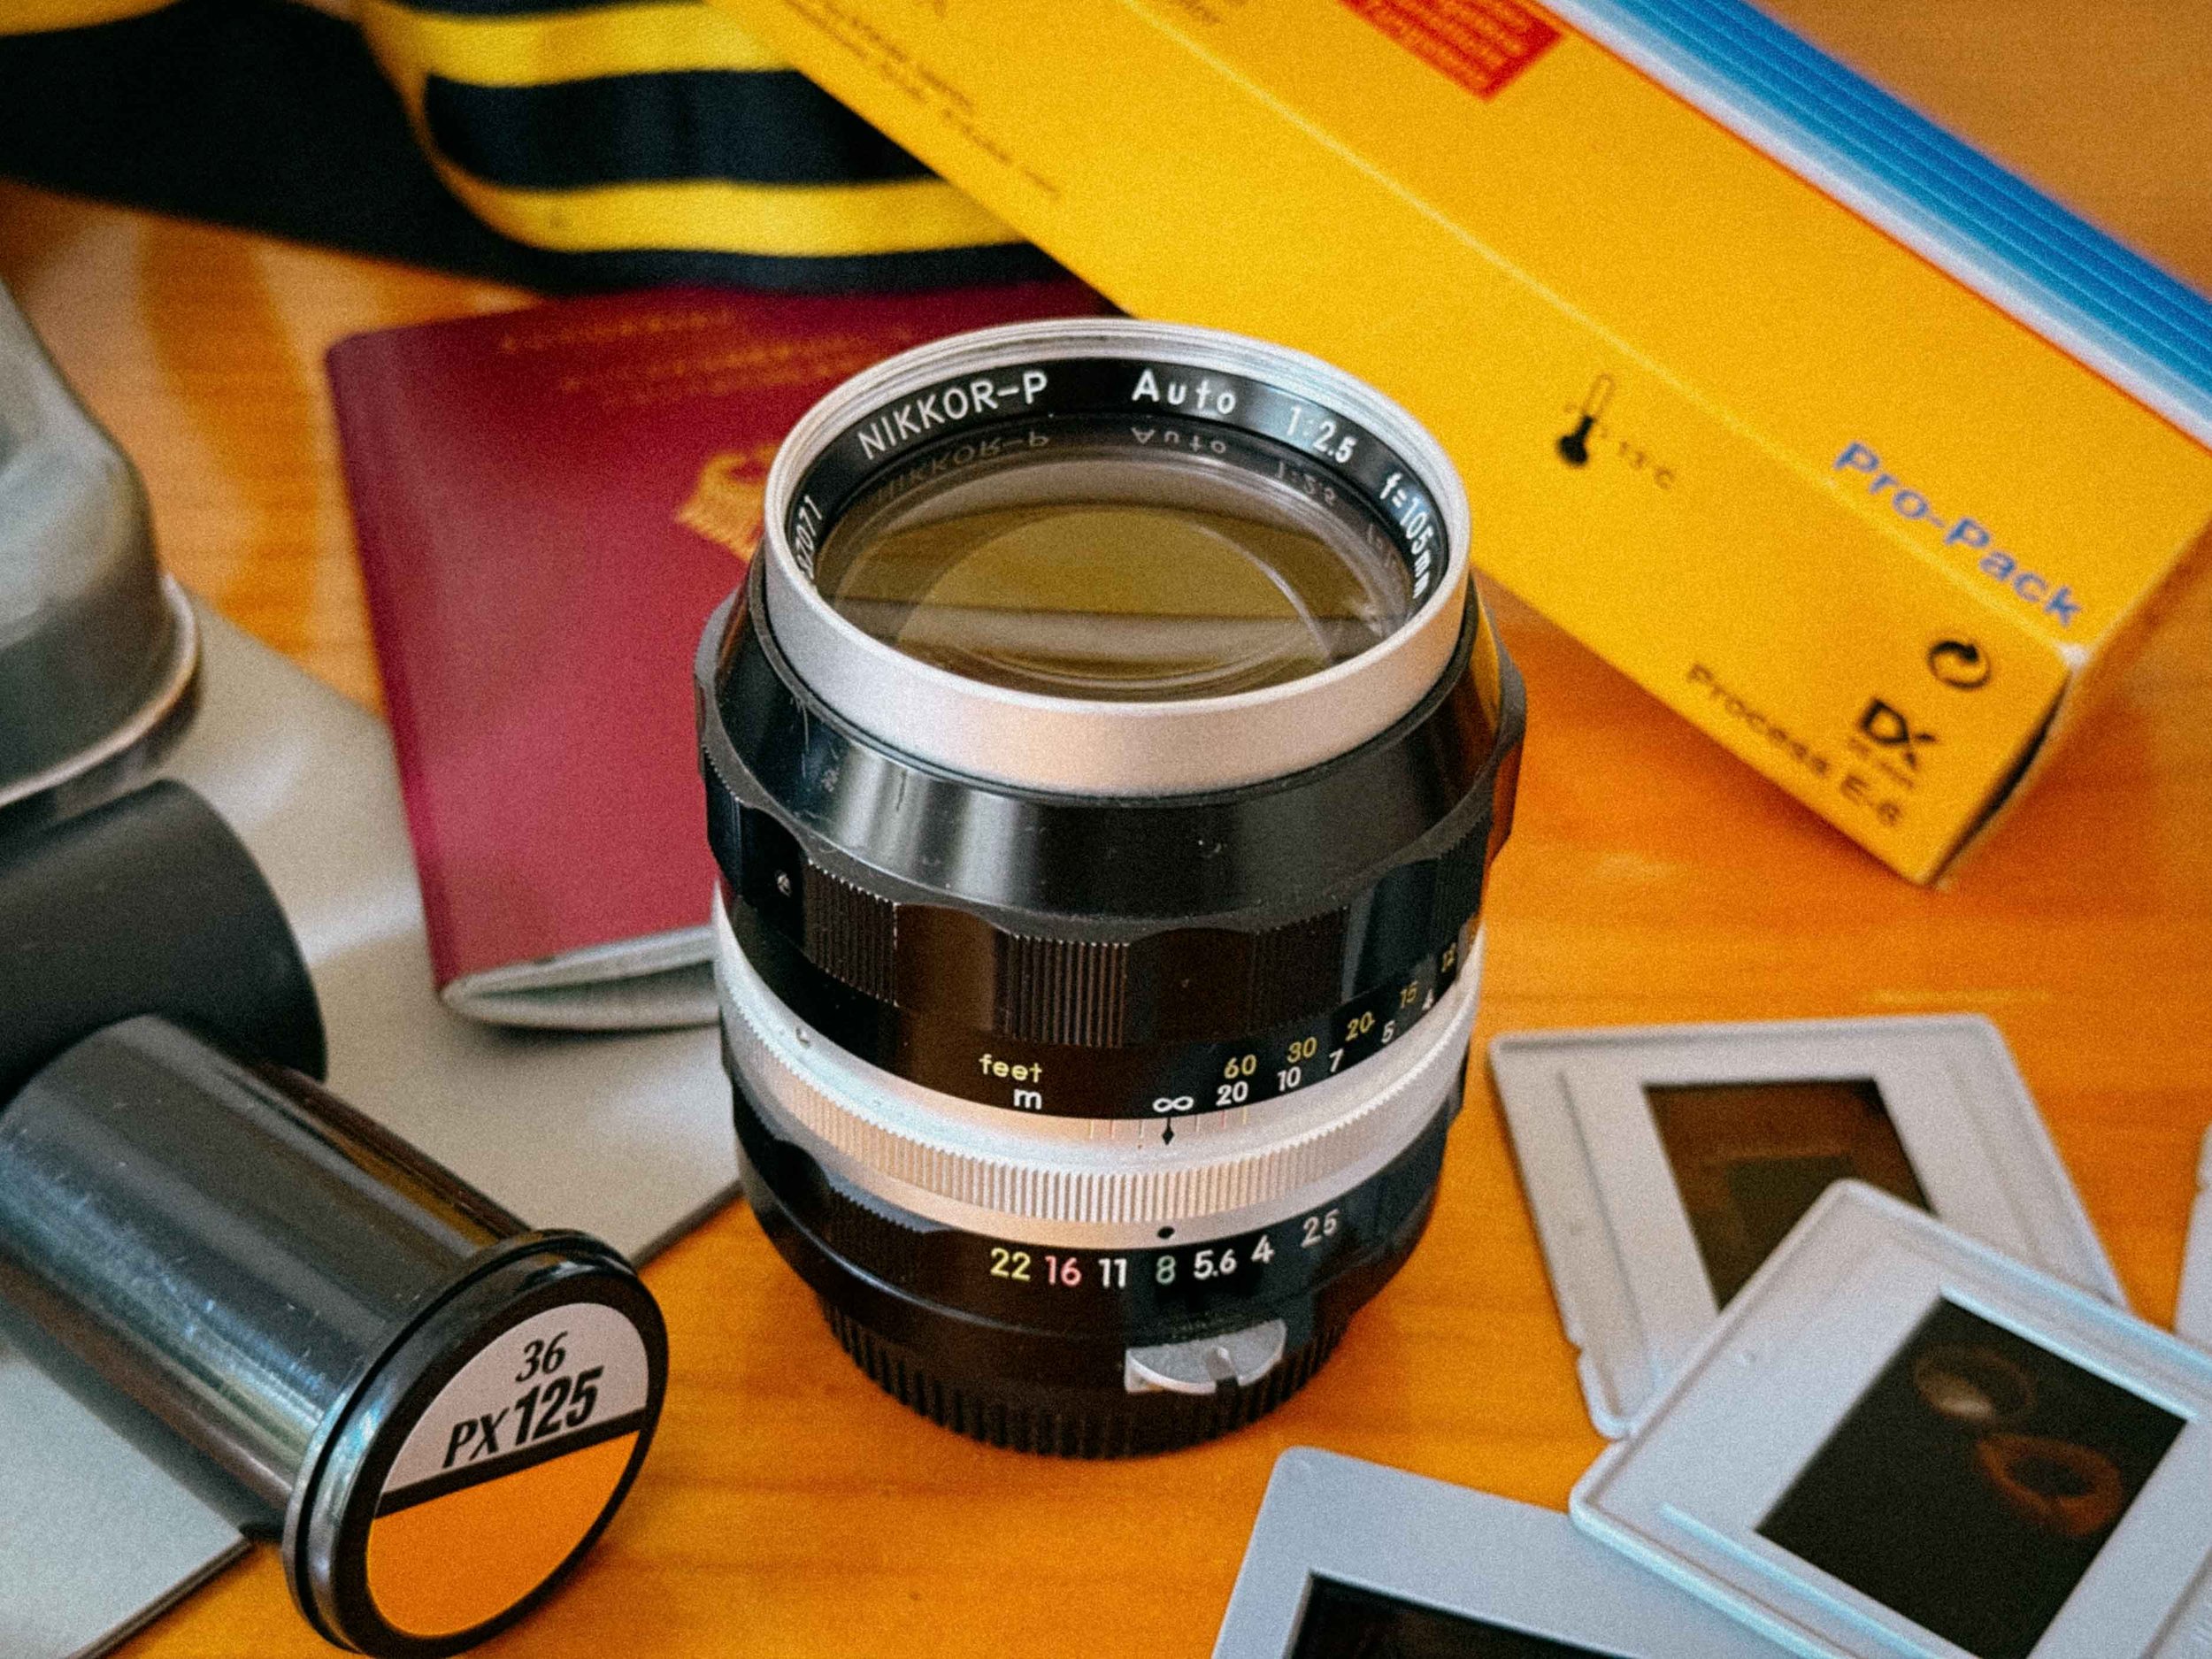
Nikkor-P 105mm F/2.5
Widely regarded as one of the finest portrait lenses in history, the 105mm f/2.5 is famous for a reason. It manages to be tack-sharp where it matters while maintaining a gentle, flattering fall-off for skin tones. This early Pre-AI version utilizes a Sonnar optical formula, which produces a creamy, painterly bokeh that modern computer-designed lenses struggle to replicate. If you want to capture the soulful, haunting depth made famous by National Geographic's most iconic covers, this lens is non-negotiable. This is my absolute favorite for portraits.
The Nikkor Alphabet: Decoding the Glass
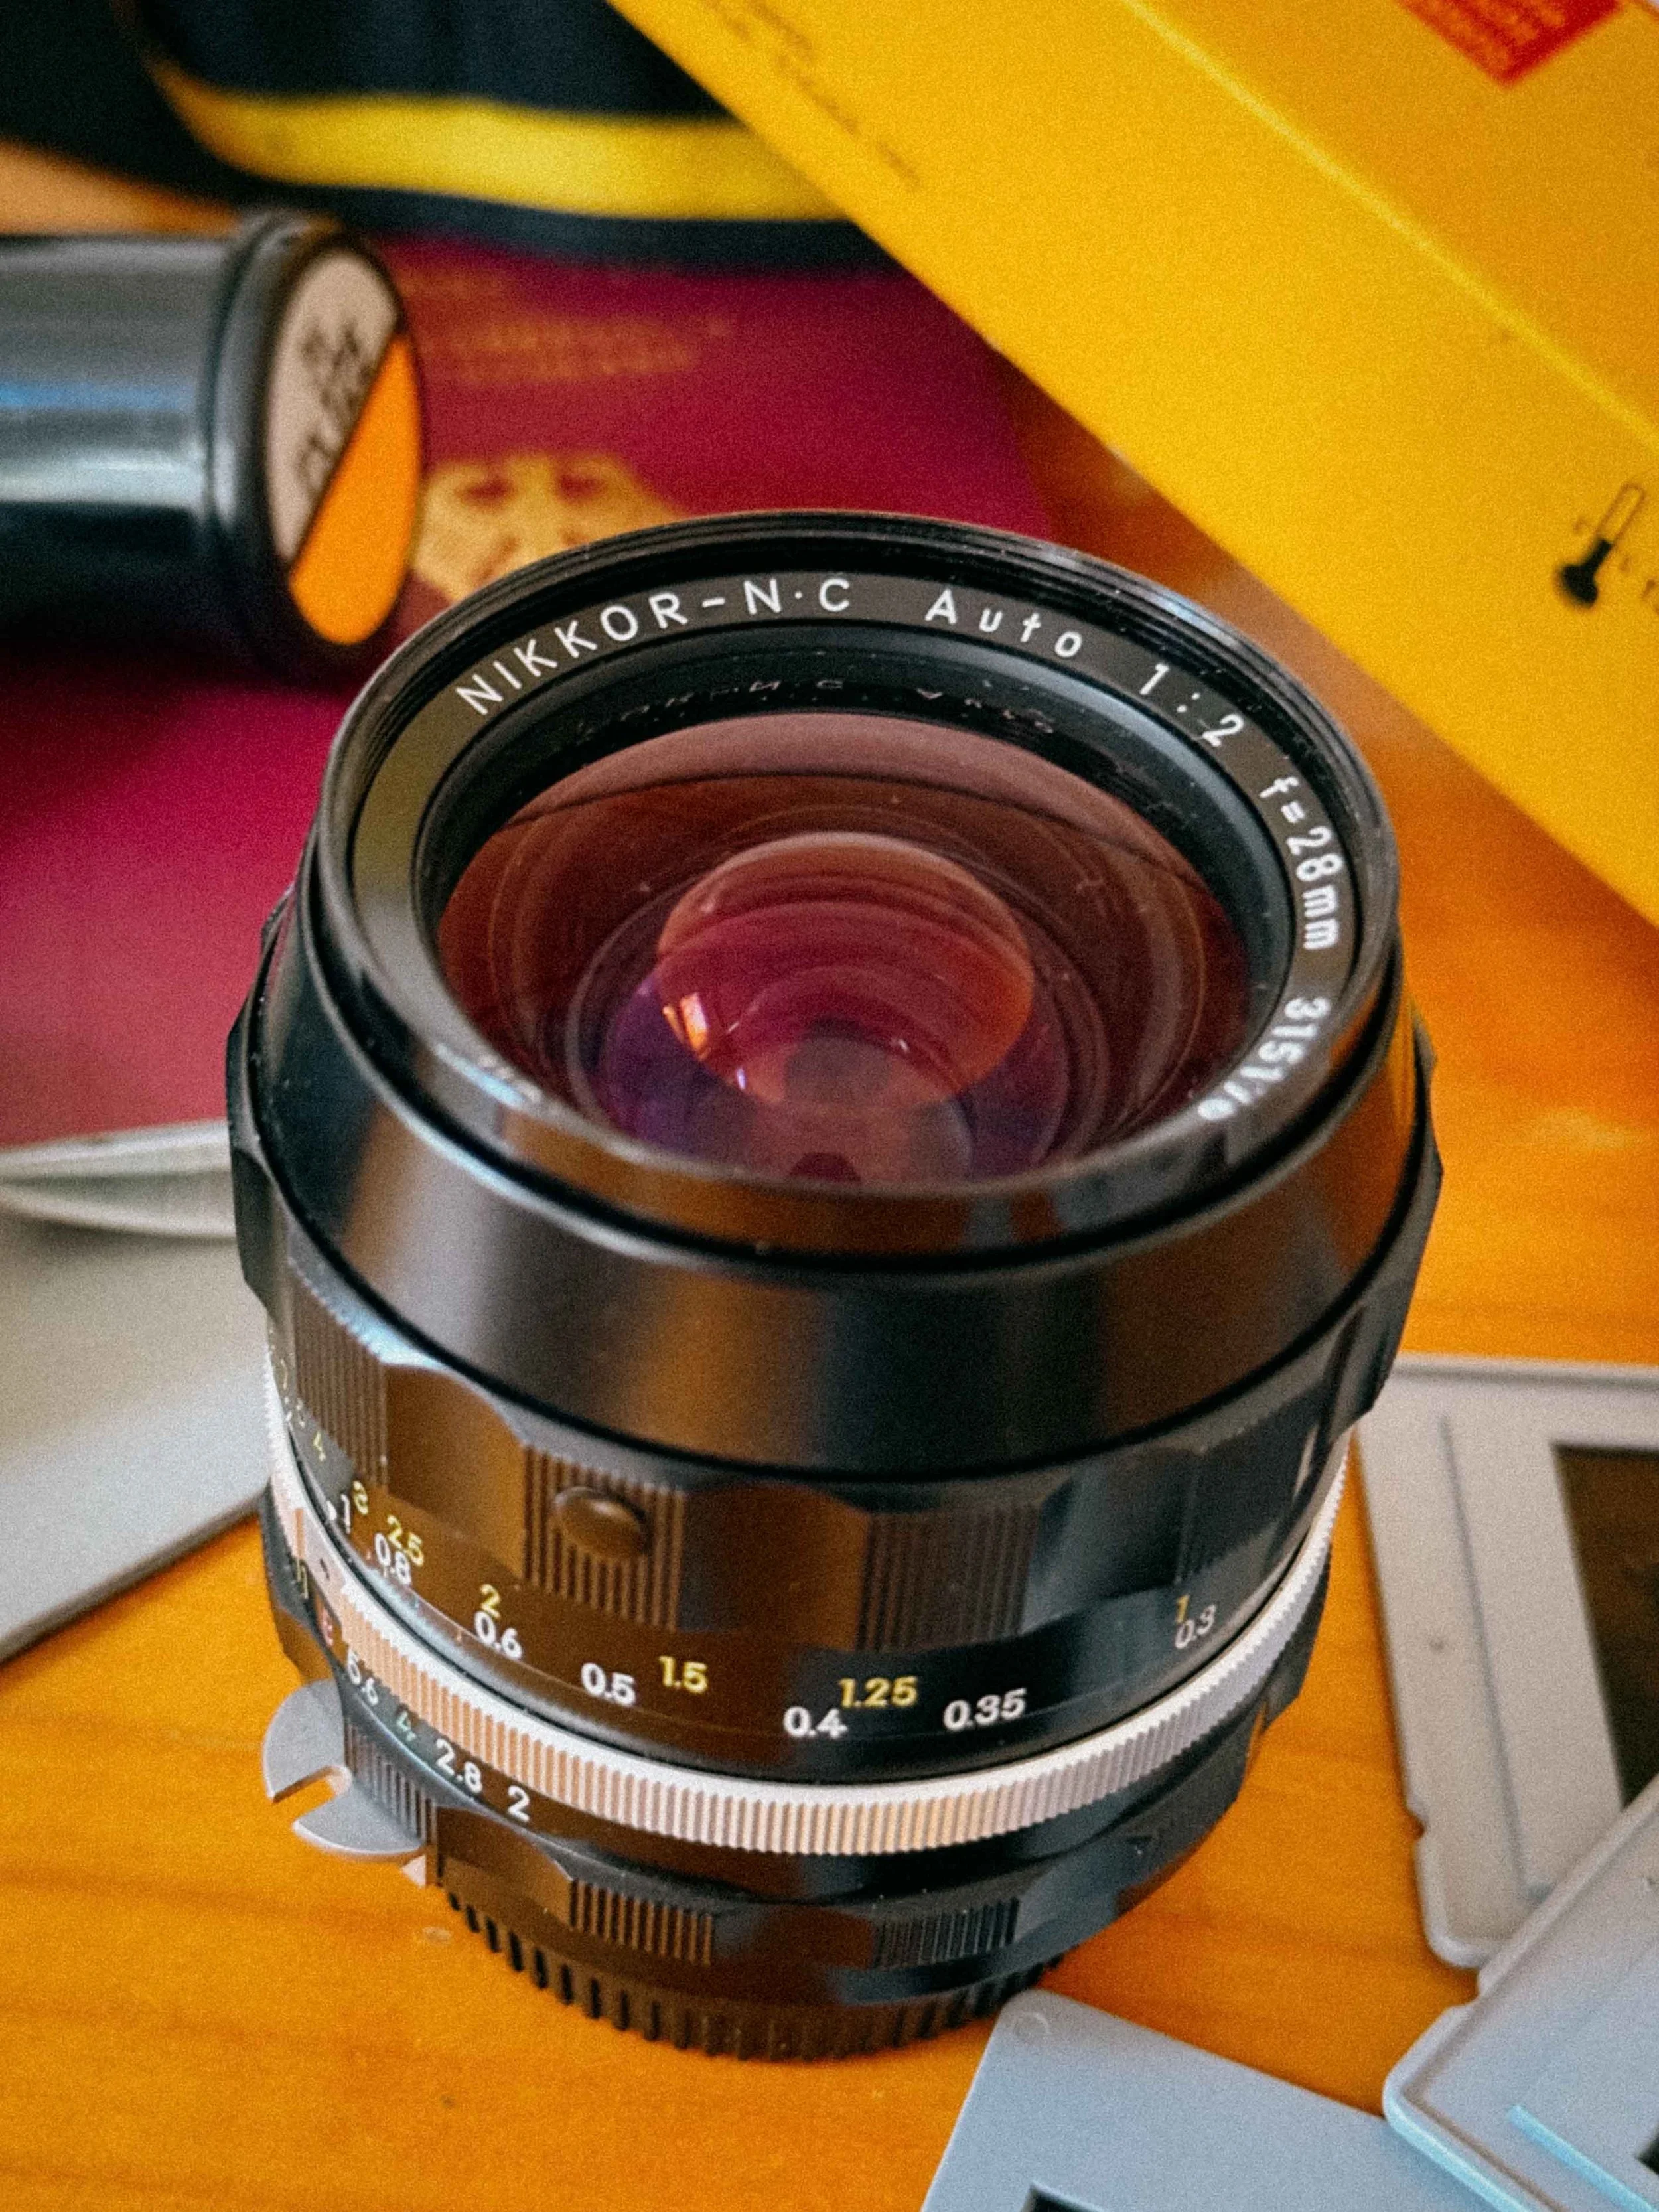
Nikkor-NC 28mm F/2.0
When you look at a vintage Nikkor, that single letter after the name (like the "P" in our 105mm) serves as a code. It’s not just a model designation; it reveals the optical soul of the lens by telling you how many glass elements were used in its construction.
Nikon drew from Latin and Greek numerical prefixes to create this system. Understanding this "alphabet" allows you to appreciate the mechanical and optical complexity of your kit before you even look through the viewfinder.
| Letter | Origin (Latin/Greek) | Elements | Example Lens |
|---|---|---|---|
| U | Unus | 1 | Ultra-rare specialized optics |
| B | Bini | 2 | Early tele-converters / specialized glass |
| T | Tres | 3 | Nikkor-T 10.5cm f/4 |
| Q | Quatuor | 4 | Nikkor-Q 135mm f/3.5 |
| P | Pente | 5 | Nikkor-P 105mm f/2.5 (The Legend) |
| H | Hex | 6 | Nikkor-H 28mm f/3.5 |
| S | Septem | 7 | Nikkor-S 50mm f/1.4 |
| O | Octo | 8 | Nikkor-O 35mm f/2 |
| N | Novem | 9 | Nikkor-N 24mm f/2.8 |
| D | Decem | 10 | Nikkor-D 15mm f/5.6 |
Pro Tip: Generally, the more elements (like the Nikkor-O or Nikkor-N), the more complex the optical design was
The "·C" Suffix: Understanding Light and Coating
As you hunt for vintage glass, you’ll often see a small "·C" engraved after the element letter (for example, Nikkor-S·C). This isn’t just a minor update; it marks the transition to Multicoating, a massive leap forward in optical technology.
Non-C (Single-Coated) Lenses: These are the purist's choice for a "period-correct" vintage look. They are more prone to flare and produce a lower-contrast, pastel-like aesthetic. If you want your photos to look like they were pulled straight from a 1970s archive, these are for you.
C-Type (Multicoated) Lenses: These handle harsh backlighting with much more grace. They offer punchier contrast and deeper color saturation, making them the better choice for slide film or high-contrast street scenes where you need to control stray light.
The "Auto" Label: A Mechanical Revolution
One of the most common points of confusion for newcomers is the "Auto" designation found on the barrel of many Pre-AI Nikkors. In 2026, we associate "Auto" with electronics, but in the era of the F2, it was a masterpiece.
It stands for Automatic Diaphragm. Before this innovation, the viewfinder would dim as you stopped down the lens; focusing at f/11 felt like trying to see through a dark room.
The "Auto" feature changed everything: it allows the lens to stay wide open for a bright, crystal-clear focusing experience, only "snapping" down to your selected aperture at the exact millisecond you fire the shutter. It is the mechanical heartbeat of the Nikon system, a seamless interaction between the camera body and the glass that made the F2 the fastest tool of its time.
Accessories and Motor Drives: Expanding the Nikon F2 System
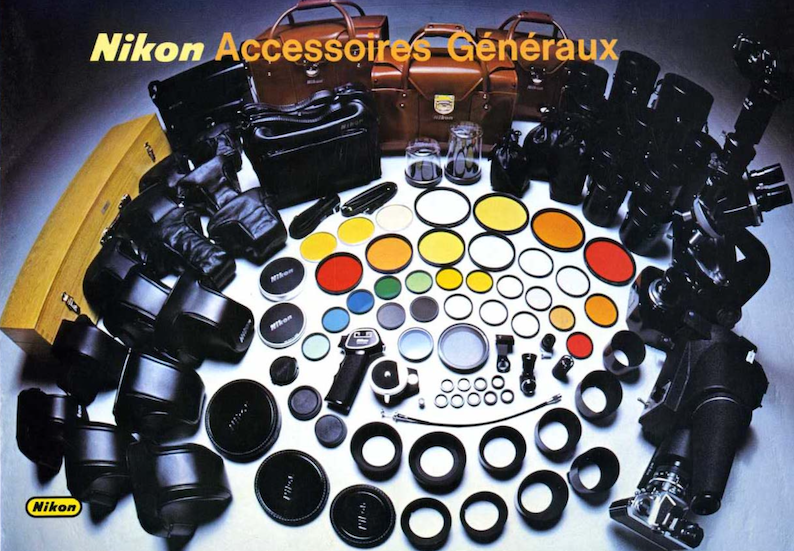
Nikon offered a wide array of accessoires for the F2
Nikon AS-1 Hotshoe Adapter
Nikon AS-1 Adapter
The Nikon F does not have a standard hot shoe. It uses a unique mount around the rewind crank. If you want to use a modern flash or a wireless trigger in 2026, you’ll need the Nikon AS-1 adapter. Without it, your will have to use its PC-Port.
The Shutter Release Cable (The AR-2)
Nikon AR-2 Cable Release
The Nikon F uses a proprietary "Leica-style" bell mount. To use a remote cable for long exposures or tripod work, you need the Nikon AR-2 cable release (or a "Nikon to Standard" adapter). It’s a small detail, but realizing your standard cable will not fit while at a shooting is something you want to avoid.
While most of us shoot the F2 as a regular camera, Nikon offered an staggering array of expansions that transformed the camera for specialized work:
Motordrives and more
Fully rigged Nikon F2 with motor drive and 250 exposure magazine
Motor Drives (MD-1, MD-2, MD-3): These high-speed drives allowed for up to 5 frames per second. They turn the F2 into a loud, fast, and heavy beast, hard to believe but it was an importat accessoire for 1970s sports and news photographers.
Specialized Backs: From 250-exposure "bulk film" backs for surveillance to data backs for scientific recording, the F2 could be modified for almost any task.
Macro and Repro: The system included a massive range of Bellows units and slide copiers, allowing for extreme high-magnification work.
While you may never need a 250-exposure magazine (maybe you do :), knowing they exist reinforces why the F2 earned its reputation.
Nikon F2 Sample Images (Film Examples and Results)


The Verdict: Is the Nikon F2 Still Worth Buying in 2026?
Today we are surrounded by technology that is designed to be obsolete within a few years. The Nikon F2 is the exact opposite. It is a quiet middle finger to the disposable era of modern cameras. No autofocus, no auto exposure modes, no menus, no firmware updates, and absolutely nothing that gets in the way between you and the image.
So why should you buy one?
Because shooting a Nikon F2 is a physical experience in the best possible sense. You feel the weight of the metal body, you hear the precise shutter, and you get to use some of the best manual-focus Nikkor lenses ever made. Everything about it feels intentional. Nothing is automated, nothing is guessing for you, the camera simply does exactly what you tell it to do.
It’s a tool that demands your attention, but rewards you with a shooting experience that modern cameras simply don’t offer anymore. Even in 2026, the Nikon F2 still feels just as relevant as it did when it was introduced in 1971. Which is such a rare and precious thing to experience.
Is it for everyone?
Probably not. It’s heavy, it’s fully manual, and it won’t help you in any “point and shoot” situation. Some might even call it outdated. But once you get used to it, it becomes hard to go back. Shooting it is not convenient, it’s satisfying.
Where to buy a Nikon F2?
If you’re looking for a clean and properly serviced body, specialist vintage dealers or dedicated Nikon repair shops are usually the safest option. Cameras that have been CLA’d (cleaned, lubricated, adjusted) are worth the extra money, especially for long-term use.
I bought mine at Nikonclassics which i can highly recommend.
If your are looking for a super premium variant i suggest to reach out to Sover Wong. Legendary Nikon F2 repairman and seller.
The Bottom Line
The Nikon F2 is more than just a film camera, it’s THE camera system built at the peak of analog engineering. It connects you directly to the golden era of 35mm photography in a way few cameras can match. In a world of plastic, screens, and planned obsolescence, the Nikon F2 still stands as one of the most complete SLRs ever made. Looking back at my work, it’s striking that many of my favorite photographs were captured with a Nikon F2.
Buying a Nikon F2 in 2026: What to Look For

Withouth the Finder you have an instant waist level view
In 2026, purchasing a Nikon F2 is a bit tricky. They are over 50 years old, and many have survived decades of abuse. To ensure your camera remains functional and not a heavy paperweight, follow this expert inspection protocol.
1. The Viewfinder: Prism Rot & The "Horror Line"
The most common "illness" of the F2 is prism desilvering.
The Inspection: Look through the viewfinder at a bright, plain surface. Do you see a jagged dark horizontal line or "cloudy" patches near the bottom?
The Cause: Nikon used internal foam for damping. Over time, this foam turns into a corrosive mess that chemically eats the silver coating off the glass.
Minor dust is expected, but desilvering is permanent. This is why pristine DE-1 Eyelevel finders now fetch such high prices, they are the "Holy Grail" for a clean, unobstructed view.
2. Light Seals & Mirror Bumper: The "Black Tar" Syndrome
Before you load a roll of film, you must inspect the "soft" components. On an F2, these are almost certainly decayed unless recently serviced.
The Door Channels: Open the back and run a toothpick along the channels. If the material is sticky, crumbly, or looks like black tar, it’s dead. These degraded seals will cause light leaks and can shed debris into the shutter.
The Mirror Bumper: Look at the foam strip where the mirror strikes the top of the chamber. If this has disintegrated, the mirror will "clack" harshly or, worse, get stuck in the up position.
Replacing seals is a relatively easy DIY task, but it’s a “must” to keep your F2 light-tight and quiet.
3. The Titanium Shutter: Inspecting the Foil
The F2’s shutter is known for its durability, but titanium foil requires a careful inspection.
The Ripple Check: Open the back and inspect the curtains. A few tiny "dimples" are normal, but avoid curtains with deep creases or "ripples."
Shutter Capping: Fire the camera at 1/2000s against a bright light. If the frame doesn't seem to open fully or you see a dark band on one side, the shutter is "capping" and needs a specialist to re-tension the springs.
4. The Photomic Meter: "Jumping" Needles and Power
If you are buying a metered version (like the F2SB or F2AS), the electronics need a specific test.
The "Jump" Test: Slowly turn the aperture ring while watching the meter needle or LEDs. If the reading "jumps" erratically rather than moving smoothly, the internal Ring Resistor is dirty or worn.
Modern Battery Advantage: Unlike the original Nikon F, the F2 was designed for 1.5V Silver Oxide batteries (SR44). These are widely available today, meaning you don't need voltage adapters or banned mercury cells to get an accurate reading.
5. Mechanical Musicality: Slow Speeds & The Whir
Set the shutter speed dial to 1 second and fire.
The Sound: It should have a consistent, whirring sound. If it sounds hesitant or the second "click" is delayed, the lubricants have turned into glue.
A "sticky" slow-speed escapement is the #1 sign that a CLA (Clean, Lubricate, Adjust) is overdue. If you plan on taking your F2 into cold climates, fresh synthetic oils are mandatory.
6. Brass Integrity: The Impact Check
Because the F2 is made of heavy-gauge brass, a dent usually means it took a significant fall.
The Corners: Check the corners of the prism and the baseplate. If the brass is "dented in," the internal prism might be cracked, or the film advance geartrain could be misaligned.
Wind the camera. The stroke should be smooth and legendary. If it feels gritty or requires force, walk away. As written above; buying from reputable dealers is always a good idea.
Final Tip
When in doubt, buy the body condition first and the finder second. You can always upgrade a Photomic finder to a clean DE-1 later, but a body with a damaged film transport or a bent lens mount is a lost cause. The F2 was built to be serviced, if you find a clean one, treat it to a proper CLA, and it will likely outlast you.
Nikon F vs Nikon F2: Which One Should You Buy?

Not an easy choice
Choosing between the Nikon F and the F2 is a "not easy. Both are superb tools that will deliver great images if you do your part. However, despite their similarities, they possess entirely different souls.
The Feel
It is hard to describe until you hold them, but the difference is tactile.
The Nikon F feels like driving an original 1950s Willys Jeep. It’s raw, slightly unrefined, and incredibly raw. There is a certain "clunk" to its operation that reminds you that you are handling the very beginning of a revolution.
The Nikon F2, by contrast, feels like a refined 1970s sports car. Nikon took every rough edge of the F and polished it. The film advance is smoother, the shutter release is more ergonomic, and the overall handling feels "faster."
The Practical Reality
The Back: Many people complain about the Nikon F’s removable back (which you have to take off entirely to load film), but I find it part of the charm, it forces you to slow down. The F2, however, introduced the hinged back, which is undeniably more convenient
The Shutter: While the F is great, the F2's shutter is even better, offering speeds up to 1/2000s and a much more sophisticated slow-speed timer (doubling as a self-timer). Interestingly the F2 shutter is actually a bit louder than the shutter of the F.
The Verdict
Buy the Nikon F if: You want the purest, most "historic" SLR experience. You appreciate the "industrial" feel of the 1960s and don't mind a camera that demands a bit more deliberate attention.
Buy the Nikon F2 if: You want the peak of mechanical photography. You need a camera that feels more refined while still providing that classic Nikon vibe.
Ultimately, you don't choose an F2 because it's "better", you choose it because it is the perfected version of the camera that changed the world.
Alternatives? The Minolta SRT Series comes close but feels different again. Full review here.

Ready for the next adventure
Nikon F2 FAQ: Common Questions Answered
1. Which battery does the Nikon F2 use?
Unlike the original Nikon F, the F2 is much easier to power today. It uses two standard 1.5V silver oxide batteries (SR44 recommended) or LR44 alkaline cells. Because it was designed for 1.5V systems, you don’t need mercury batteries or voltage adapters.
Important: only the Photomic metered finders need batteries. The camera itself is fully mechanical and will work at all shutter speeds without any power at all.
2. What is the difference between a Nikon F2A and a Nikon F2AS?
This is probably the most common question when looking for an F2.
Both are AI-compatible, but the difference is in the metering system inside the prism:
F2A (DP-11): Classic needle-style CdS meter. Very analog, very “vintage” feeling, but a bit slower in low light.
F2AS (DP-12): Uses a more modern SPD (silicon photodiode) sensor with LED display. Faster, more responsive, and generally the most refined F2 finder.
If you want the “best” version, the F2AS is usually the one people end up with.
3. Can I use modern Nikon lenses on the F2?
Yes, but not all of them.
You can use AI, AI-S and Series E lenses without issues on most F2 bodies. They mount properly and work as intended.
Modern G lenses (no aperture ring) and AF-P lenses won’t really work, since you can’t control the aperture manually. So stick to older manual glass and you’re good.
4. Is the Nikon F2 better than the Nikon F3?
Depends on what you’re after.
The F3 brought electronics into the system, including an electronic shutter and aperture priority mode. It’s more modern, easier to use in some situations, but also more dependent on power.
The F2 is the last of the true mechanical Nikon flagships. No batteries needed for operation, no electronics in the shutter path. Just pure precision. That’s why a lot of photographers still prefer it for travel, expeditions, and long-term reliability.
5. What is “Prism Rot” (desilvering) and can it be fixed?
Prism rot shows up as dark patches, lines, or “clouding” in the viewfinder. It’s caused by deteriorating internal foam that slowly attacks the prism coating over time.
Unfortunately, it cannot really be repaired. The only real solution is replacing the prism. That’s why clean, clear viewfinders are getting more expensive every year.
Going Deeper: The F2 Rabbit Hole
While this guide barely covers the essentials on the Nikon F2 in 2026, the history of this camera is gigantious. I’ve tried to sum up the knowledge I feel is most important for today, but there is so much more to discover. If you’re ready to dive even deeper, check these pages.
Richard de Stoutz: Nikon F Collection & Typology
MIR: Photography in Malaysia (Nikon F/F2 Section)
Thanks to Frank-Horst for the support!
Nikon F2 Vintage Adverts


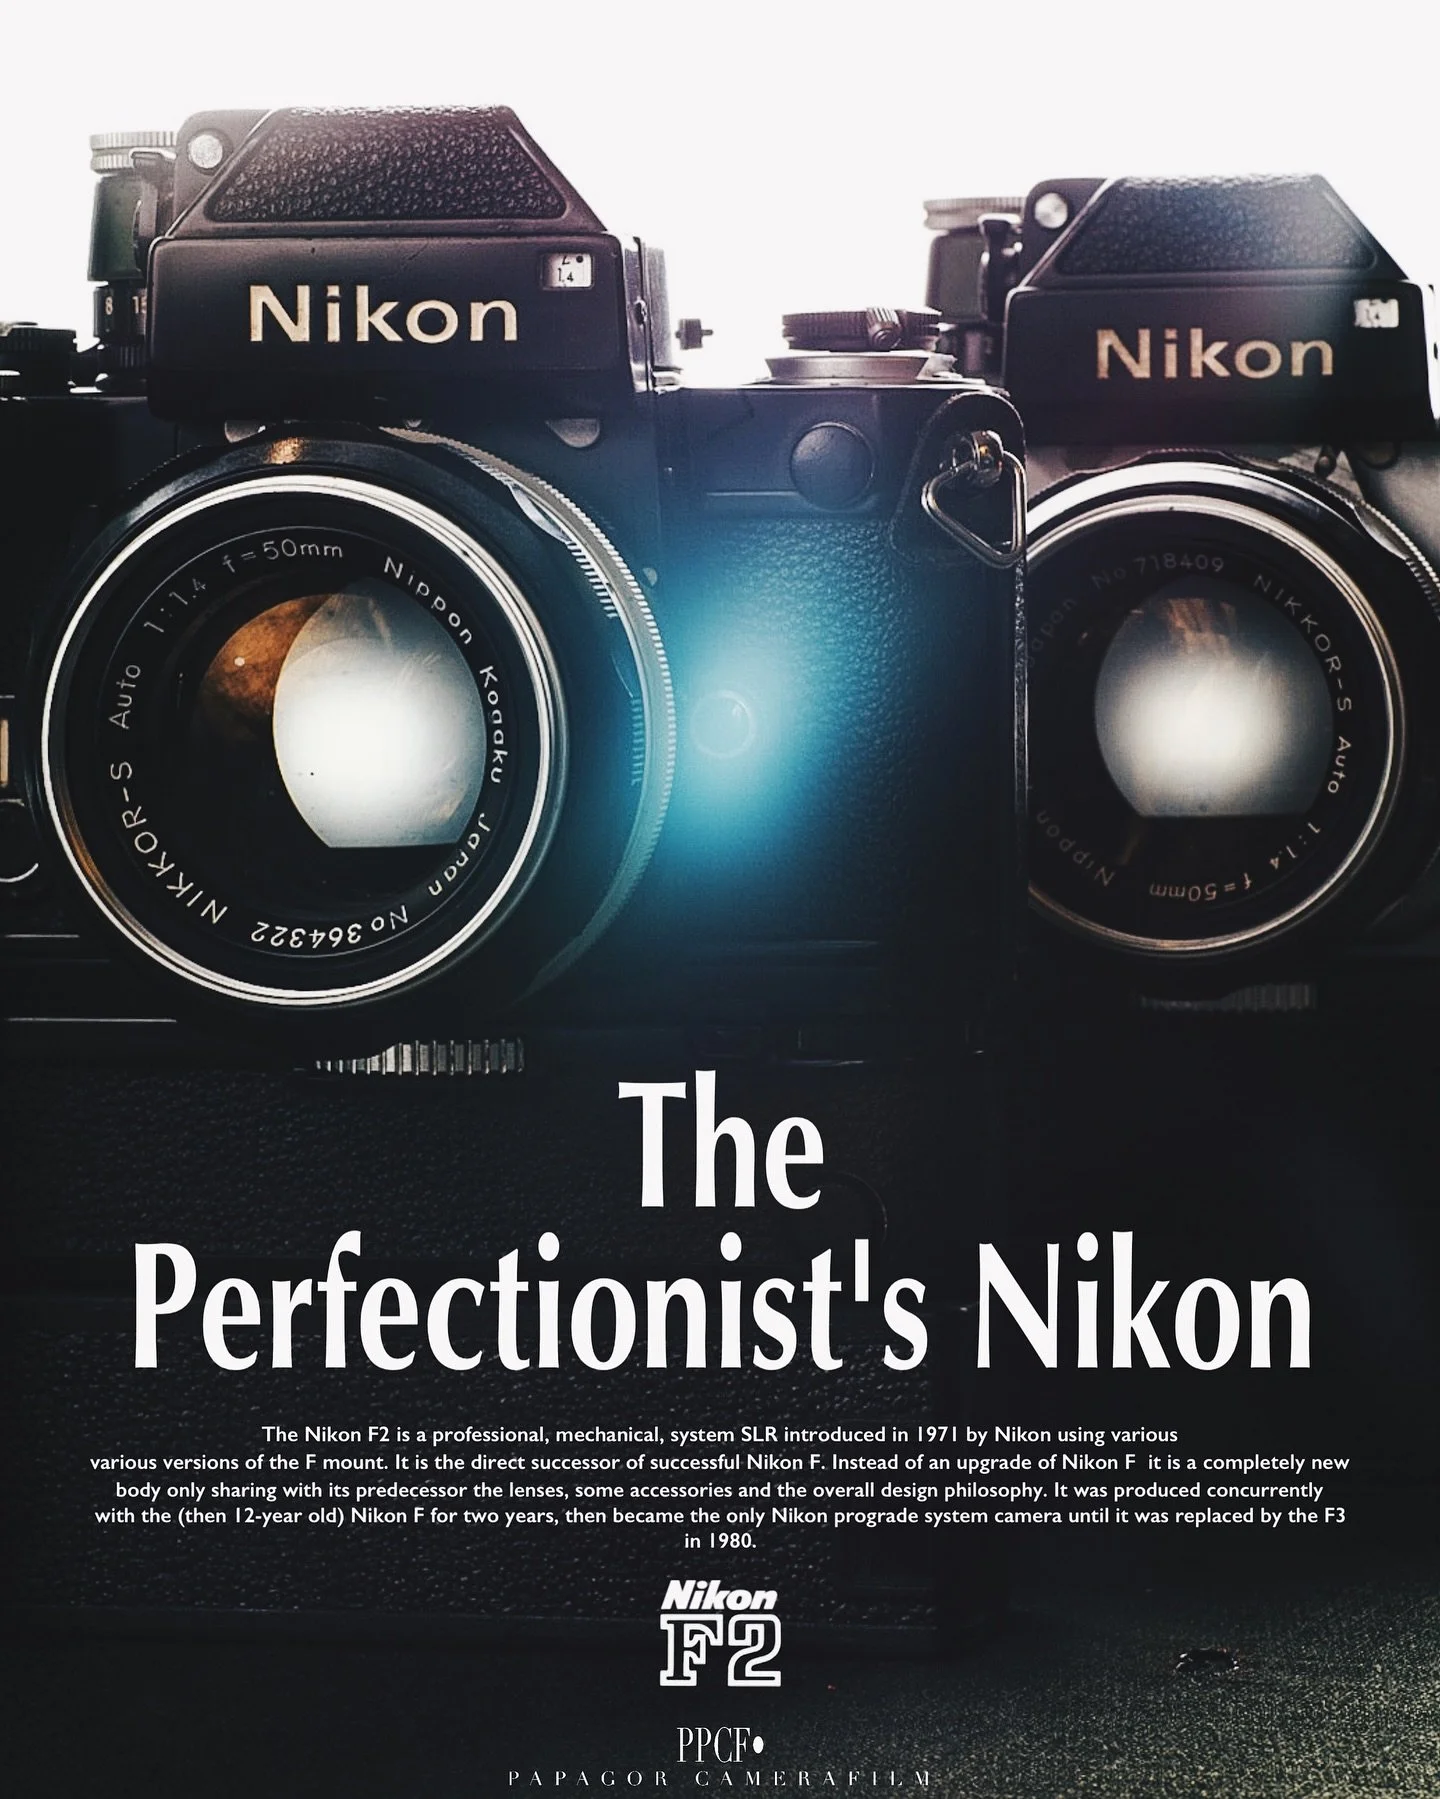


Downloads
The Nikon F2 is one of the most advanced fully mechanical 35mm SLR systems ever made, and understanding its modular design is key to using it properly in 2026. Original Nikon F2 manuals remain an essential resource for photographers who want to learn how the system works in detail, from interchangeable viewfinders and focusing screens to exposure metering and motor drive compatibility.
Whether you are trying to master the Nikon F2 Photomic finder system, understand lens compatibility across AI and Pre-AI Nikkor lenses, or simply learn how to properly load film into the hinged back system, the original documentation provides clear, technical insight that is still relevant today.
Manuals: Original Nikon F2 instruction manuals covering operation, film loading, exposure metering, and system overview.
→ (link)
Service Manuals: Technical repair and maintenance documentation used by Nikon technicians, including mechanical diagrams and adjustment procedures.
→ (link)
Brochures: Official Nikon marketing materials and product brochures showcasing the F2 system at launch, including specifications and professional positioning.
→ (link)
Enjoyed this? You might also like:
If you found this article helpful, check out my other deep dives into the world of expired emulsions and color recovery:
FPP Retrochrome 400 Review: Shooting High-Speed Surplus Slide Film
Nikon F Review (2026): Shooting the Indestructible 35mm Legend
422 Meters of Frozen Gold: The Expired Ektachrome Heist Part I
422 Meters of Frozen Gold: The Expired Ektachrome Heist Part II
Embrace the Blues: Why Ektachrome shifts cooler and how to handle it
Minolta SR-101 (SRT 101) Review: The Ultimate Mechanical SLR in 2026?
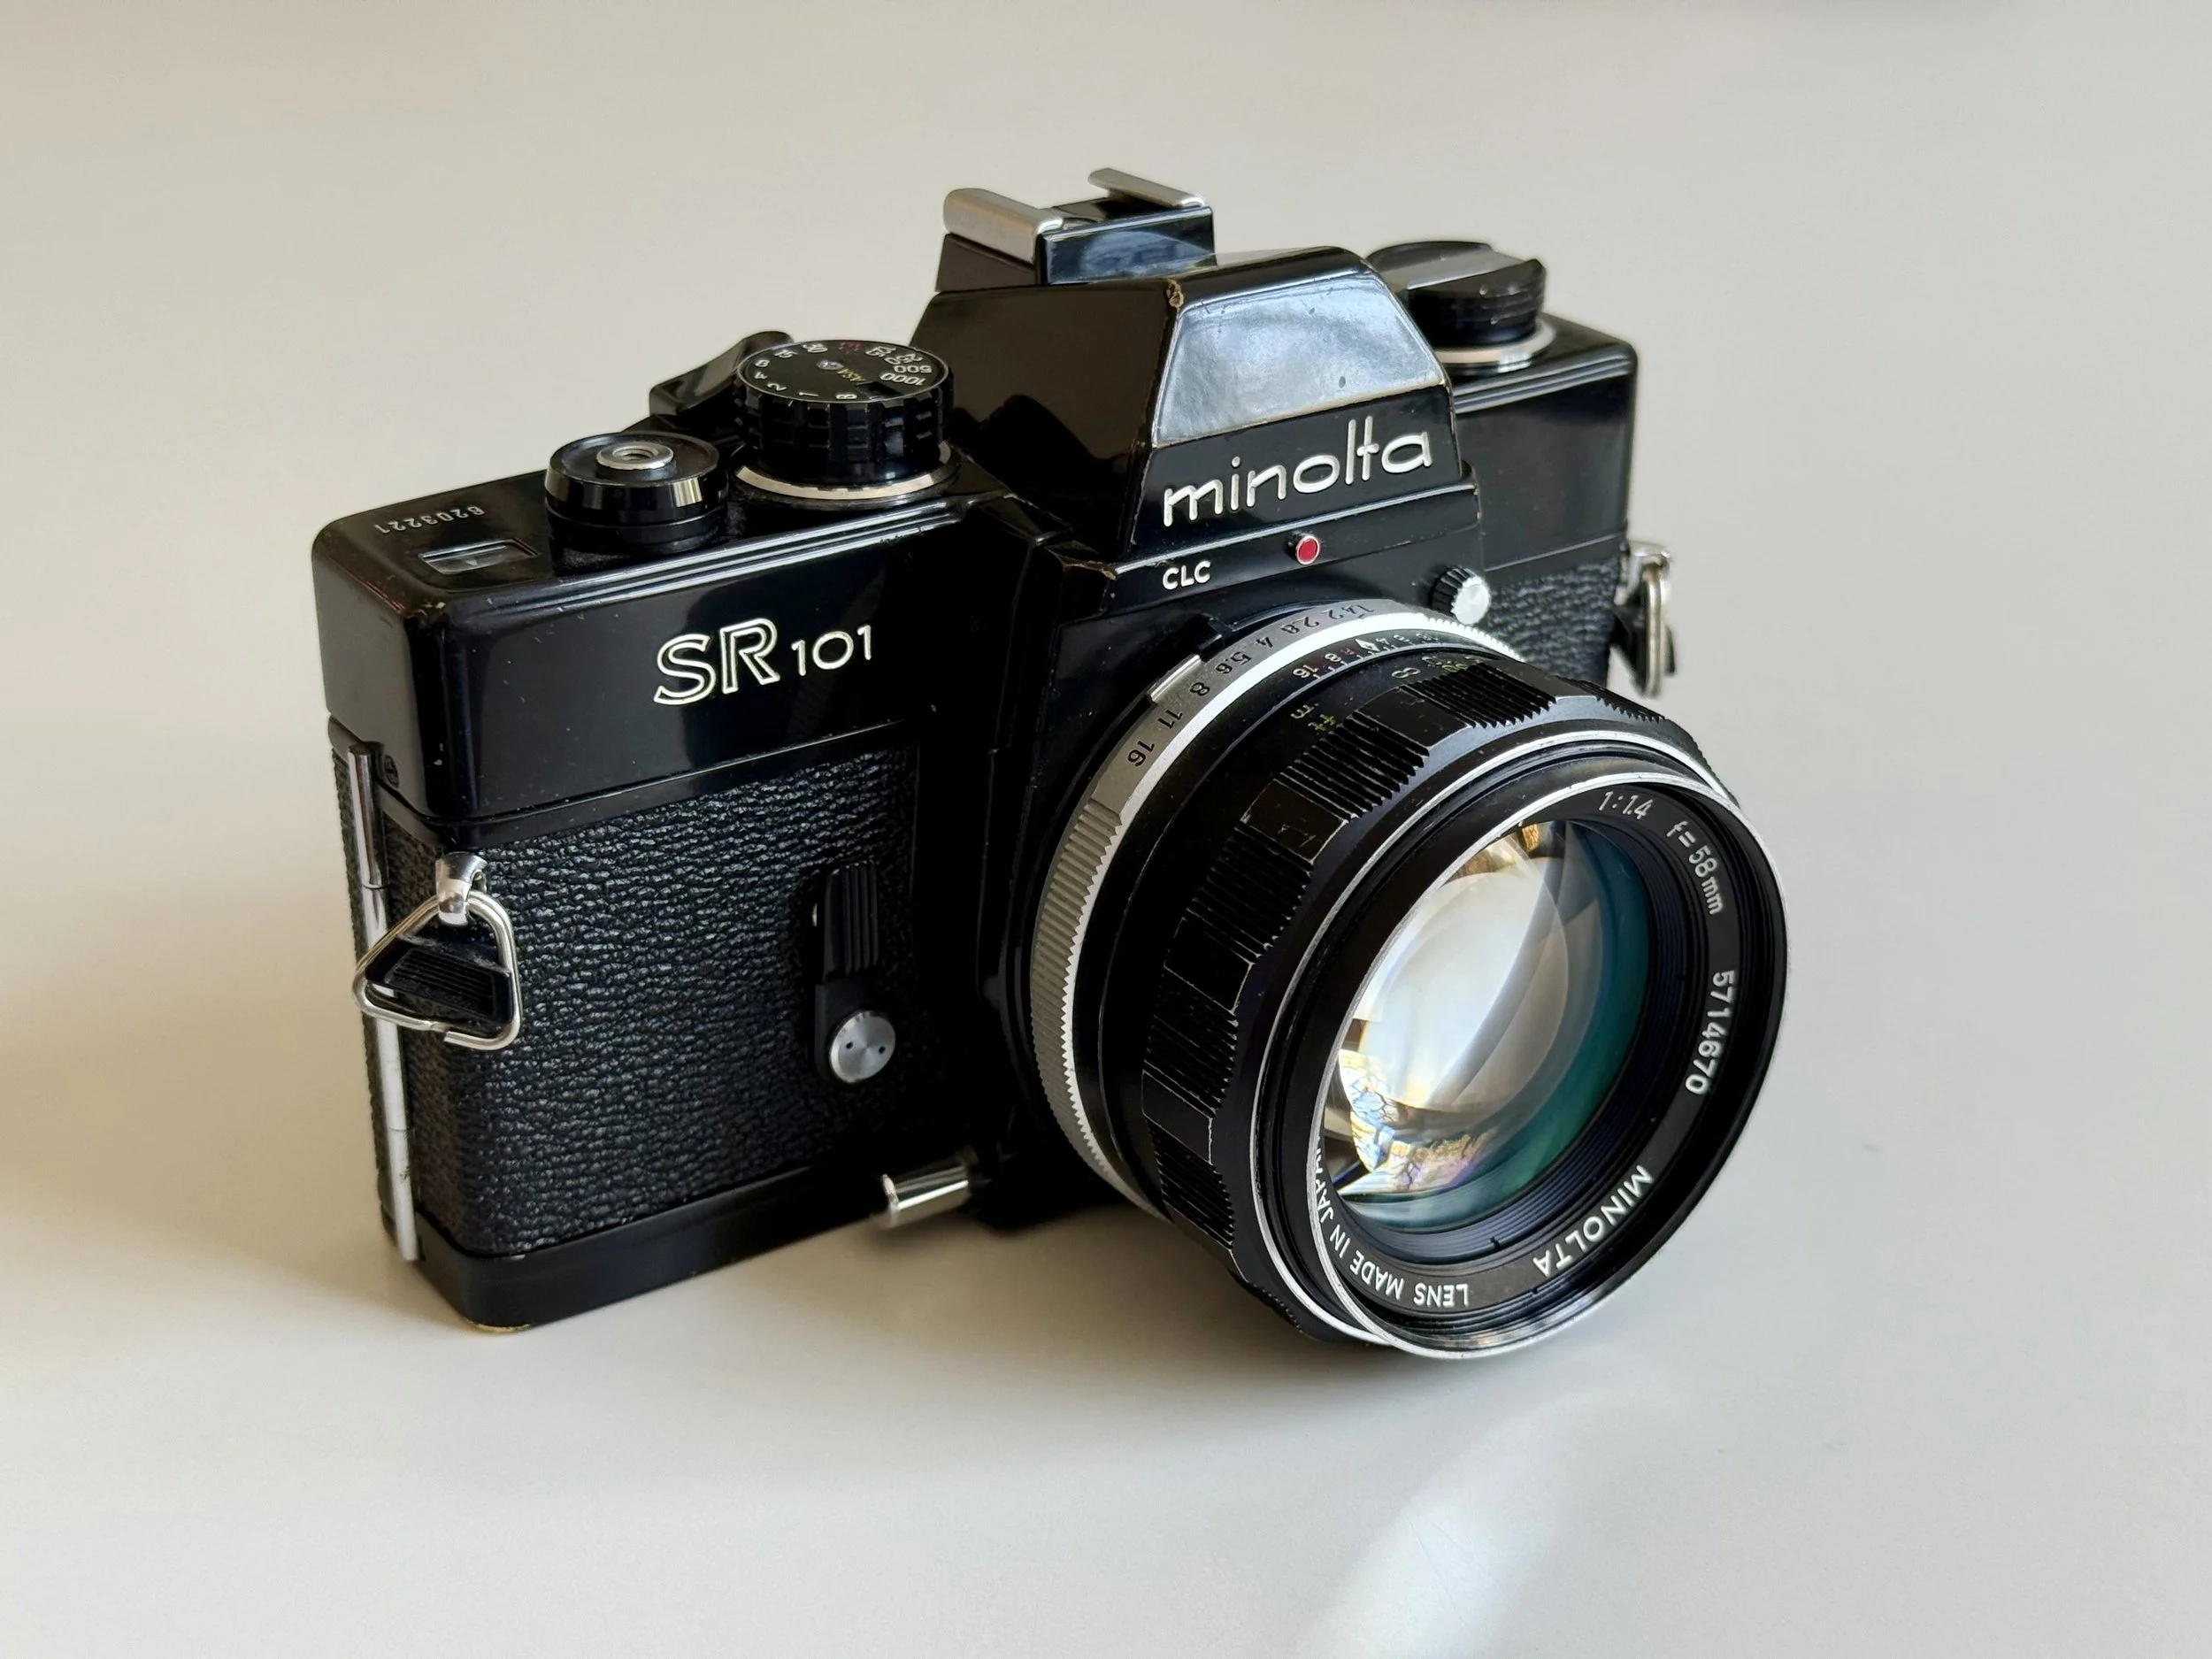
Minolta SR-101 (SRT 101) Review: The Ultimate Mechanical SLR in 2026?
Is the Minolta SR-101 the hidden twin of the legendary SRT-101? In this deep dive, we explore why this mechanical masterpiece is a top choice for portrait photography in 2026. From mastering the 58mm f/1.4 Rokkor on Ilford HP5 to integrating modern Godox flash (X vs. FP sync), I share why the SR-101’s bright viewfinder makes it the ultimate vintage SLR for glasses wearers.
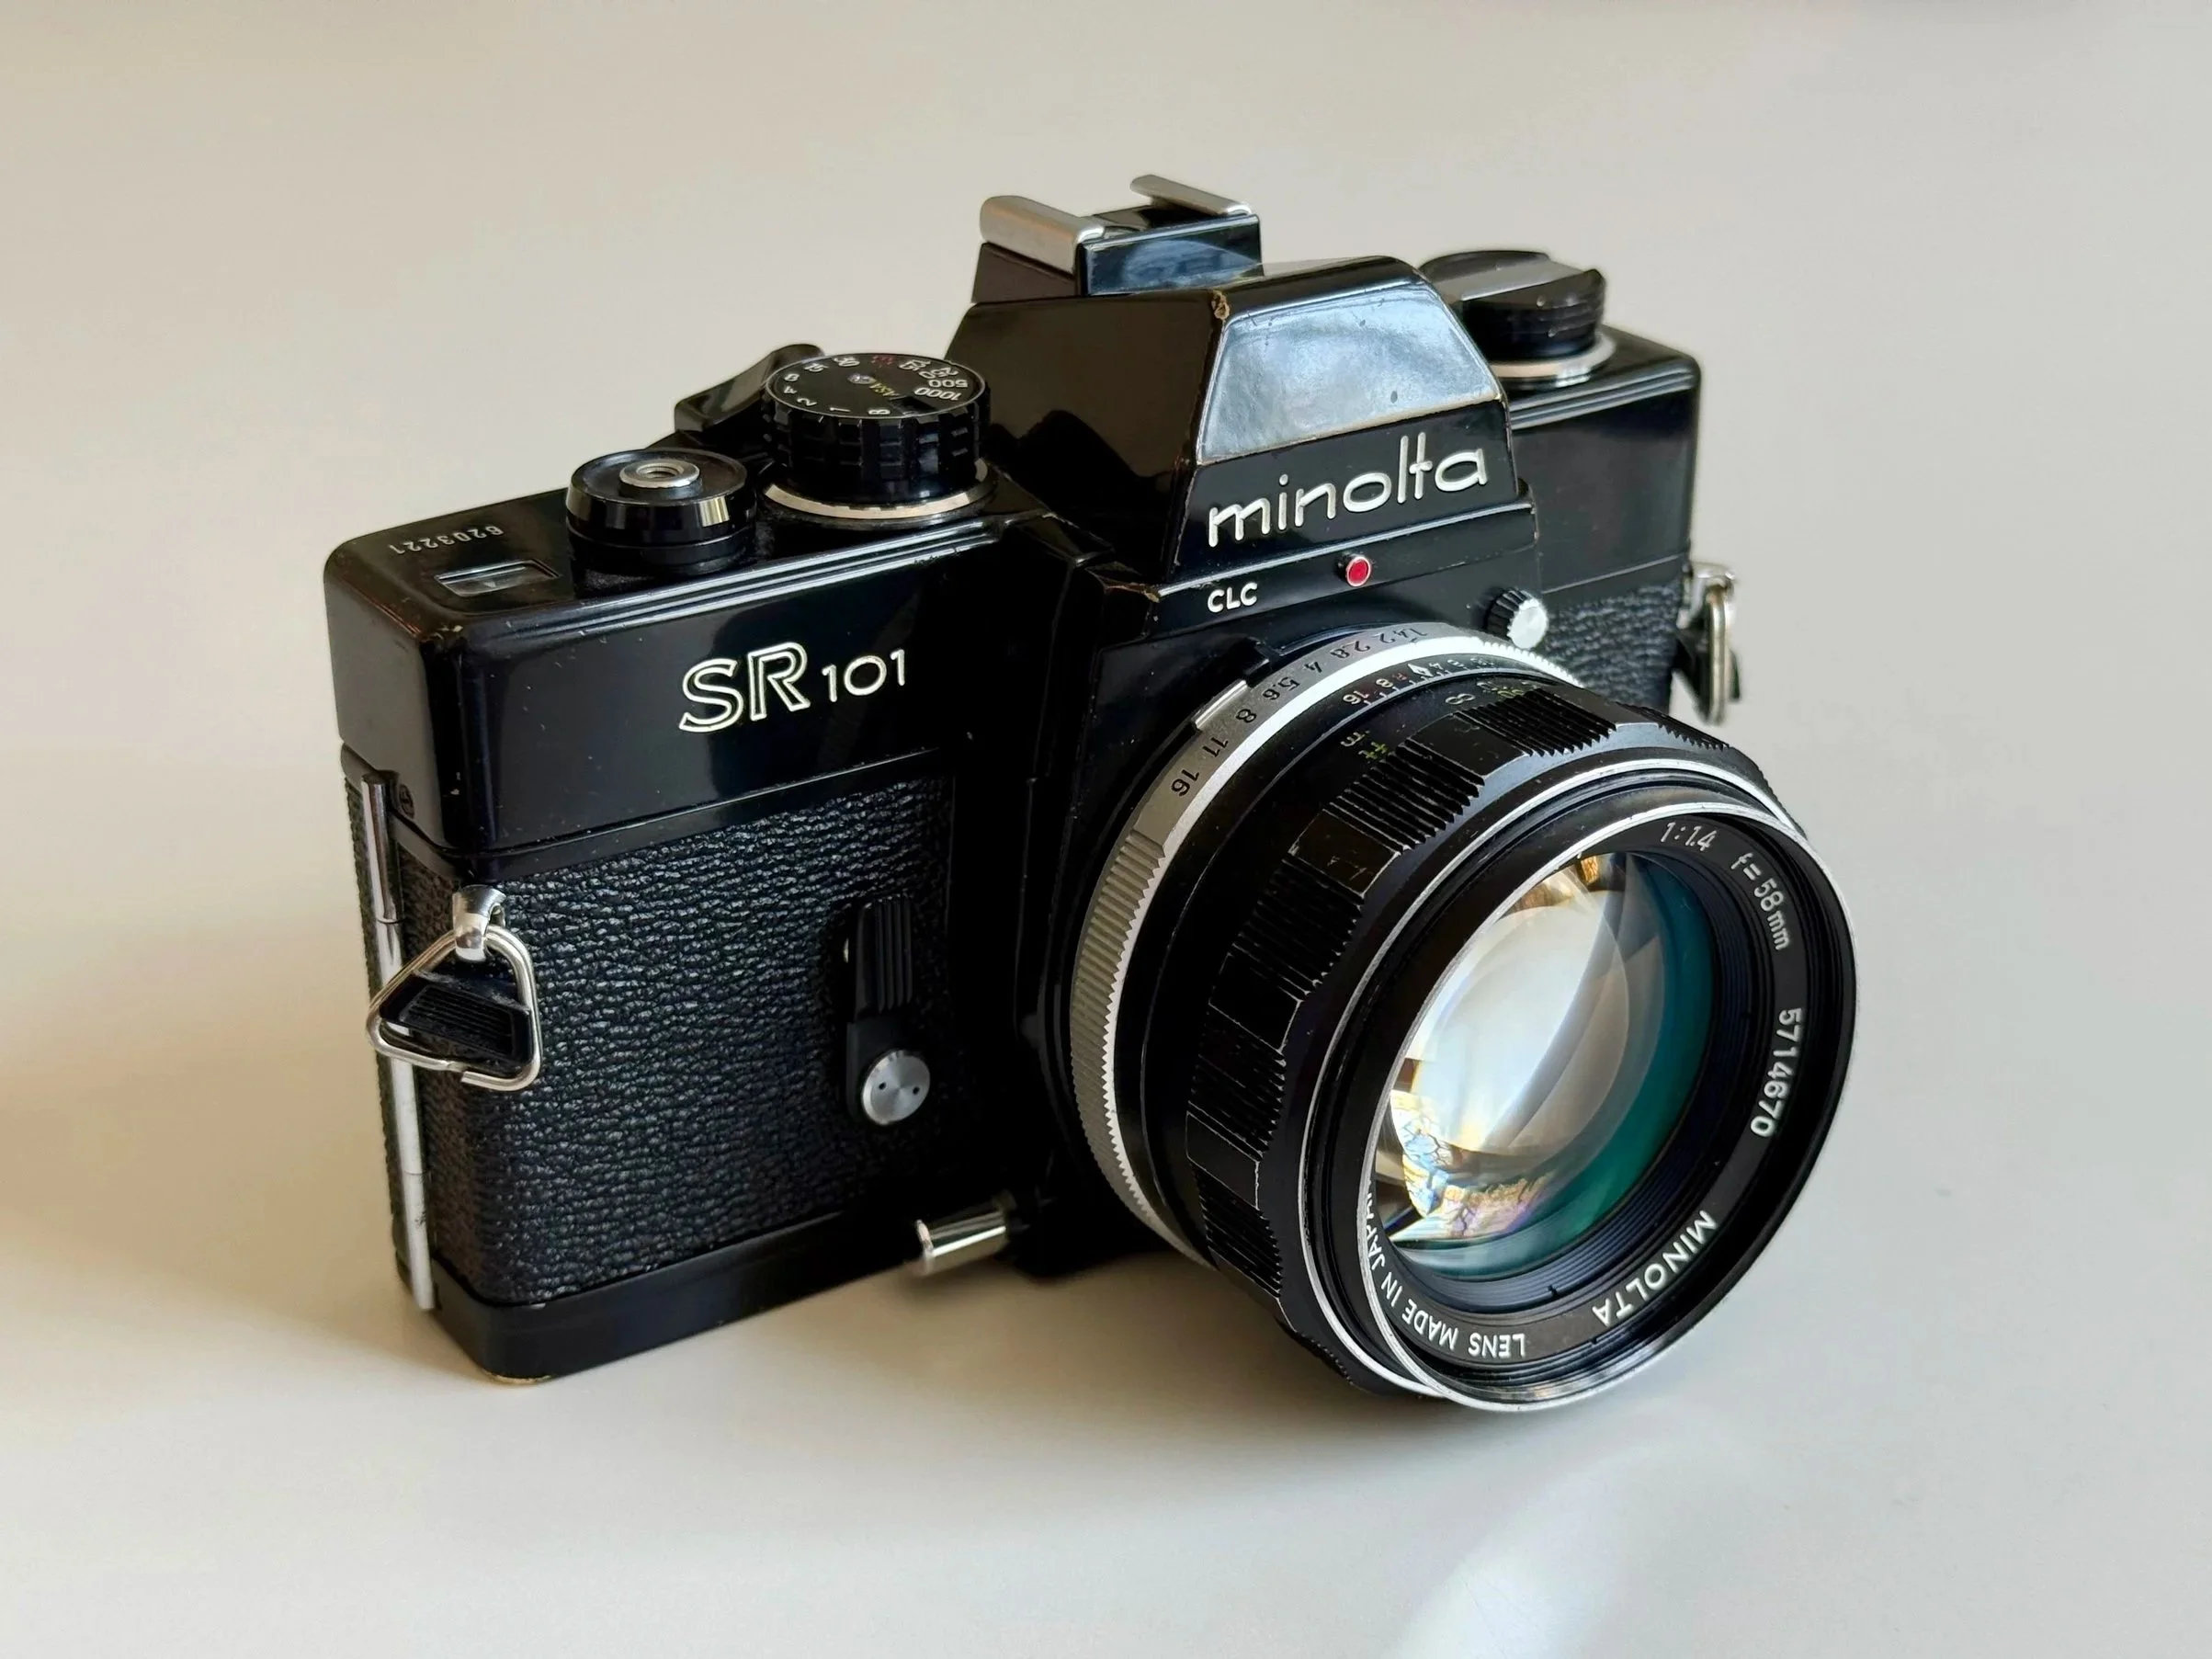
An anvil of a camera
Reading Time: 5 Minutes
The Minolta SR-101 is a fully mechanical 35mm SLR camera and the Japanese domestic version of the SRT 101b. It is known as one of the most durable vintage SLRs ever made, featuring reliable TTL CLC metering and excellent MC/MD Rokkor lens compatibility. While still highly usable in 2026, it is heavy, fully manual, and lacks modern conveniences—better suited for deliberate, analog shooting rather than casual use.
TL;DR: Minolta SR-101 at a Glance
Type: Fully mechanical 35mm SLR (JDM Version)
Equivalent: Minolta SRT 101b / SRT 201
Lens Mount: Minolta SR-mount (Rokkor Glass)
Key Features: All-brass build, TTL CLC metering, 1/1000s shutter
Power: Needed for the Meter (1.35V cell)
Best For: Mechanical purists & glasses wearers
Not For: Users wanting lightweight bodies
Minolta SR 101 Review Contents (Quick Navigation)
The "Nikon Emergency": Why I’m shooting Minolta today
A my Nikon F (full review here) and F2 were in the shop (shoutout to Camera Service Hoffmann!) for a full CLA. I was stranded without a mechanical SLR until my wife handed me her Minolta SR 101 which i hadn’t used in quite a while. I’ve always looked at Minolta as the "sensible" choice, but after a few days of hauling this brass beast around, I realized: this isn't just a backup. It’s a thing of its own.
Pros
Extremely solid, tank-like build quality
Reliable TTL CLC metering (still accurate in 2026)
Excellent Rokkor MC/MD lens ecosystem
Bright, usable viewfinder (even for glasses wearers)
Cons
Heavy compared to other SLRs
No modern automation (fully manual)
Requires understanding of older battery/metering systems
Quick Verdict: Is the Minolta SR-101 / SRT 101 still good in 2026?
Yes. The Minolta SR-101 is one of the most reliable, fully mechanical 35mm SLRs ever built. Known as a "tank" for its brass construction, it offers the legendary CLC (Contrast Light Compensation) metering and access to great Rokkor MC/MD lenses. While heavy, it remains a top choice for photographers seeking a purely mechanical, "Leica-proof" shooting experience.
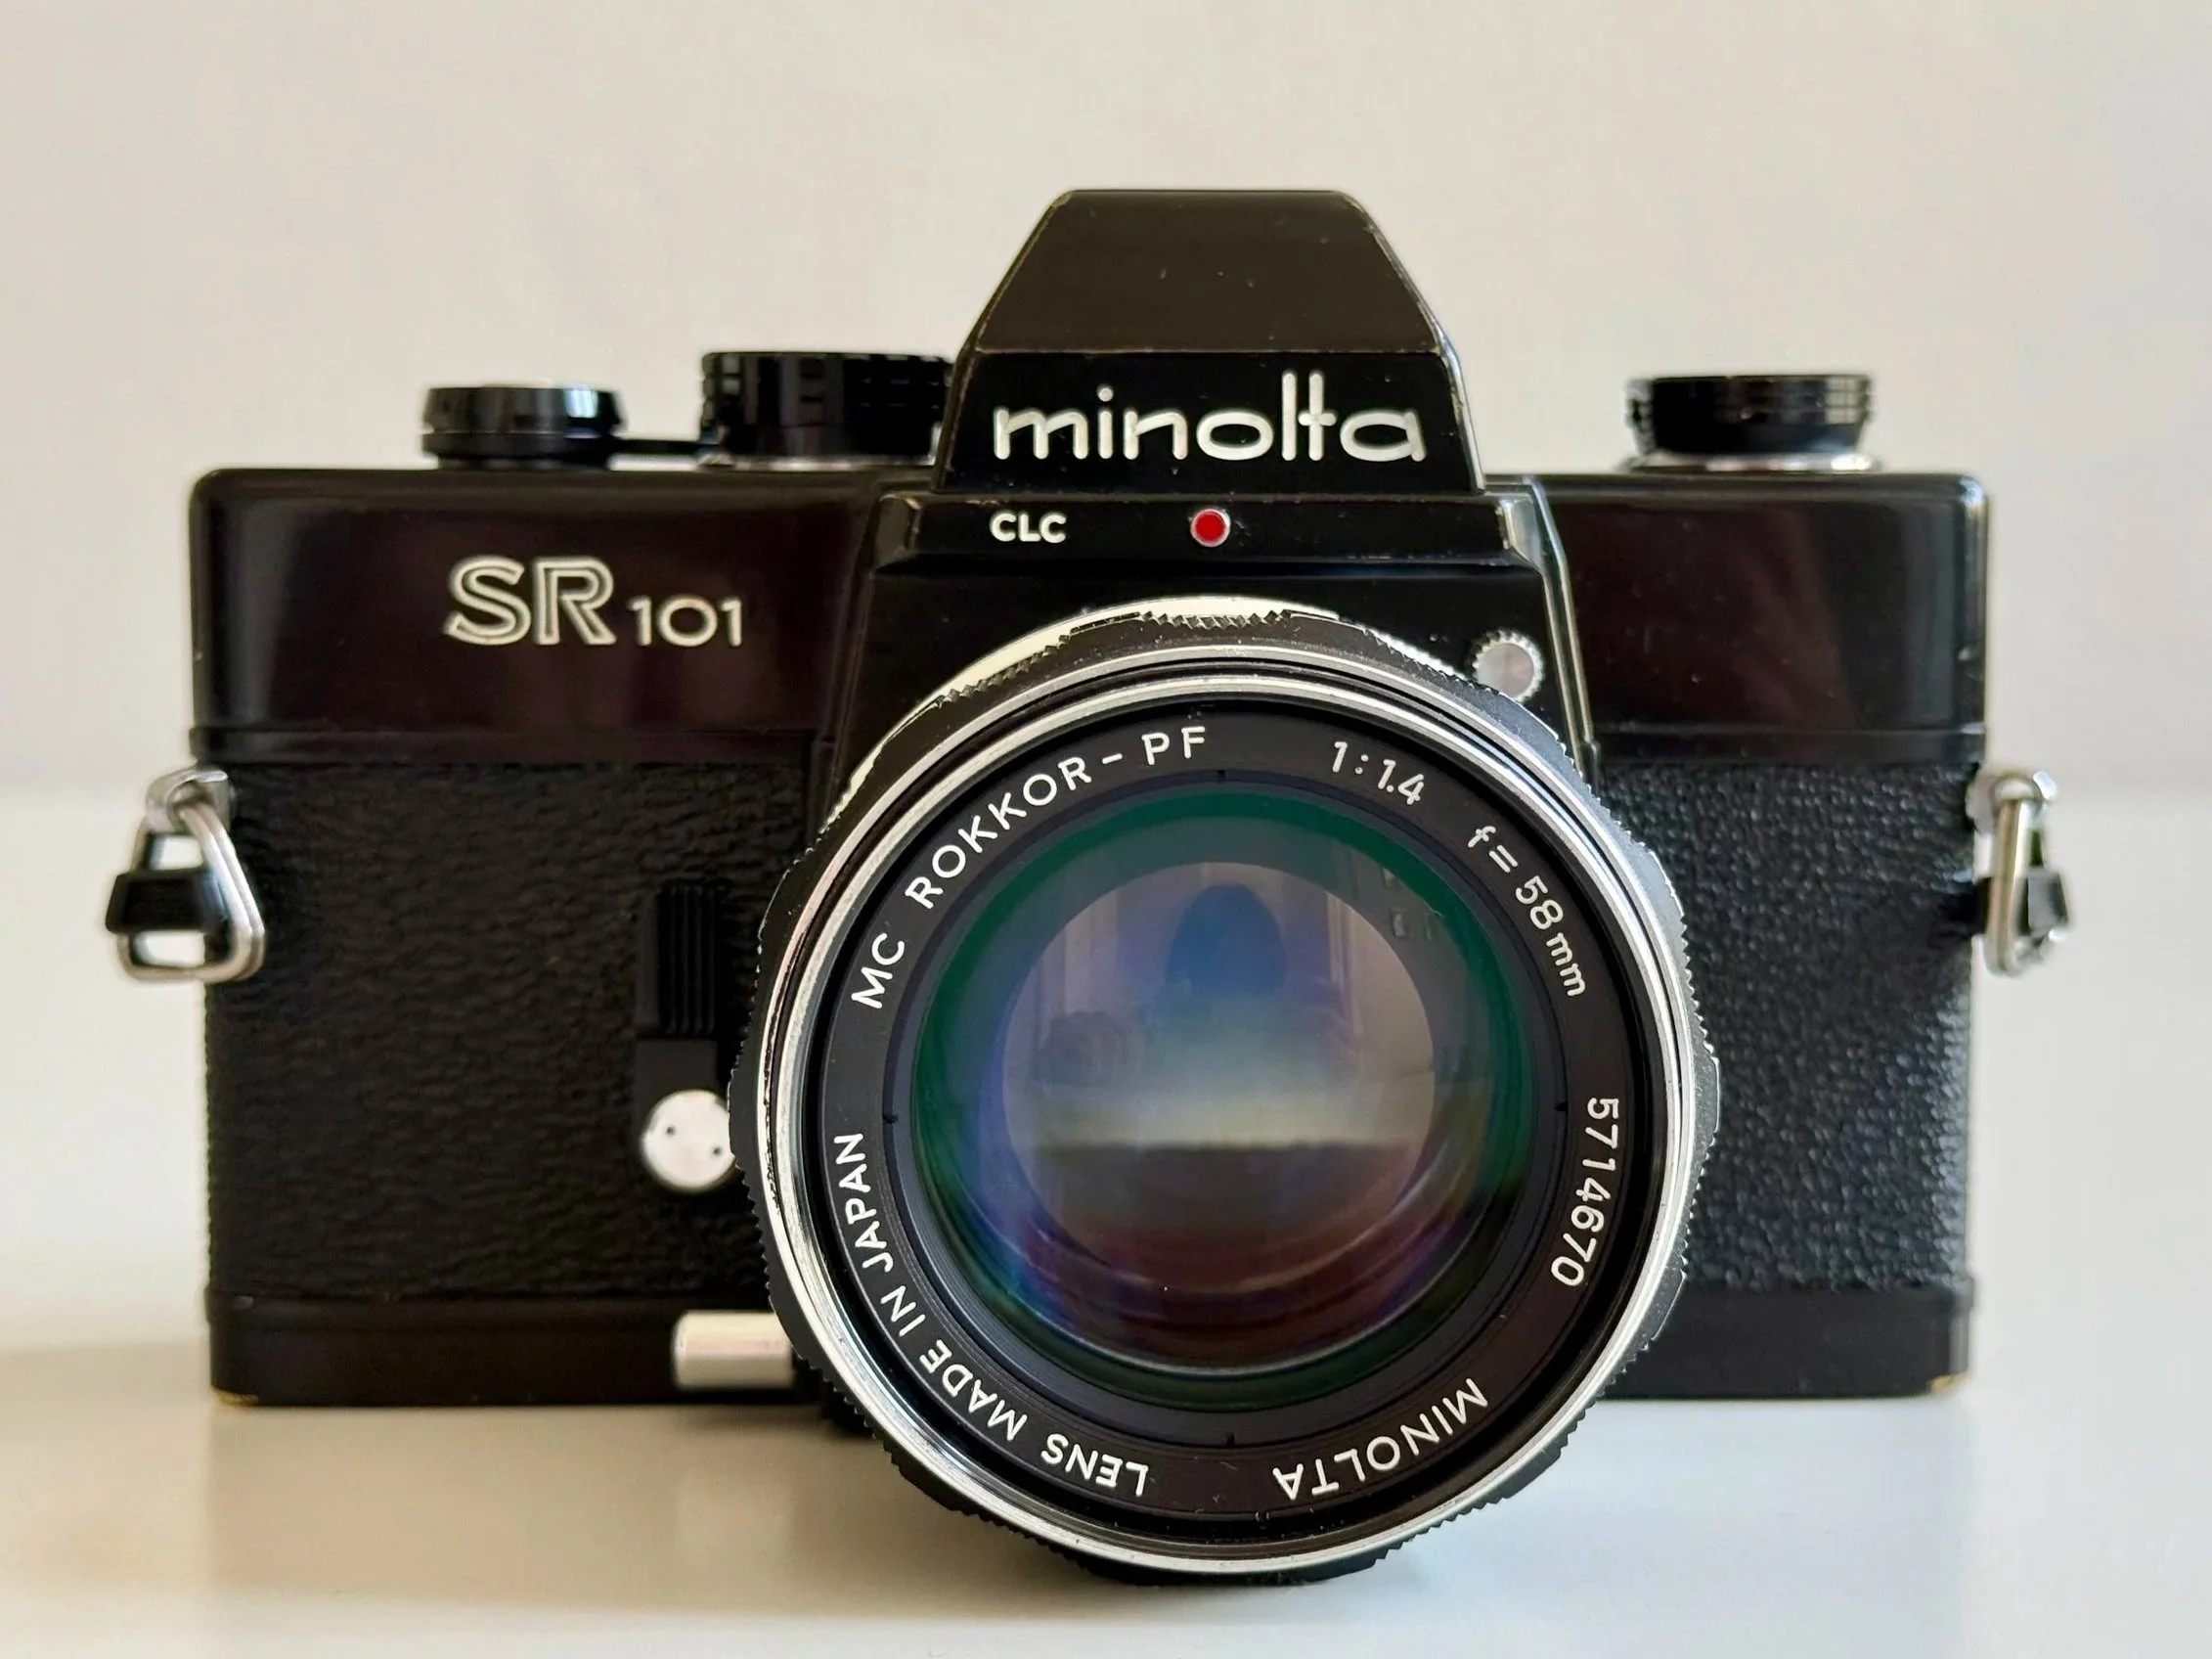
The front - self timer and depth of field preview button on the left
Minolta SR-101 vs. SRT 101: Differences of the Japanese (JDM) Version
You’re probably asking, is it an SR-101 or an SRT 101? If you're looking at the photos, you’ll notice the badge says SR-101. This is the Japanese domestic market version (JDM) of what most of the world knows as the SRT 101 (specifically the updated SRT 101b).
SR-101 vs SRT 101
If you’re looking for this camera on eBay, you’ll mostly come across the SRT 101. The SR-101, on the other hand, is the Japanese domestic version of the system. While both cameras are almost identical in core design, there are a few real-world differences that actually matter when shooting them today.
SR-101 advantages over SRT 101:
Later production refinement (equivalent to the SRT 101b / SRT 201 generation) with small mechanical improvements from years of production evolution
Built-in hot shoe with direct electrical contact, making flash use (e.g. modern Godox setups) much more convenient without a sync cable
Typically better condition on the used market due to Japan-only distribution and less export wear
What remains the same:
Fully mechanical SLR platform with the same core SR system design
Compatible with MC/MD Rokkor lenses across both systems
TTL CLC metering system with the same match-needle workflow
Overall shooting experience: heavy, solid, and deliberately analog
Depth of Field Preview: Both models feature a dedicated depth of field preview button on the front.
Mirror Lock-Up (MLU): Note: Early versions of the original SRT 101 had a mirror lock-up switch. Because the SR-101 is based on the later SRT 101b chassis, this feature was removed, which is completely fine for 99% of shooters today.
In practice, the SR-101 is not a different camera in philosophy — it is simply a slightly refined, Japan-market evolution of the SRT system. If you already like the SRT 101, the SR-101 just removes a few of its small inconveniences.
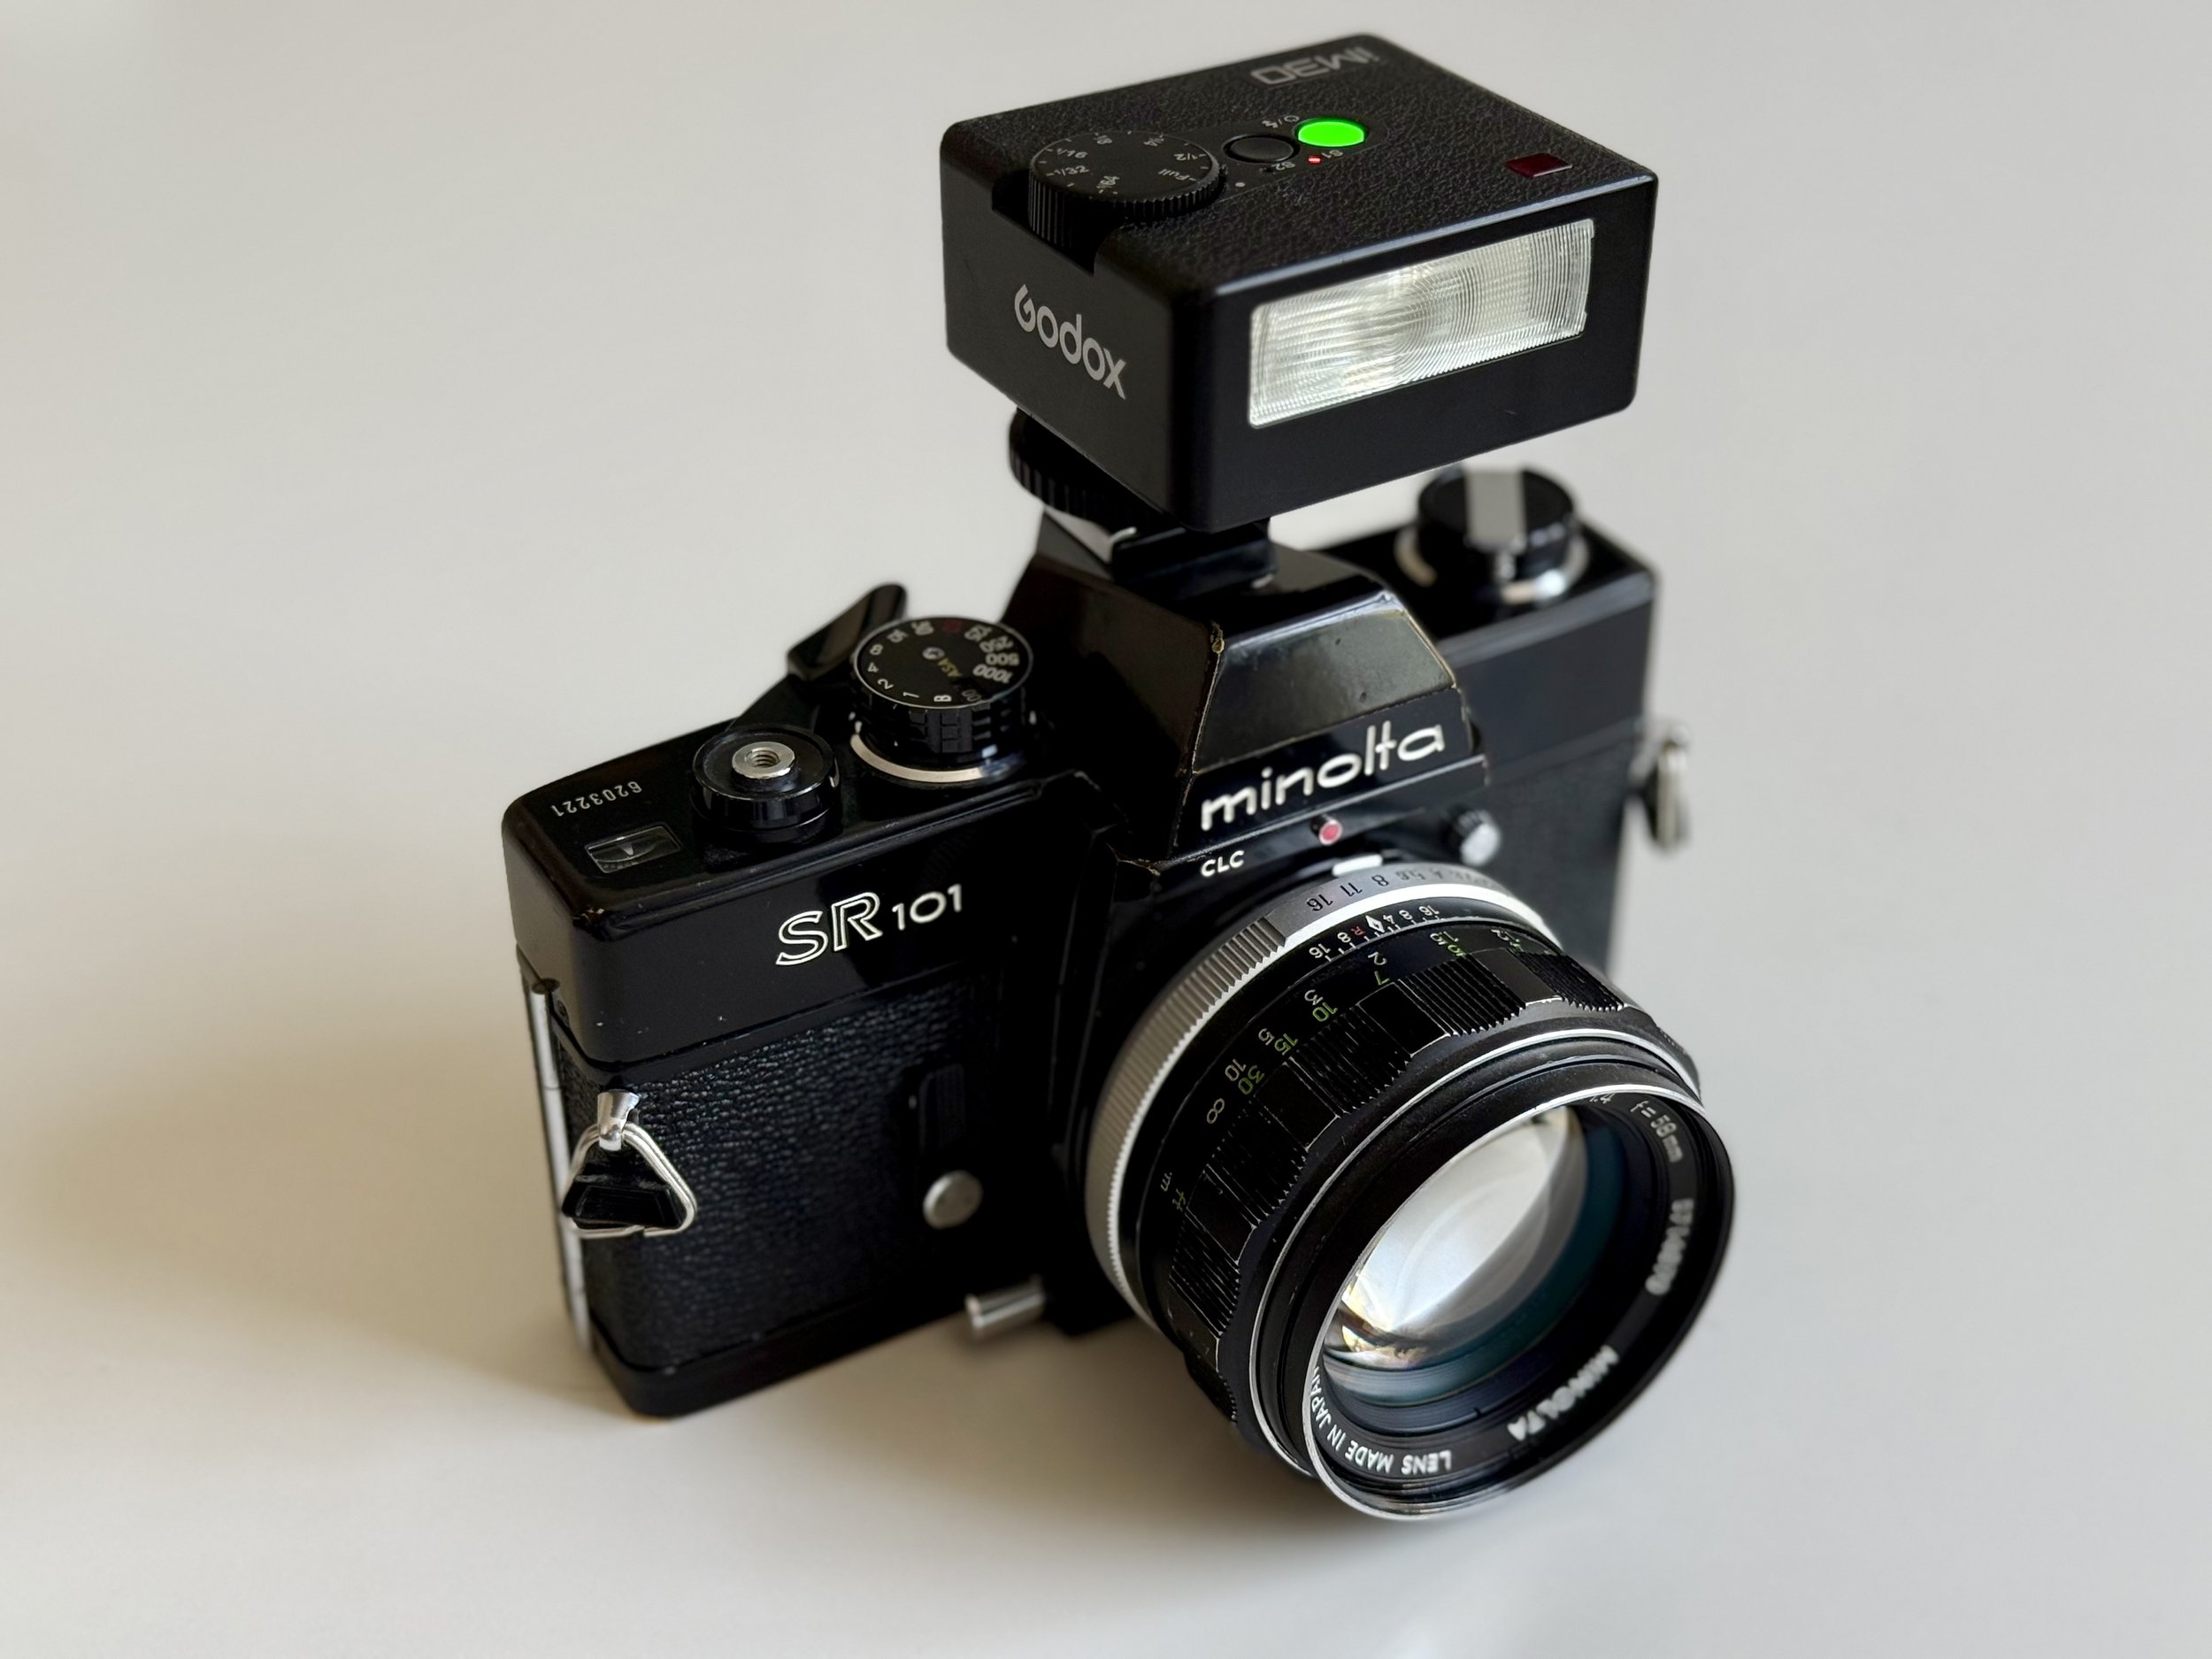
SR101 with the Godox Im30 flash
Technical Specifications: Minolta SR-101
| Feature | Specification |
|---|---|
| Camera Type | 35mm Manual Focus SLR (Japanese Domestic Market) |
| Equivalent | Minolta SRT 101b / SRT 201 |
| Lens Mount | Minolta SR-Mount (MC/MD compatible) |
| Shutter | Horizontal-travel cloth focal plane shutter |
| Shutter Speeds | 1s to 1/1000s + Bulb |
| Metering | TTL with CLC (Contrast Light Compensation) |
| Viewfinder | 0.86x Magnification (Shutter Speed visible) |
| Flash Sync | Integrated Hot Shoe + PC-Socket (X-sync at 1/60s) |
| Battery | 1.35V Mercury (Use Zinc-Air or 1.5V Adapter) |
| Weight | ~710g (Body only) |
| Build Material | High-quality chrome-plated brass and steel |
Minolta’s History: From Chiyoda Kogaku to the Leica Partnership
Before they were known as Minolta, the company was Chiyoda Kogaku. Just like Canon, their journey began with a deep obsession with rangefinders. In the 1940s and 50s, the Minolta 35 series was a direct (and some say, better built) competitor to the Leica screwmount cameras. They even had a unique film format (24x32mm) before sticking to the standard 24x36mm.
The SLR Revolution: By the late 50s, Minolta realized that the future was the SLR. While Canon was perfecting their Rangefinder line up, Minolta was working on the SR-system. The SRT 101, released in 1966, was the result of a decade of optical engineering. It was so successful that it stayed in production (in various versions) for over 10 years.
The Leica Connection: A fun fact for the Leica-purists reading this: Minolta's engineering was so world-class that it eventually led to a partnership with Leica in the 70s. The Leica R3 and the Leica CL were heavily influenced (or even built) by Minolta.
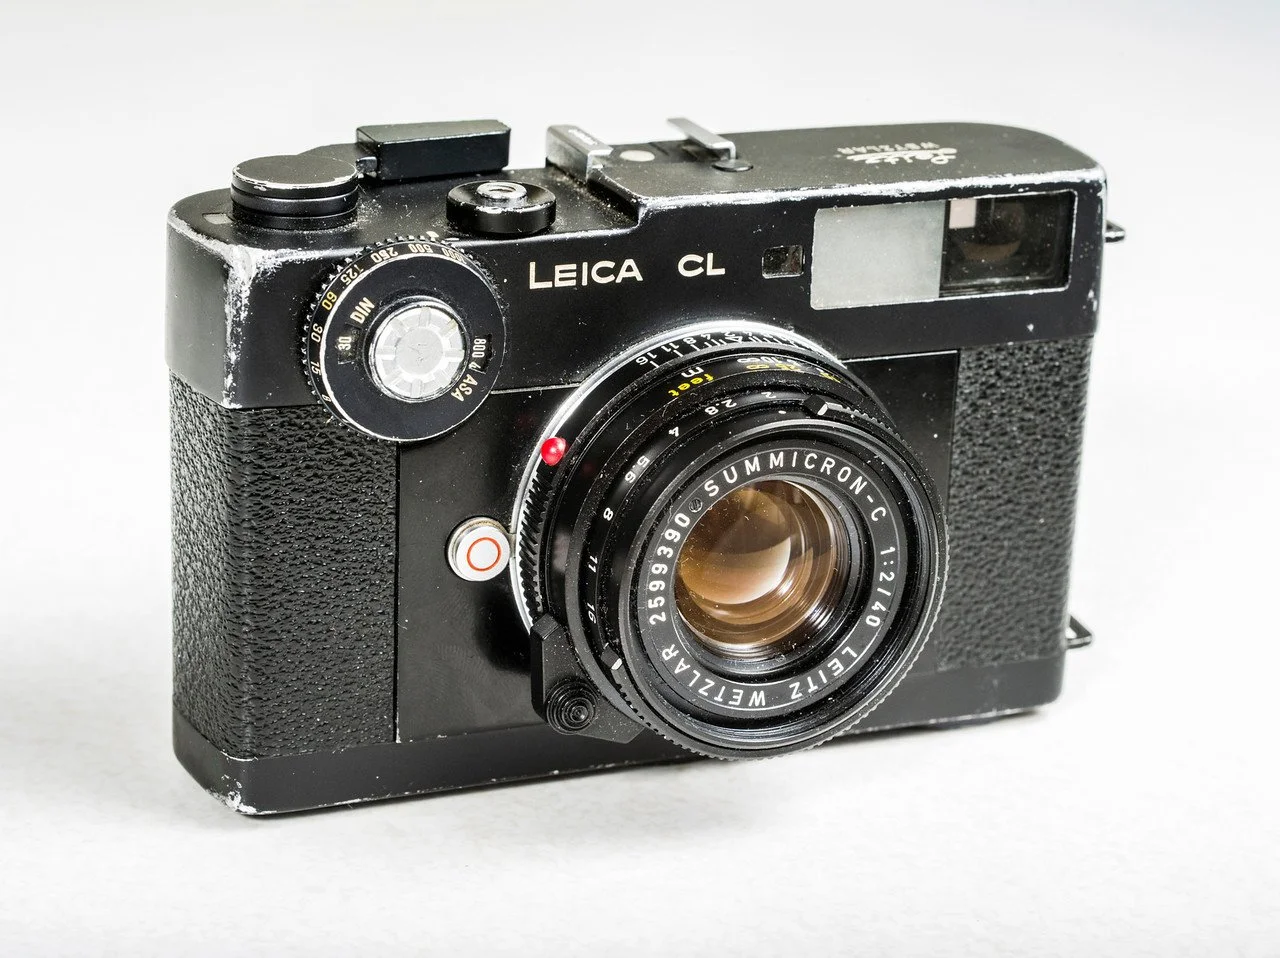
The Leica CL
The Final Chapter: From Minolta to the Sony
Many modern photographers wonder how Sony, a company known for Walkmans and TVs and the PlayStation, suddenly became the giant of the mirrorless camera market. The answer is simple: They bought Minolta’s DNA.
In 2006, after decades of innovation, Konica Minolta (who had merged a few years prior) decided to leave the camera business. Sony, looking for a way to enter the professional camera market, saw their chance and acquired Minolta’s camera division—including their legendary lens mounts and autofocus technology.
The Legacy Lives On
When you hold a modern Sony Alpha today, you are essentially holding the evolution of the Minolta SRT 101.
The "A-Mount": Sony’s first DSLRs were basically rebranded Minolta designs, and they kept the Minolta A-mount compatible for years.
The Color Science: Many fans argue that the pleasing colors and skin tones Sony is known for today originated from Minolta’s optical coatings and sensor research.
The Innovation Spirit: Minolta was always the "risk-taker" (first integrated autofocus, first CLC metering). Sony inherited this spirit, which is why they were the first to successfully push mirrorless technology to the professional level.
Build Quality & Handling: Why the SRT Series is a Tank
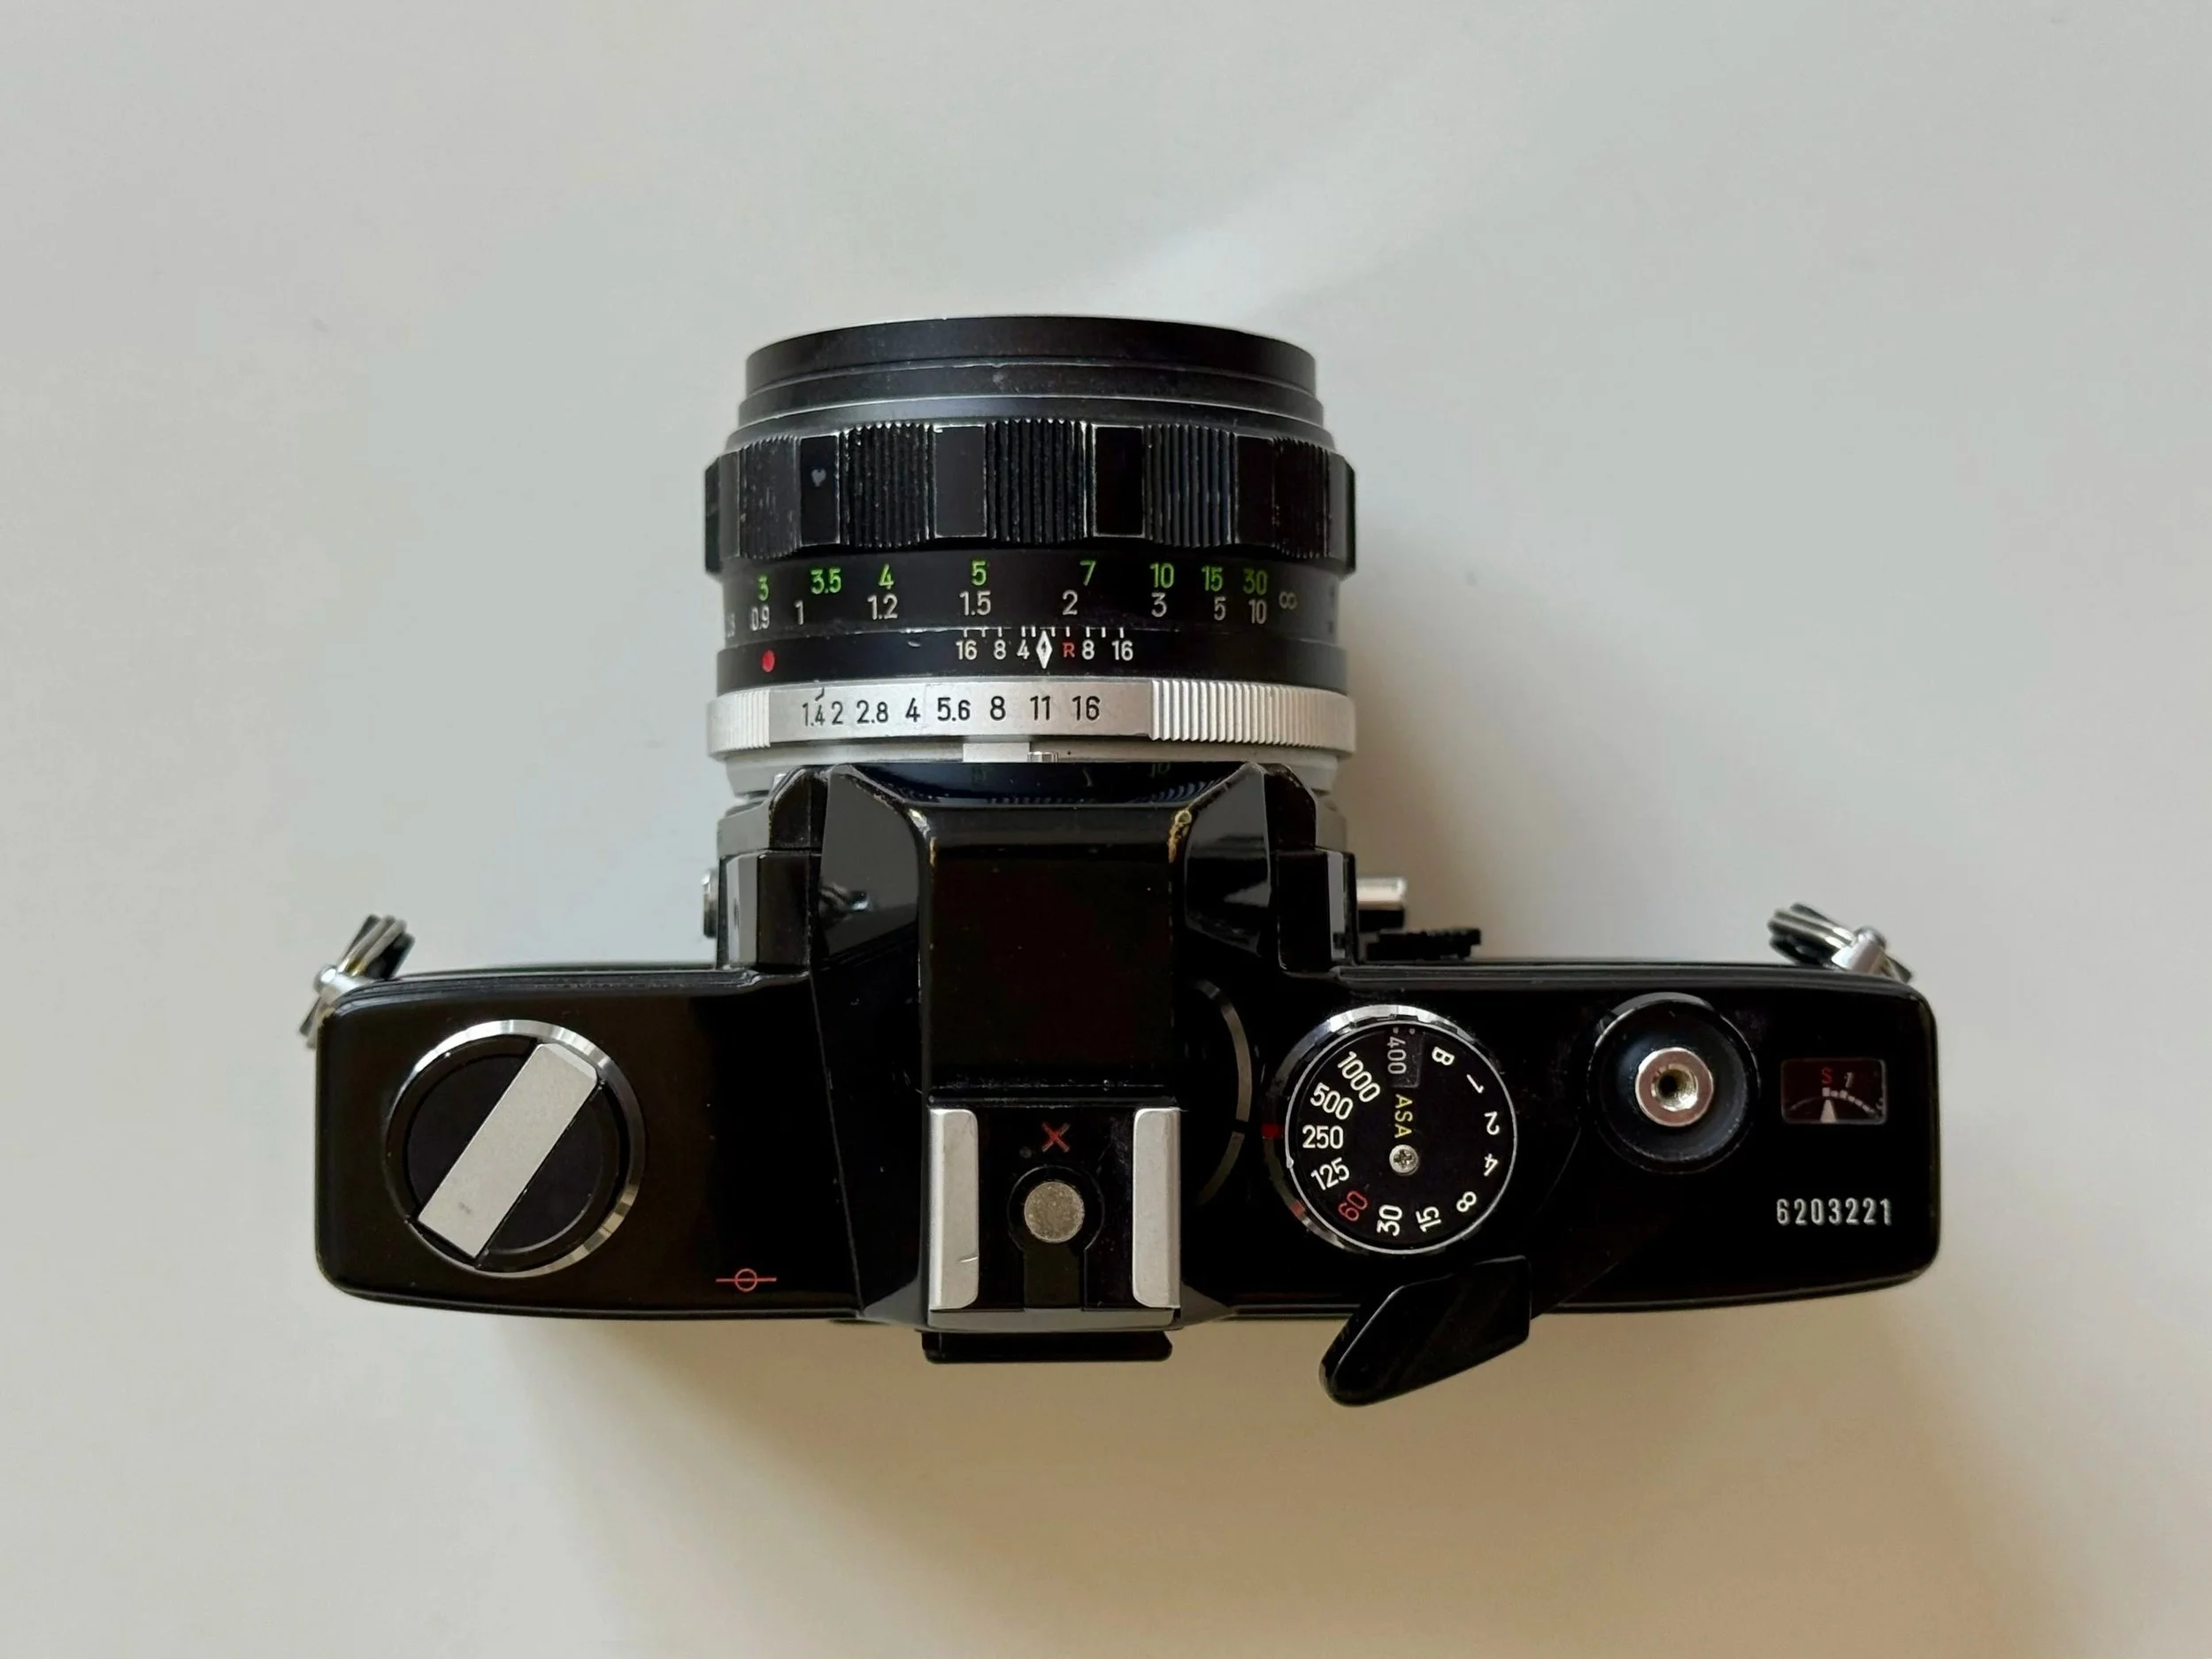
Its a tank
When you pick up the SRT 101, the first thing you notice is the weight. It’s dense. It feels like it was milled from a solid block of brass. Unlike the sleek Canon P, the Minolta is utilitarian. It will happily also work in the harshest climates.
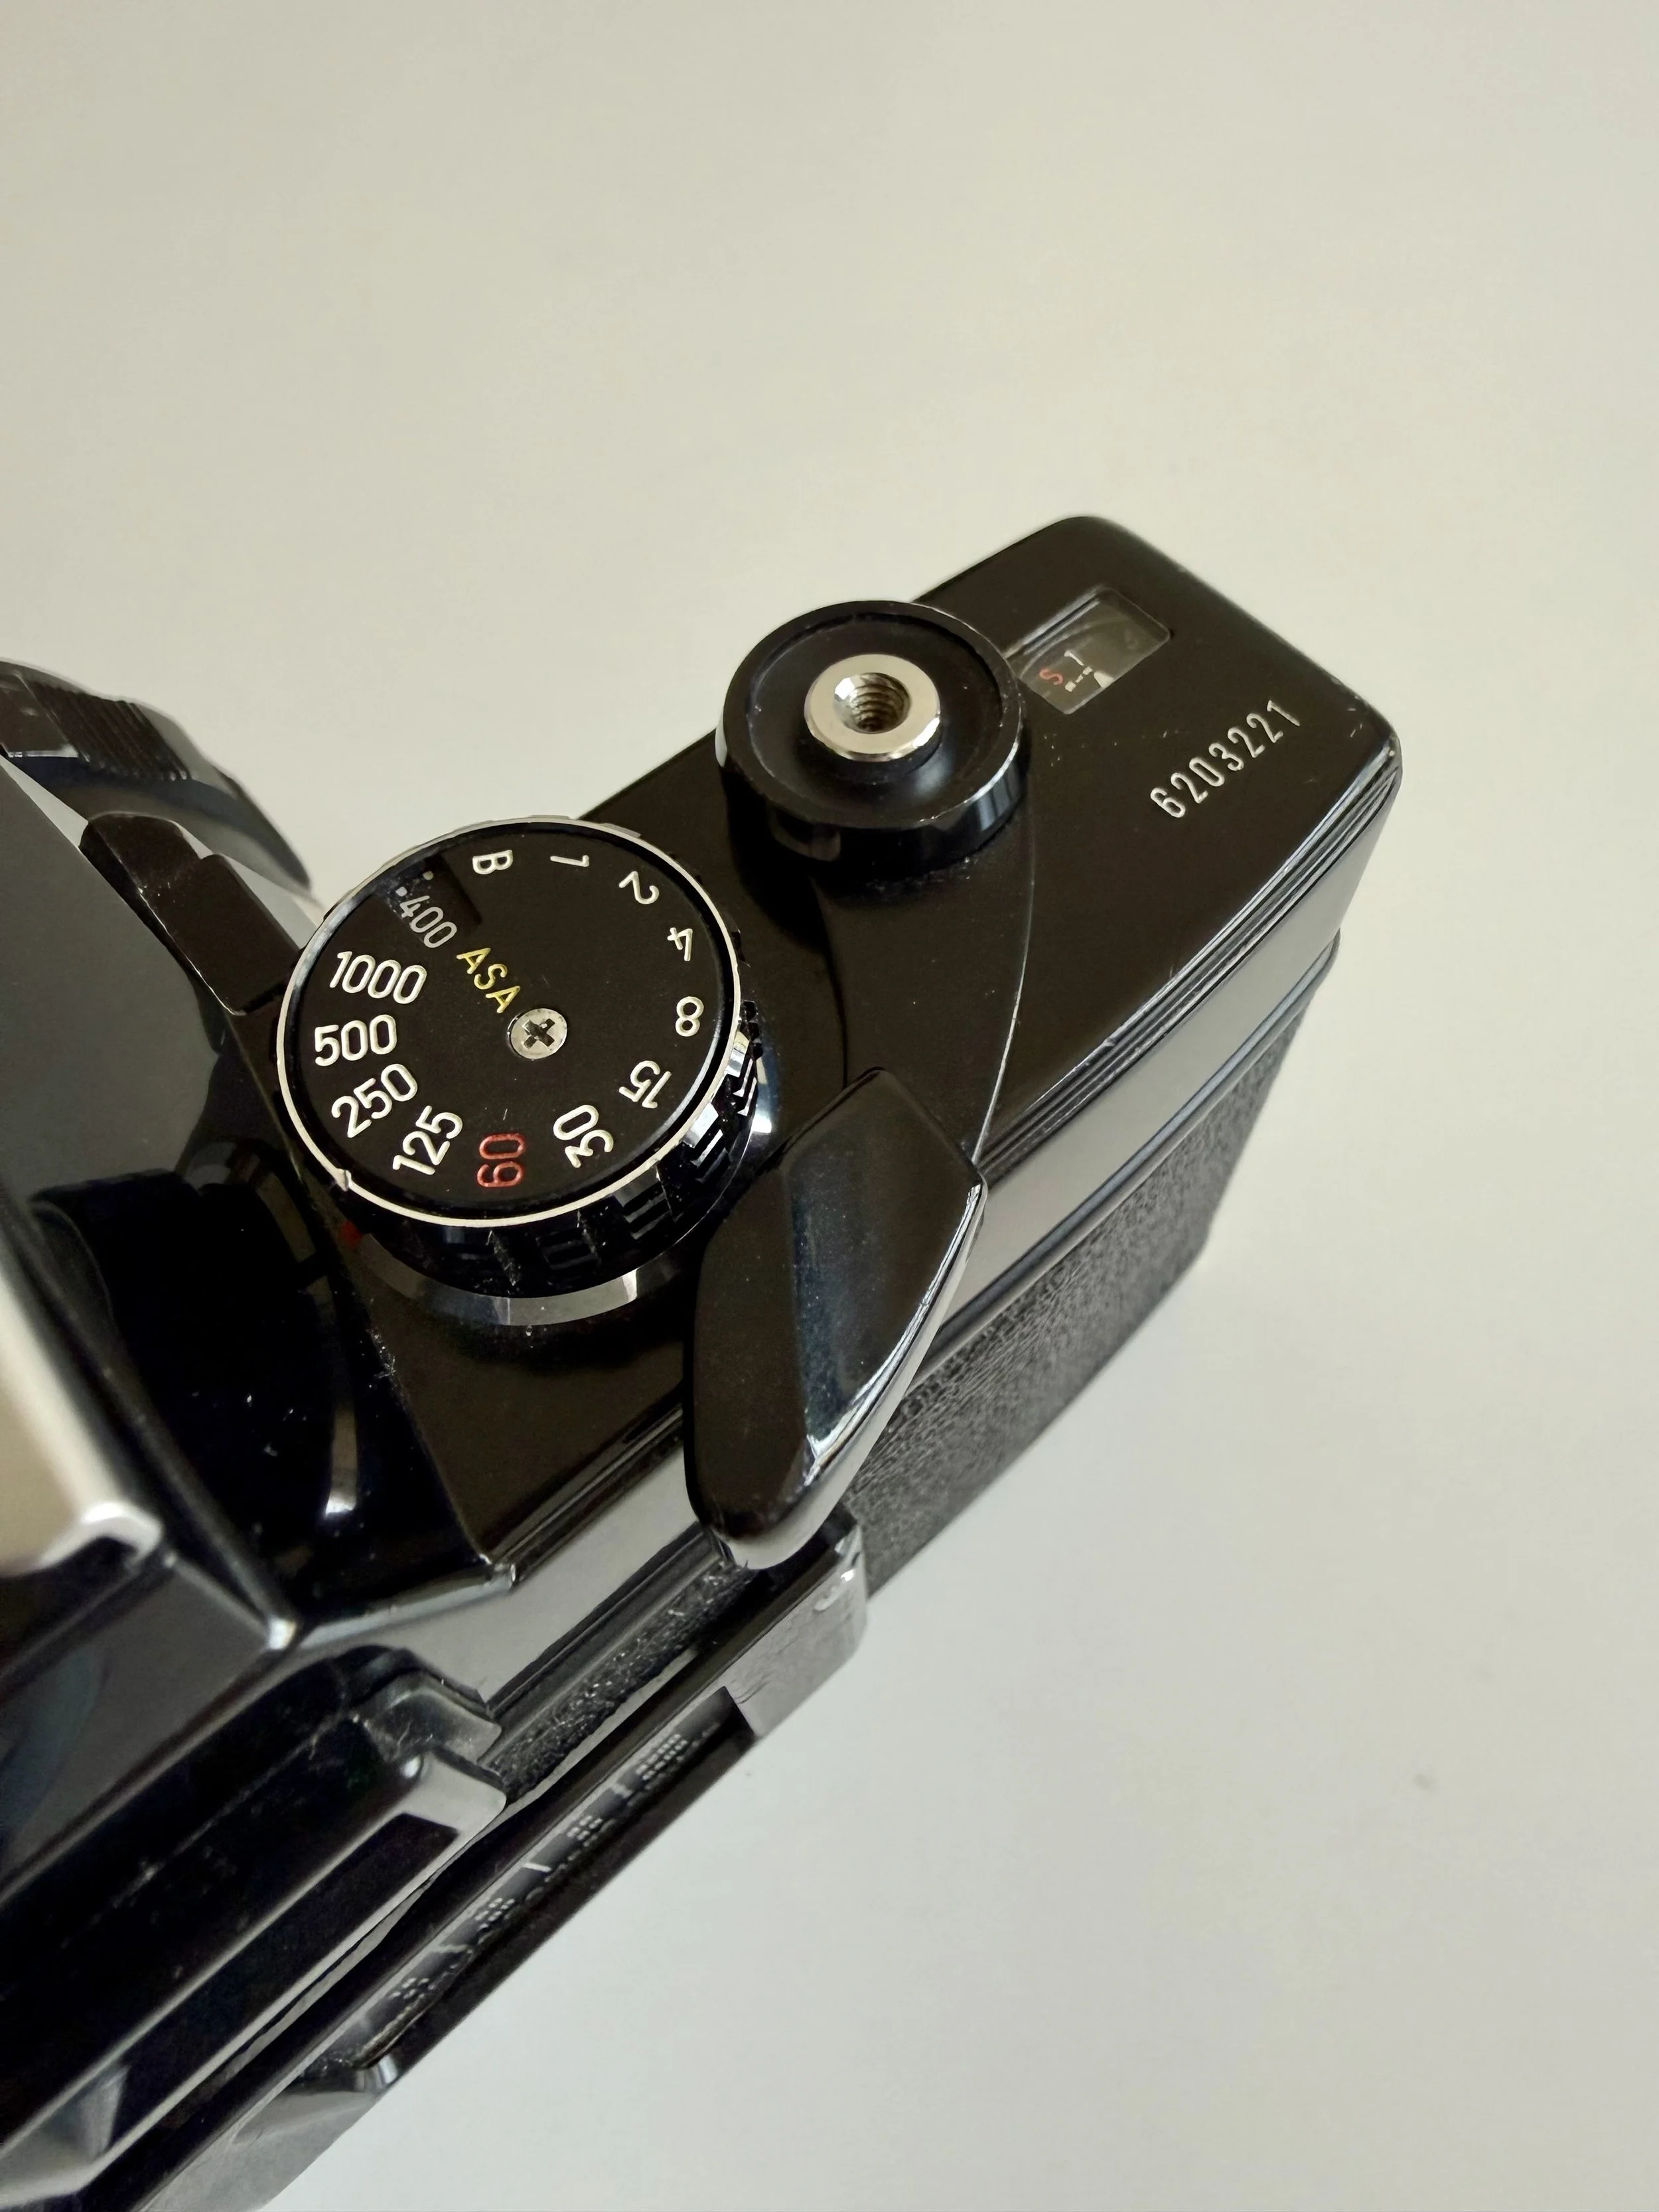
Top view close up
The "Tank" Factor: There is a reason these are still everywhere. They just don't die.
The Winding Stroke: It’s not as "silky" as a Leica, but it’s incredibly satisfying.
The Japan Connection
I didn’t just pick this up at a local flea market. I originally purchased this SRT 101 as a gift for my wife via DKY Japan on eBay—a seller I can’t recommend enough if you're looking for top-tier Japanese gear.
But what makes this specific copy special is its history: it was freshly CLA’d by the legendary Hideki Tada (better known as @obsessed_with_camera_repair). If you're deep into the analog scene, you know Hideki is an absolute master. Knowing that a legend like him worked on the internals makes all the difference. Needless to say, both the body and the 58mm f/1.4 Rokkor are in extraordinary condition—smooth, accurate, and ready for another 50 years of service.
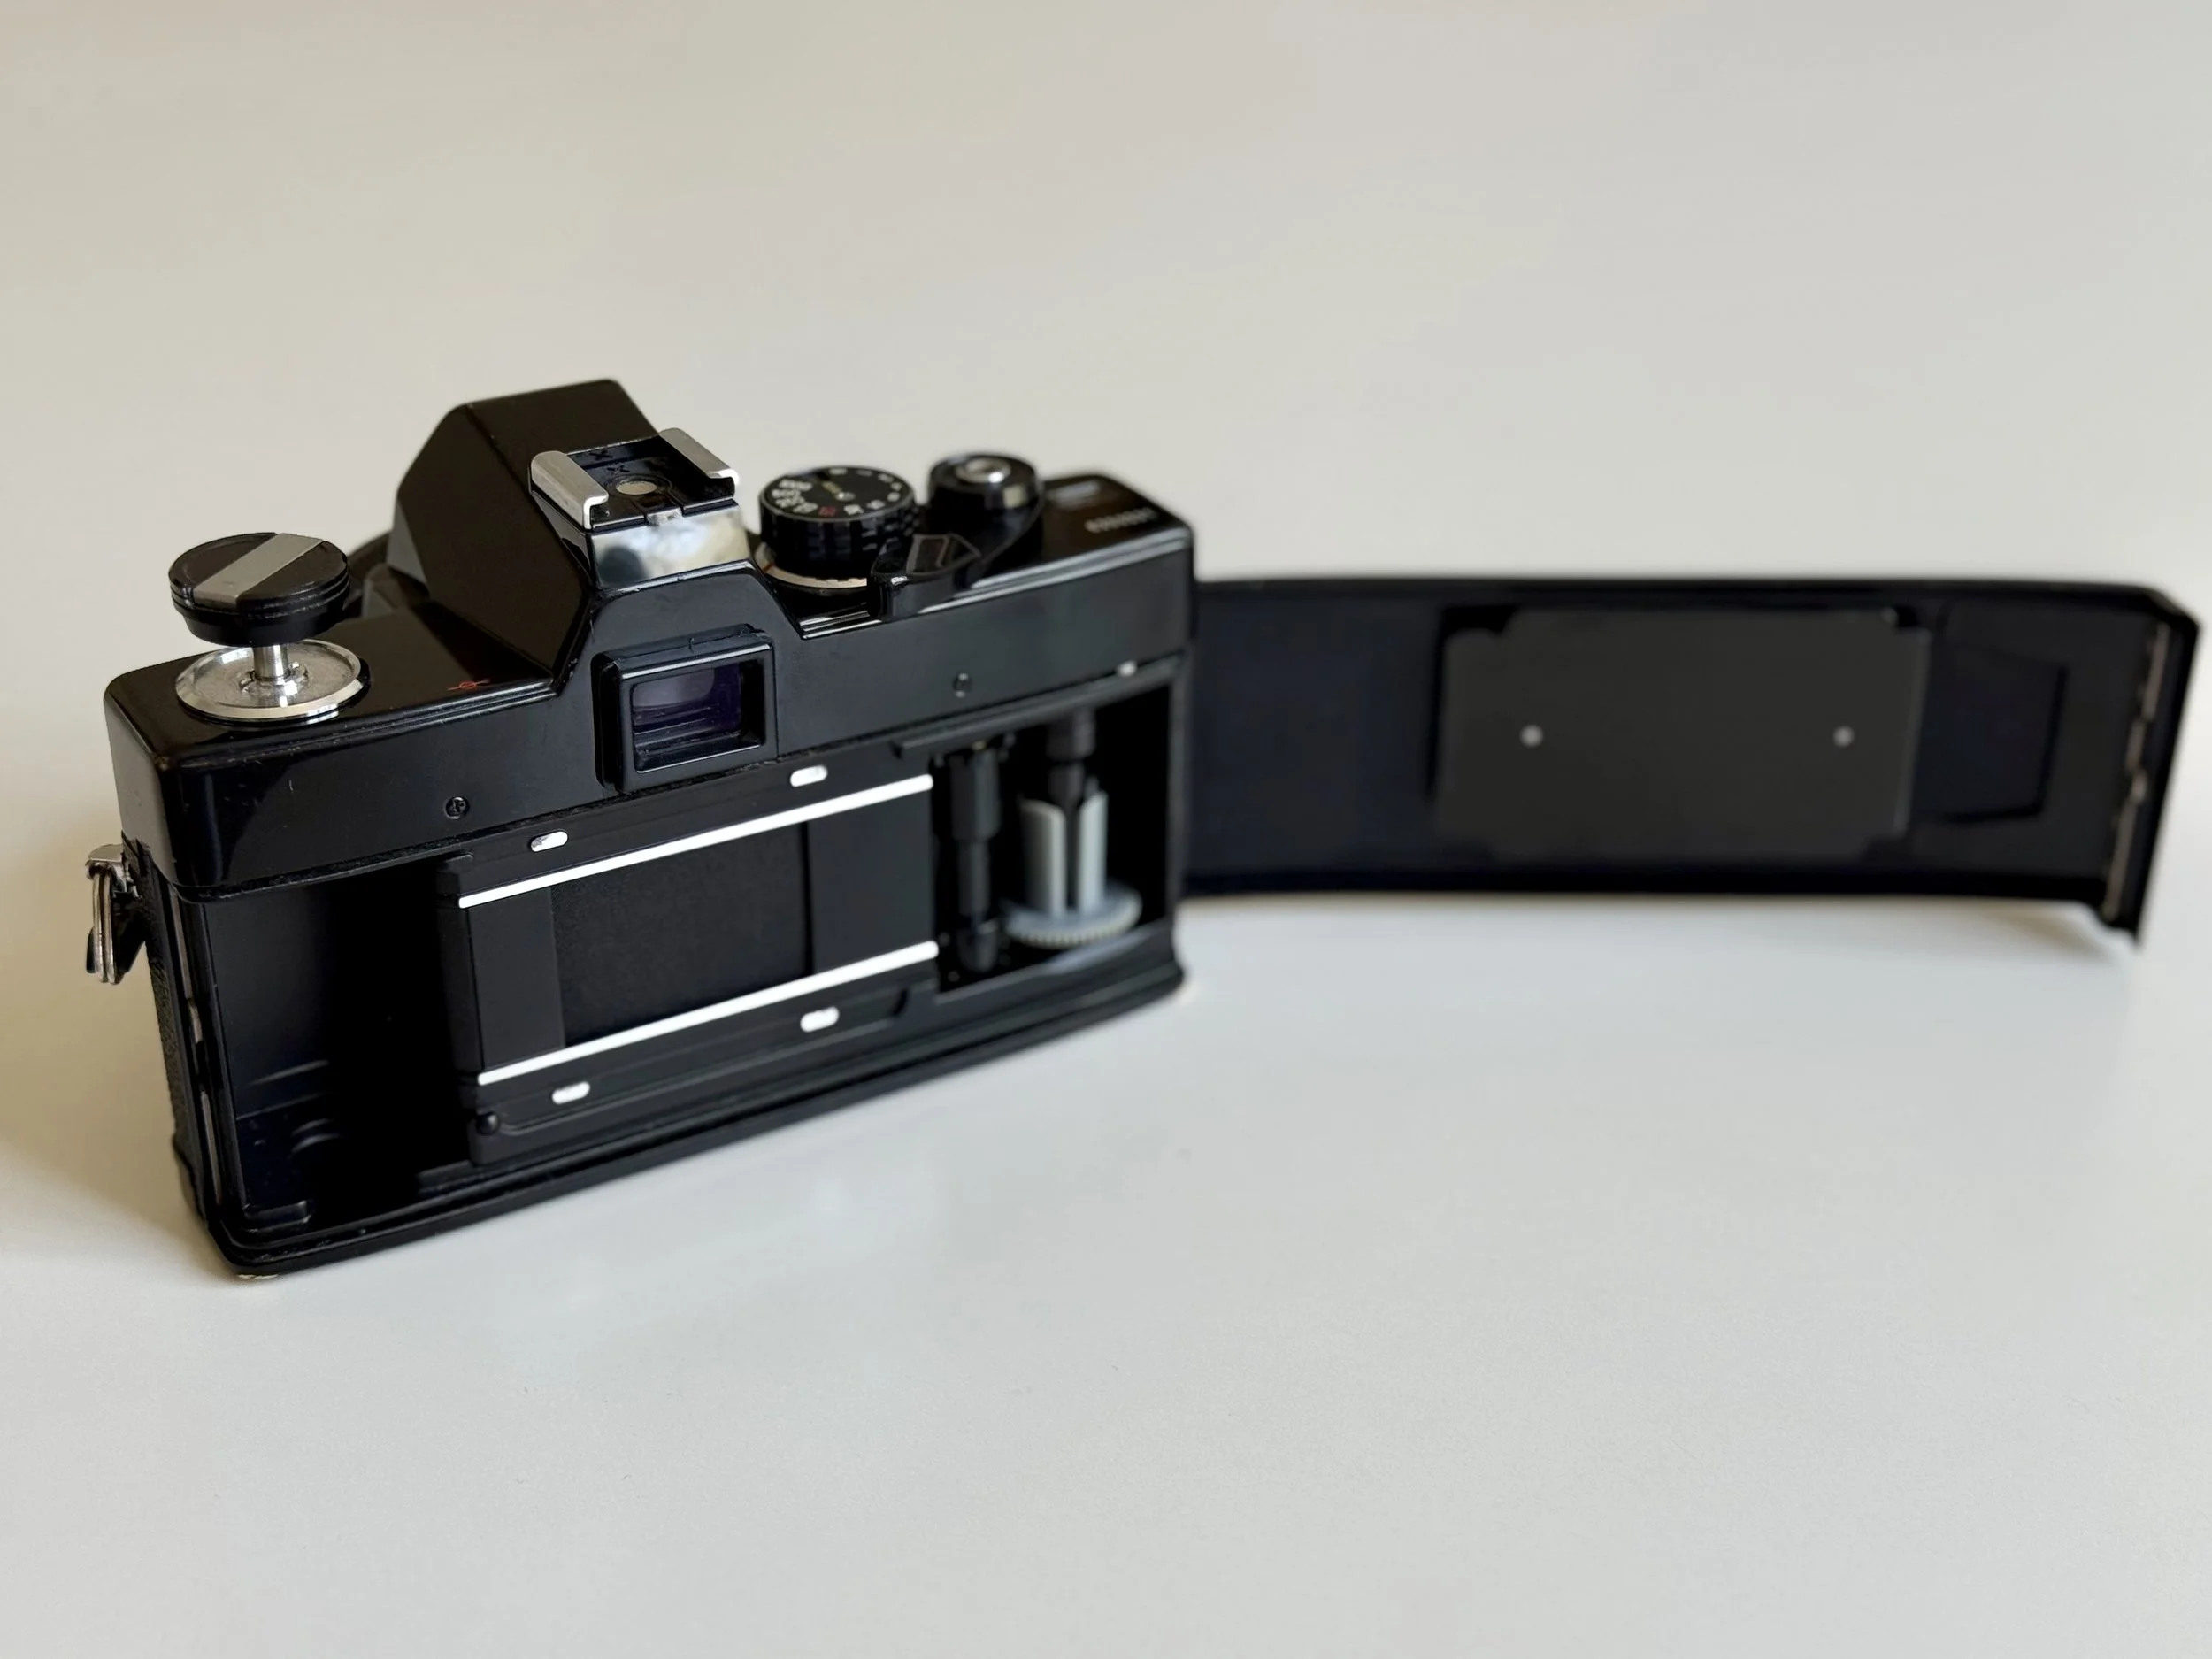
So clean! Internals with cloth shutter
How Minolta CLC Metering Works: The First Matrix Metering?
While Nikon and Canon were still figuring out basic TTL (Through The Lens) metering, Minolta introduced CLC in 1966 and it remained a main feature of the SRT series until its discontinuation in 1981. CLC stands for Contrast Light Compensation. It uses two CdS cells located in the pentaprism. They are wired in series to read the upper and lower halves of the frame independently. If you have a bright sky and a dark foreground, the meter compensates to prevent underexposing your subject. It can easily be considered the grandfather of modern matrix metering.
Does it work? Surprisingly well, even by 2026 standards. It can be considered grandfather of matrix metering.
The metering system on this camera still works like a charm, and to be honest, it’s the main reason I bought this specific model. Minolta’s "Contrast Light Compensation" was way ahead of its time, and it shows.
The "No-Fail" Experience
It’s super easy to use, and not a single frame on this camera has been under or overexposed yet. Whether I'm shooting in harsh sunlight or tricky shadows, the needle stays true. In a world where vintage light meters are often erratic or dead, the SRT 101 remains a tool you can actually trust. Which is quite rare!
Information is King: Why the SR-101 Viewfinder is a Joy for Glasses Wearers
One thing the SRT 101 does better than many of its contemporaries: It tells you everything. And the best part is, it’s massive and bright. You can see everything through that thing. Very impressive and super usable, even with glasses. Which is important to me! (as you might know by now :) So i can say, it’s one of the best vintage SLR for glasses wearers.
You can see your shutter speed and your aperture (on later models) right in the finder.
The "Match-Needle" System: It’s so intuitive. You just line up the circle with the needle and you’re good to go. No flashing LEDs, just pure analog feedback.
Fun Fact: The communication between the shutter speed, lens and the needle in the finder is actually accomplished by cables and pulleys. This may sound crude, but turned out to be super reliable.

Probably one of the best Viewfinders out there - this one being specifically clean too!
Using Flash for Film Photography on the Minolta SR-101
Integrating a modern flash like the Godox IM30 into a vintage workflow might seem daunting, but the SR-101 makes it remarkably intuitive. Just slide it into the hotshoe! You can also use it hand held, off camera. How? On the front of the body, you'll find two PC sync terminals, each serving a distinct purpose: Just connect the X socket with a pc sync cable to the Godox IM30. (3,5mm jack to to PC male sync.)
X Socket (Xenon/Electronic Flash): The standard for modern photography. This is where your Godox peaks instantly at the exact moment the shutter is fully open. For the SR-101, ensure your shutter speed is set to the 1/60s sync speed (marked in red or with an 'X').
FP Socket (Focal Plane Flash): Designed for older, slow-burning flash bulbs. It initiates the bulb just before the curtain moves, allowing the bulb to burn while the slit traverses the film plane.
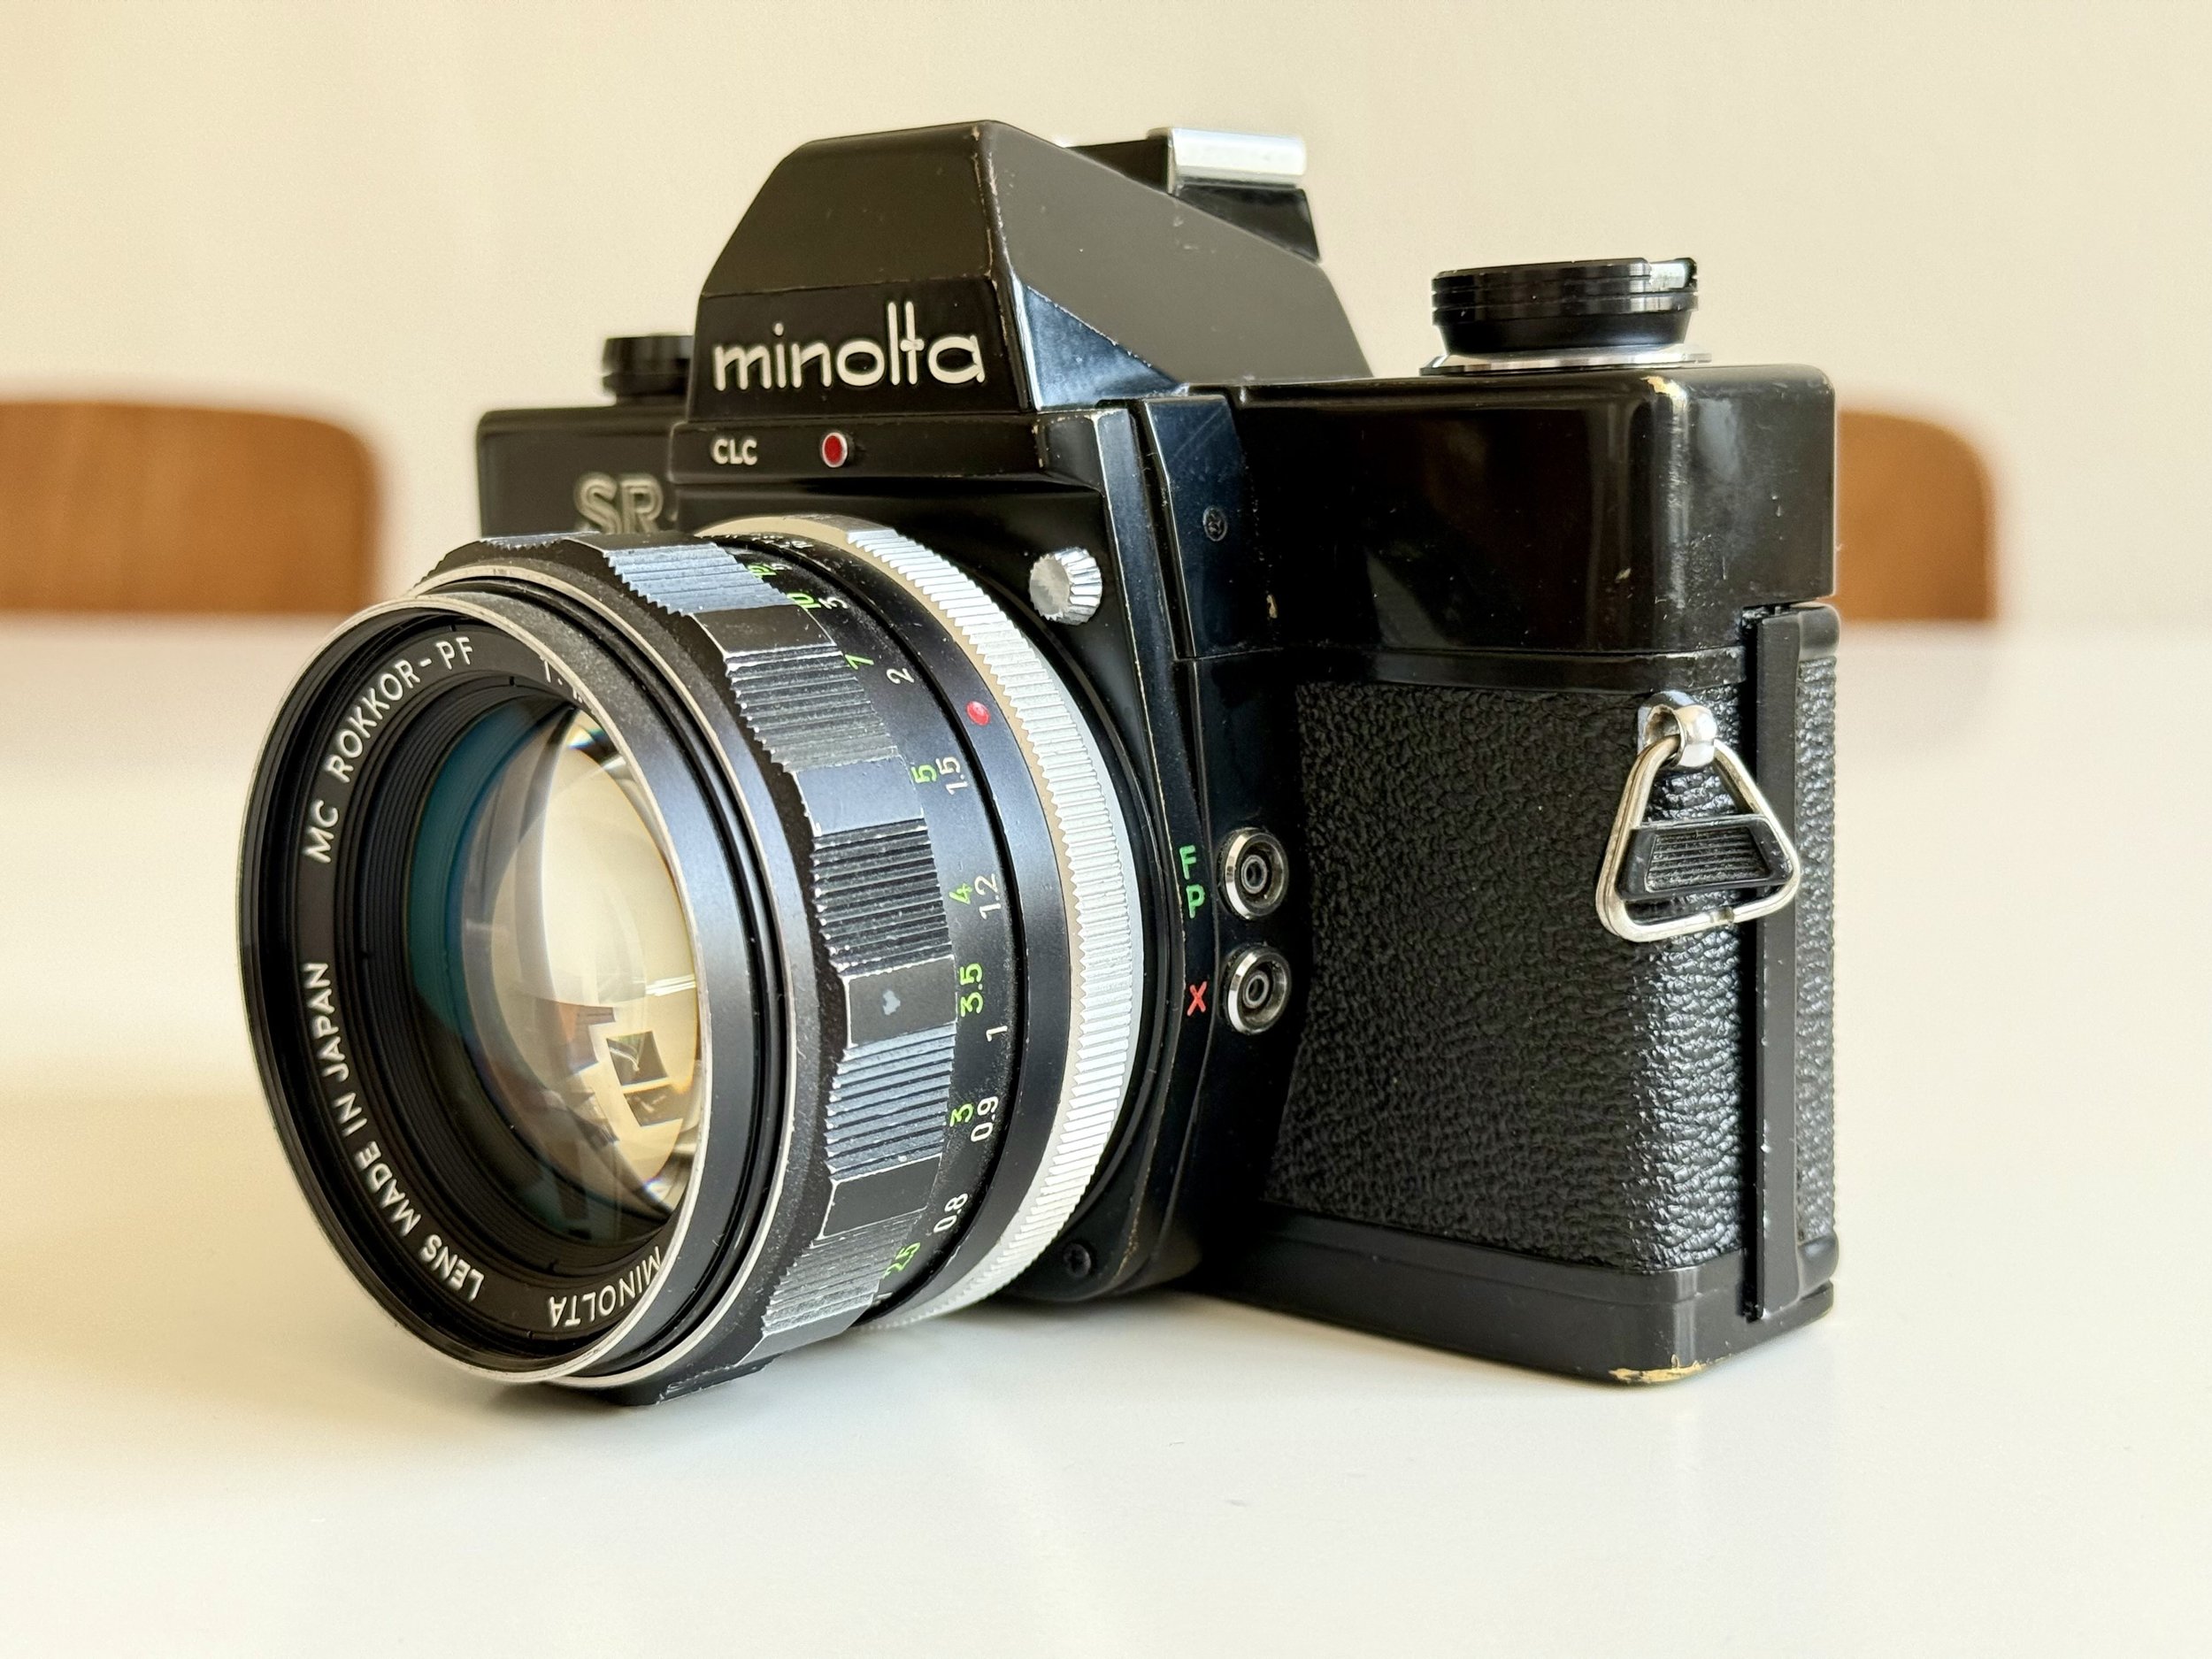
SR 101 Flash sync. sockets
Using flash on a fully mechanical camera like the SR-101 is incredibly rewarding once you get the hang of it. Let me know if you want a deep dive on how to calculate flash power and use flash manually—it’s easier than it looks, and it opens up a whole new world of light for your film photography.
Minolta MC Rokkor 58mm f/1.4 Lens Review: Vintage Bokeh & Soul

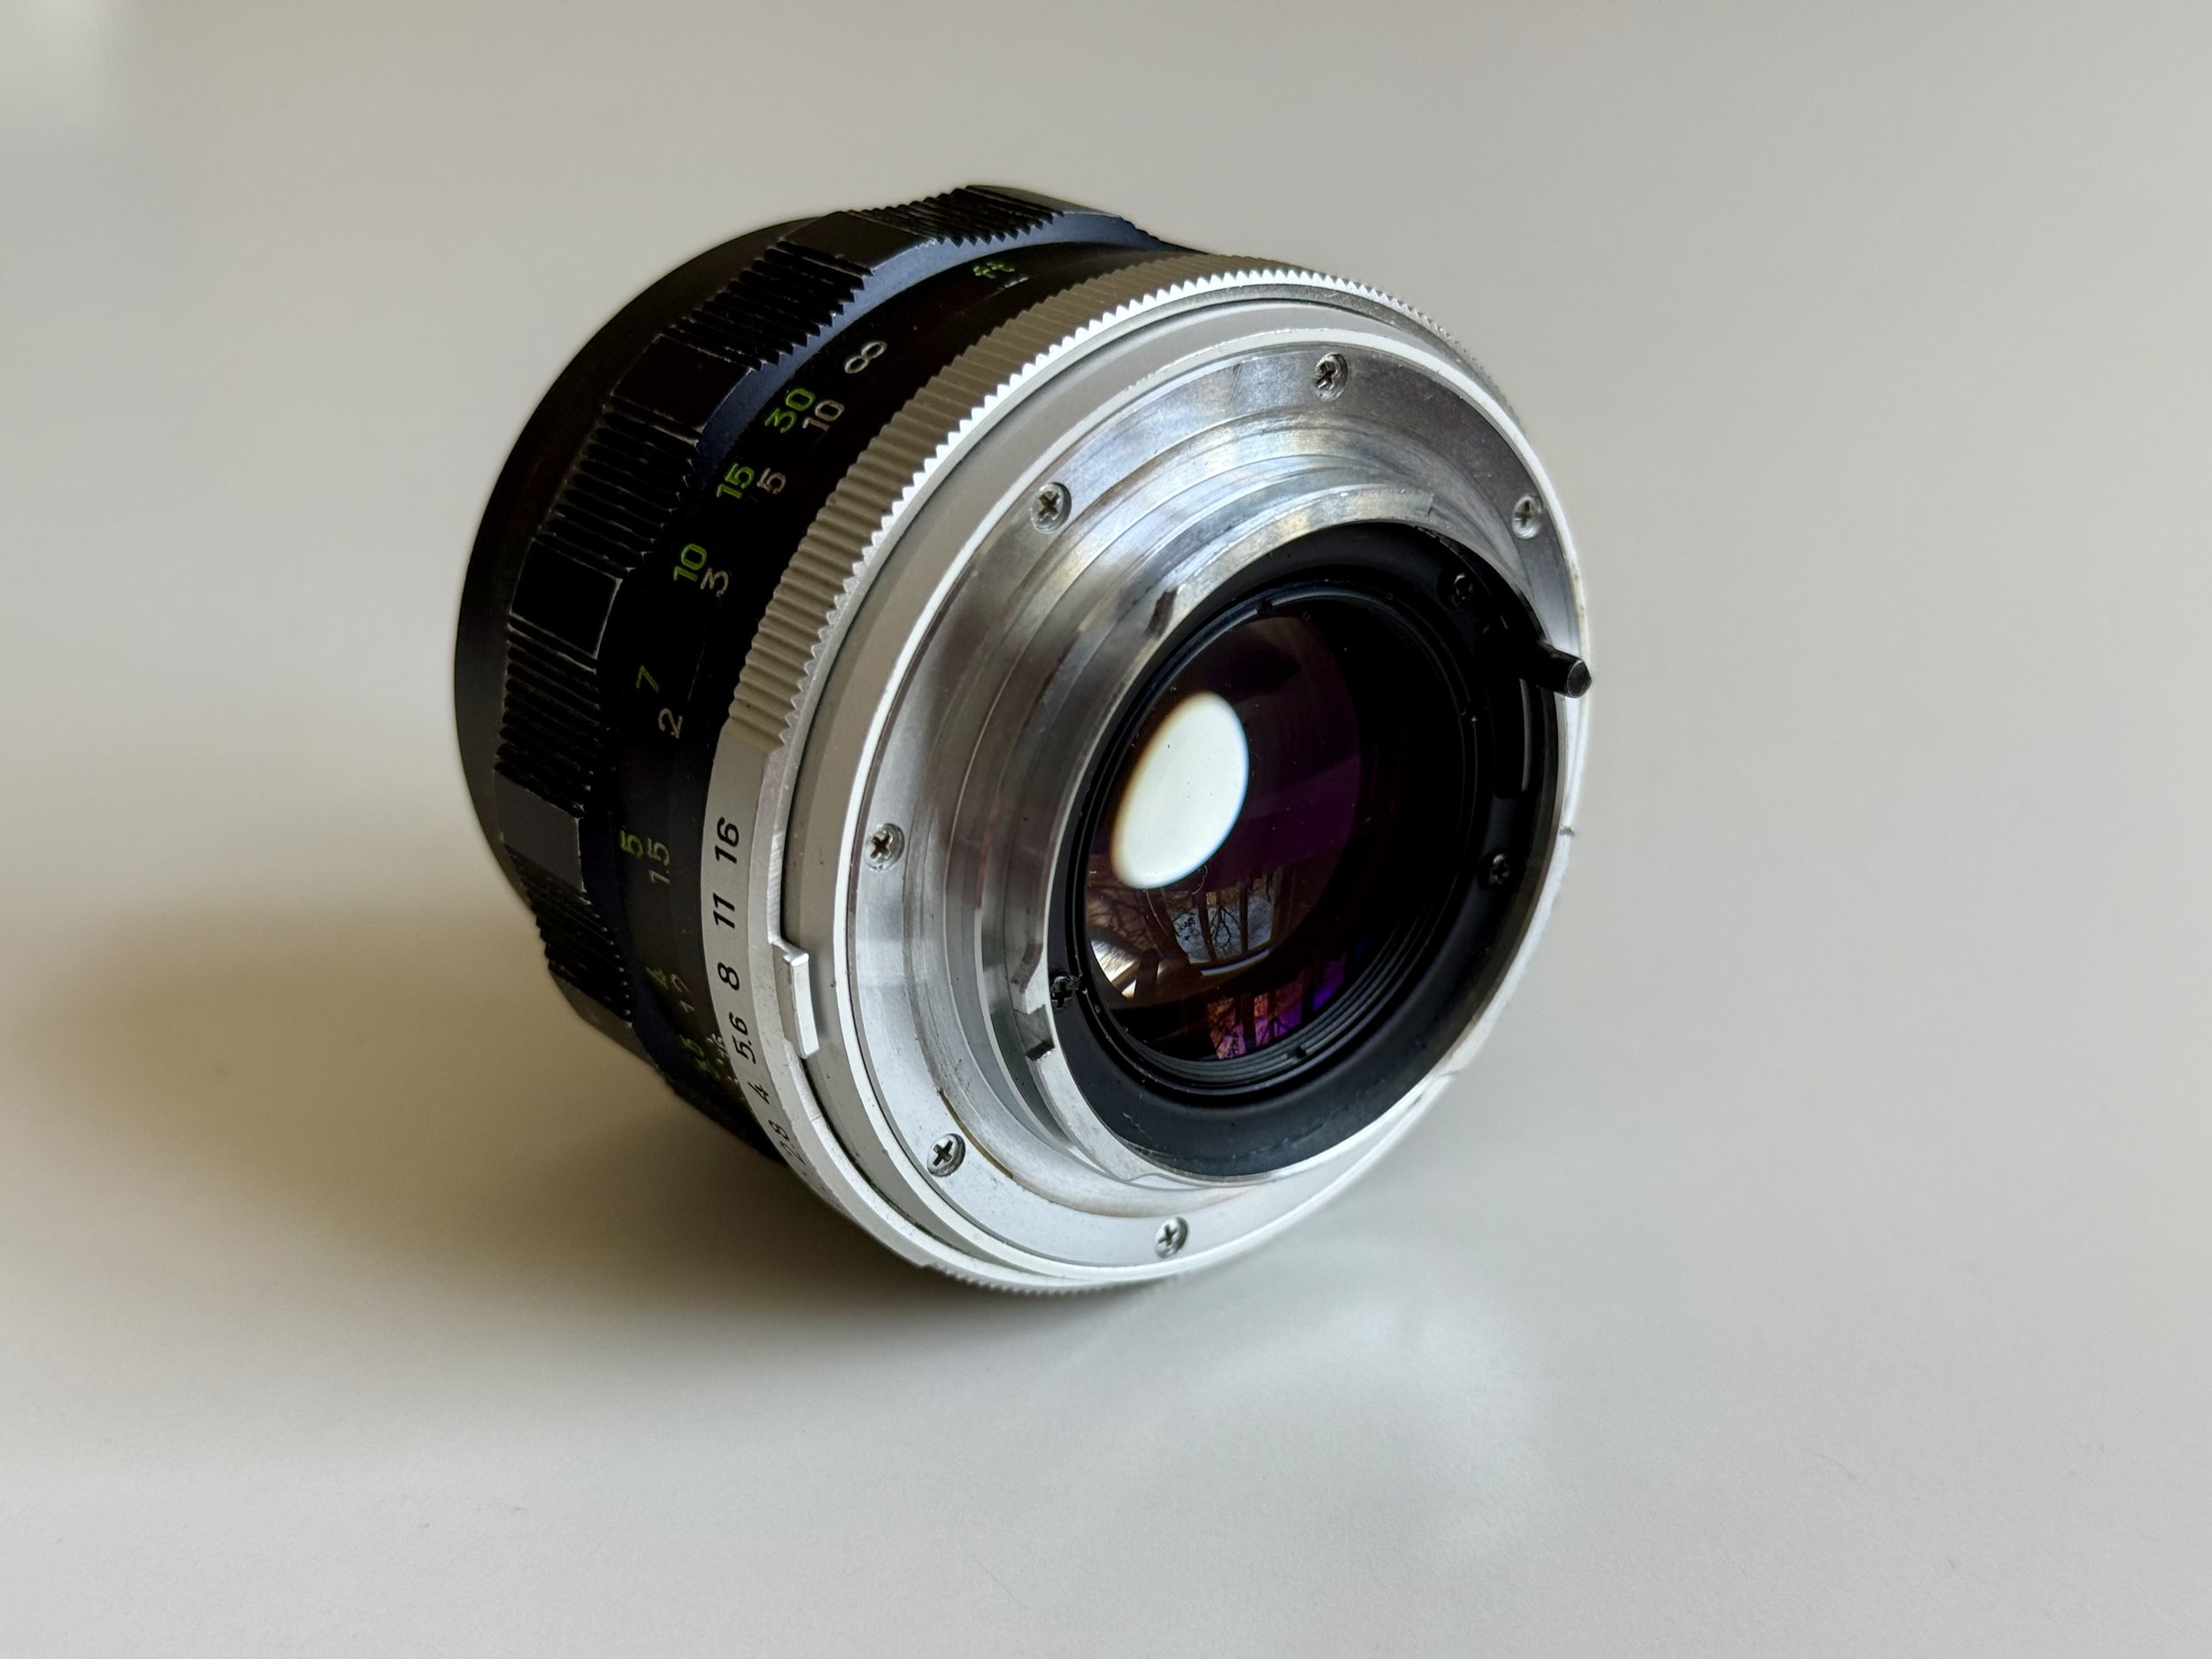
This lens has a look that is hard to describe. It possess a warmer, more romantic glow than my Nikkor lenses.
The "Wide Open" Magic If you shoot the 58mm f/1.4 wide open, things get dreamy. Very dreamy. Some pixel-peepers might call it "soft," and "bad tongues" would even say it’s unusable at f/1.4. But they are missing the point. For portraiture work, this lens is great. It gives a unique, painterly, and very vintage look that you simply cannot replicate with modern, over-corrected glass.


Value: The best part is you can still find amazing Rokkor glass for a fraction of the price of LTM or M-mount lenses. While the world is chasing Leica prices, the Minolta ecosystem remains the best-kept secret for photographers who prioritize "vibe" over charts.
Common Minolta SRT 101 Problems: Battery, Metering & Repair
Every vintage camera has its own personality, and the SR-101 is no exception. There are three specific things you need to know before you load your first roll:
1. The Hidden Power Switch Unlike many modern SLRs where the light meter is activated by a half-press of the shutter, the SR-101 has a dedicated physical switch on the bottom plate. You have to manually flip it to "ON" to see the needle move in the viewfinder. It’s a bit unusual by today’s standards. Just make sure to flip it back to "OFF" before putting it in your bag, or you’ll find a dead battery the next morning!

2. The 1.35V vs. 1.5V Battery Struggle
This camera was originally designed for the now-illegal 1.35V Mercury batteries (PX625). If you just pop in a modern 1.5V alkaline battery, your meter will likely be off by 1-2 stops because the voltage is too high.
The WeinCell: We’ve been using a Zinc-Air (WeinCell) battery for one and a half years now, and it’s still going strong. Most people claim these only last a few months, but if you are disciplined about flipping the bottom power switch to "OFF" when you’re not shooting, they can last surprisingly long. It’s the most reliable way to ensure the light meter stays accurate without any guesswork.
While we use a WeinCell (Zinc-Air) battery, other popular solutions for the SRT 101 battery issue include using an MR-9 adapter (which drops a 1.5v silver-oxide battery down to 1.35v) or having a technician recalibrate the meter to accept modern 1.5v batteries.
Final Thoughts: Is it better than my Nikons?
To be honest? No. My Nikon F2 is a more refined machine. But doing a Minolta SRT 101 review made me realize that this camera has just as much charm. It’s the camera you take when you don't want to worry about your gear—because you know, no matter what happens, the SR will survive.
The Minolta SR-101 is not the most advanced SLR ever made, but it is one of the most dependable. If you want a fully mechanical, no-excuses film camera with excellent metering and legendary build quality, it is still one of the best choices in 2026.
Who is it for?
The Minolta SR-101 is best suited for photographers who want a fully mechanical SLR experience and a durable, no-frills film camera. It is ideal for film shooters who prefer full manual control and a slower, more intentional shooting process.
It is especially appealing for users looking for a best vintage SLR experience with reliable metering and strong Rokkor lens compatibility.
Who the Minolta SR-101 is for:
photographers who want a fully mechanical SLR
film shooters who prefer manual control
users who want durable, long-lasting gear
Who it is NOT for:
beginners expecting automation
lightweight travel setups
casual point-and-shoot users
This is a camera for deliberate, fully manual film photography — not convenience shooting.
Minolta SRT 101 / SR-101 Frequently Asked Questions
What battery does the Minolta SRT 101 use? Originally, it used a 1.35V PX625 mercury battery, which is now banned. Today, the best replacements are a WeinCell (Zinc-Air) battery or an MR-9 adapter with a modern 1.5V silver-oxide battery.
Are Minolta SR-101 and SRT 101 lenses the same? Yes. Both cameras use the Minolta SR-mount. They are fully compatible with all Minolta MC and MD Rokkor lenses.
Does the Minolta SRT 101 shoot without a battery? Yes. The camera is fully mechanical. The battery is only required to power the internal CLC light meter. You can shoot at all shutter speeds without a battery using the Sunny 16 rule.
What is the difference between Minolta MC and MD lenses? MC (Meter Coupled) lenses were introduced for the SRT series to enable full-aperture metering. MD lenses are a later evolution designed for shutter-priority modes on cameras like the XD-7, but they work perfectly on the SRT 101.
Conclusion: Why the Minolta SR-101 is a Best-Buy in 2026
The Minolta SR-101 (and its sibling, the SRT 101) is the perfect antidote to the rising prices of Leica and Nikon FM2 cameras. It offers professional build quality, a brilliant viewfinder for glasses wearers, and a metering system that was decades ahead of its time. If you don't mind the weight, this "brass beast" is arguably the best value mechanical SLR on the market today.
Minolta SR 101 Sample Images


Enjoyed this? You might also like:
If you found this article helpful, check out my other deep dives into the world of expired emulsions and color recovery:
Mamiya M645 Review (2026): The Best Entry into Medium Format?
FPP Retrochrome 400 Review: Shooting High-Speed Surplus Slide Film

Nikon F Review (2026): Shooting the Indestructible 35mm Legend
Discover the Nikon F in this 2026 review. Learn why this legendary 35mm film camera still stands out with its mechanical design, durability, and lens system.
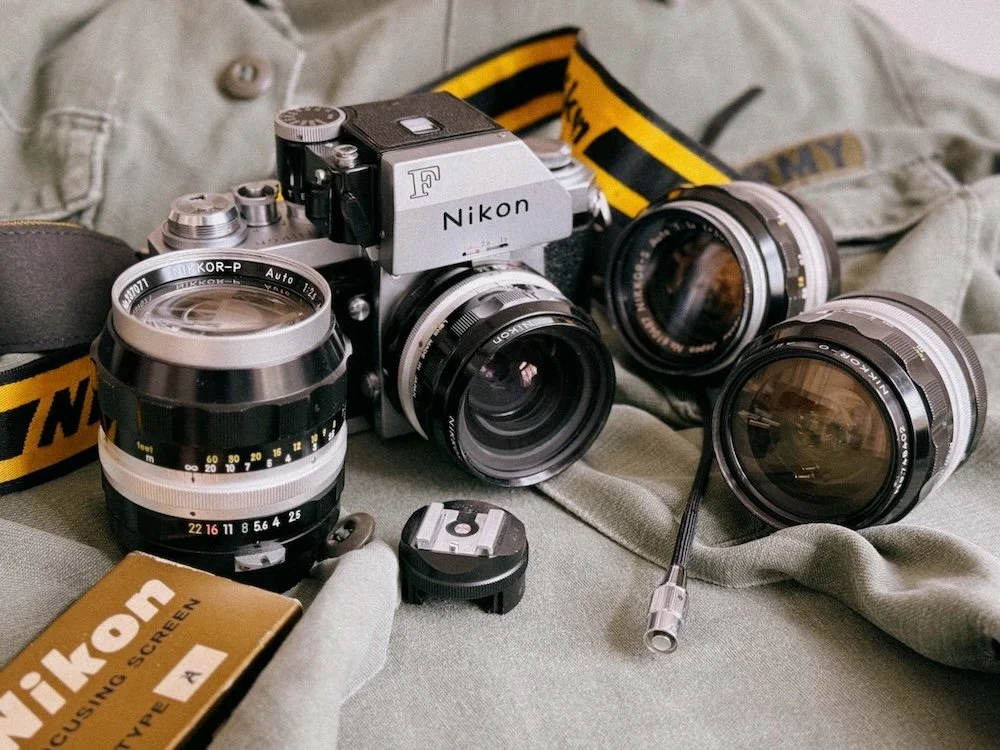
Nikon F Photomic FTN – a masterpiece
Reading Time: 7 Minutes
A lot of photographers consider the Nikon F the most important 35mm film camera ever made. Introduced in 1959, it defined the professional SLR system and remains highly usable in 2026 thanks to its fully mechanical design and legendary Nikon F-mount.
TL;DR: Nikon F at a Glance
Camera Type: Fully mechanical 35mm SLR
Launch Year: 1959 (helped replace rangefinders)
Lens Mount: Nikon F-mount (60+ years of Nikkor lenses)
Key Features: All-metal build, 100% viewfinder, titanium shutter
Power: No battery needed (meter requires Photomic finder)
Best For: Experienced film photographers & collectors
Not For: Beginners or users expecting automation
Why I Bought the Nikon F (From Rangefinder to SLR)
Like many people out there, I was one of those who started with a rangefinder because of the Leica hype. But about a year later, I was lusting for somehting different. Not just because I wanted to be able to shoot something other than 50mm lenses on my Canon P rangefinder, but because I was looking for a new experience.
After some research, I came across the Nikon F: often cited as the first-ever professional SLR system. This camera had a certain rebellious appeal to it, probably due to movies like Apocalypse Now, where Dennis Hopper plays a nameless photographer. This character combined with that 60s vibe was so intriguing that I had to get one for myself.
First Impressions: Nikon F Photomic FTN in Hand
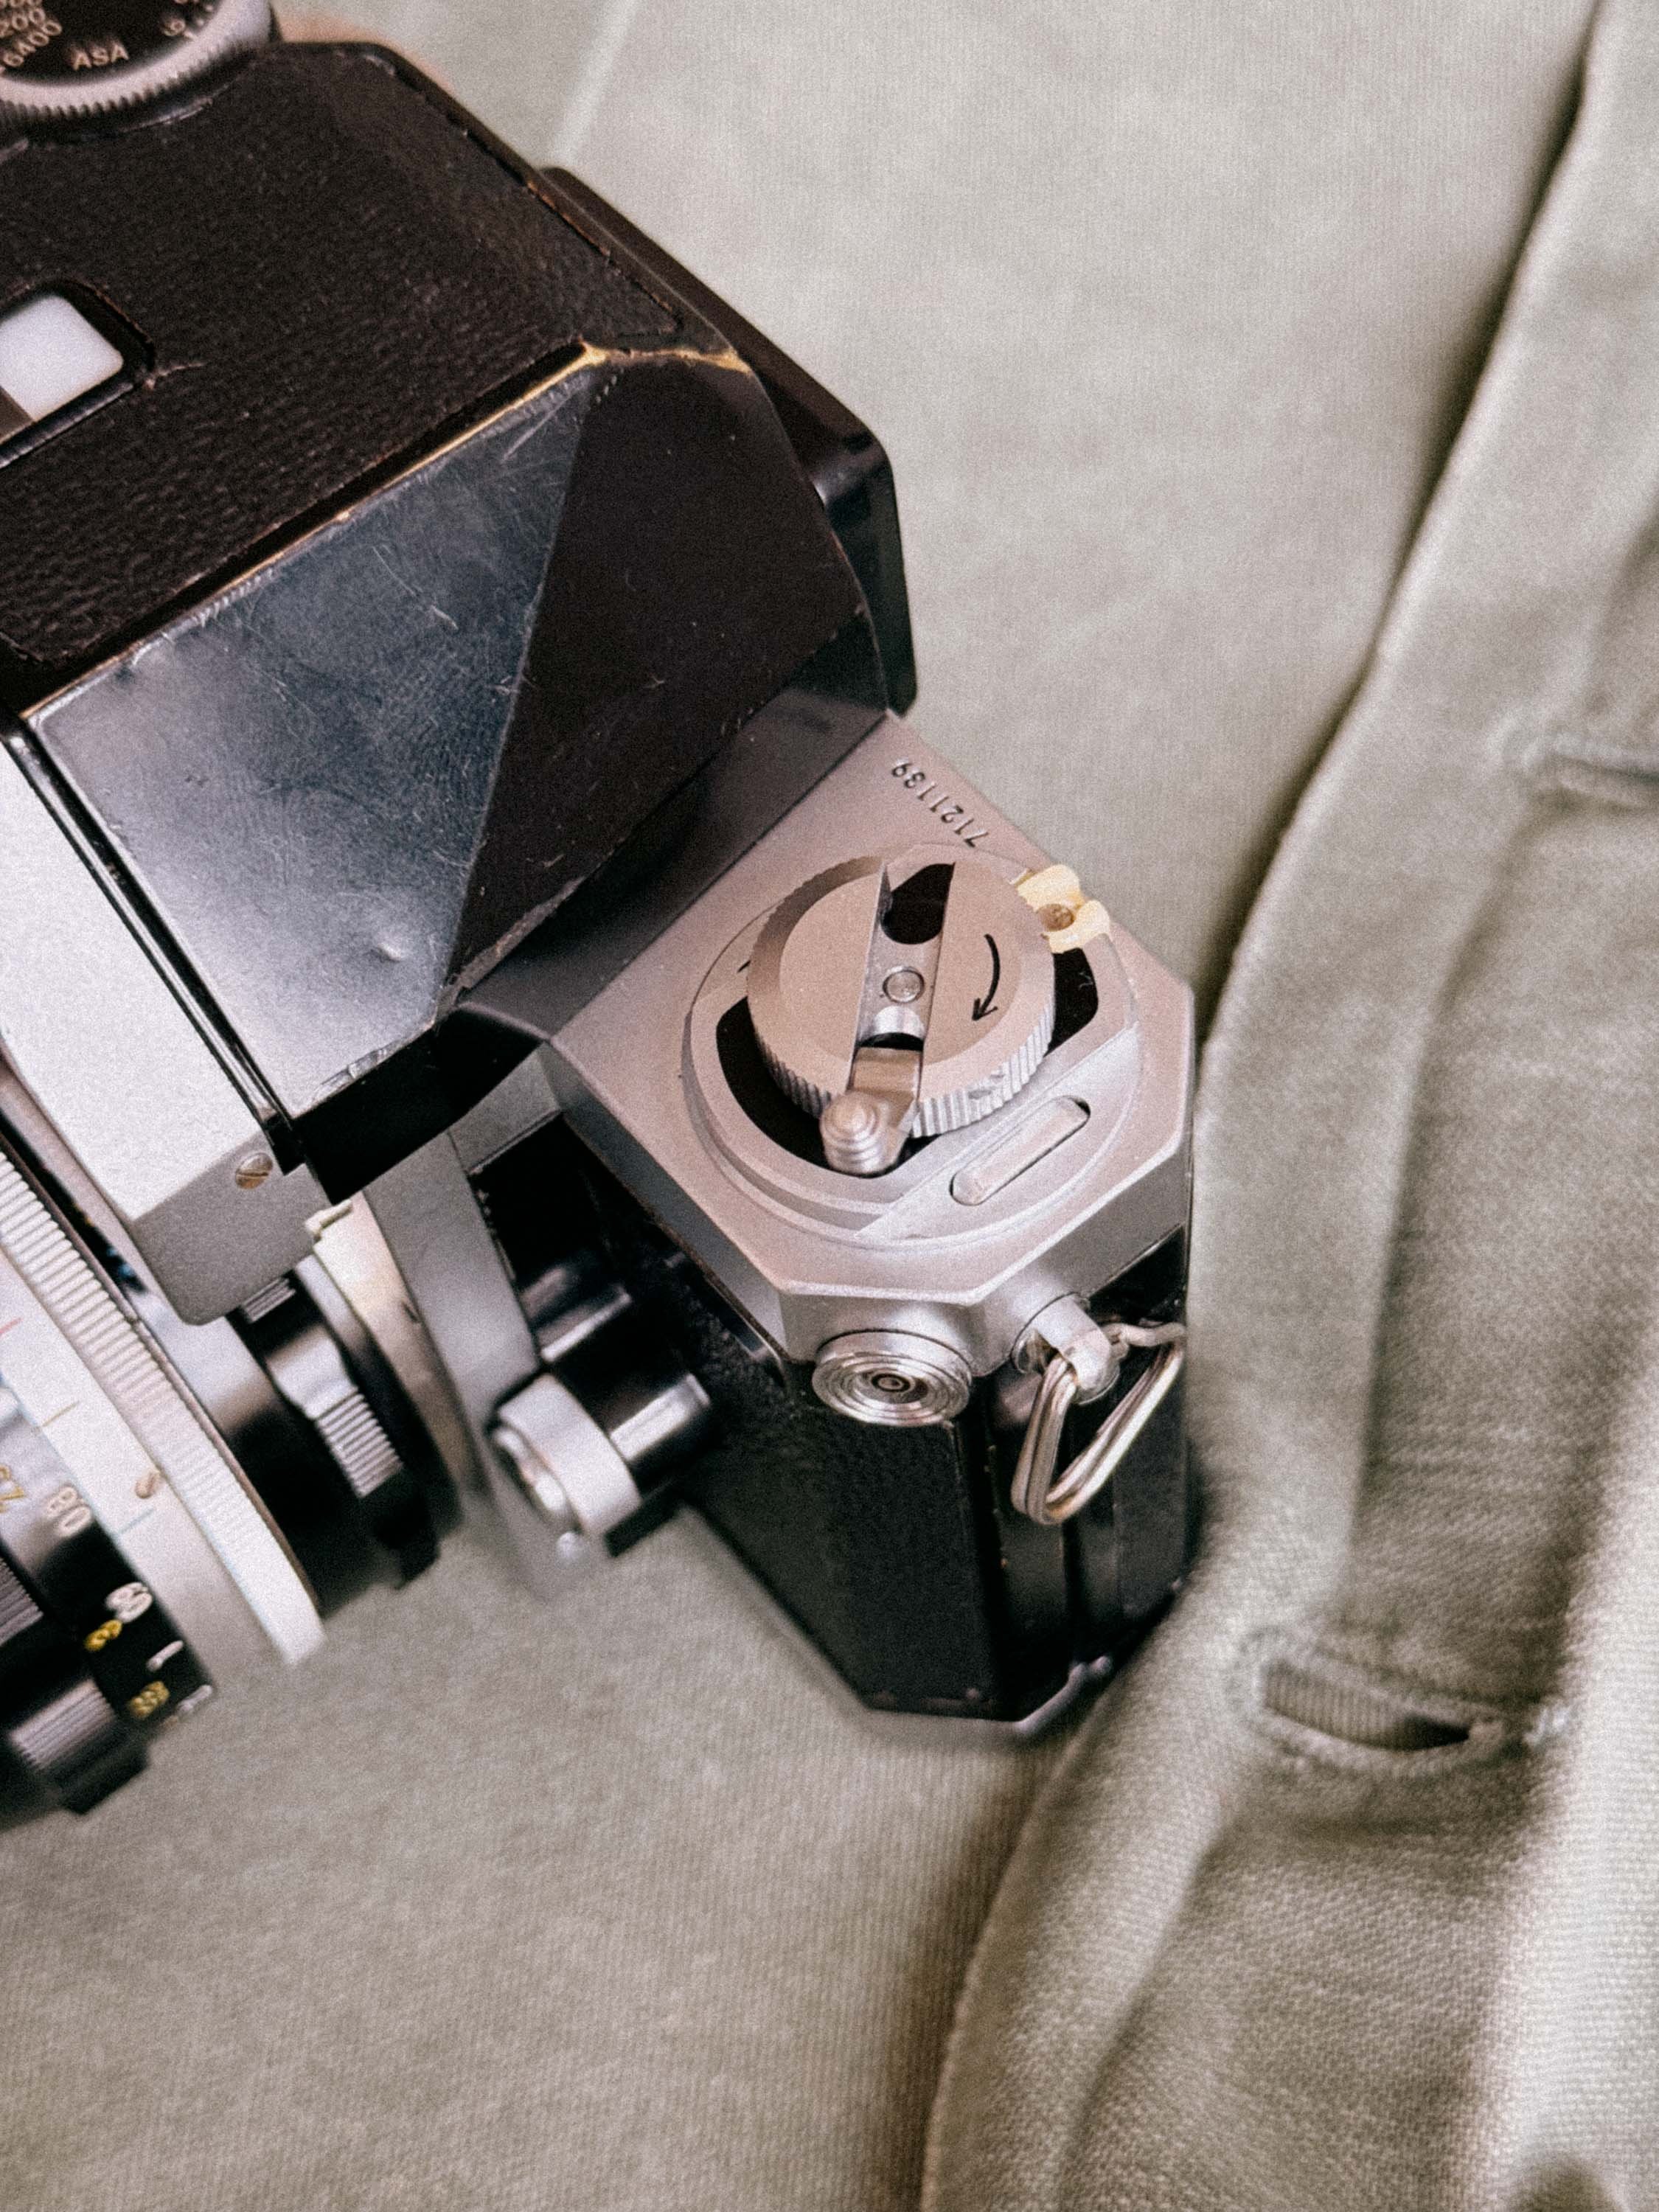
Nikon F - Rewind Crank and PC-Sync
When my Nikon F Photomic FTN arrived from Japan at my doorstep, I was in for a surprise. In combination with the Pre-AI 50mm f/1.4, the look and tactile experience were just something else. It made me instantly realize why not only war photographers but also journalists in the 60s chose this model. It’s a tank offering the precision of a clockwork.
CLA Service & Long-Term Reliability
I just had a full CLA (clean lubricate adjust) service done by Kamera Service Hoffmann in Stuttgart, not because something was broken, but simply out of love for the camera. I want to enjoy it for many more years to come. So, strap on your boots for this Nikon F review.
Quick Summary: Nikon F Pros & Cons in 2026
| Pros | Cons |
|---|---|
| Indestructible Build: Built like a tank with a legendary titanium foil shutter. | Handling Quirks: The fully removable back makes film loading slow and clunky. |
| 100% Viewfinder: What you see is exactly what you get on the negative—no surprises. | Weight: It’s a heavy piece of solid metal (approx. 1kg with a lens). |
| Pre-AI Lens Paradise: The best body to use affordable, high-quality vintage "Non-AI" glass. | No Internal Meter: Unless you use a (often bulky or dead) Photomic finder. |
| Fully Mechanical: Works without batteries; perfect for long-term reliability. | Ergonomics: No built-in grip and a non-standard cold shoe for flash. |
| Modular System: Interchangeable finders and screens for any shooting style. | External Sync: Requires a special adapter for standard PC-sync or flash use. |
The Nikon F History: From Nippon Kogaku (1917) to Rangefinder Kings
Before we can talk about the "F", we have to talk about Nippon Kogaku K.K. Established in 1917, they weren't originally a camera company, they were an optical powerhouse. In the early days, they even manufactured lenses for other brands (including the very first Canons).
After WWII, Nikon shifted focus to their own bodies, leading to the legendary Nikon S-series rangefinders. By 1957, they had reached the pinnacle with the Nikon SP, a camera so advanced it rivaled the Leica M3. Nikon was a rangefinder company through and through, and this heritage is the secret sauce of the Nikon F.
The Shift from Rangefinder to SLR
When Nikon released the Nikon F in June 1959, they didn't just launch a new product; they almost drove Leica into bancruptcy. But the genius of the Nikon F wasn’t that it invented new technology out of thin air. Instead, it was born in the genius of integration.
Nikon took elements that already existed in various forms, the SLR mirror, the focal plane shutter, interchangeable finders, and combined them into one rugged, cohesive, and professional-grade system. As the official Nikon Chronicle states:
"The Nikon F was developed with the goal of creating the ultimate SLR camera, incorporating every possible feature a professional photographer could need."
The Nikon SP Connection
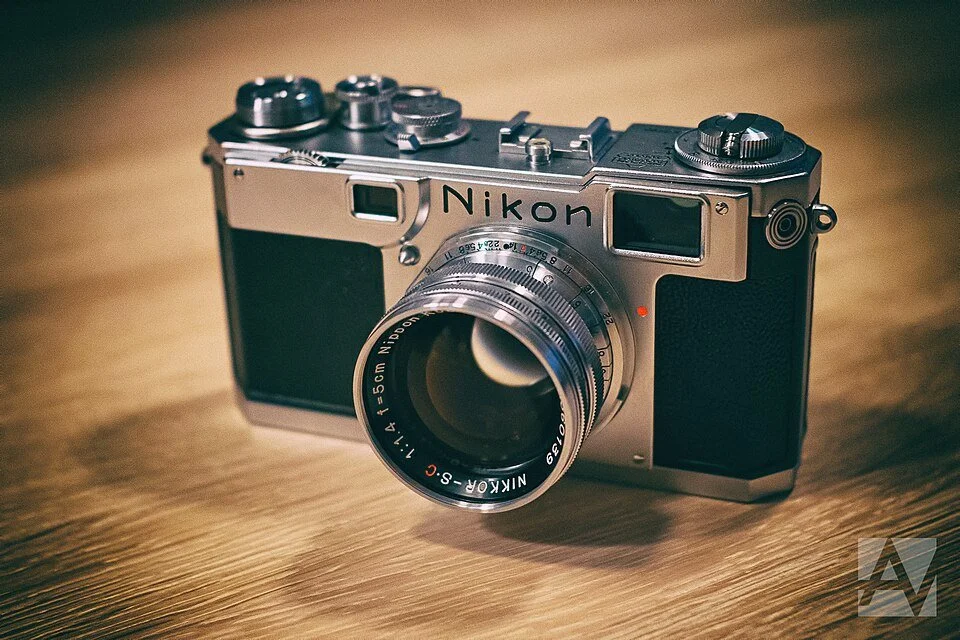
Nikon S2 with its matching 50mm F/1.4
If you look closely at a Nikon F in 2026, you can still see the rangefinder DNA of its older siblings like the Nikon SP (1957) or Nikon S3 (1958) staring back at you. The body casting, the shutter mechanics, and even the removable back are direct descendants of the Nikon SP. Nikon basically took their most reliable rangefinder, "widened" it, and integrated a mirror box in the middle.
The Camera that Changed Everything (1959)
This hybrid heritage is exactly why the F felt so familiar to professionals in 1959, yet offered a revolutionary way to see through the lens. It was the birth of a system that would dominate the next 50 years of photography.
The Birth of the F-Mount: A Design for Eternity
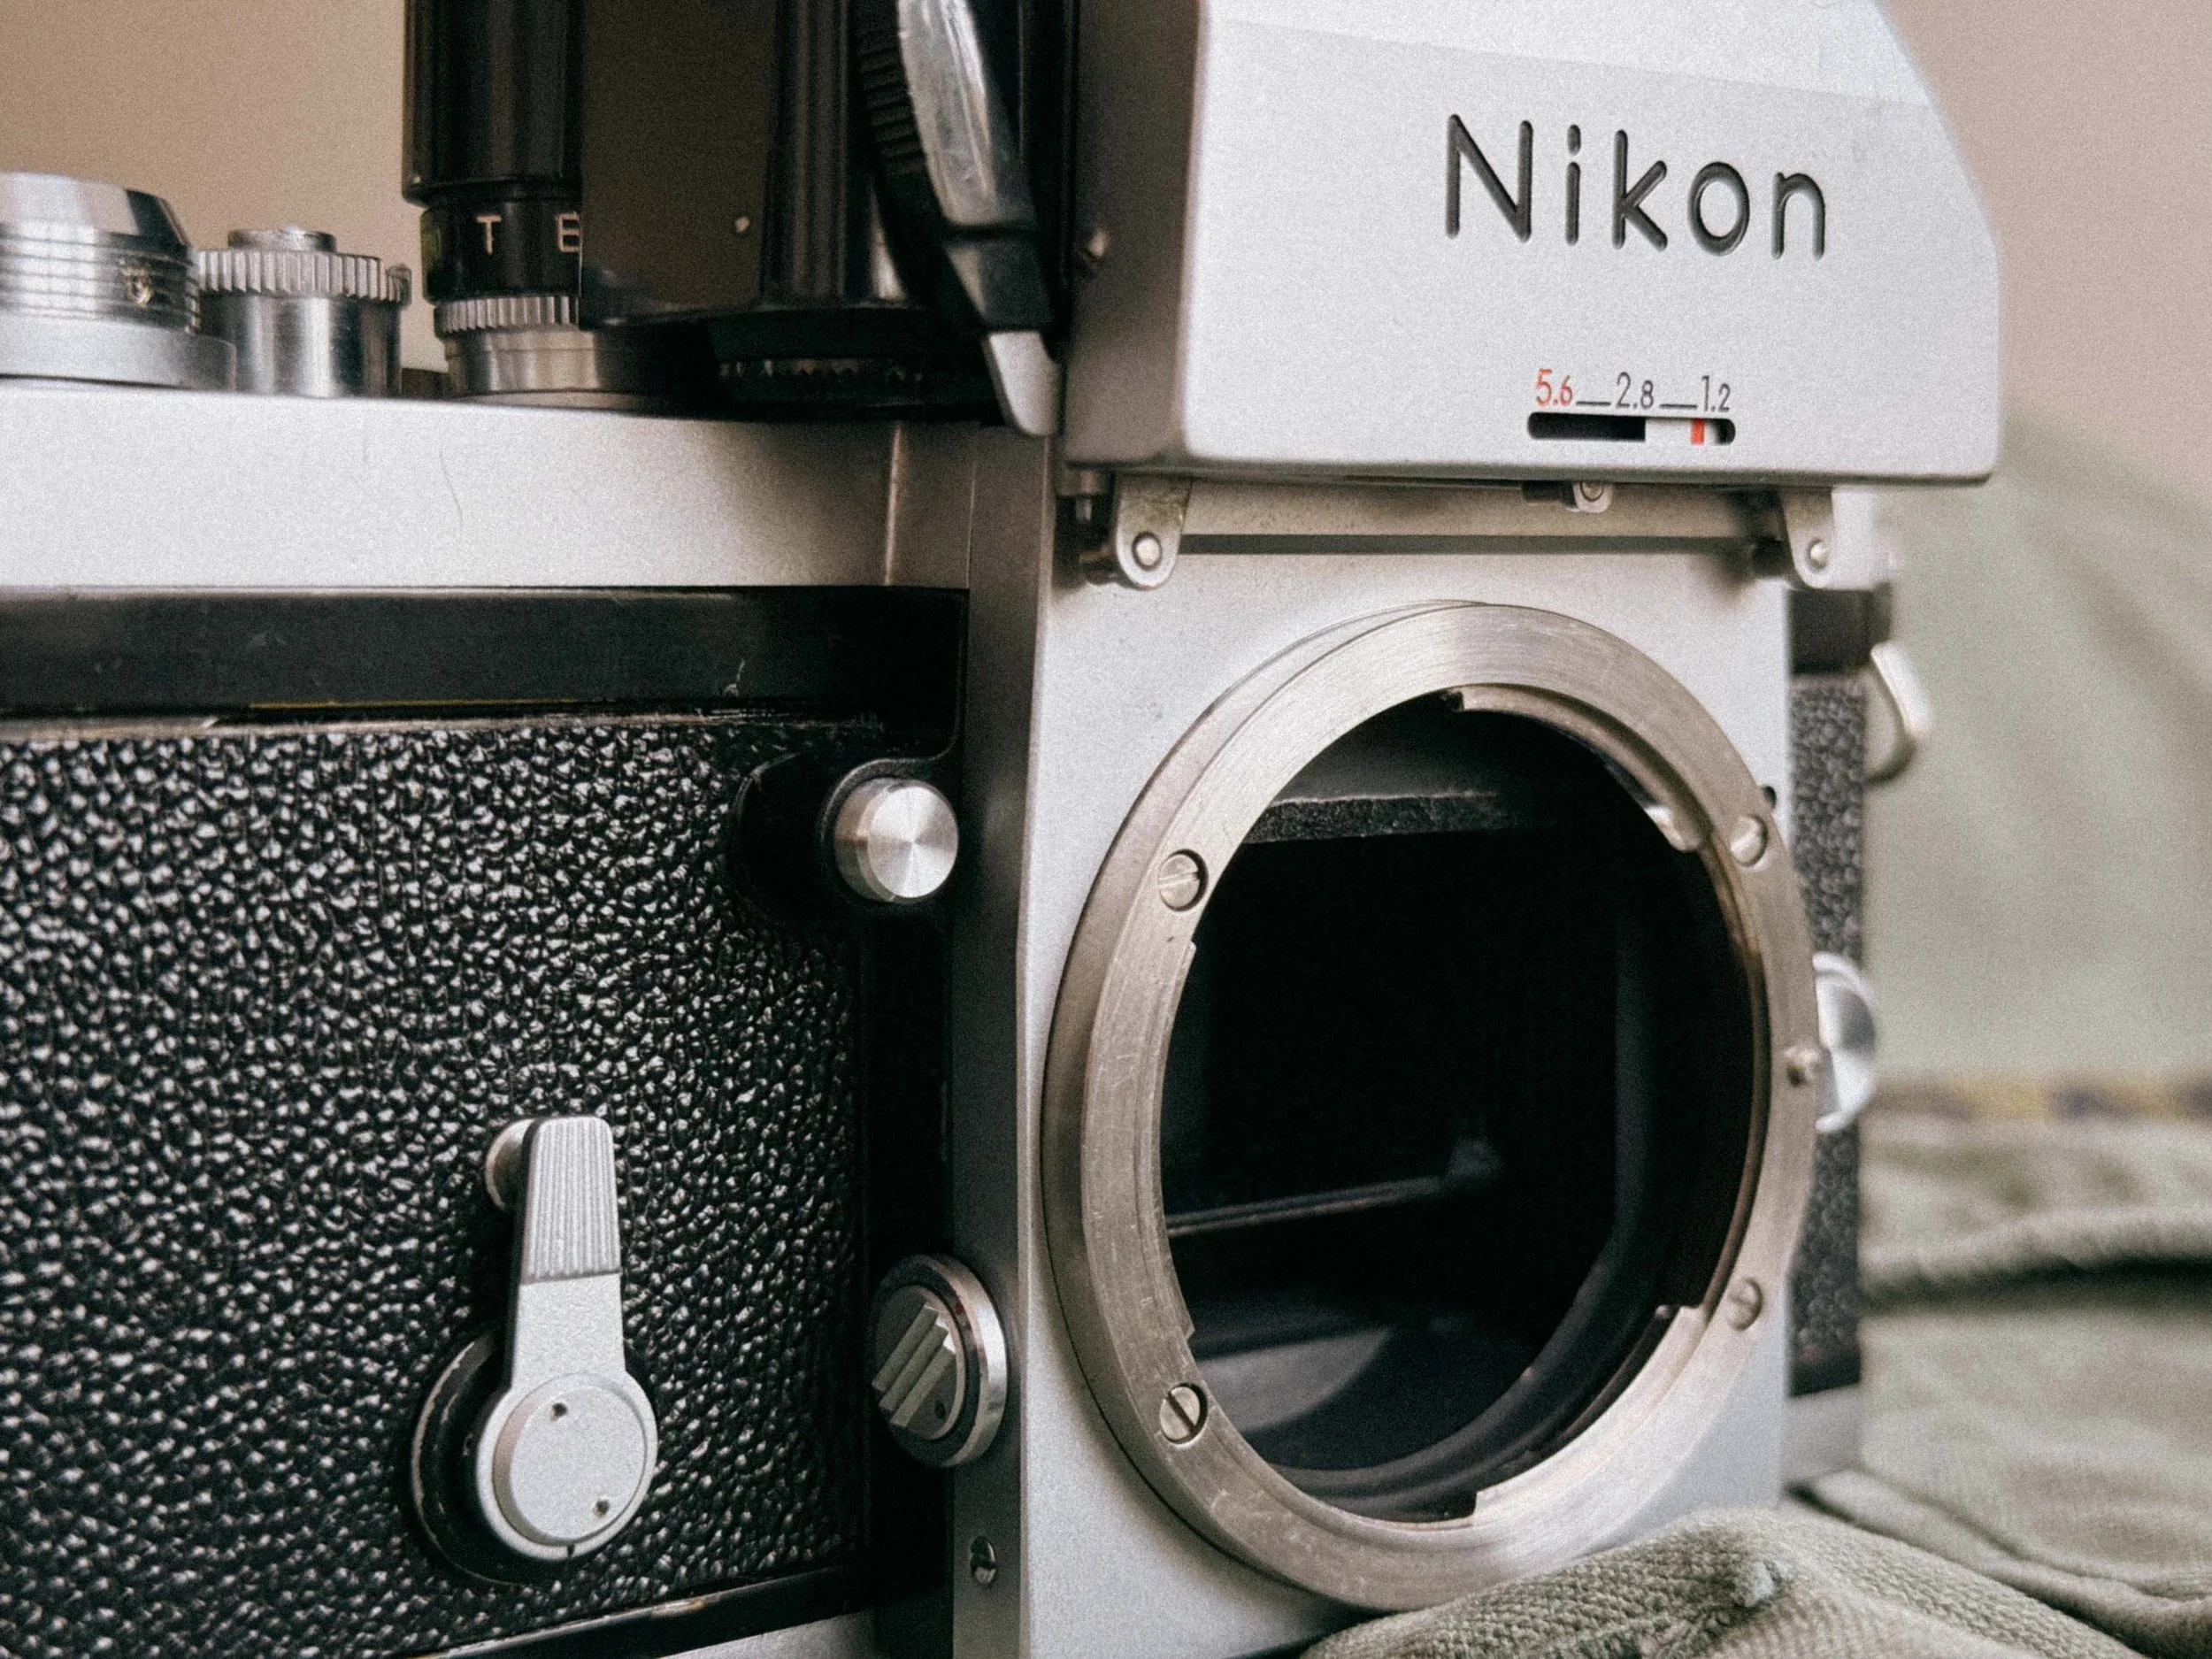
Nikon F Mount - Your Gateway to Great Lenses
When Nikon introduced the F-mount in 1959, they didn't just design a lens attachment. The mount was revolutionary for its time, featuring a large internal diameter that allowed for fast lenses (like the legendary 50mm f/1.4) and a robust three-lug bayonet system.
This decision allowed Nikon users to access a massive selection of lenses spanning over six decades. However, the true magic of the original Nikon F is its pure compatibility. Unlike modern Nikon DSLRs, the F has no "AI-indexing tab" on the camera body that could be damaged. This makes the Nikon F the ultimate native home for Non-AI (Pre-AI) lenses. Which great cause they are mostly cheaper!
Note: While these vintage "Nippon Kogaku" lenses are affordable and optically stunning, there are specific compatibility rules when mounting them on modern digital bodies or later film cameras like the F4 or F100. Let me know in the comments if you want a deep dive on navigating the Pre-AI vs. AI-S lens maze!
Forged in Combat: The Nikon F in the Vietnam War
When I think of the Nikon F, I hear "Fortunate Son" by CCR in my head while being on board a Bell UH-1 helicopter over Vietnam in the late '60s. I’ve probably seen too many war movies, but this image is not solely created by pop culture. If you look into the history books, so many important, and sometimes horrible, moments of human achievement and cruelty in modern photojournalism were captured with this exact camera.
The Nikon F became the standard-issue tool for war photography. This includes what many consider the most iconic picture of the Vietnam War: Eddie Adams’ photo of South Vietnamese General Nguyen Ngoc Loan shooting Vietcong officer Nguyen Van Lem. The Nikon F didn’t just capture death; it also prevented it. Don McCullin’s life was saved when an AK-47 bullet was deflected by his combat-proven Nikon F. It’s a testament to its legendary durability.
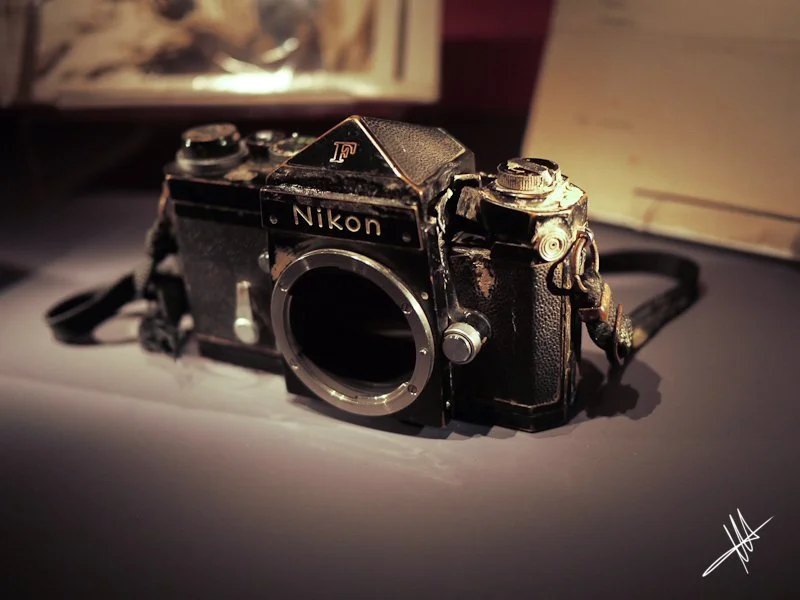
But it was also the camera of the jet set: the Beatles, Mick Jagger, and Marilyn Monroe. This camera has seen it all. From the dirt of the jungle to the glamour of the stage alike and space itself.
Nikon F Technical Specifications
To understand why this camera was a revolution, you have to look at the specs. In 1959, these specs weren't just "good"—they were the standard that every other manufacturer tried to chase for the next decade.
| Feature | Specification |
|---|---|
| Camera Type | 35mm Single Lens Reflex (SLR) |
| Introduction Year | 1959 (Produced until 1973/74) |
| Lens Mount | Original Nikon F-Mount (Non-AI / Pre-AI native) |
| Shutter Type | Horizontal-travel, focal-plane shutter |
| Shutter Material | Legendary Titanium Foil (Early models had cloth) |
| Shutter Speeds | 1 second to 1/1000 sec, plus Bulb (B) and Time (T) |
| Viewfinder Coverage | 100% accurate (What you see is what you get) |
| Interchangeable Finders | Standard Prism, Photomic (T, Tn, FTN), Waist Level, Action Finder |
| Focusing Screens | 17 interchangeable types (Type A, J, K, etc.) |
| Flash Synchronization | X-sync at 1/60 sec (via PC sync or cold shoe adapter) |
| Film Advance | Single-stroke lever (can be used with F-36 motor drive) |
| Mirror Lock-Up | Yes (Manual, requires firing one blank frame to engage) |
| Self-Timer | Variable delay (approx. 3 to 10 seconds) |
| Depth of Field Preview | Yes (Dedicated button next to the lens mount) |
| Film Loading | Removable back (The "Hockey Puck" style) |
| Dimensions (Body only) | Approx. 147 x 98 x 56 mm |
| Weight (Body only) | Approx. 685g (approx. 1kg with FTN Finder and 50mm lens) |
Why these specs still matter in 2026
- The 100% Viewfinder: Even many modern DSLRs and mirrorless cameras don't offer a true 100% view. With the Nikon F, there are no surprises at the edges of your frame.
- Titanium Shutter: Unlike cloth shutters, the titanium foil is nearly indestructible and won't develop pinholes if you accidentally leave the camera pointing at the sun without a lens cap.
- Mirror Lock-Up (MLU): This was a world-first for a mass-produced SLR. It allows for vibration-free long exposures and is required for some early ultra-wide lenses that protrude deep into the body.
Build Quality & Mechanics: The "Hockey Puck" Philosophy
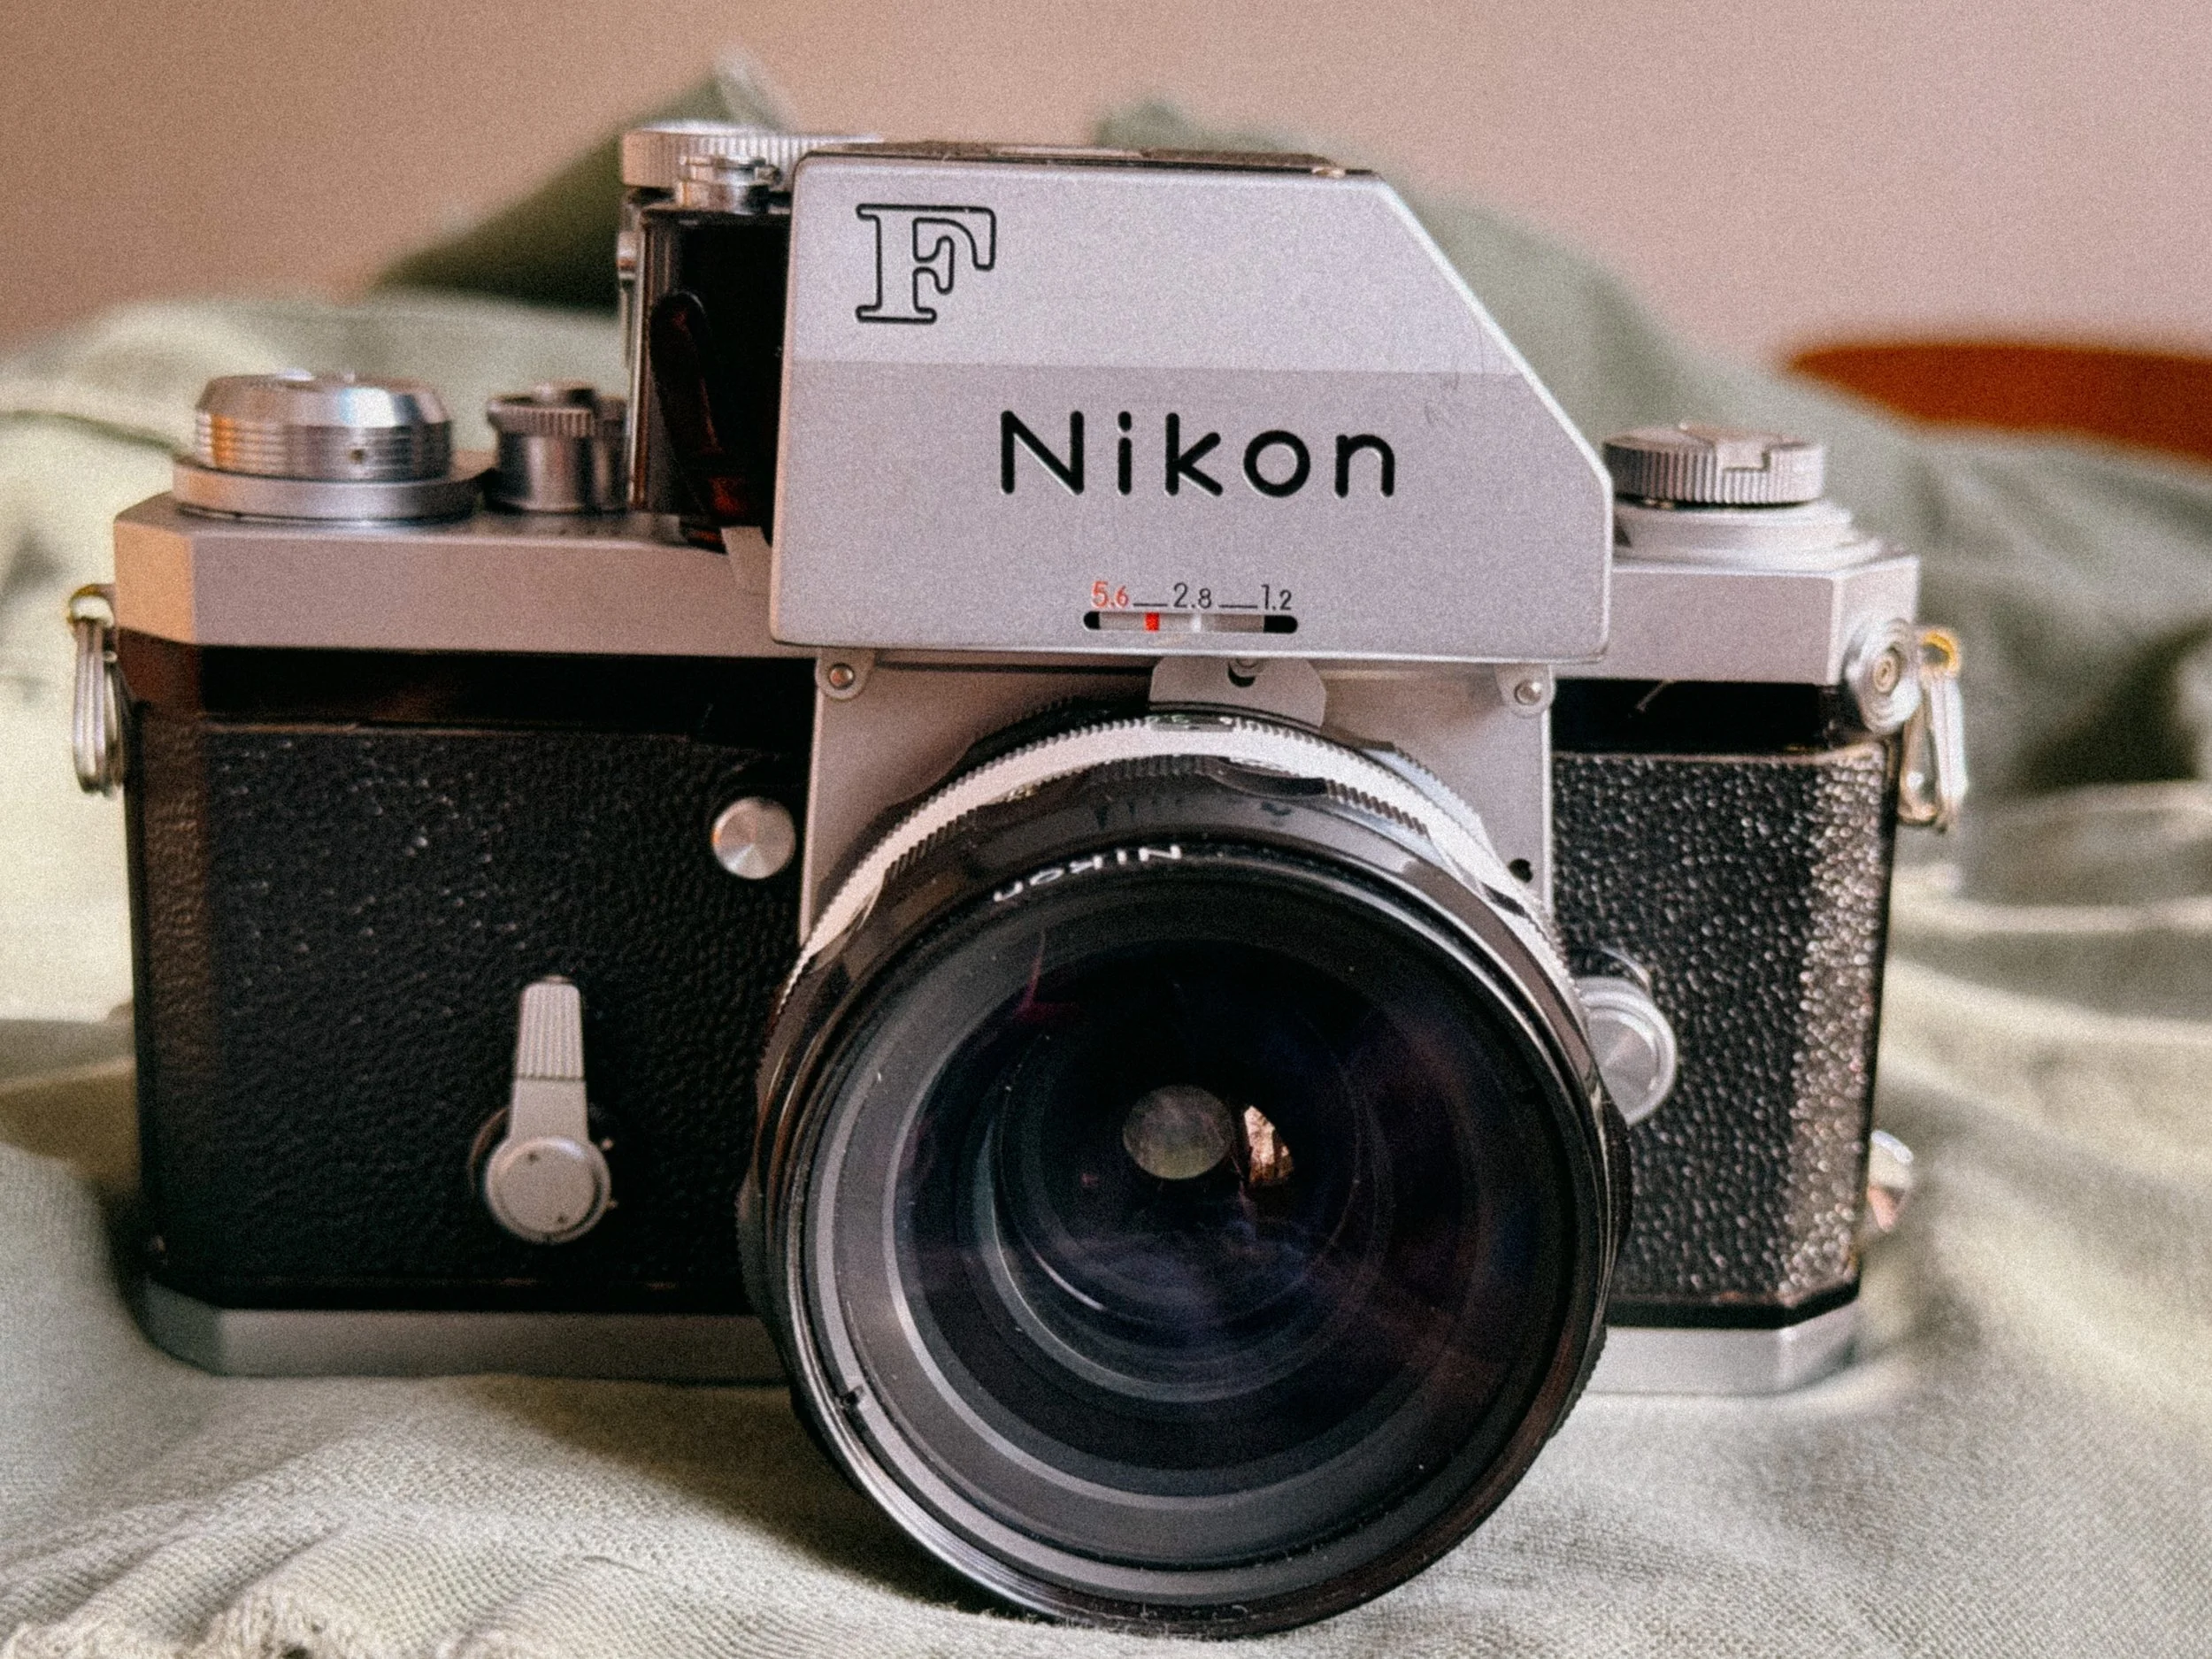
It’s sturdy!
If you pick up a Nikon F for the first time, you instantly understand why photographers affectionately nicknamed it the "Hockey Puck." There is absolutely no plastic here. Designed during the golden era of Nippon Kogaku, the camera feels like it was milled from a single, solid block of brass. Weighing in at nearly a kilogram with a lens and the Photomic finder attached, this fully mechanical SLR doesn't just feel like a tool for photography; it’s so sturdy you can drive nails with it or use it for self-defense.
The Titanium Focal Plane Shutter

The Nikons Titanium Shutter
The heart of its bulletproof reputation is its shutter. While most cameras of the late 1950s and 60s, Leicas, relied on rubberized cloth curtains, Nikon took a massive leap and installed a titanium focal plane shutter. Why does this matter today? Because cloth shutters can easily burn pinholes if you accidentally leave your lens pointing at the sun without a cap. The titanium foil of the Nikon F just shrugs that off, ensuring long-term mechanical reliability. Originally tested for an unprecedented 100,000 actuations, this shutter provides a loud, satisfying metallic "clack" when fired. It’s a great sound with unparalleled tactile feedback that other mirrorless cameras simply cannot replicate.
Viewfinders Explained: Eye-Level Prism vs. Photomic
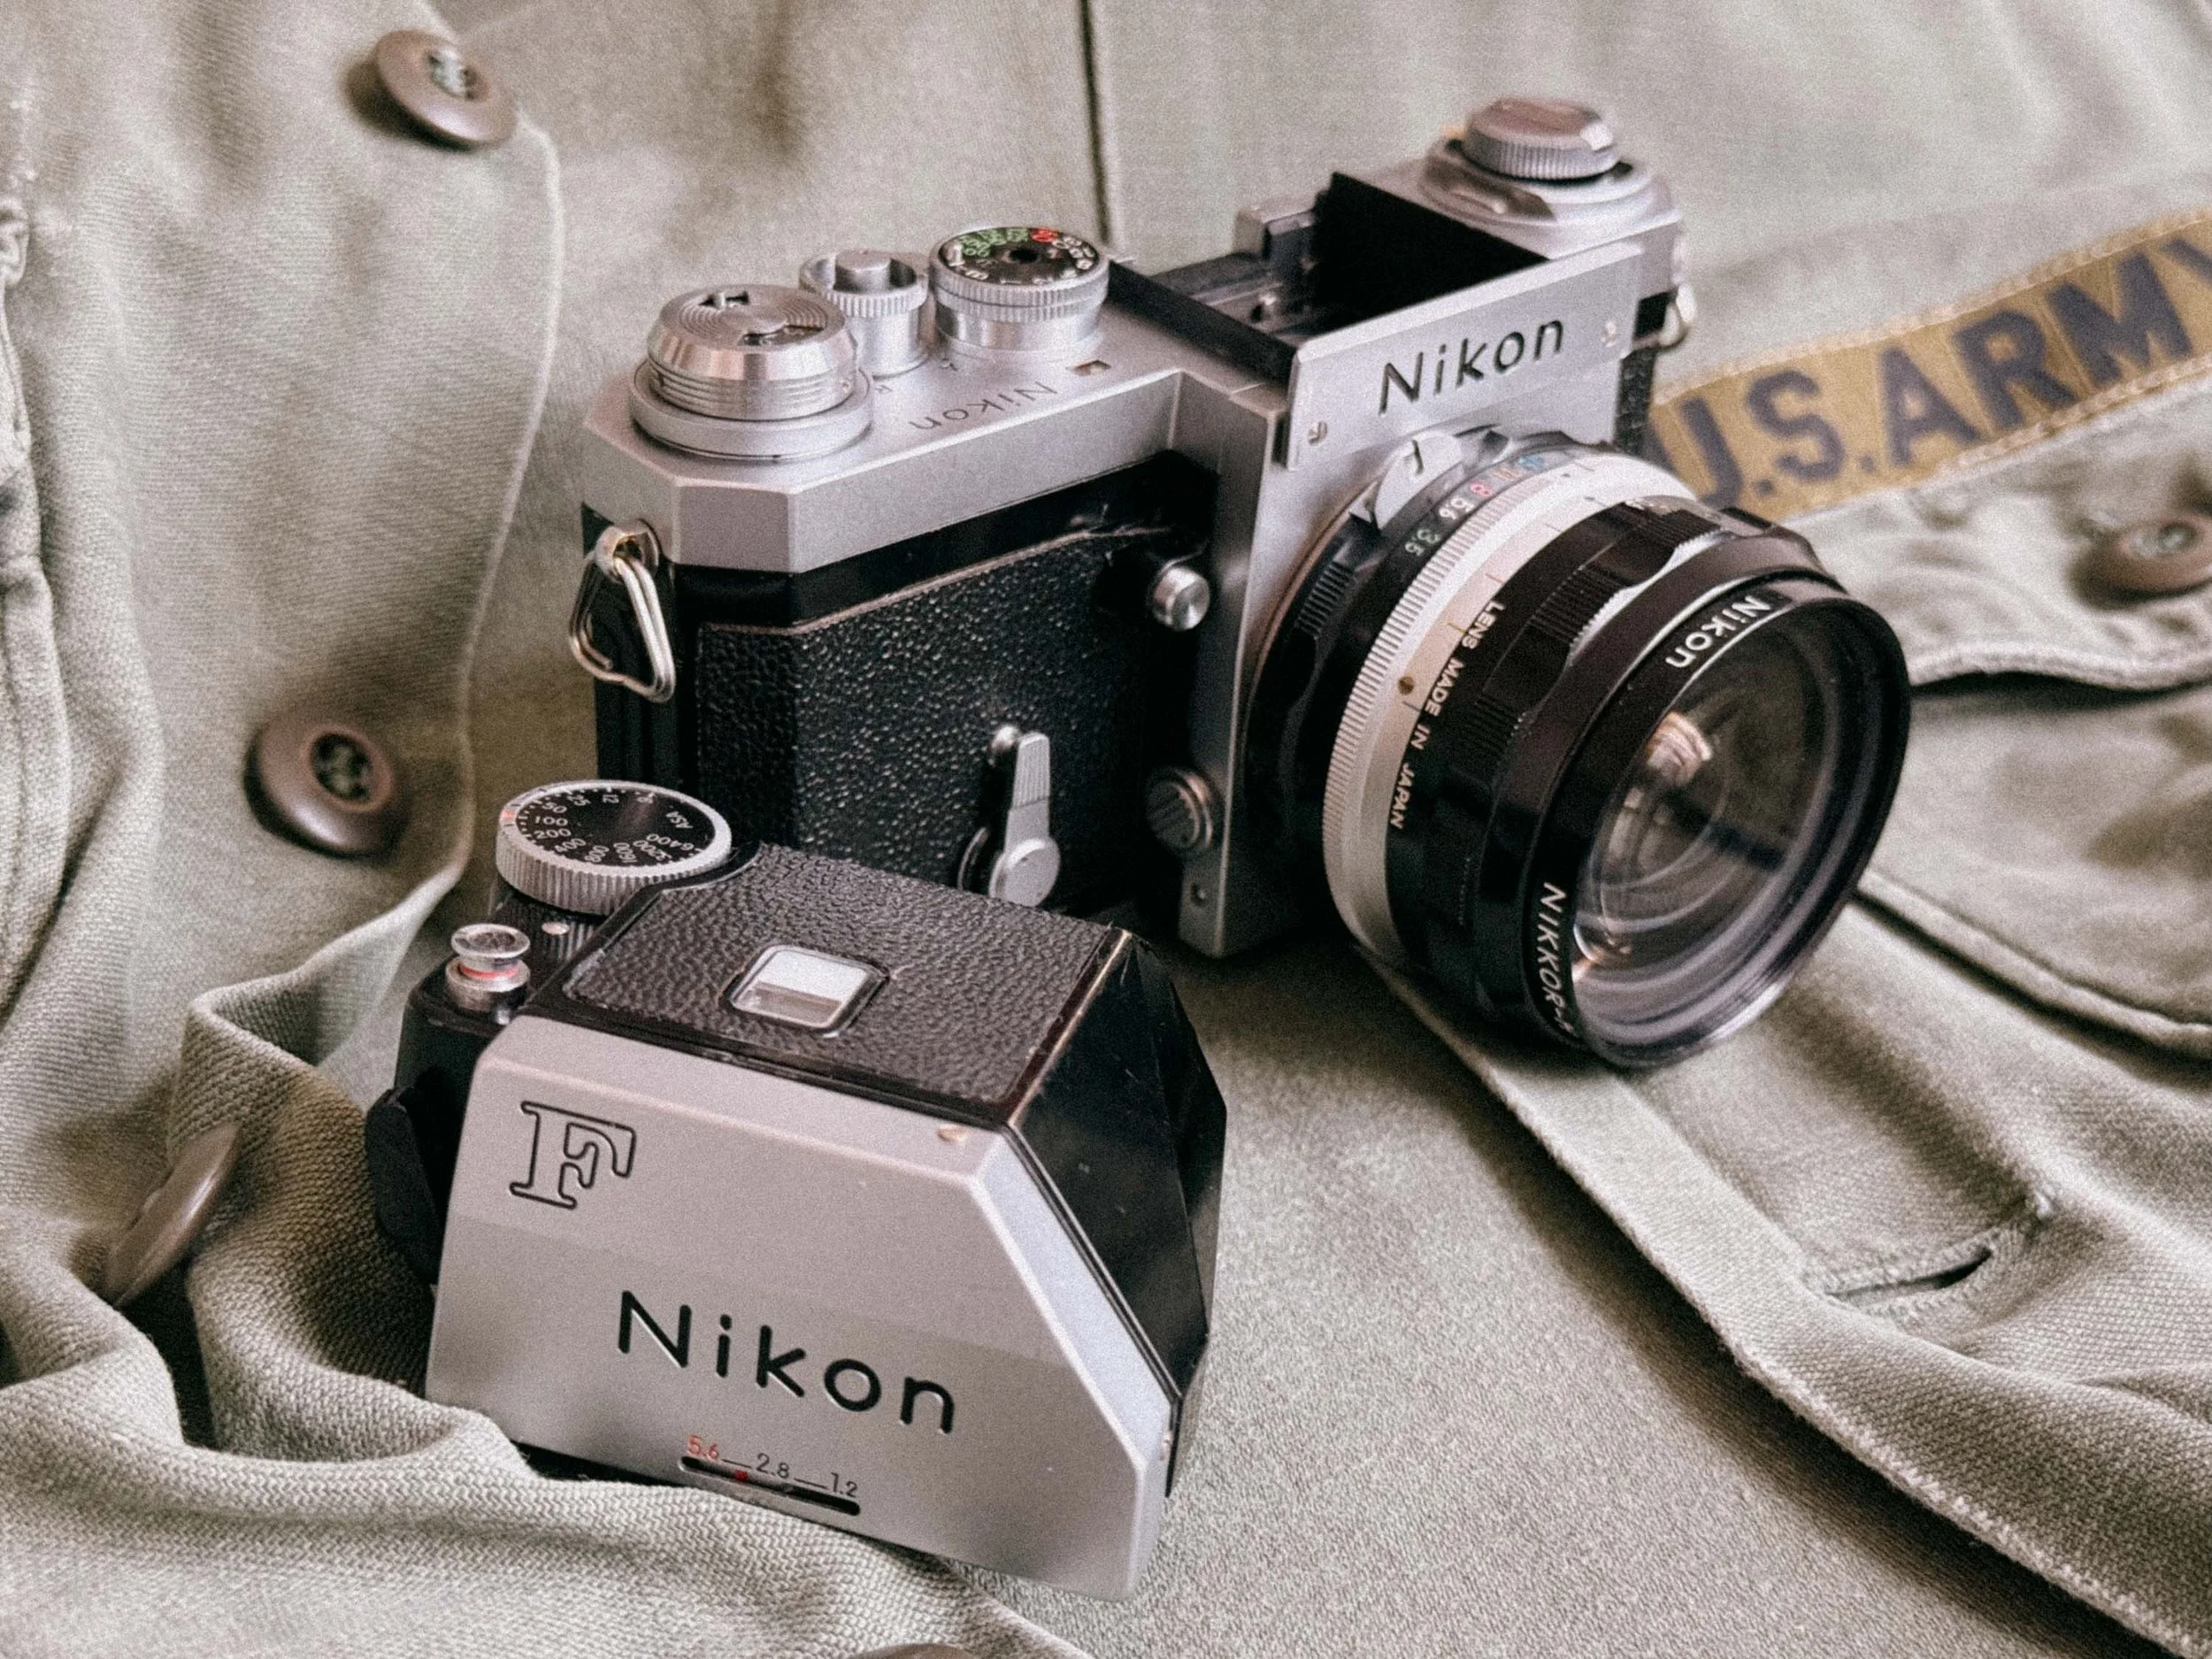
The Photomic FTN next to the Nikon F Body
One thing that sets the Nikon F apart is that it is a true system camera, designed to use different finders and accessories. At its release in 1959, the Nikon F originally shipped with a simple, beautiful non-metered prism (Ironically those are now the most “sought after” finders). So yes, the body of the camera itself does not have a light meter built in.
The very first meters were actually clip-on selenium meters that attached over the shutter speed dial and the standard prism. There were three different versions of these available before Nikon took the next big step.
In 1962, the first metered finder, the original Photomic, was introduced. This cemented Nikon's philosophy of non-obsolescence: instead of buying a whole new camera to get new technology, you could simply swap out the finders. These finders "communicate" with the camera body by sitting on top of the shutter speed dial, while a mechanical arm connects to the typical "rabbit ears" (the metal prong) on the Nikkor lenses to “read” the aperture.
The Photomic Evolution

A peek through the FNT Viewfinder
The original Photomic (1962) did not feature through-the-lens (TTL) metering. Instead, it had its own built-in "eye" metering lens on the front. You could even screw in telephoto attachments (to compensate for longer focal lengths) or an incident light attachment. There were three different variations of this early model, including the famous "flag" version. The meter settings were read externally through a little window on top of the finder.
The second iteration, the Photomic T (1965), got rid of the extra external metering lens of its predecessor and finally introduced true TTL (Through-The-Lens) metering. It was a much more reliable averaging meter that read the light actually hitting the mirror.
In 1967, Nikon introduced the Photomic TN finder. Here, they shifted from an average reading to center-weighted metering (concentrating 60% of the sensitivity in the center of the frame), which became a Nikon standard for decades.
The final iteration, introduced in 1968, is the legendary Photomic FTN. This is arguably the best and most advanced version of them all. Not only did it keep the excellent center-weighted metering, but the shutter speed was now visible directly inside the viewfinder. It also introduced semi-automatic aperture indexing, meaning you just had to mount the lens and twist the aperture ring back and forth once (the famous "Nikon shuffle") to sync the meter, rather than adjusting it manually.
Beyond the standard eye-level and Photomic prisms, the Nikon F offered a range of specialized viewing options. The Action Finder allowed photographers to see the full frame while wearing goggles or diving masks. Then there is the Waist Level Finder, which lets you look down into the camera from above for a more "Rolleiflex-style" experience.
Specialist Finders, battery and de-silvering problems
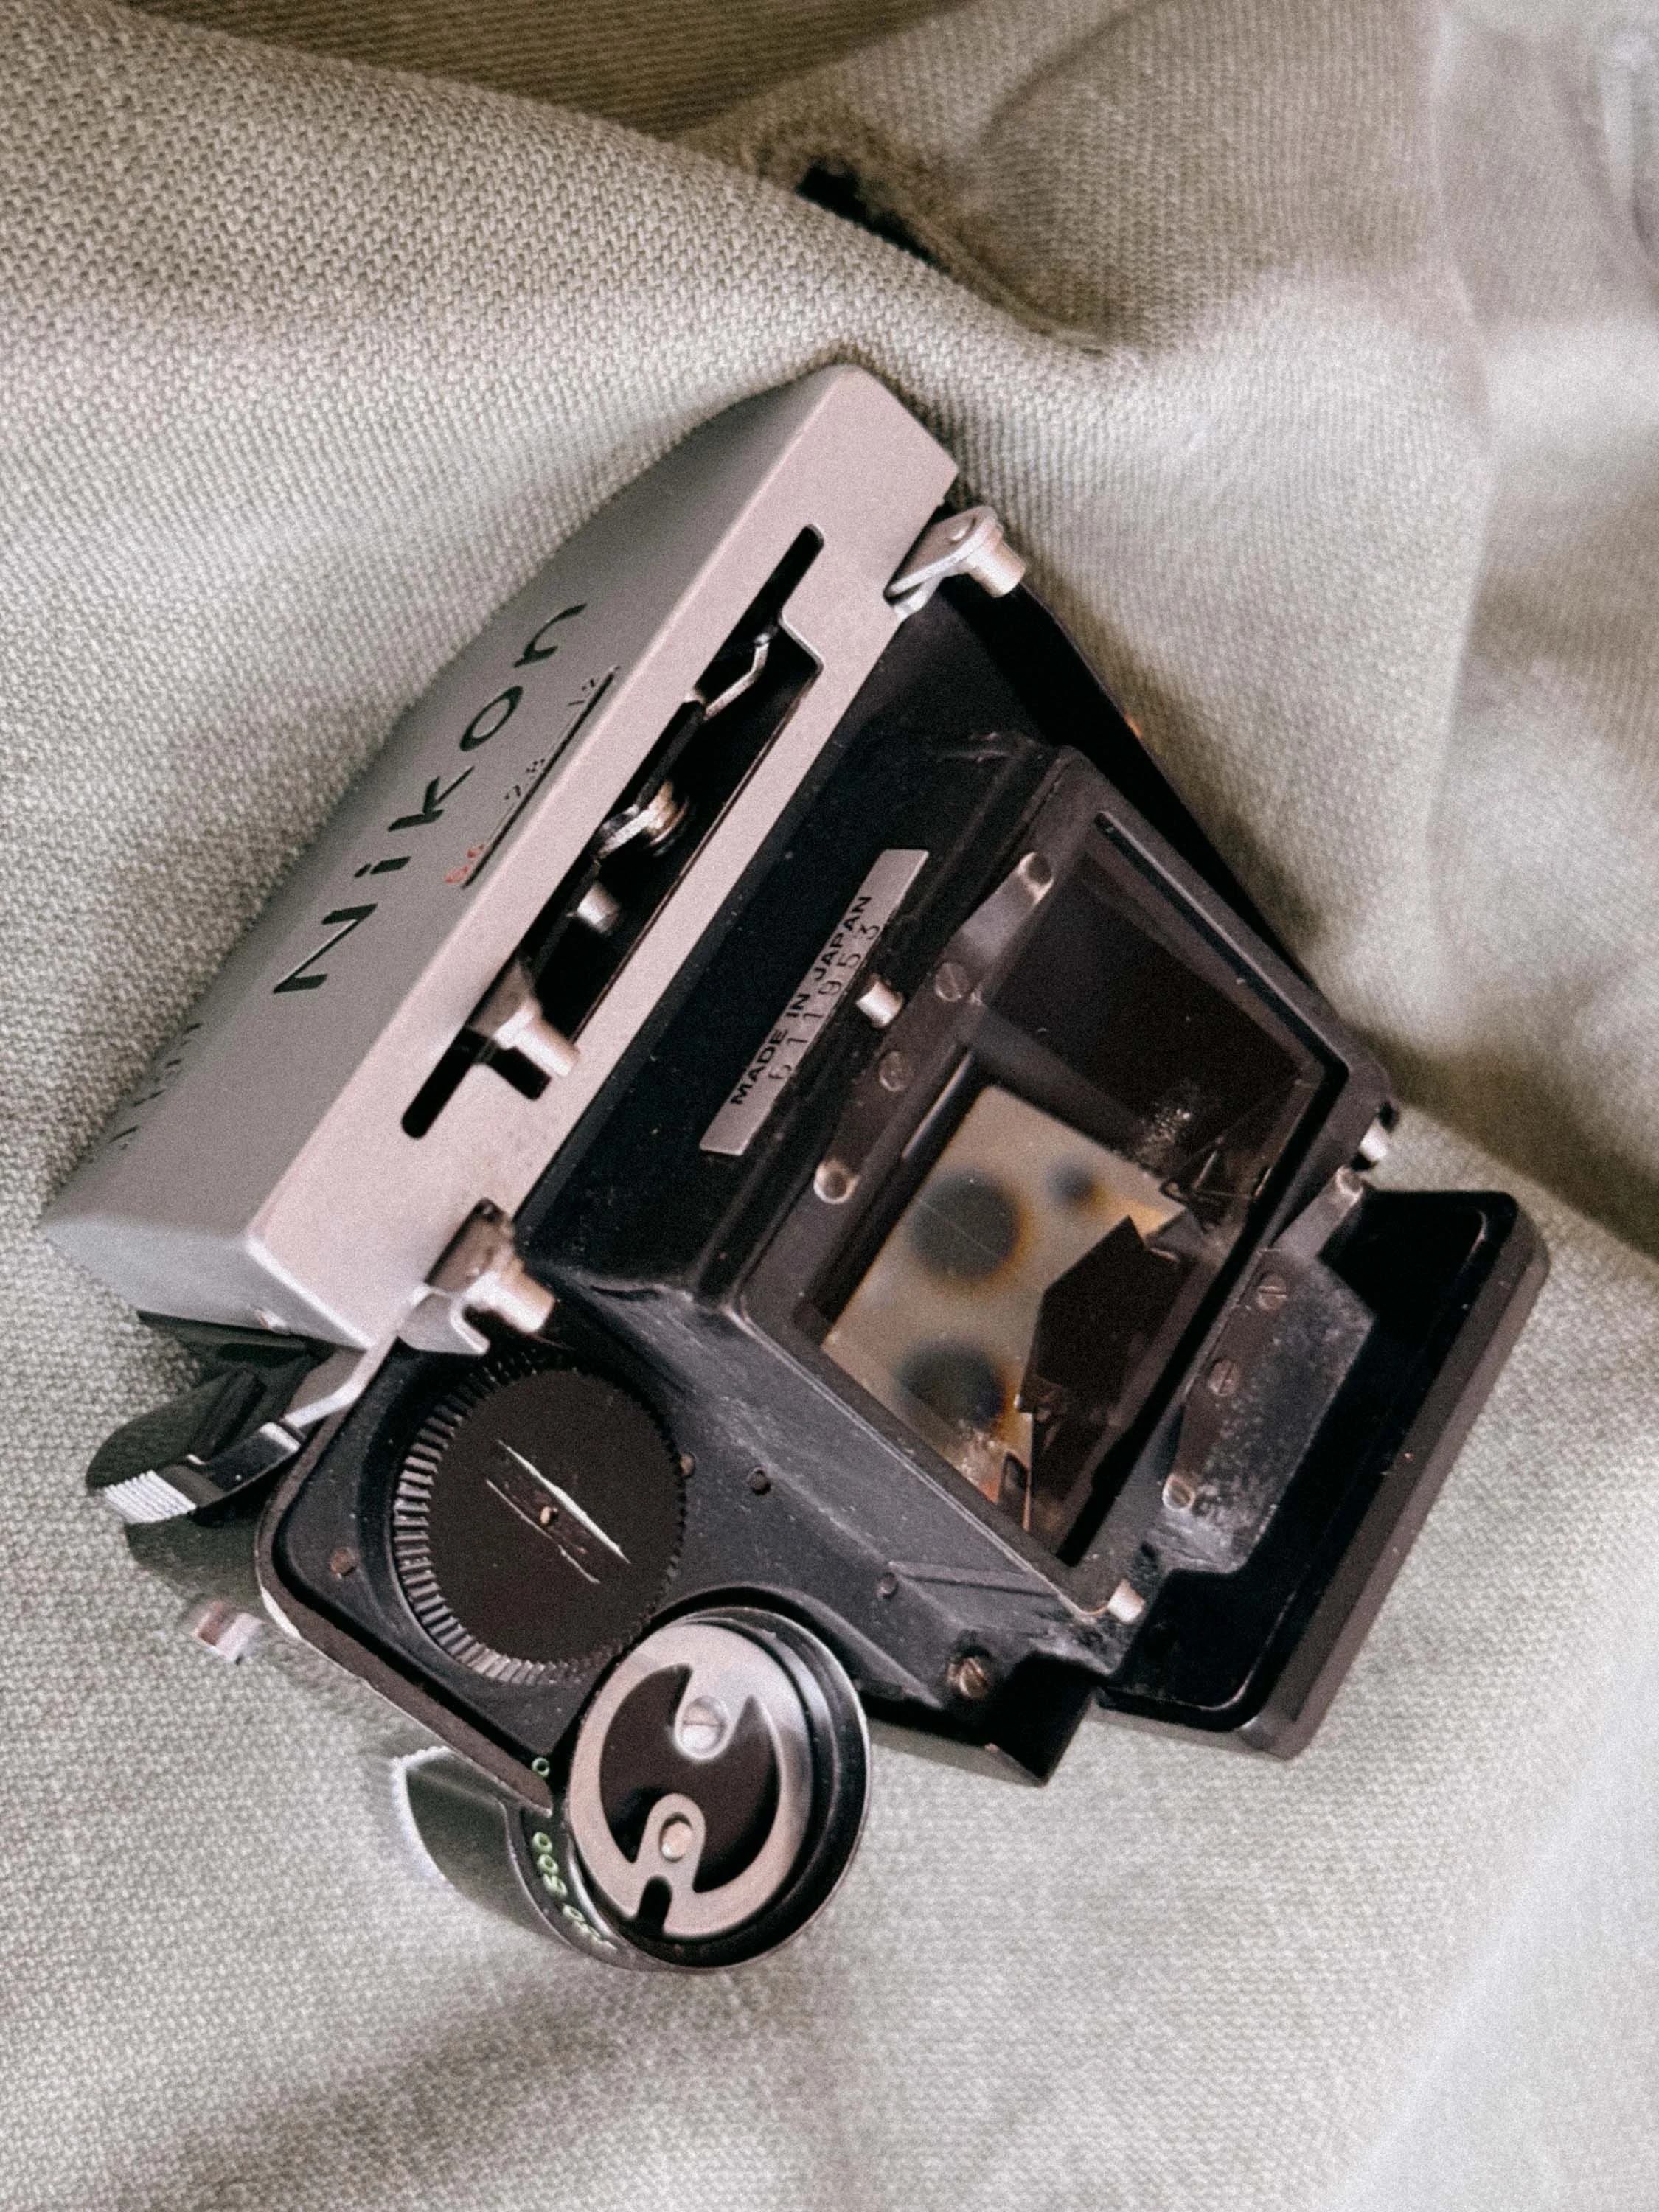
The rotten foam has already had its share of this prism
However, choosing a metered finder today comes with a hurdle: the power source. All Photomic finders were designed to run on PX625 1.35V Mercury batteries. While modern 1.5V alkaline versions exist, they provide the wrong voltage, leading to inaccurate light meter readings.
Many of these 60-year-old meters have simply died over the decades. They often suffer from prism desilvering, where the internal coatings deteriorate, leaving dark spots or lines in your view.
More on that when we talk about maintenance later.
The Secret Weapon: Interchangeable Focusing Screens
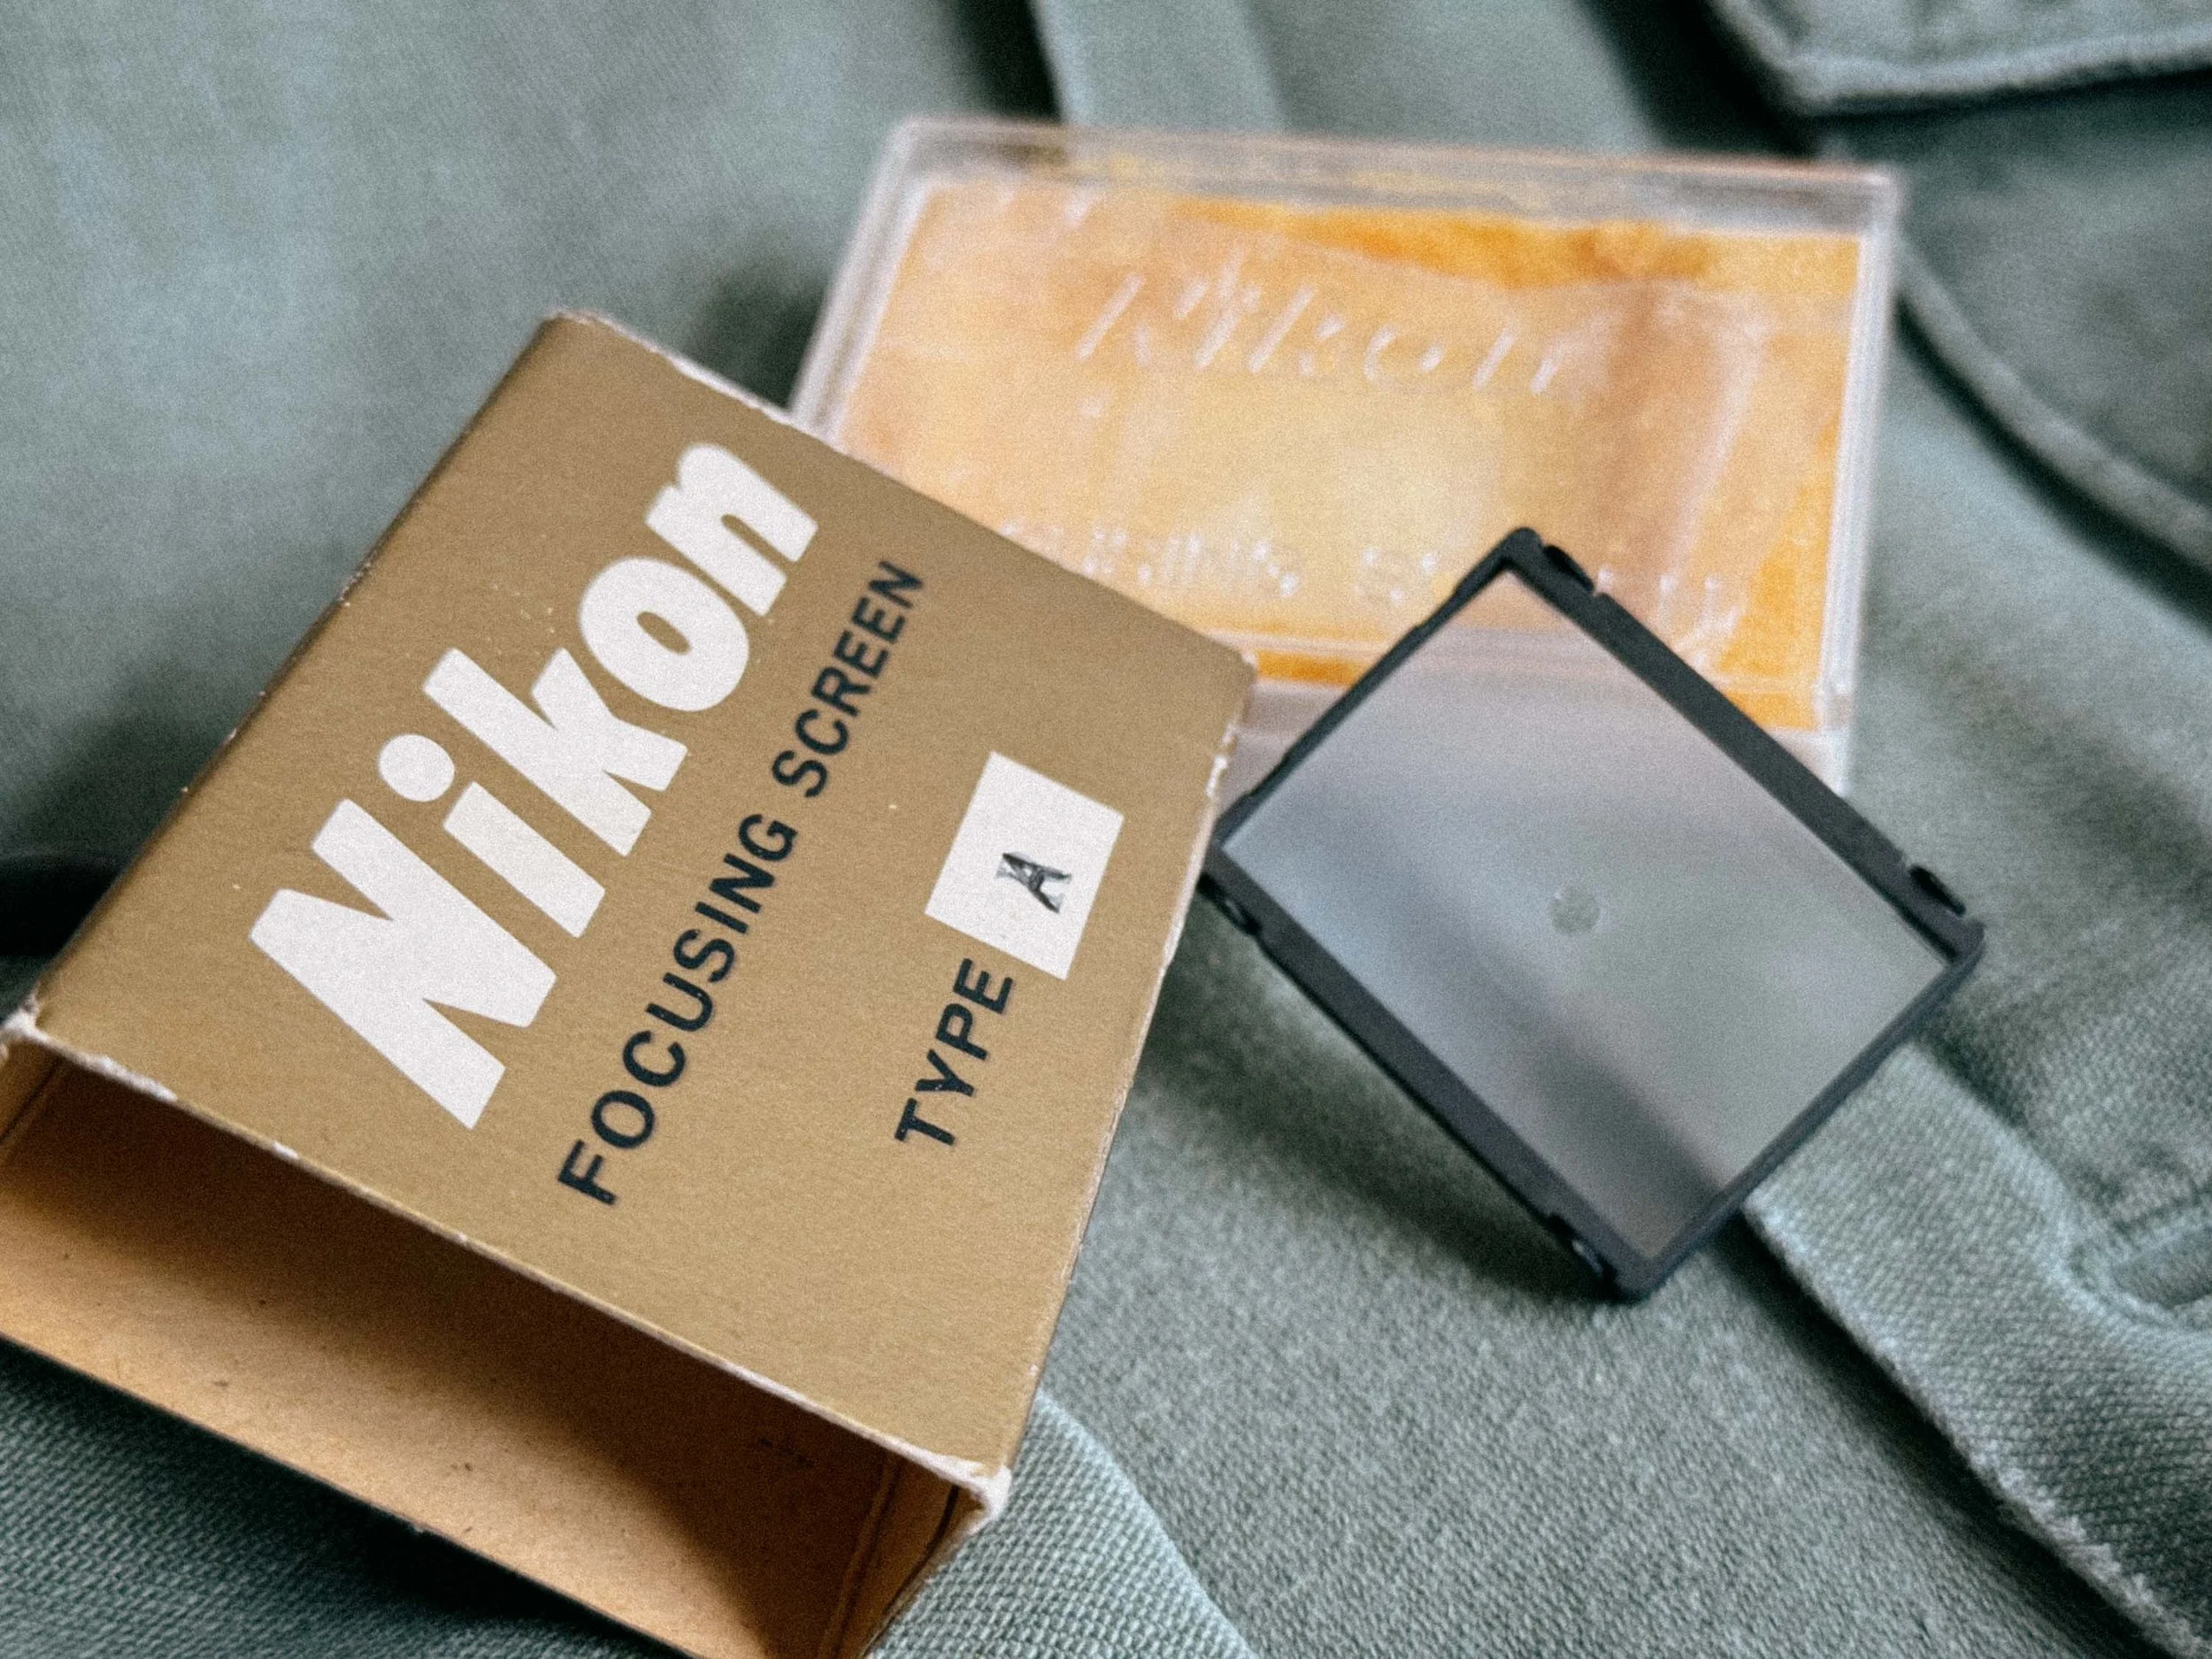
Focusing Screen Type A
While other cameras require a trip to a technician to change a screen, the Nikon F was designed as a modular system. There are 18 (later up to 22) different types of screens available. Look at this excerpt from the original instruction manual. As the document illustrates, Nikon didn't just offer one or two generic alternatives; they engineered highly specific tools for every photographic discipline.
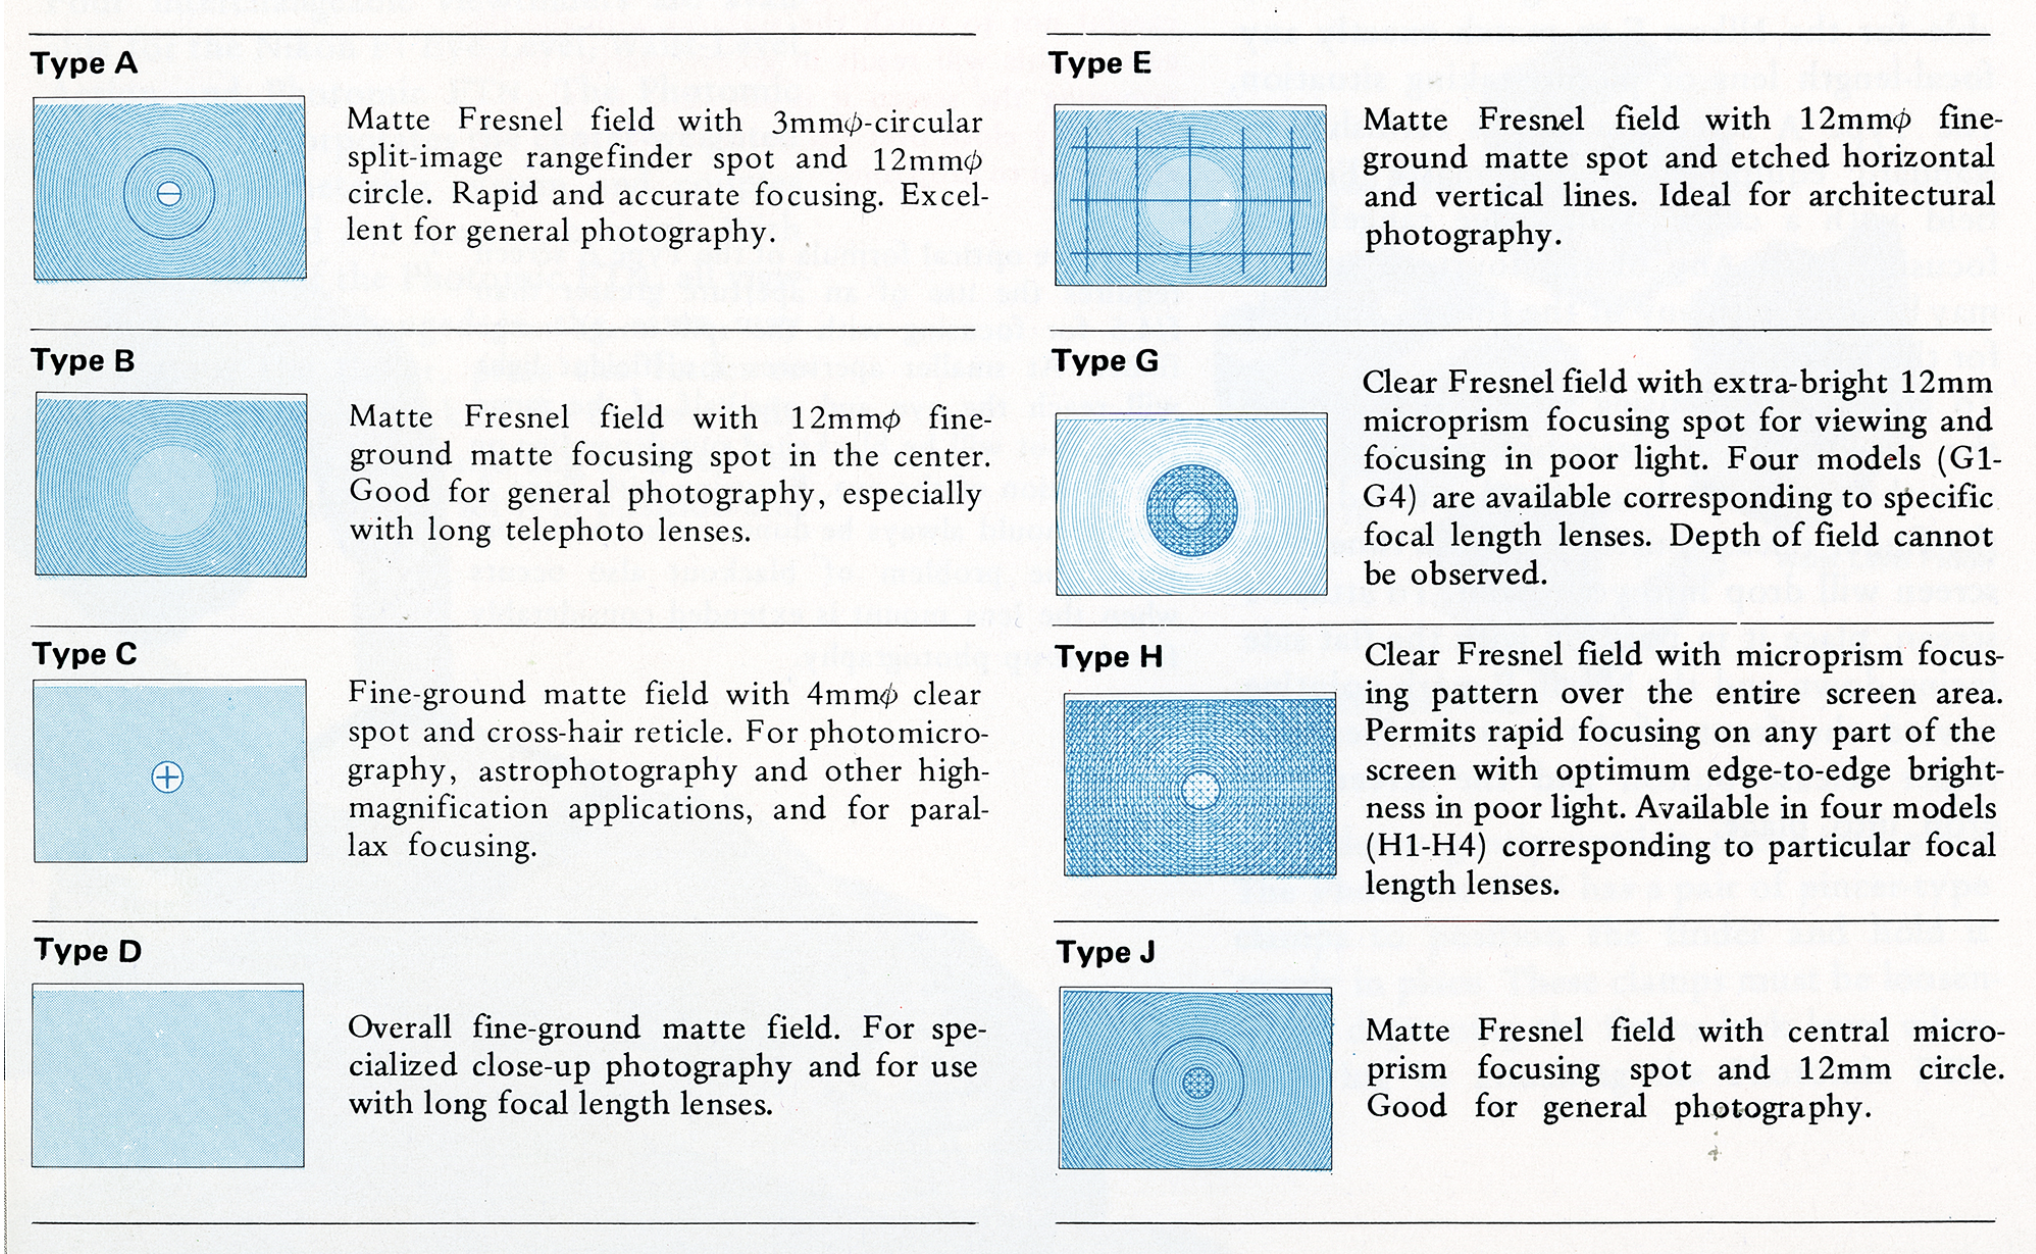
The 8 screens available at introduction, many more were added later.
Image source: Excerpt from the original Nikon F Instruction Manual (Copyright: Nikon Corporation). Screenshot retrieved from: https://old-cameras.com/2024/04/nikon-f-instruction-manual/4/Standard (Type A ): Most bodies come with Type A (horizontal split-image) or the more modern Type K (split-image plus a microprism ring). These are excellent for 95% of general photography.
Architecture (Type E): As you can see it’s a plain matte screen but with an etched grid. It’s perfect for architectural shots, keeping horizons perfectly level in street photography, and the "Rule of Thirds."
Portrait (Type P) not shown above: Known as the "Apollo" screen, it features a 45° diagonal split-image. This is genius for portraits because you can focus on vertical and horizontal lines (like eyelashes or glasses) without needing to tilt the camera.
Low Light & Telephoto (Type B): If you use "slower" lenses like the 28mm f/3.5 in low light, a split-image can often "black out" on one side. The Type B (plain matte) is much brighter and easier to use in dim conditions or with long telephoto lenses.
Buying Tip: When browsing eBay or local shops, check which screen is installed. A scratched Focusing Screen isn't a dealbreaker. Swapping them is effortless: Remove the viewfinder, press the release button, flip the camera over, and the screen drops right out.
The Heart of the System: F-Mount & The Magic of Pre-AI Lenses
The Nikon F has one massive mechanical benefit: it lacks the fixed auto-indexing (AI) tab found on almost all later bodies. Even on the later Nikon F2, specifically the F2A and F2AS models, you have to be extremely careful because their AI-indexing tabs can be damaged by older glass. But the original Nikon F? It simply doesn't care.
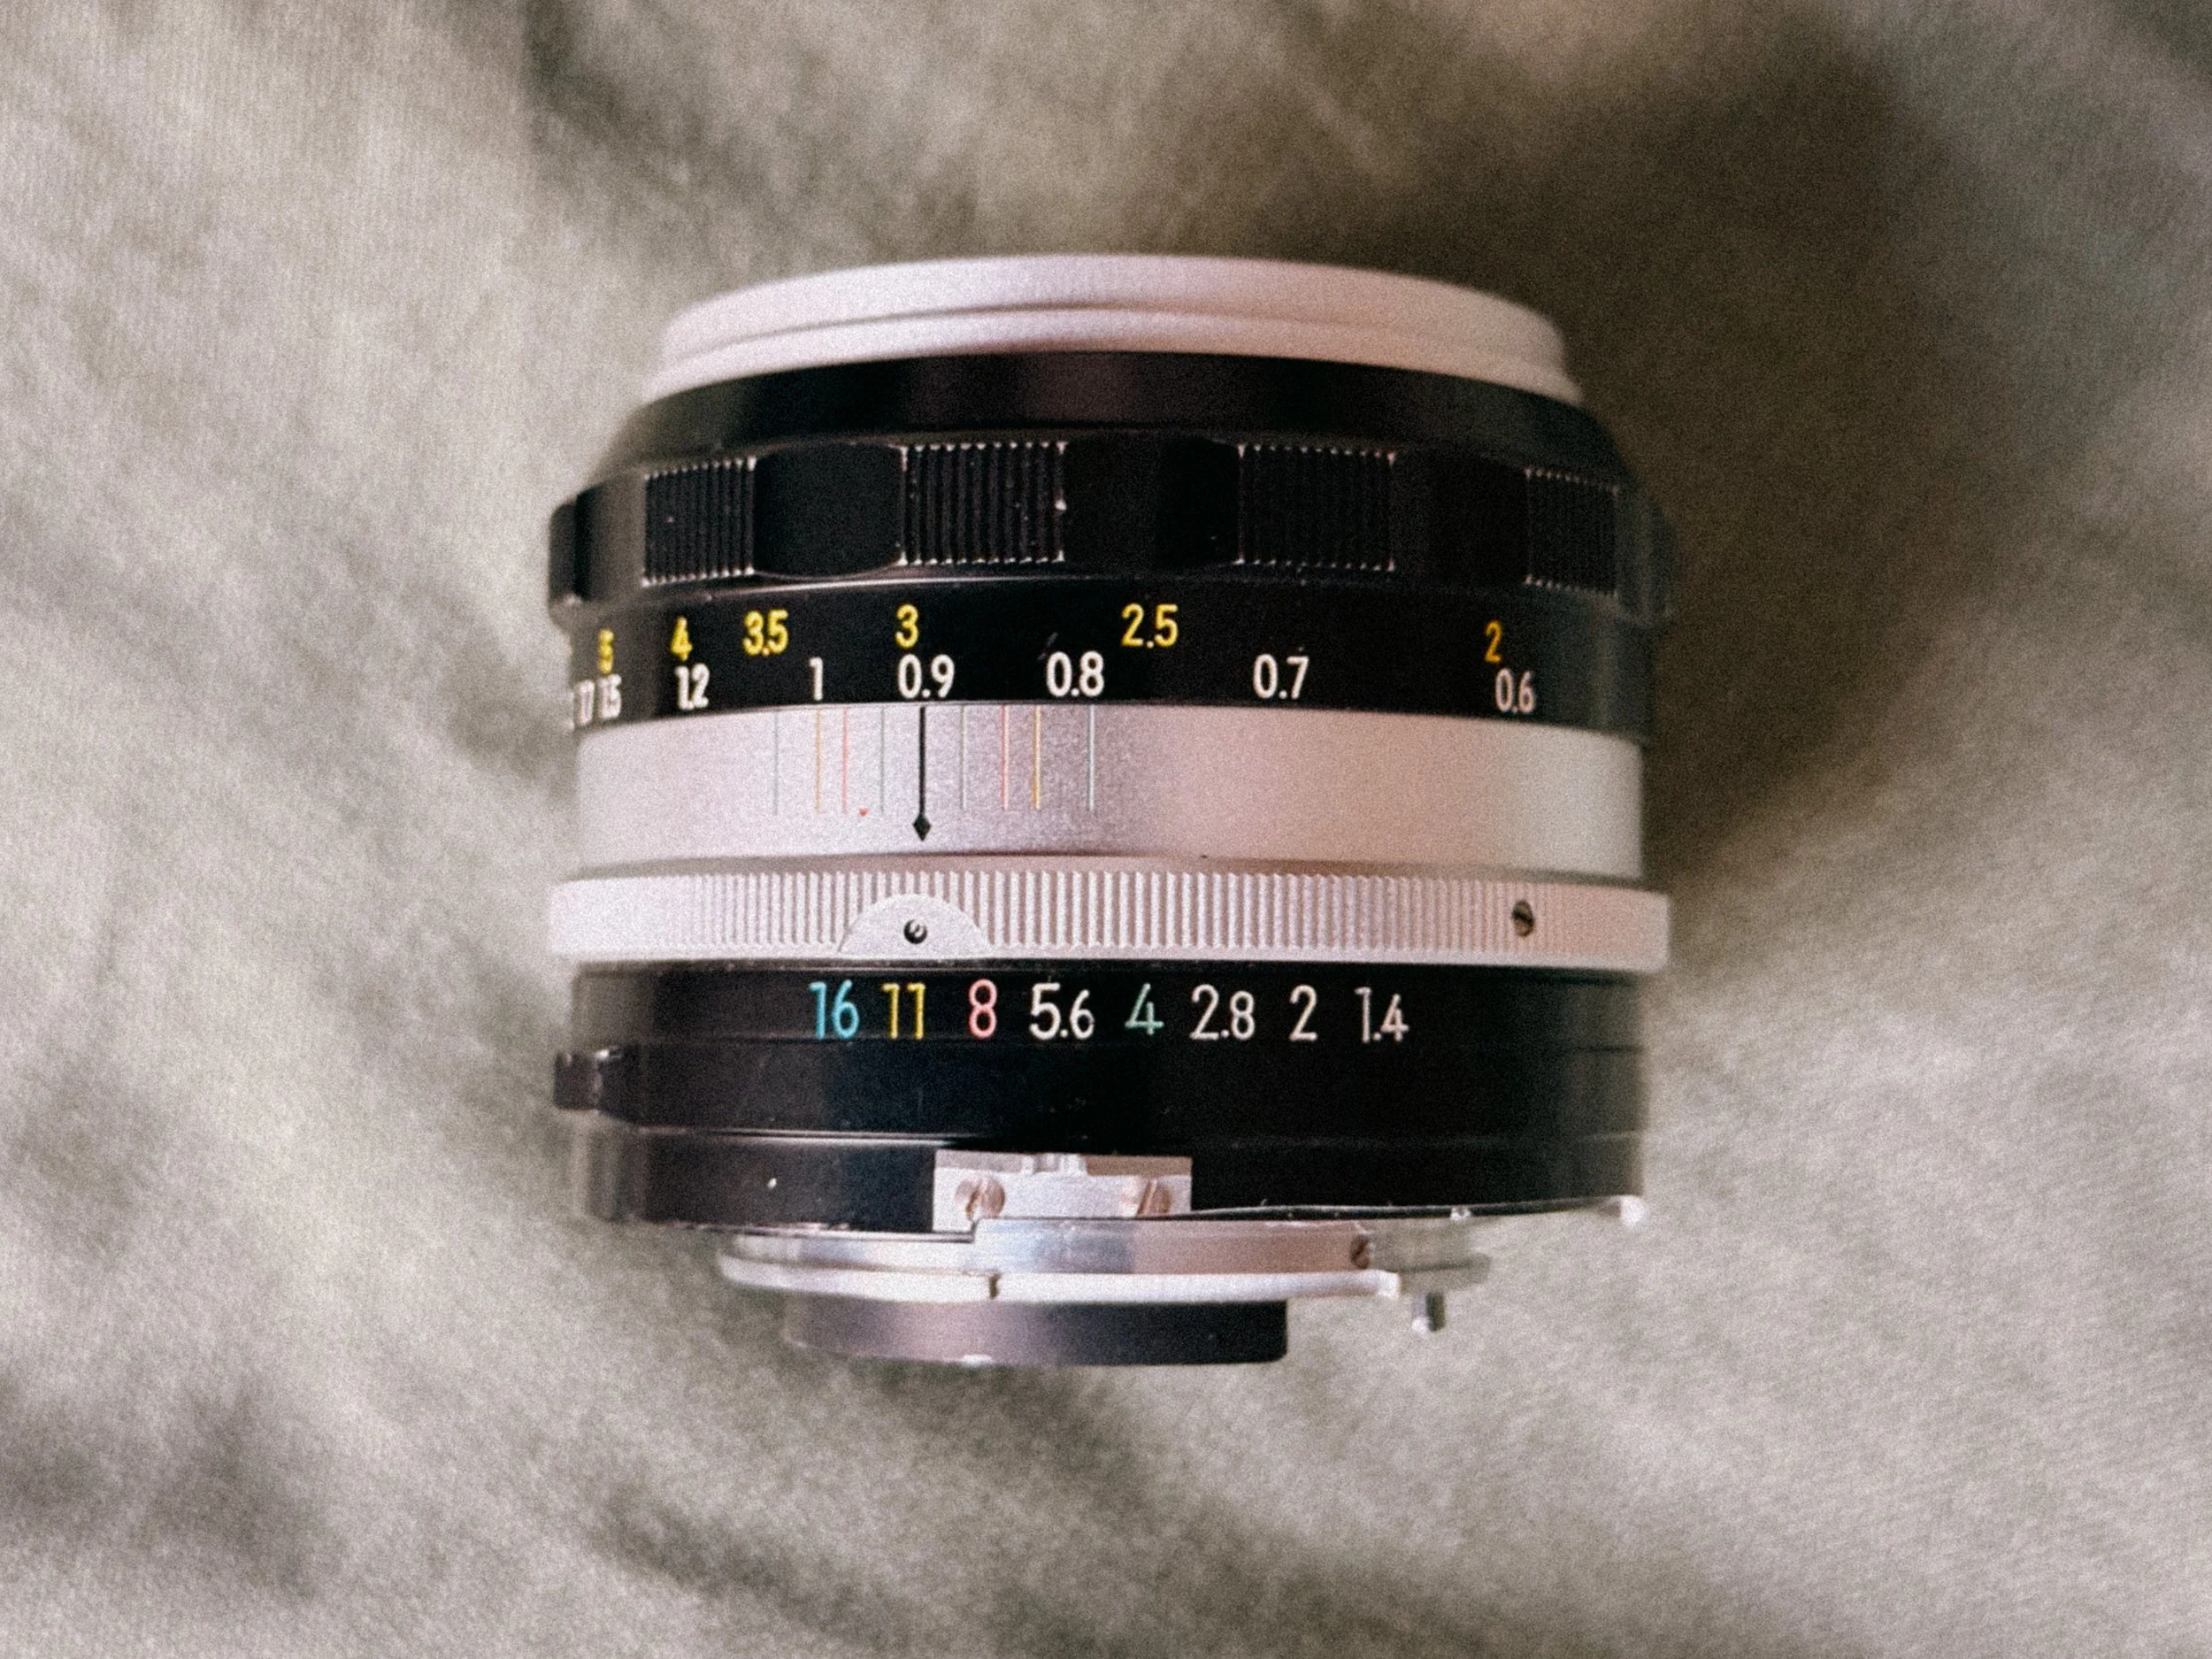
A very rough NonAI to AI Conversion
Because it doesn't have that delicate internal prong, you can tap into the largest pool of vintage lenses ever made. And trust me, there are some great ones beneath them! You are free to use Nikkor Non-AI, AI, AIS and Series E lenses without ever having to worry about bending or snapping a coupling pin. While mounting an unmodified "Pre-AI" lens on a modern Nikon DSLR or a late-model F2 can result in an expensive repair bill, the original Nikon F handles these early lenses with ease.
This means you can hunt for the most affordable, heavy-metal vintage glass from the early '60s and mount it with total confidence. Whether you are looking for the legendary single-coated "S-Line" lenses or the later, high-contrast AIS glass, the Nikon F is the ultimate "universal" body. It allows you to experiment with 60 years of optical history on a single mount, making it the most versatile entry point into high-end analog photography.
Let me rephrase, cause this is important:
On the Nikon F, you can build a whole lineup of glass that is on par with Leica or Leitz lens quality, but for the price of a single Leica lens, you can easily get four to five legendary Nikkors.
Shooting the Nikon today: Ergonomics and Quirks
Let’s be honest: If you are looking for a camera that melts into your hand, the Nikon F is not for you. It’s not uncomfortable at all, some things just take some “getting used to”.
The Shutter Button "Problem"
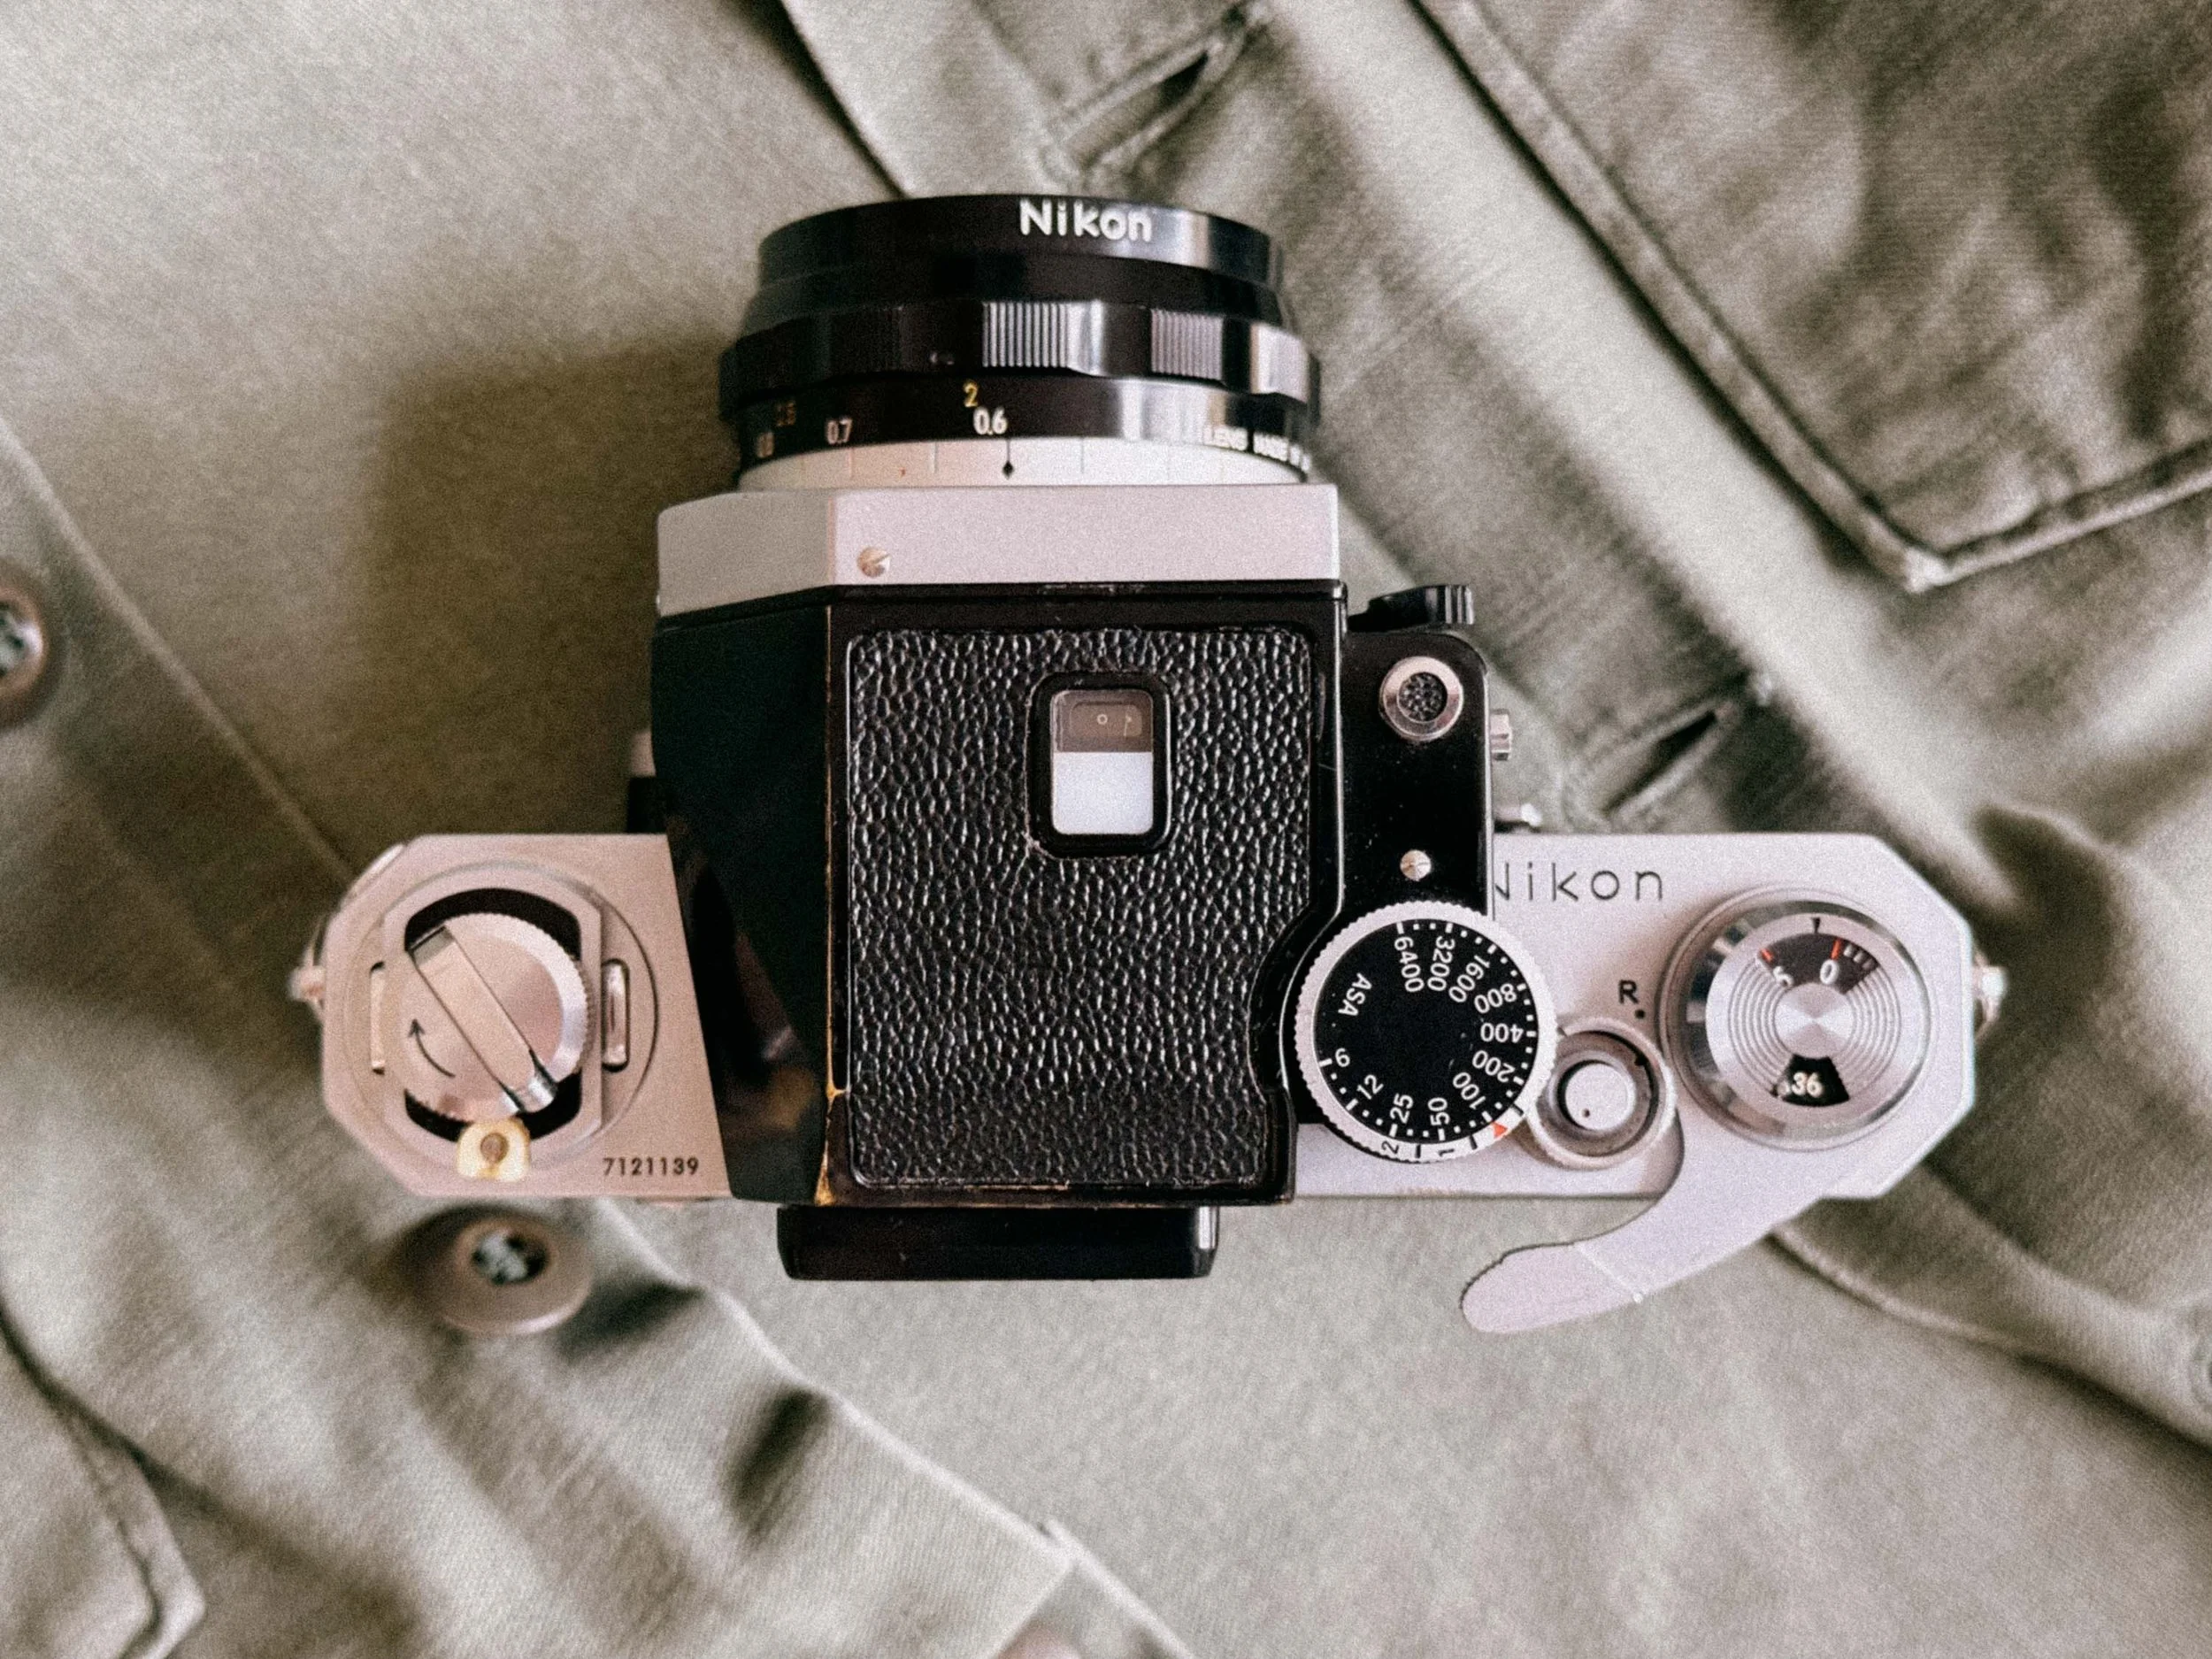
The “offset” shutter button
The first thing you’ll notice is the shutter button. Unlike the later Nikon F2 or the FM series, the button on the original F is located further back on the top plate. For many, this feels unnatural at first.
Tip: Many photographers use a Nikon AR-1 soft release or a similar third-party button. It raises the profile of the shutter release and makes it easier to find.
The Muscle Memory Trap: Focus Direction
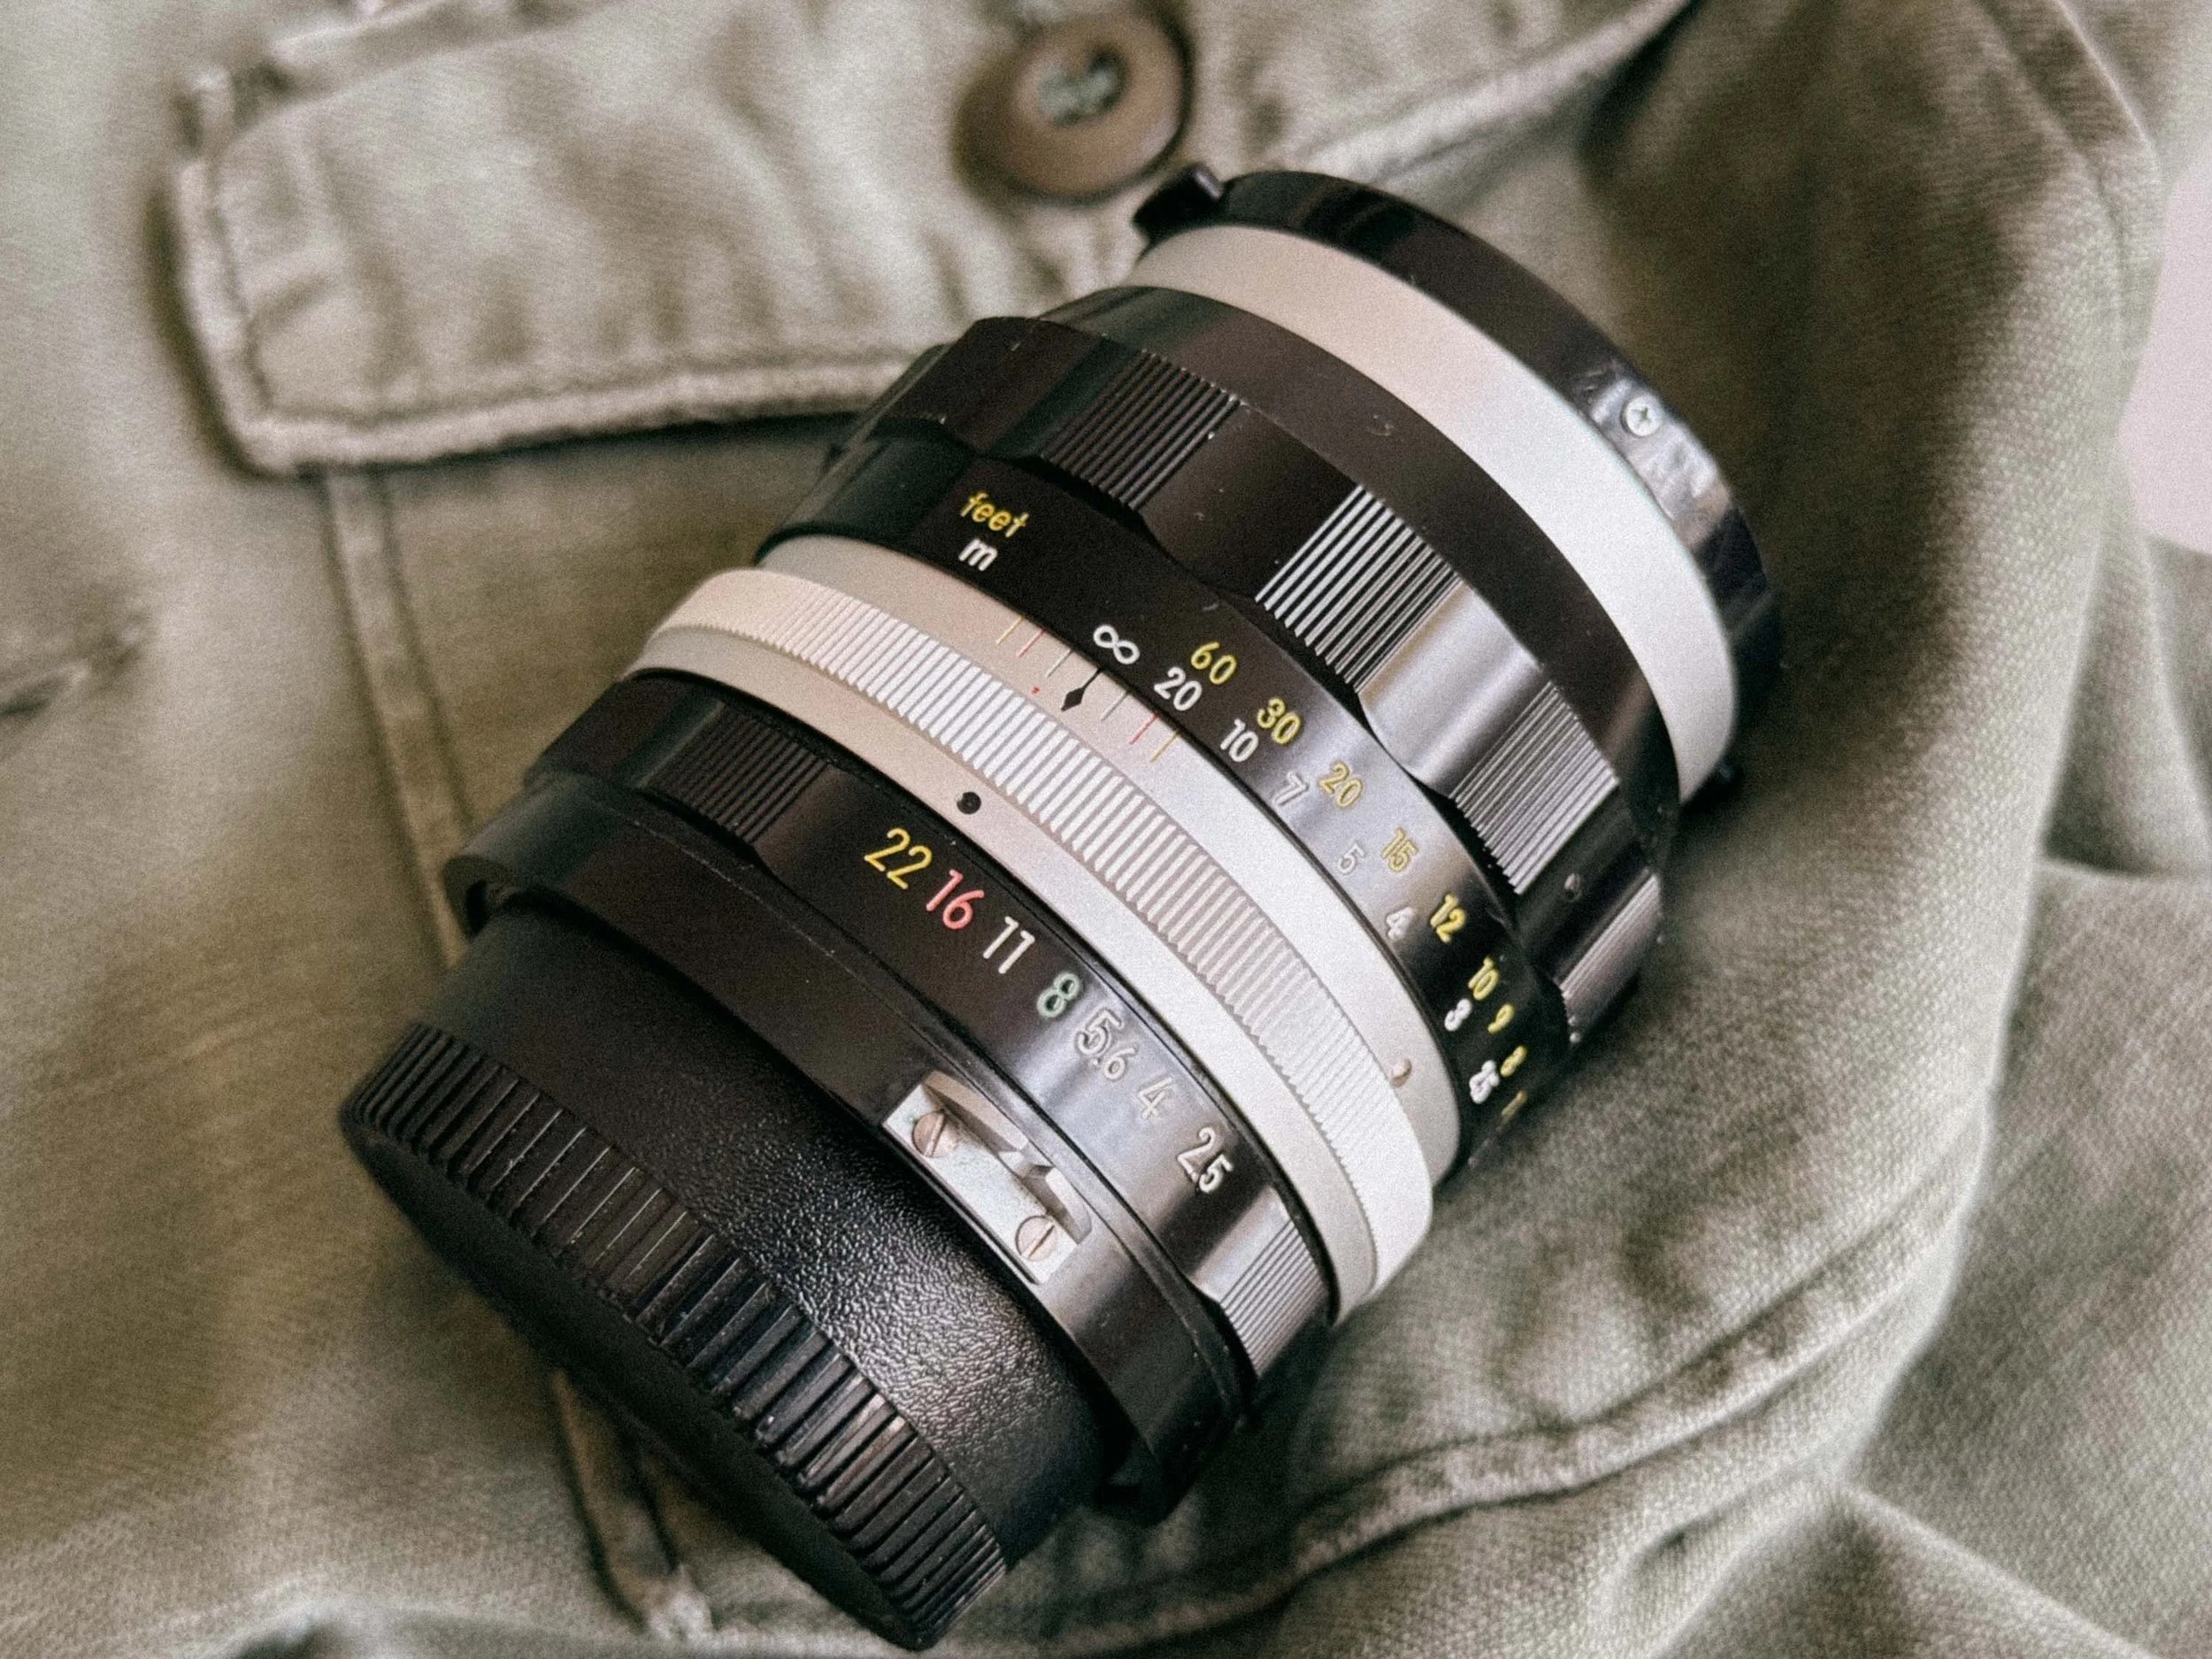
Yes infinity is on the other side on Nikkors.
If you are coming from any other systems, be prepared for a bit of a brain-freeze: Nikkor lenses focus the "other way around." To reach infinity, you turn the ring counter-clockwise. This can lead to some frustrating "missed focus" moments at first, but it does not take long before it becomes second nature.
The 1kg Workout
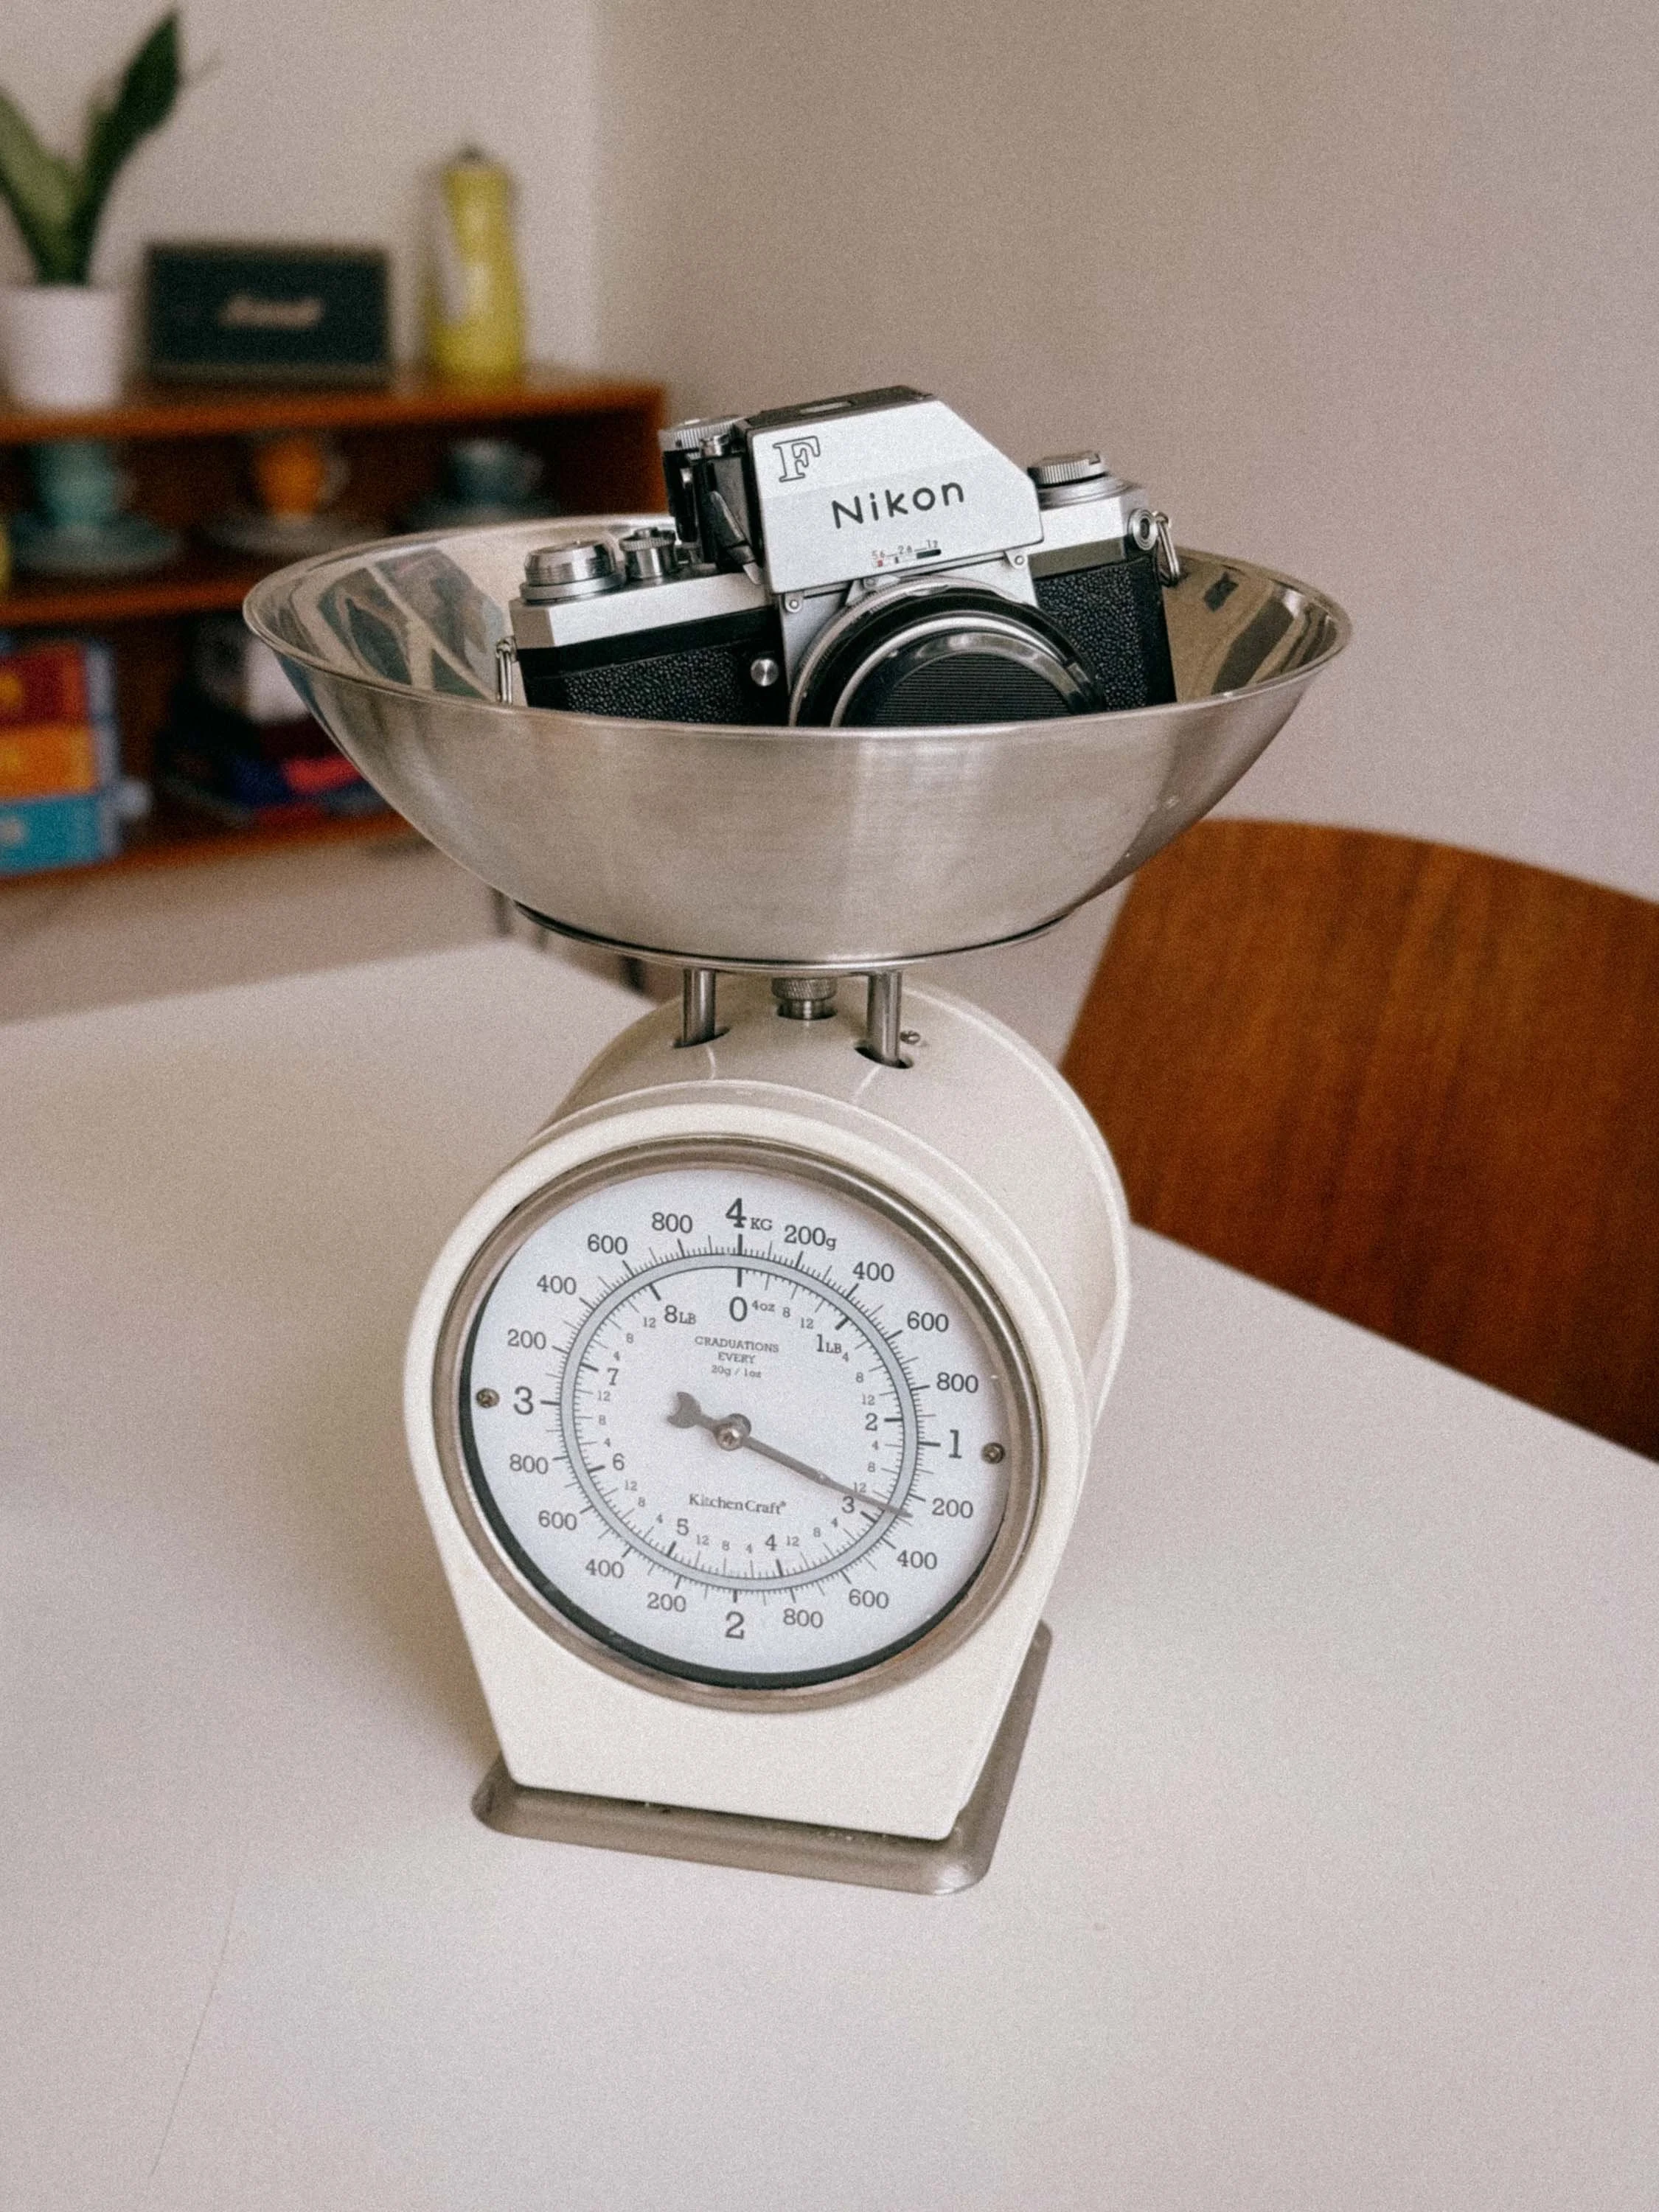
It was not designed to be lightweight.
Is it heavy? Yes. With a Photomic finder and a 50mm f/1.4 lens, you are carrying over one kilogram of solid brass and glass. But there is a benefit: the weight makes the camera incredibly stable for handheld shots at slow shutter speeds like 1/15th or 1/8th of a second. It acts like a built-in mechanical stabilizer.
The Film Loading
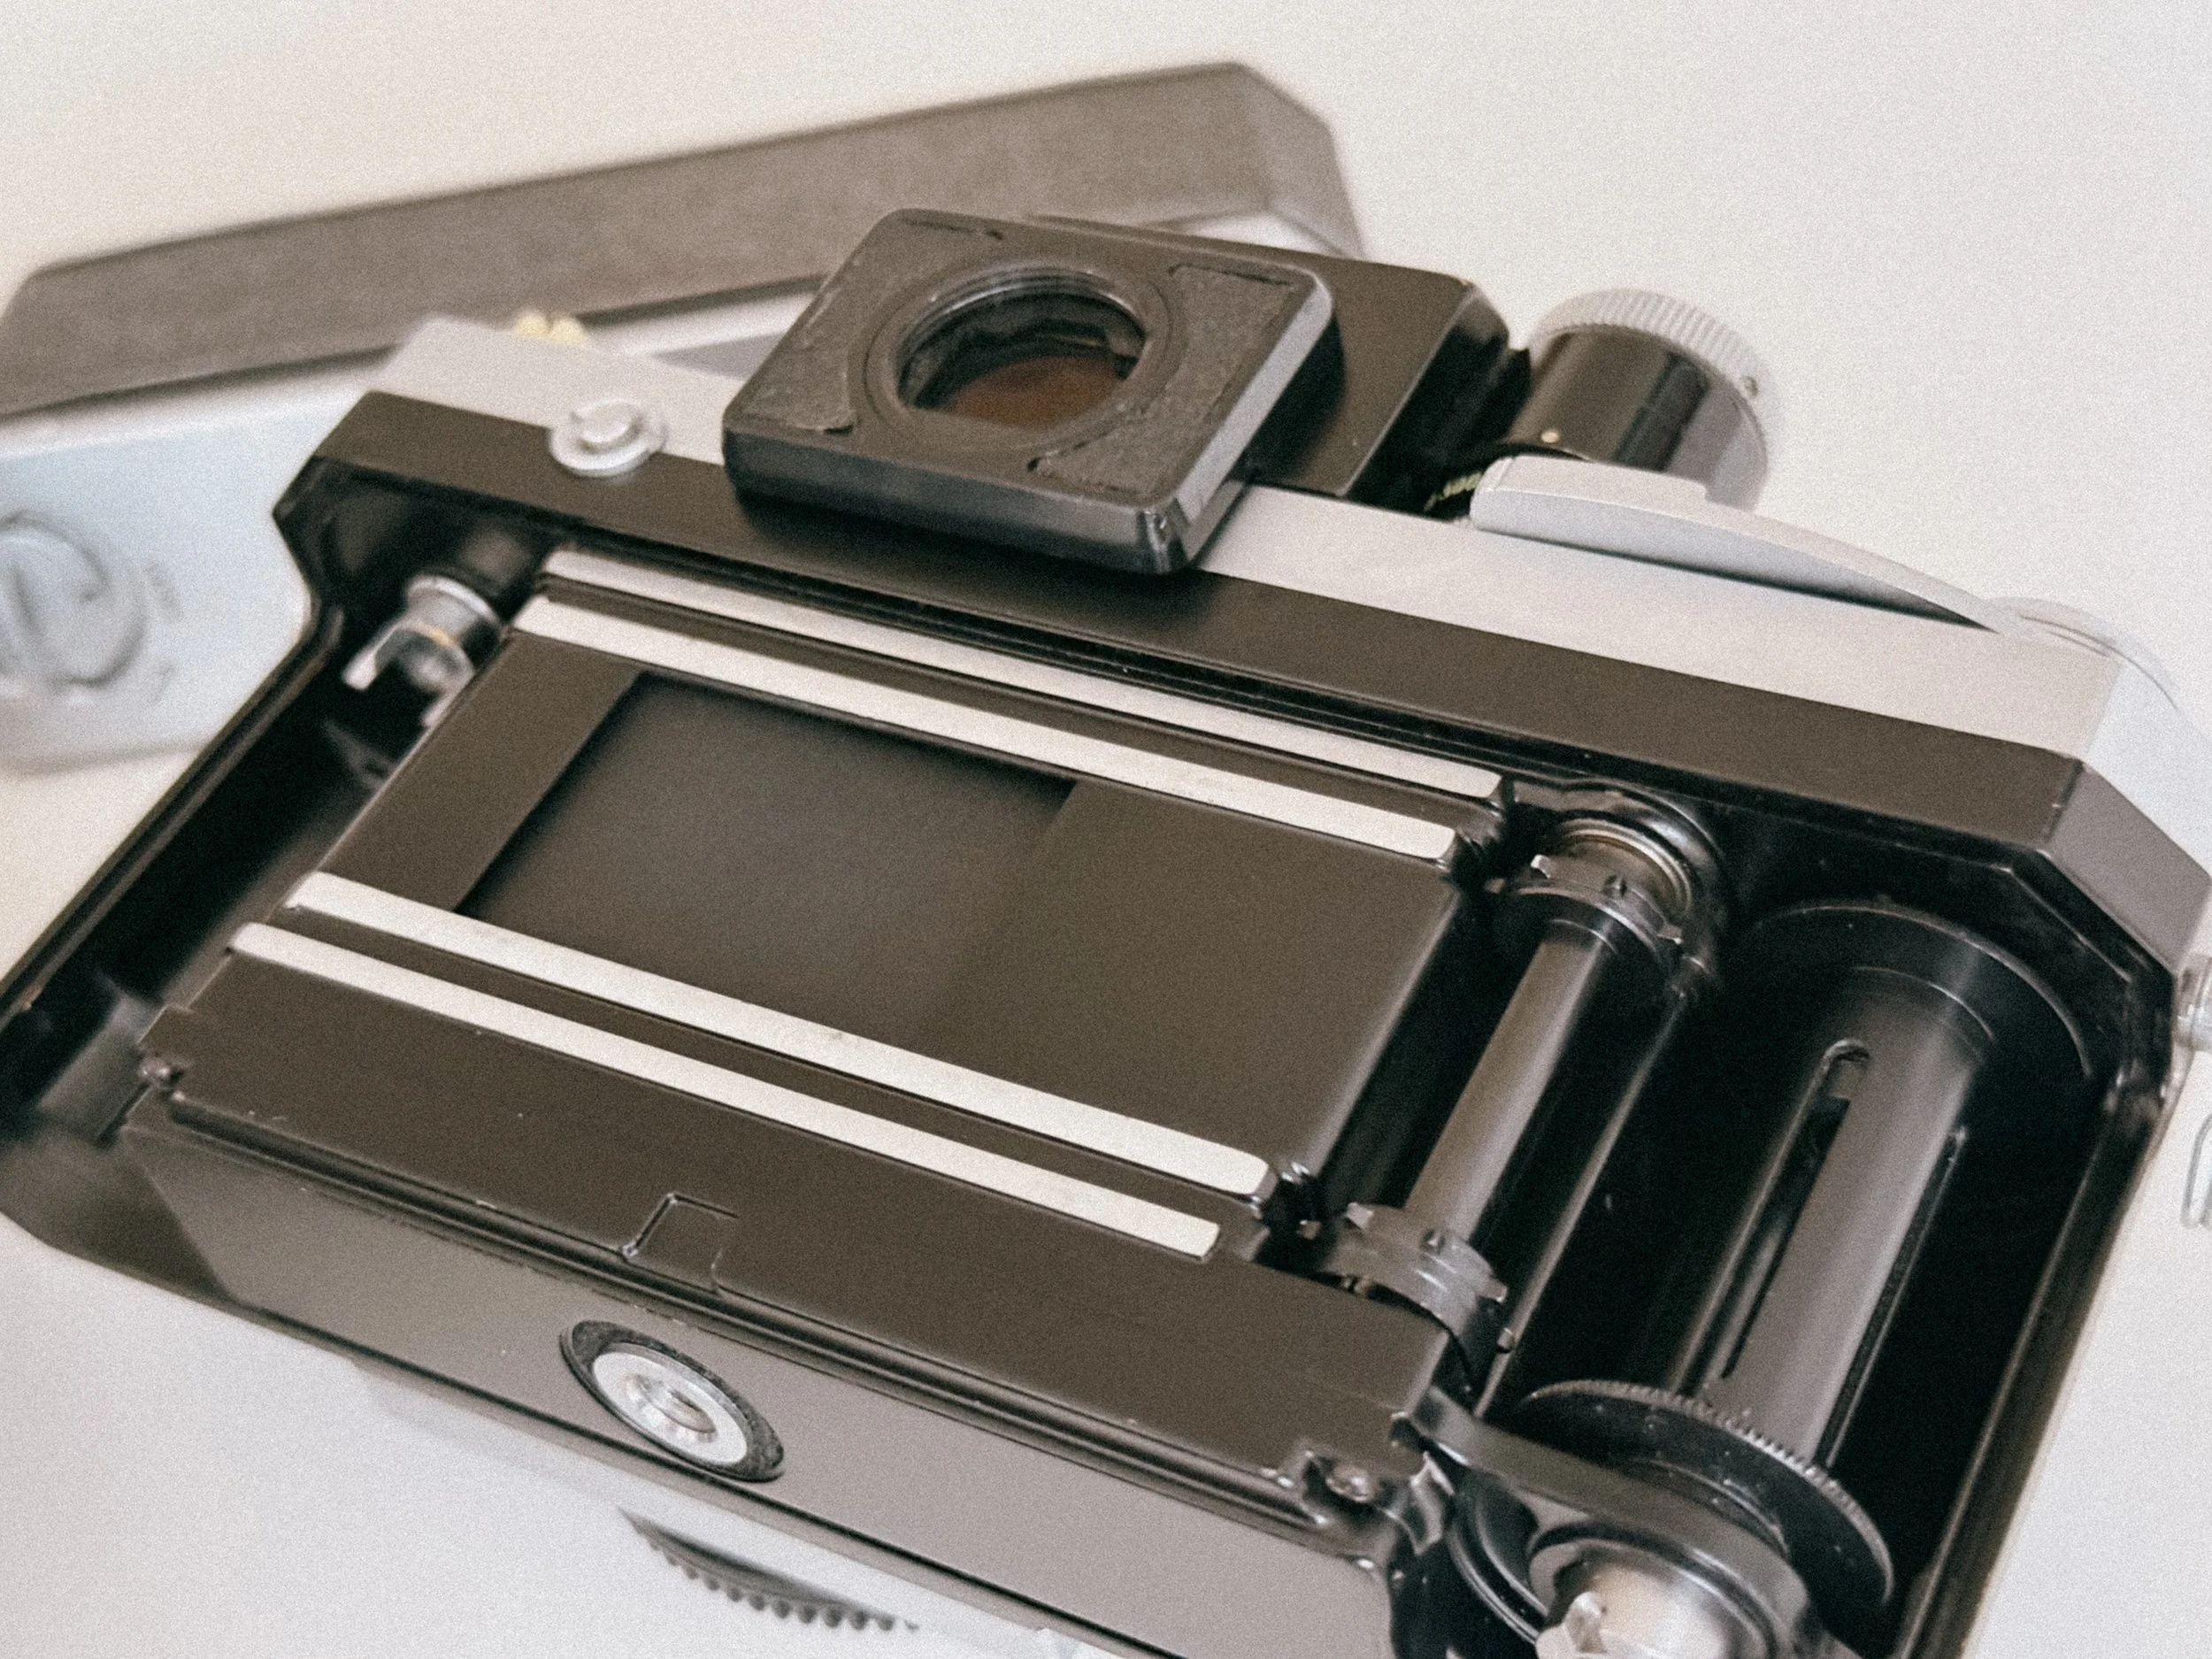
Film Spool and Shutter of the Nikon F
The removable back is the Nikon F's most famous quirk. But to be honest, it’s not half as bad as many people claim it to be. However, this design hides a massive technical advantage: The Nikon F does not require foam light seals. While almost every other vintage SLR relies on adhesive foam strips that eventually rot, turn into a sticky mess, and cause light leaks, the Nikon F uses a precision-engineered metal-to-metal light trap. Much like the legendary Canon P rangefinder (full review here), the Nikon F is built to be light-tight. It’s one less thing to worry about and a huge win for long-term durability.
The "Wobbly" Advance Lever

Don’t worry the lever is designed to have some play
When you pull the film advance lever out to its "ready" position, you’ll notice it has a bit of play or "wiggle" before it actually starts to tension the shutter.
Don't Panic: This isn't a sign of a loose screw or a worn-out spring. It is a deliberate design choice. This "stand-off" position allows you to hook your thumb behind the lever for rapid-fire shooting, and the slight play ensures that you don't accidentally put tension on the internal gears while just walking around with your thumb on the lever. It can feel slightly wobbly because of its folding design, built-in mechanical tolerances.This small amount of play is normal and helps ensure reliability, especially in tough conditions. However, if the lever feels very loose or doesn’t advance smoothly, it may need servicing.
Flash and Accessories
The Nikon AS-1 Adapter
The Nikon F does not have a standard ISO hot shoe. It uses a unique mount around the rewind crank. If you want to use a modern flash or a wireless trigger in 2026, you’ll need the Nikon AS-1 adapter. Without it, your flash setup stays dark.
The "Nikon Shuffle"
If you are using a Photomic FTN finder, remember the "Nikon Shuffle." Every time you change a lens, you have to twist the aperture ring all the way to the left and then all the way to the right to "index" the lens.
The Shutter Release Cable (The AR-2)
The sturdy AR-2 - Also works with the F2 body!
The Nikon F uses a proprietary "Leica-style" bell mount. To use a remote trigger for long exposures or tripod work, you need the Nikon AR-2 cable release (or a "Nikon to Standard" adapter). It’s a small detail, but realizing your standard cable release will not fit during a shooting is something you want to avoid.
The Ultimate Pre-AI Lens Kit for the Nikon F

My ultimate Lense kit
If you want to experience the Nikon F without breaking the bank, you don't need twenty lenses. You need a curated kit that covers everything from street photography to intimate portraits.
I can’t stress enough how well-built these vintage Nikkor lenses are. We are talking about brass, precision-ground glass, and a mechanical feel that makes modern plastic lenses feel like toys. But it’s not just about the build. These lenses have a specific "rendering" – a look that combines vintage character with surprising resolution. You should be able to tell that i am a fan by now.
Anyway, here is my recommended lineup.
1. The Wide-Angle: Nikkor-H 28mm f/3.5
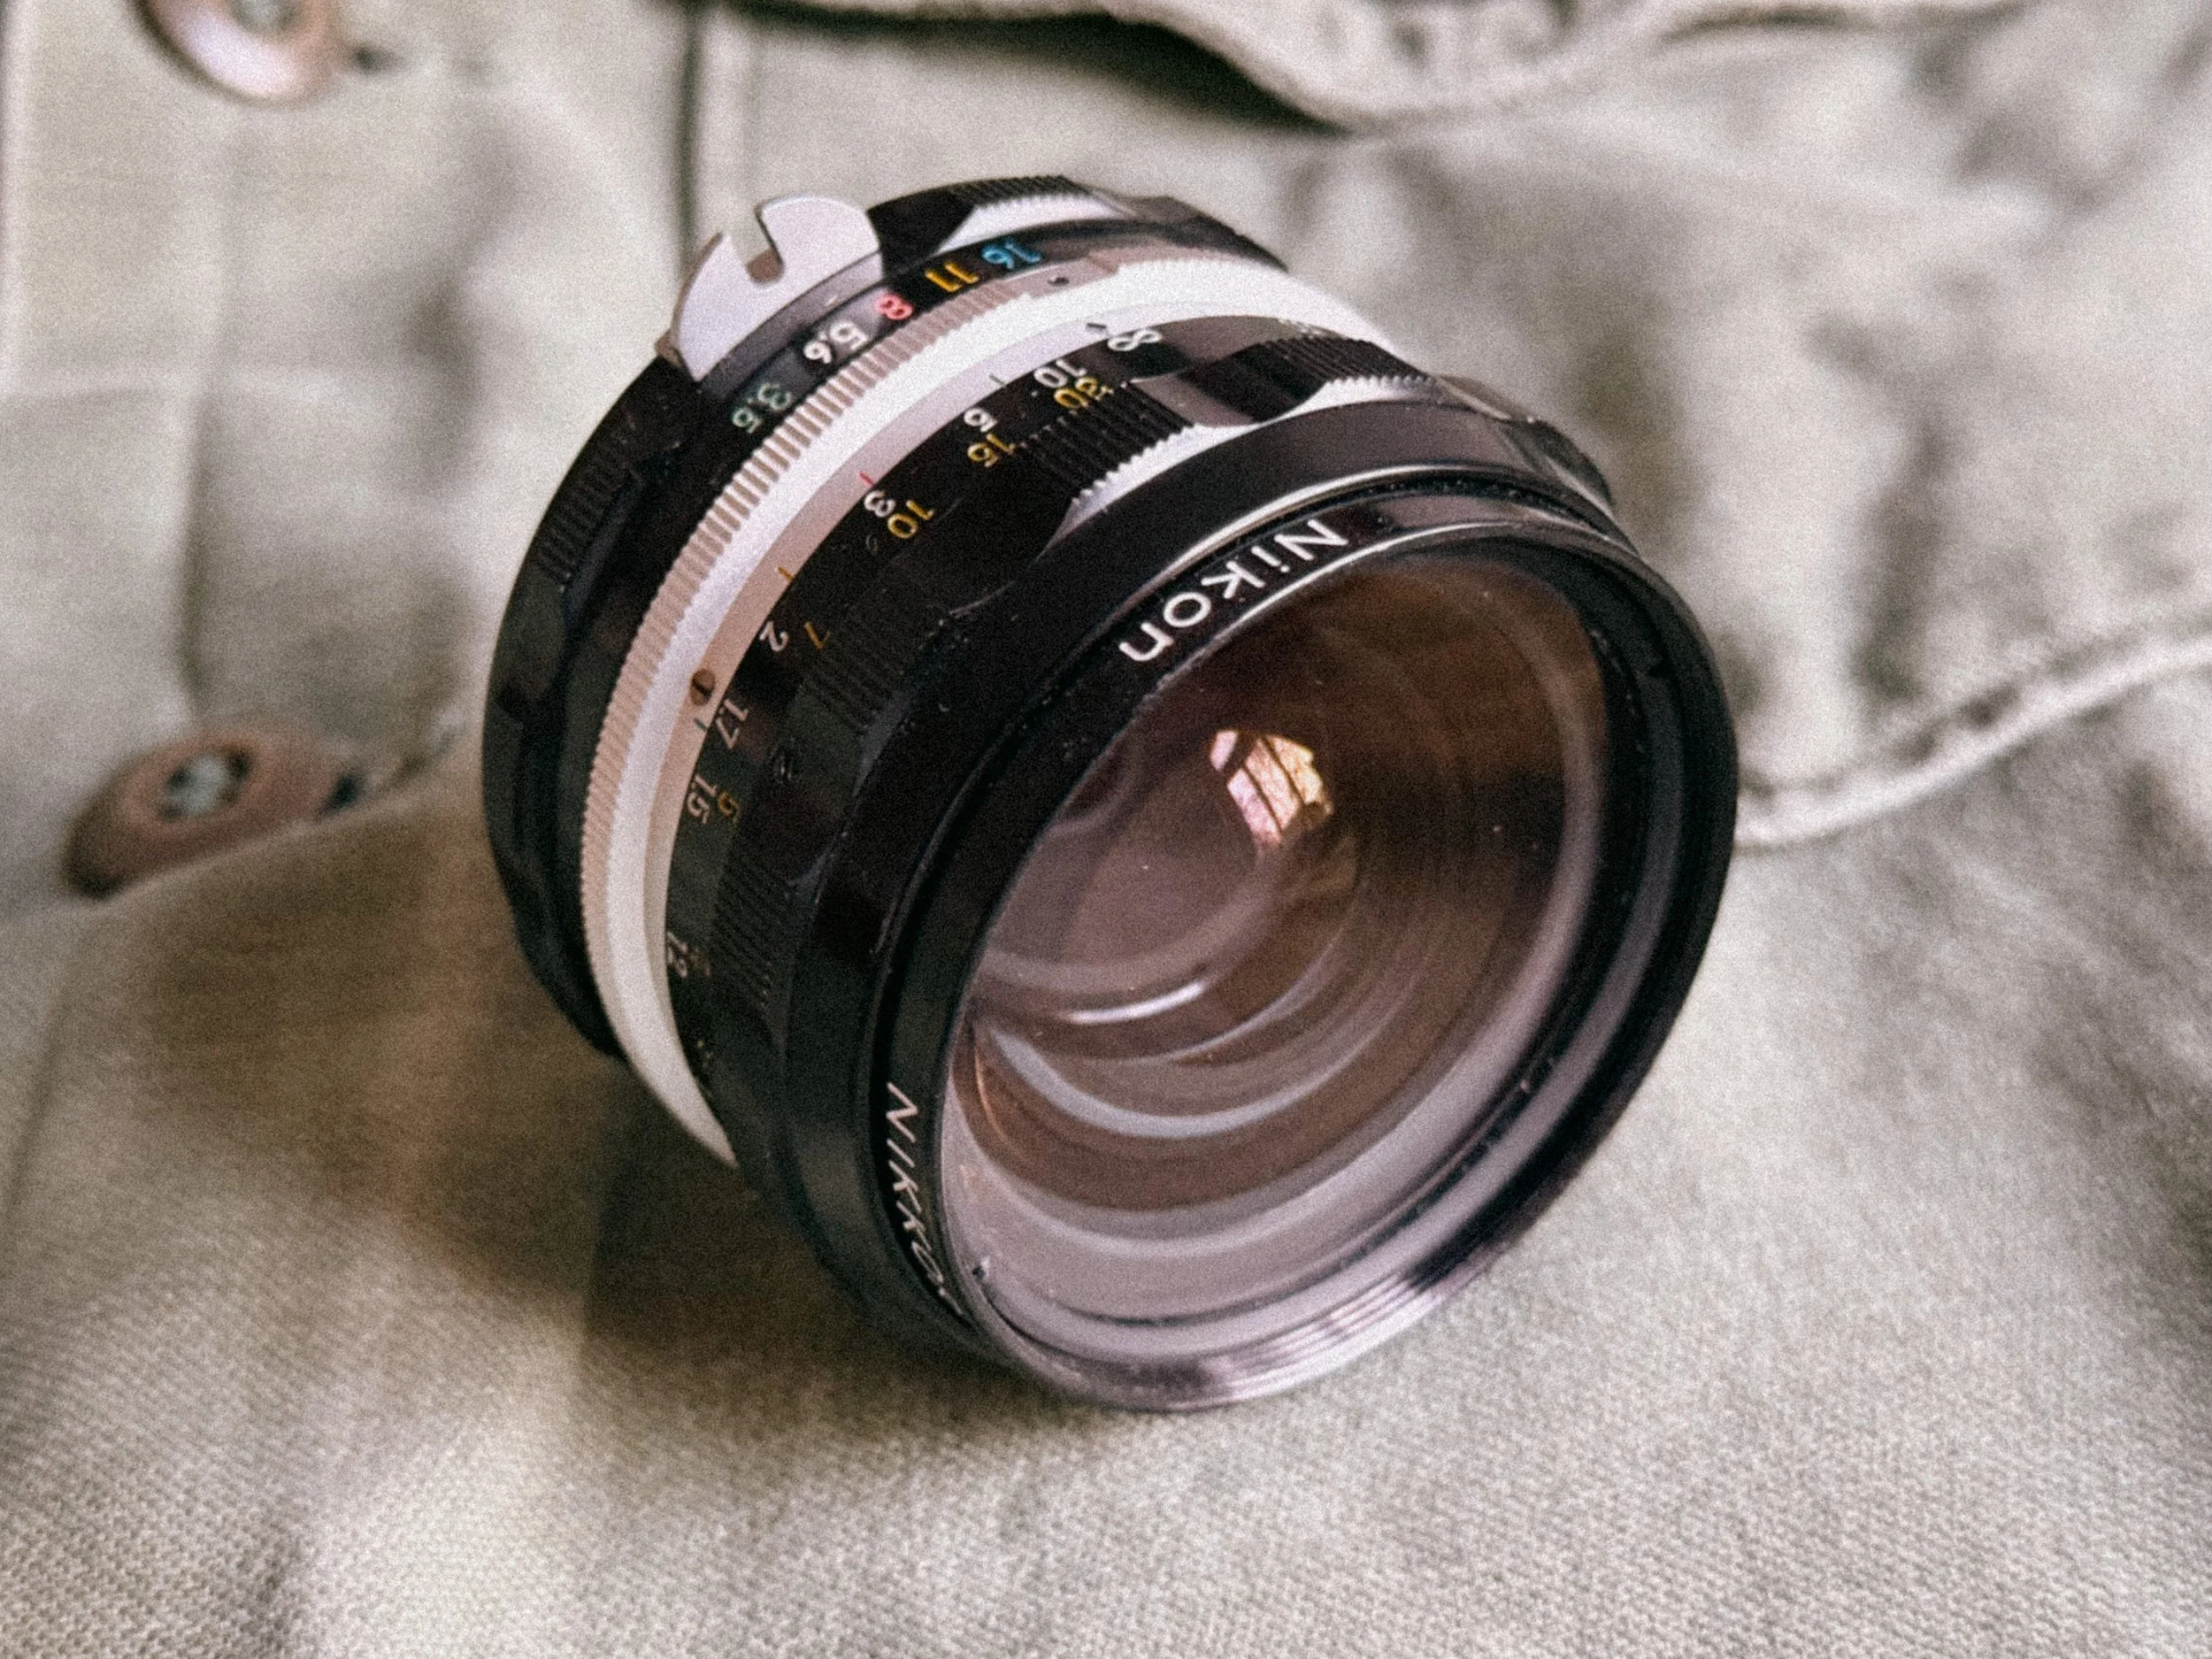

Don’t let the f/3.5 aperture fool you. This lens is legendary for its edge-to-edge sharpness and almost zero distortion. It is incredibly compact, making it the perfect companion for the heavy Nikon F body. In 2026, these are often found for under $100, which is an absolute steal for a piece of glass that feels this mechanical and precise. It’s just not the best for dark scenes though.
2. The Classic: Nikkor-O 35mm f/2
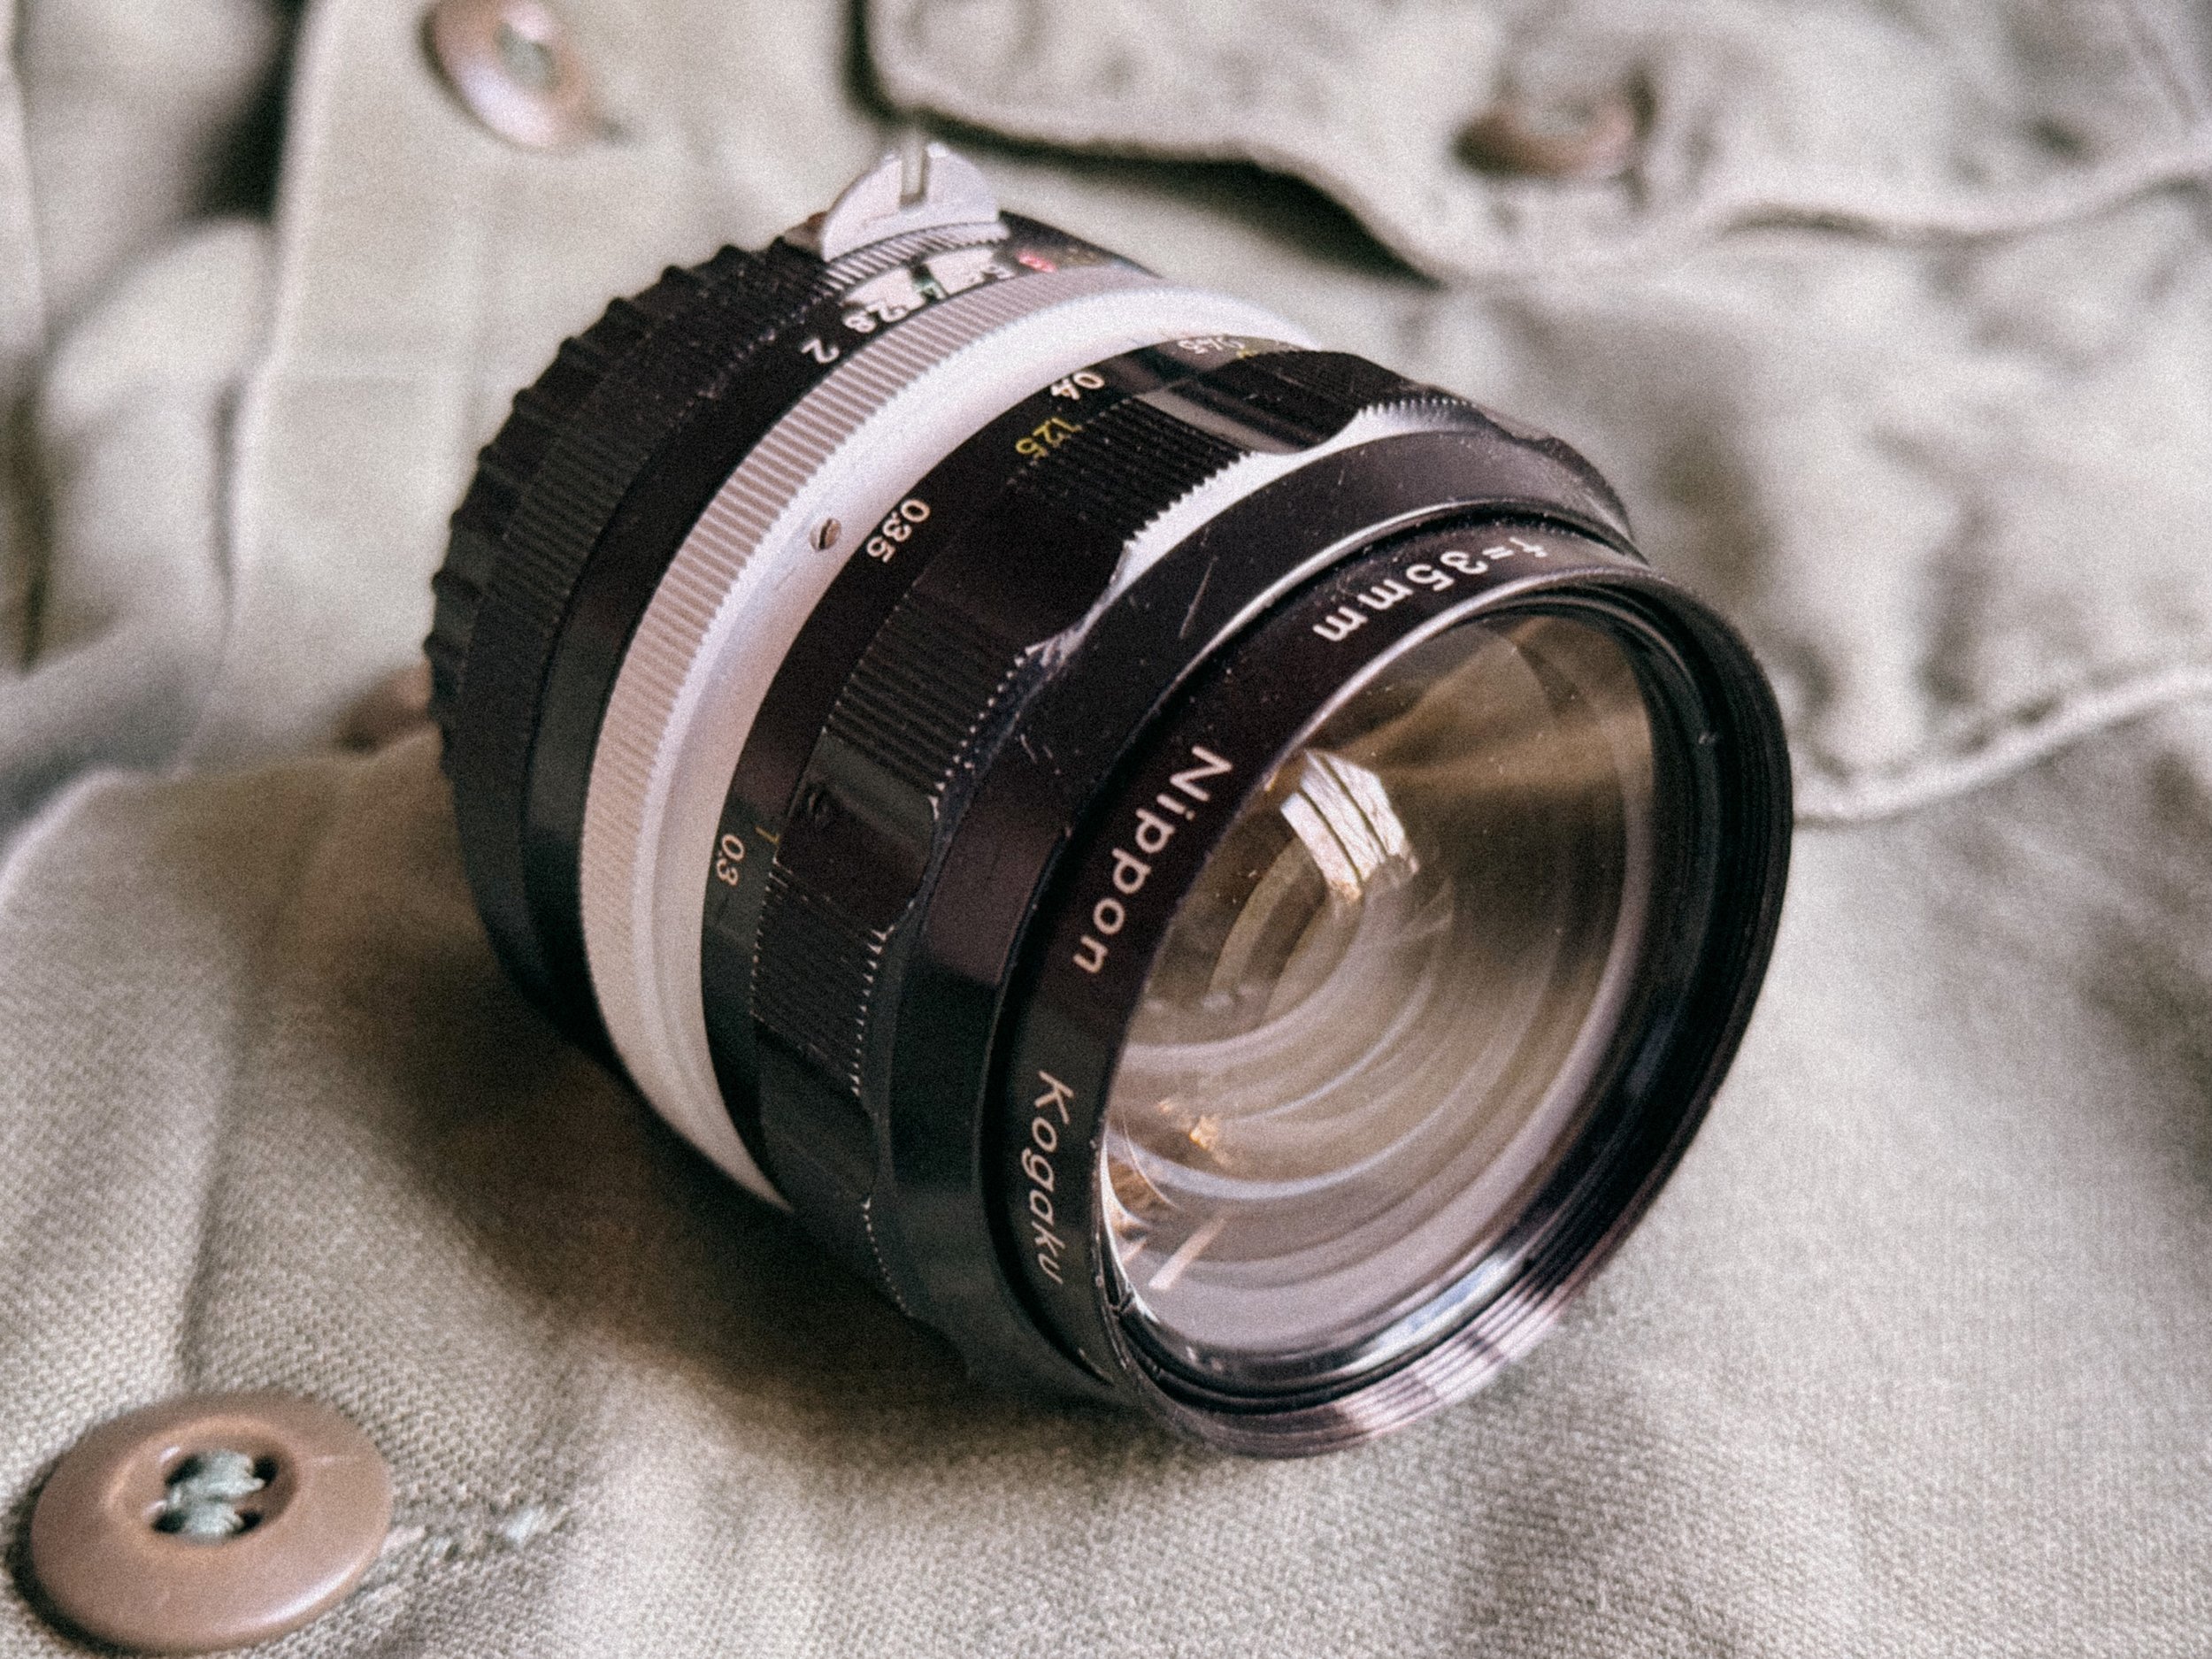
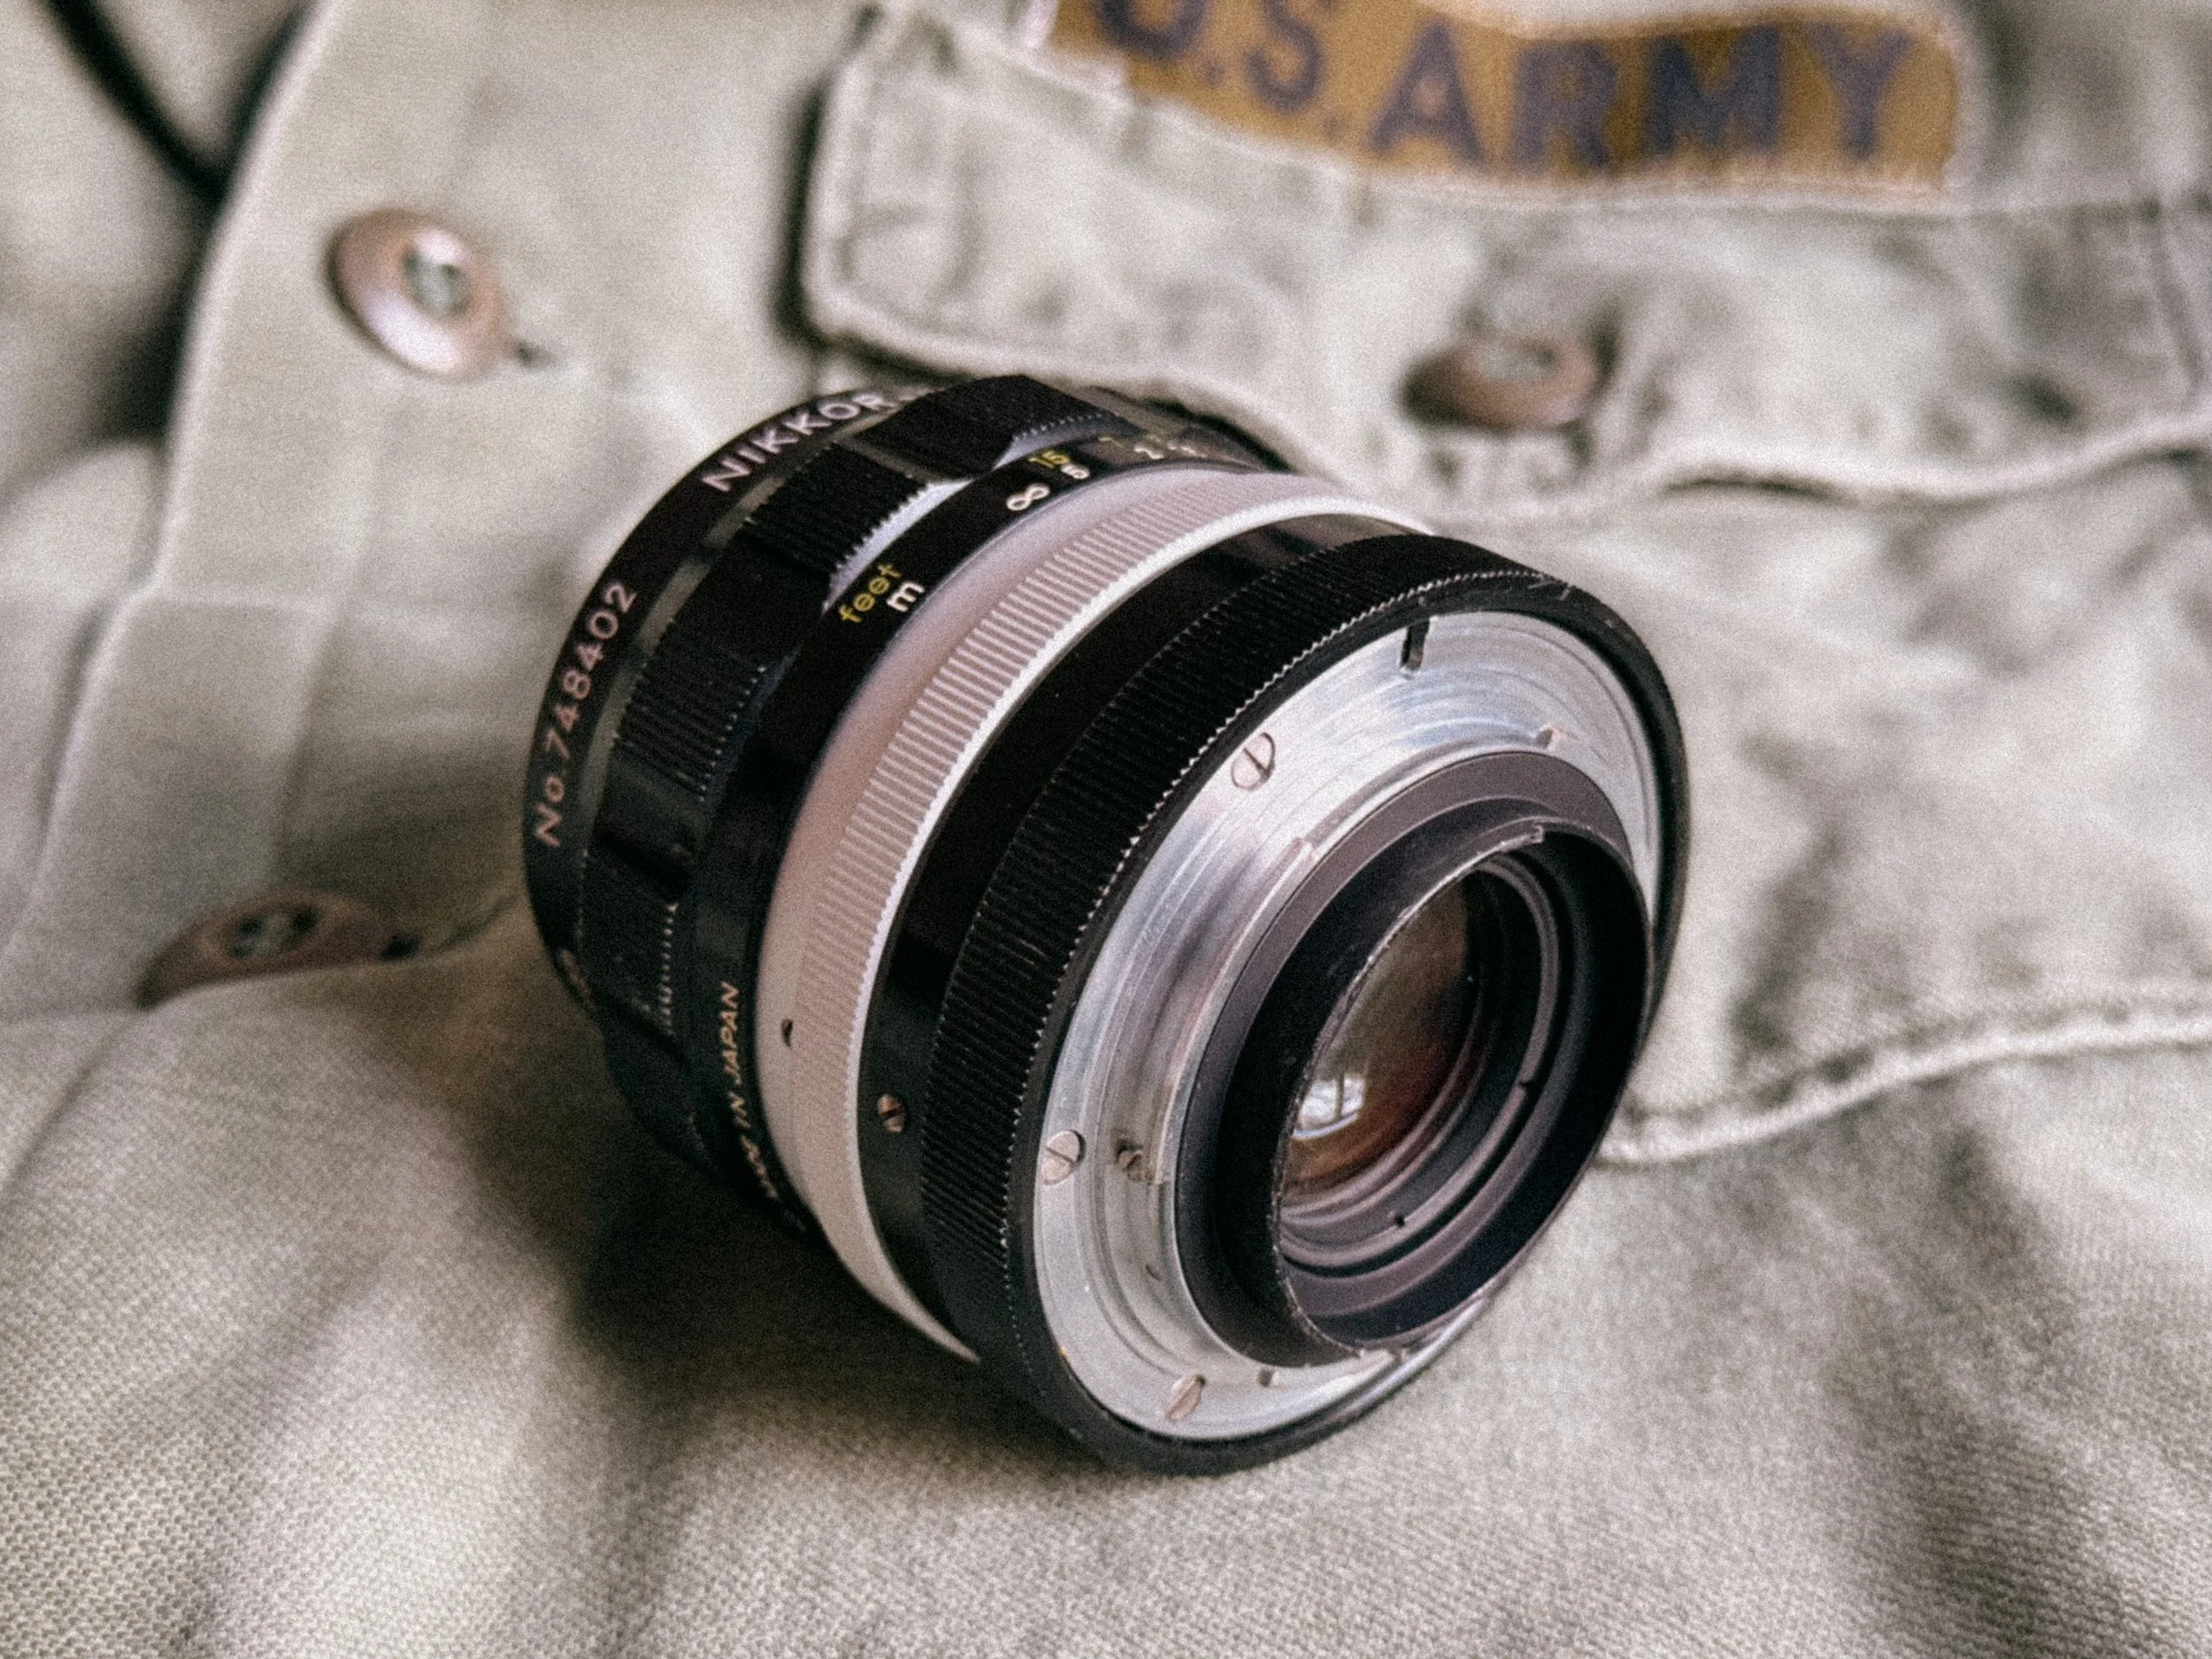
If you could only have one lens on your Nikon F, this should be it. The 35mm f/2 is fast enough for low-light situations and has a beautiful, slightly "glowy" character wide open that sharpens up significantly by f/4. It’s the quintessential documentary lens of the 60s, the lens that captured history.
3. The Standard: Nikkor-S 50mm f/1.4

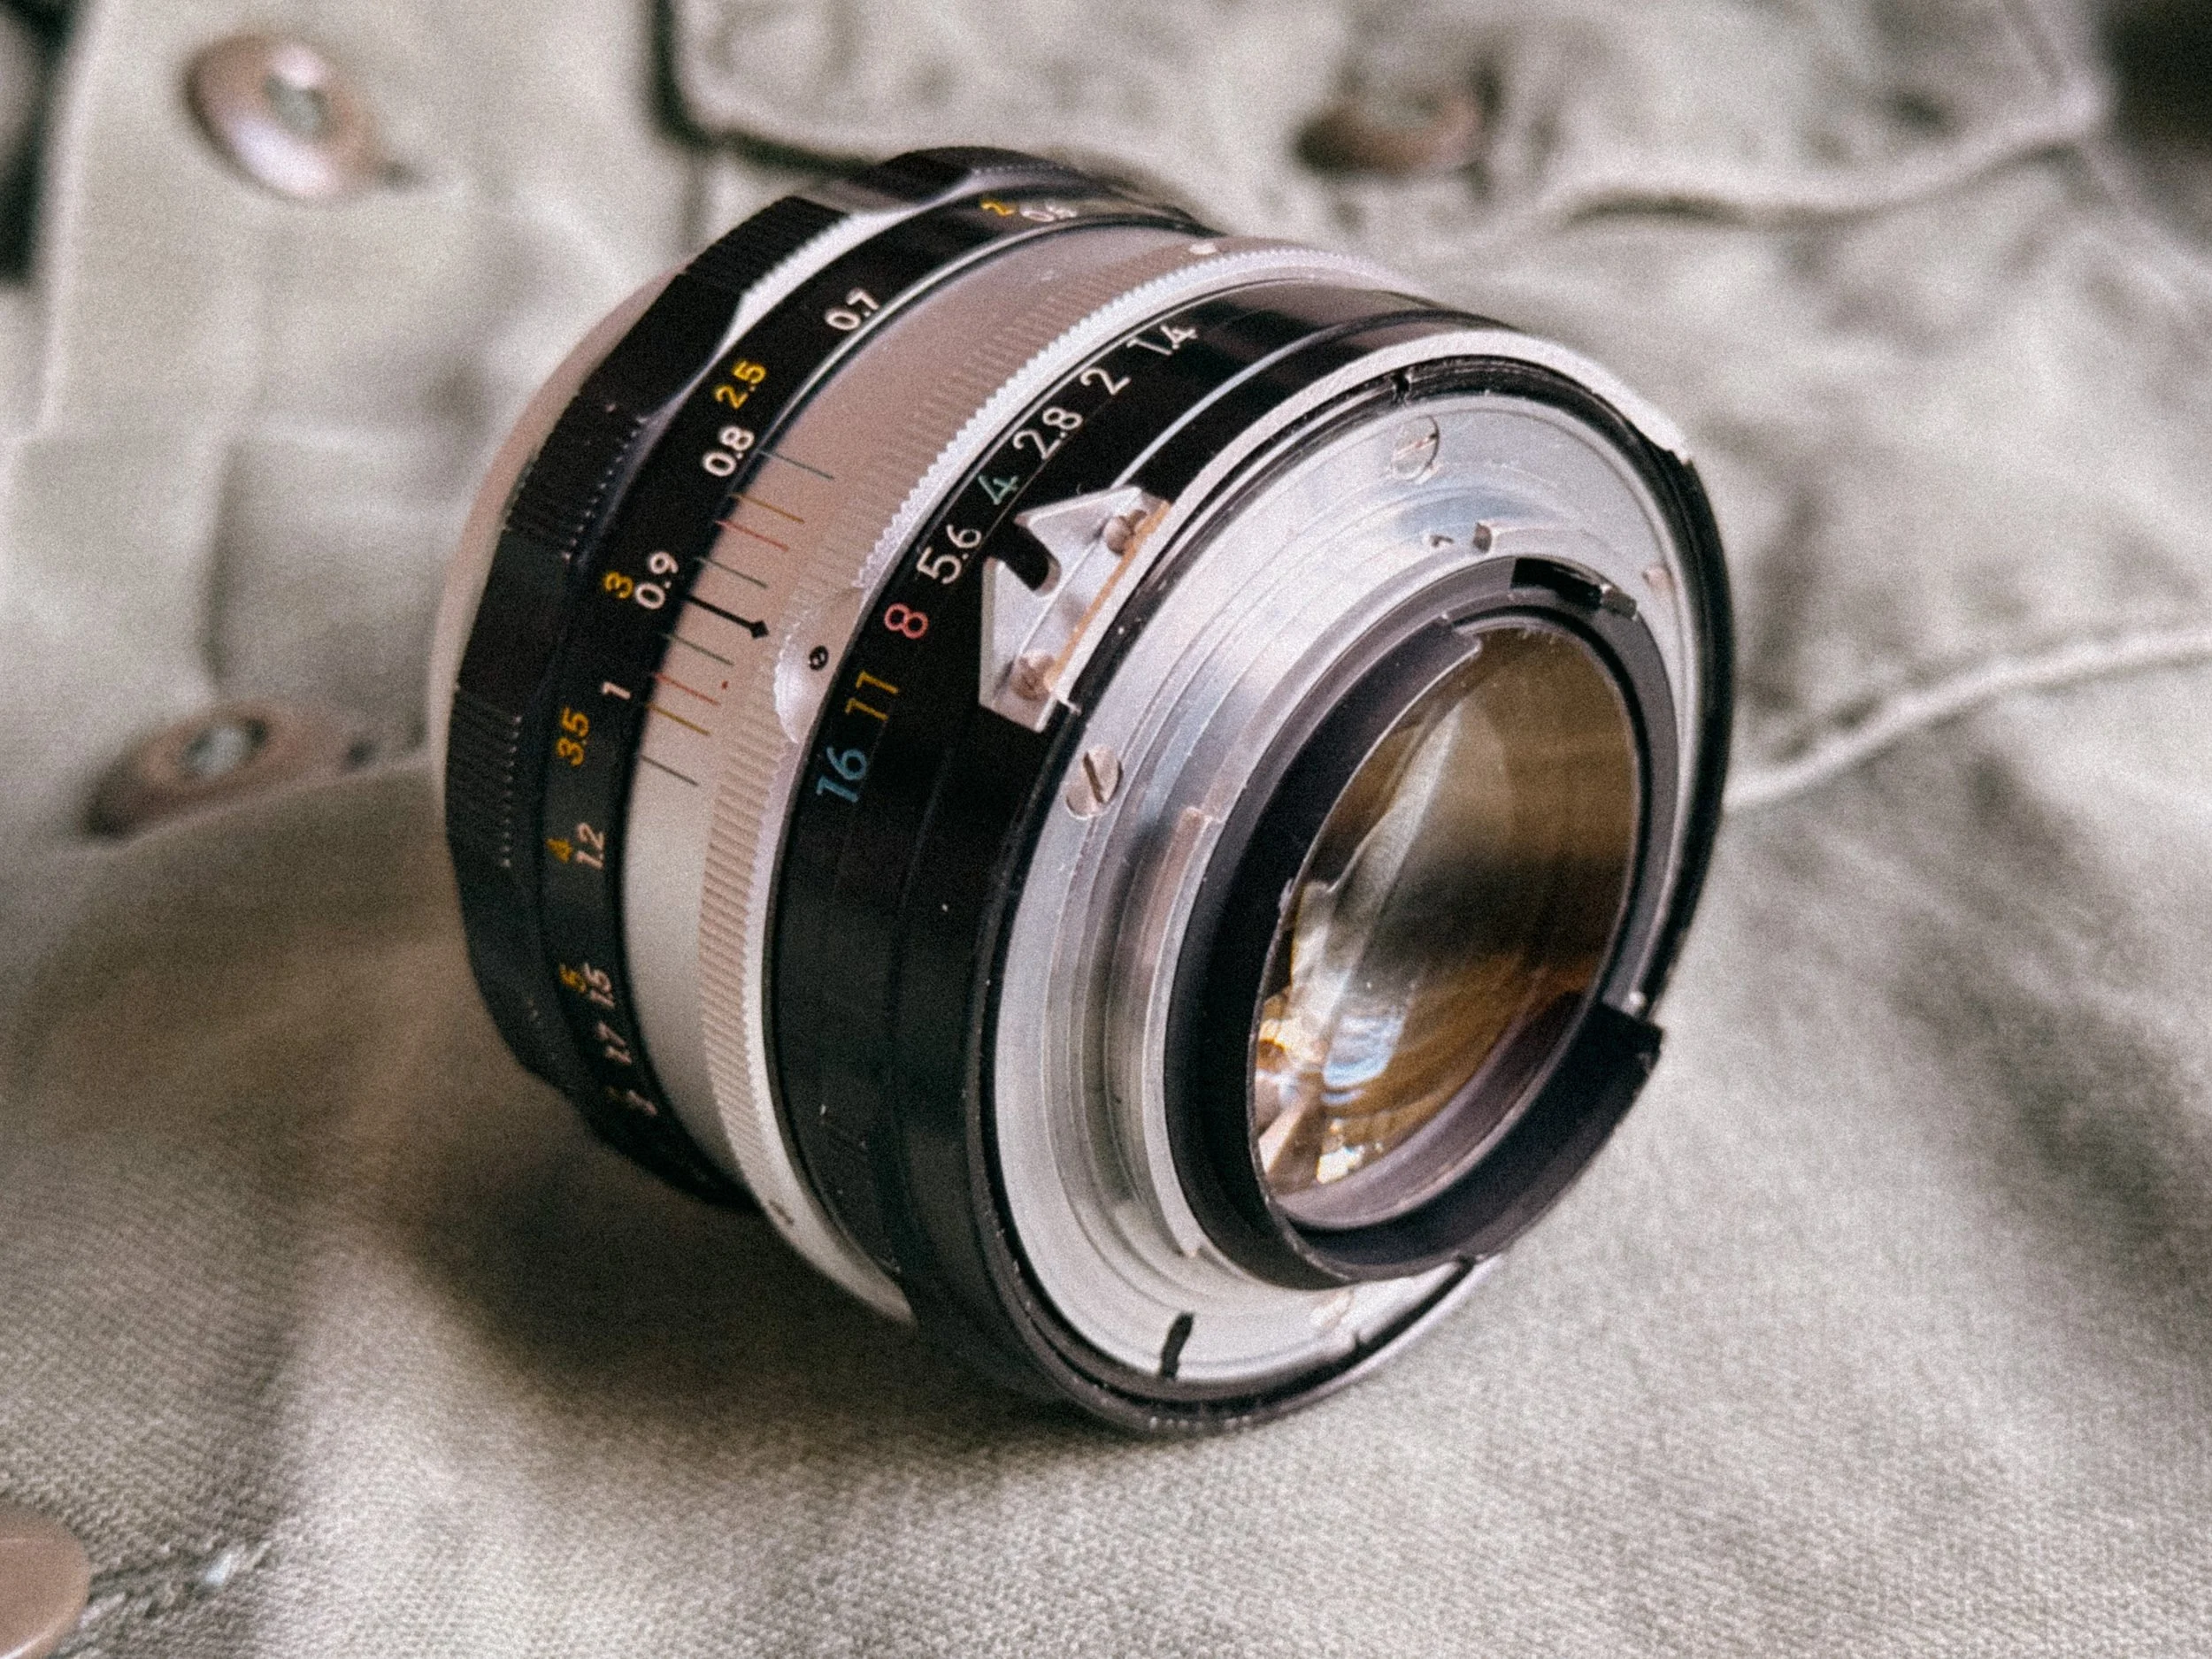
This is the "Standard" lens that defined the Nikon F era. The "S" stands for Septem (seven elements), and this glass is pure character. While it's slightly soft and dreamy wide open, perfect for moody, atmospheric shots, it becomes very-sharp as soon as you stop it down. It’s a heavy, brass-heavy masterpiece that balances perfectly on the Nikon F body. If you want that classic 1960s photojournalist look, this is your lens.
4. The Legend: Nikkor-P 105mm f/2.5
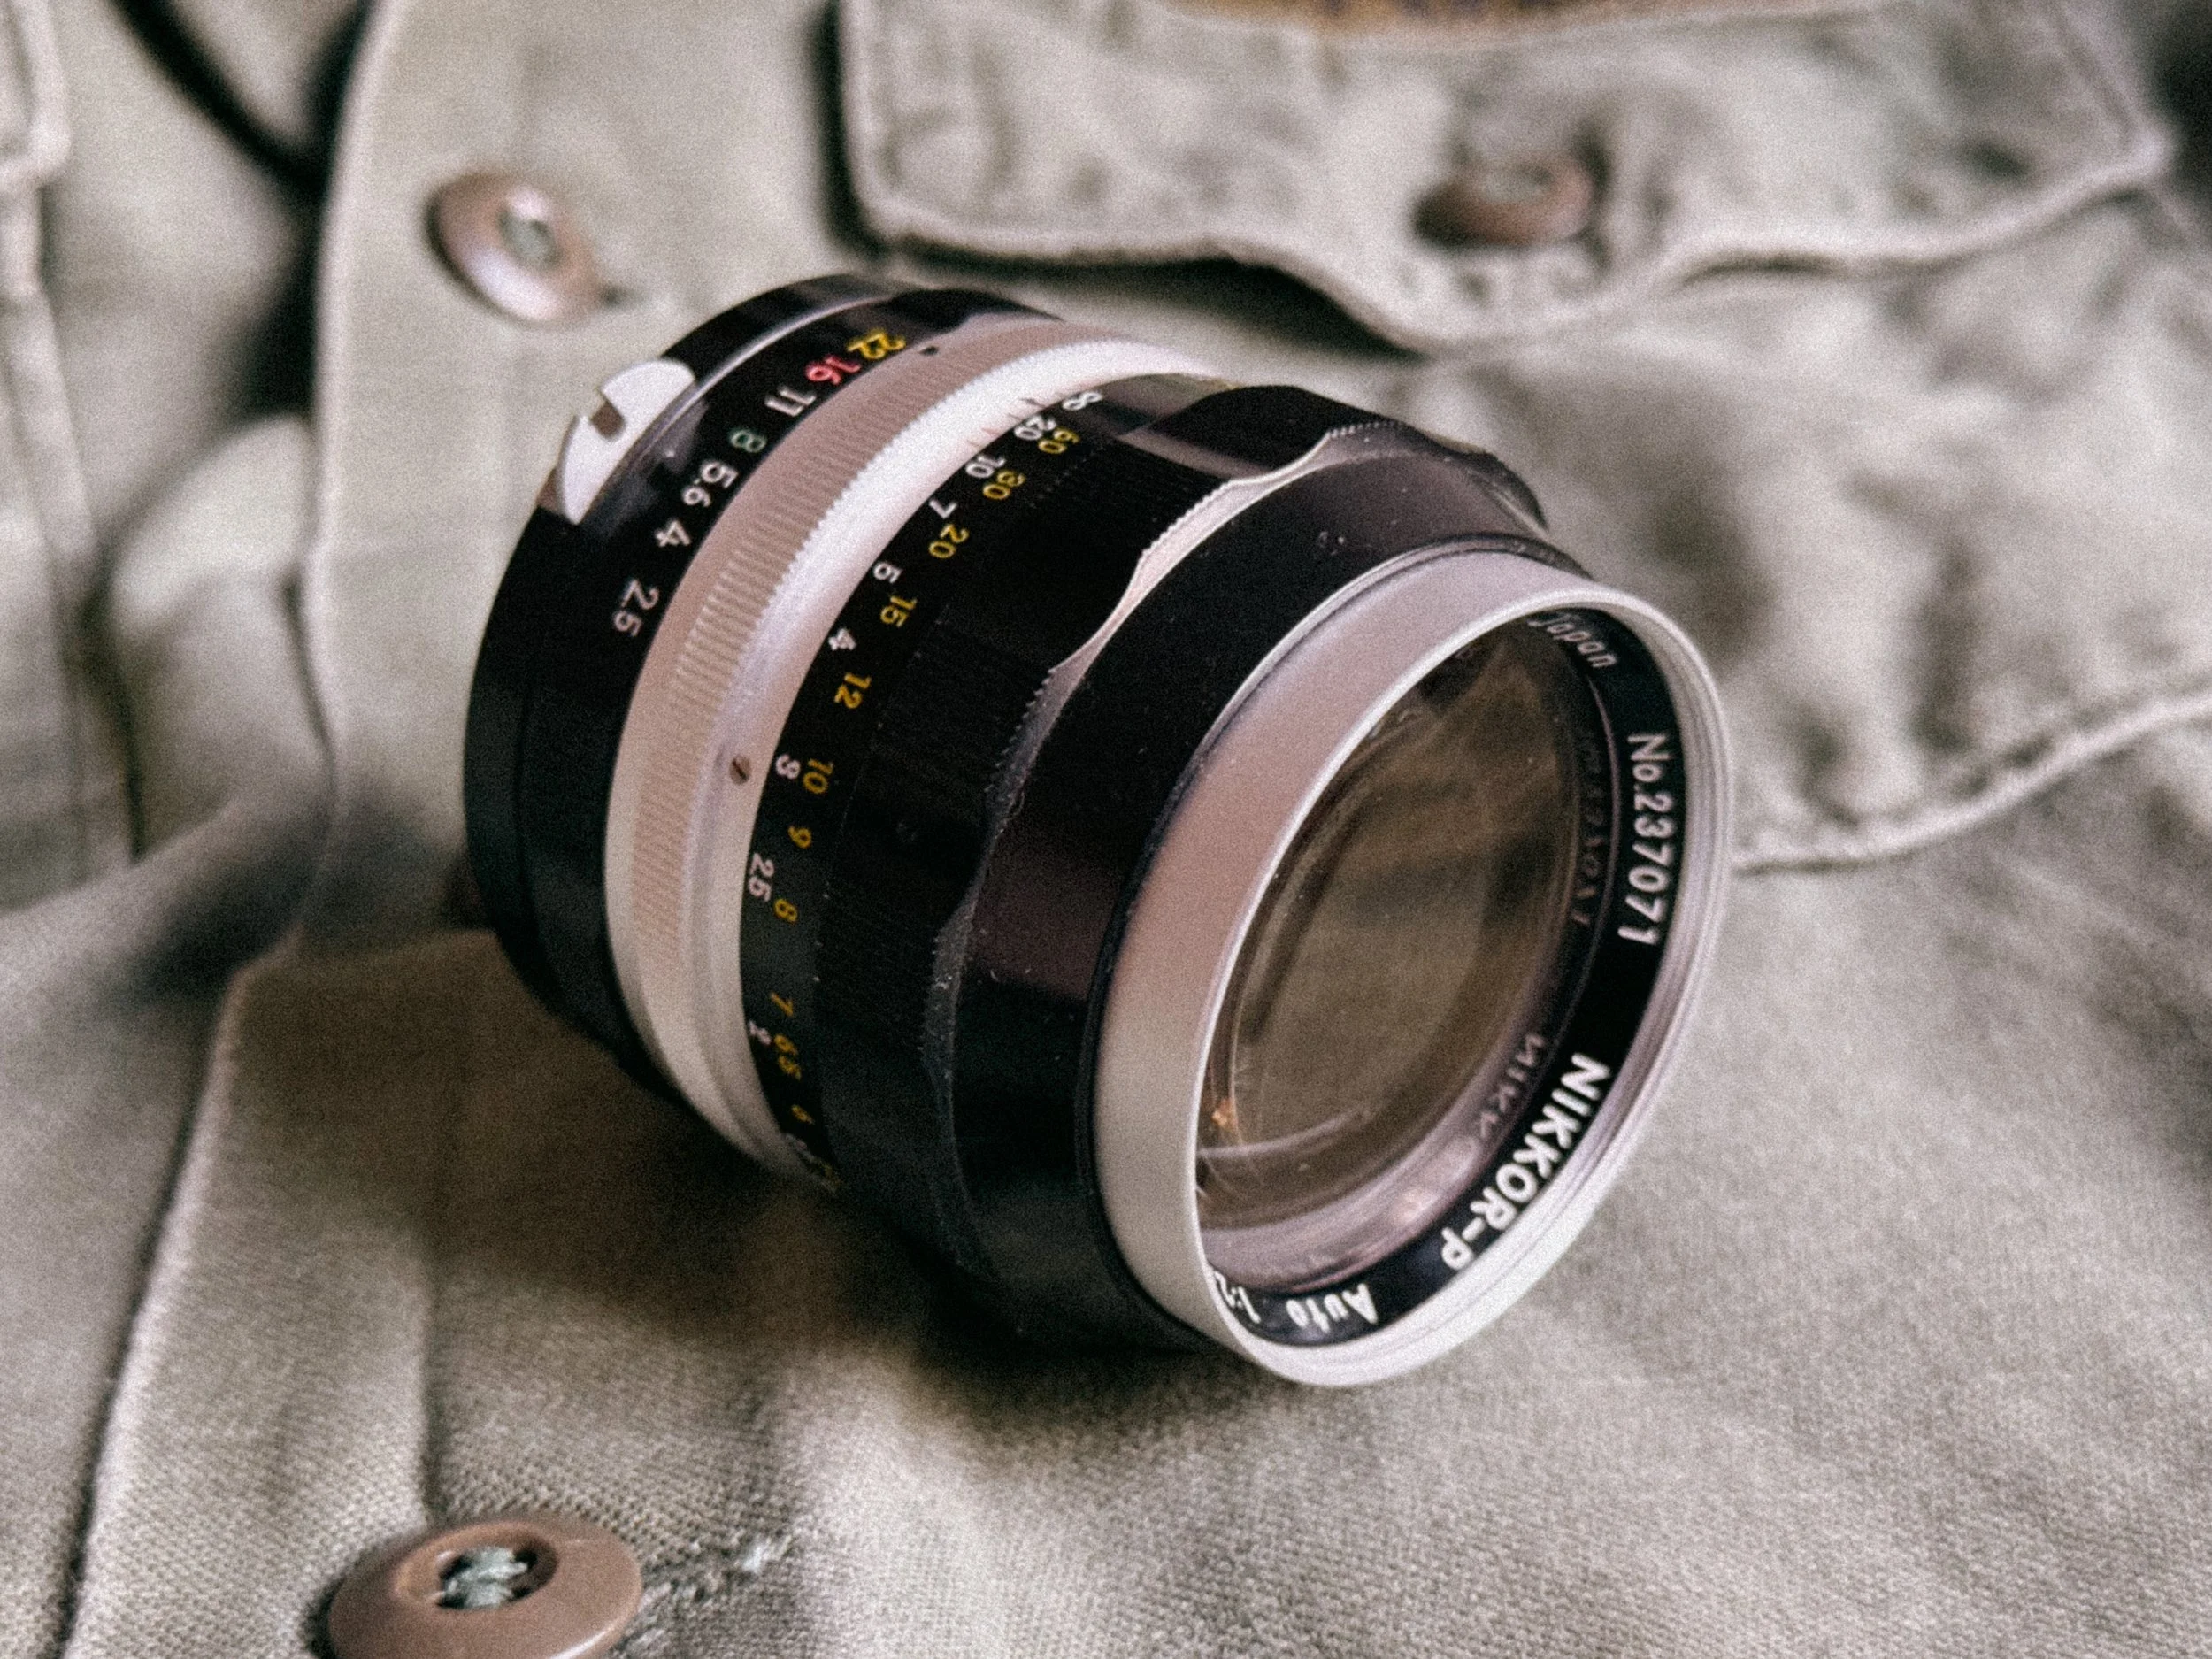
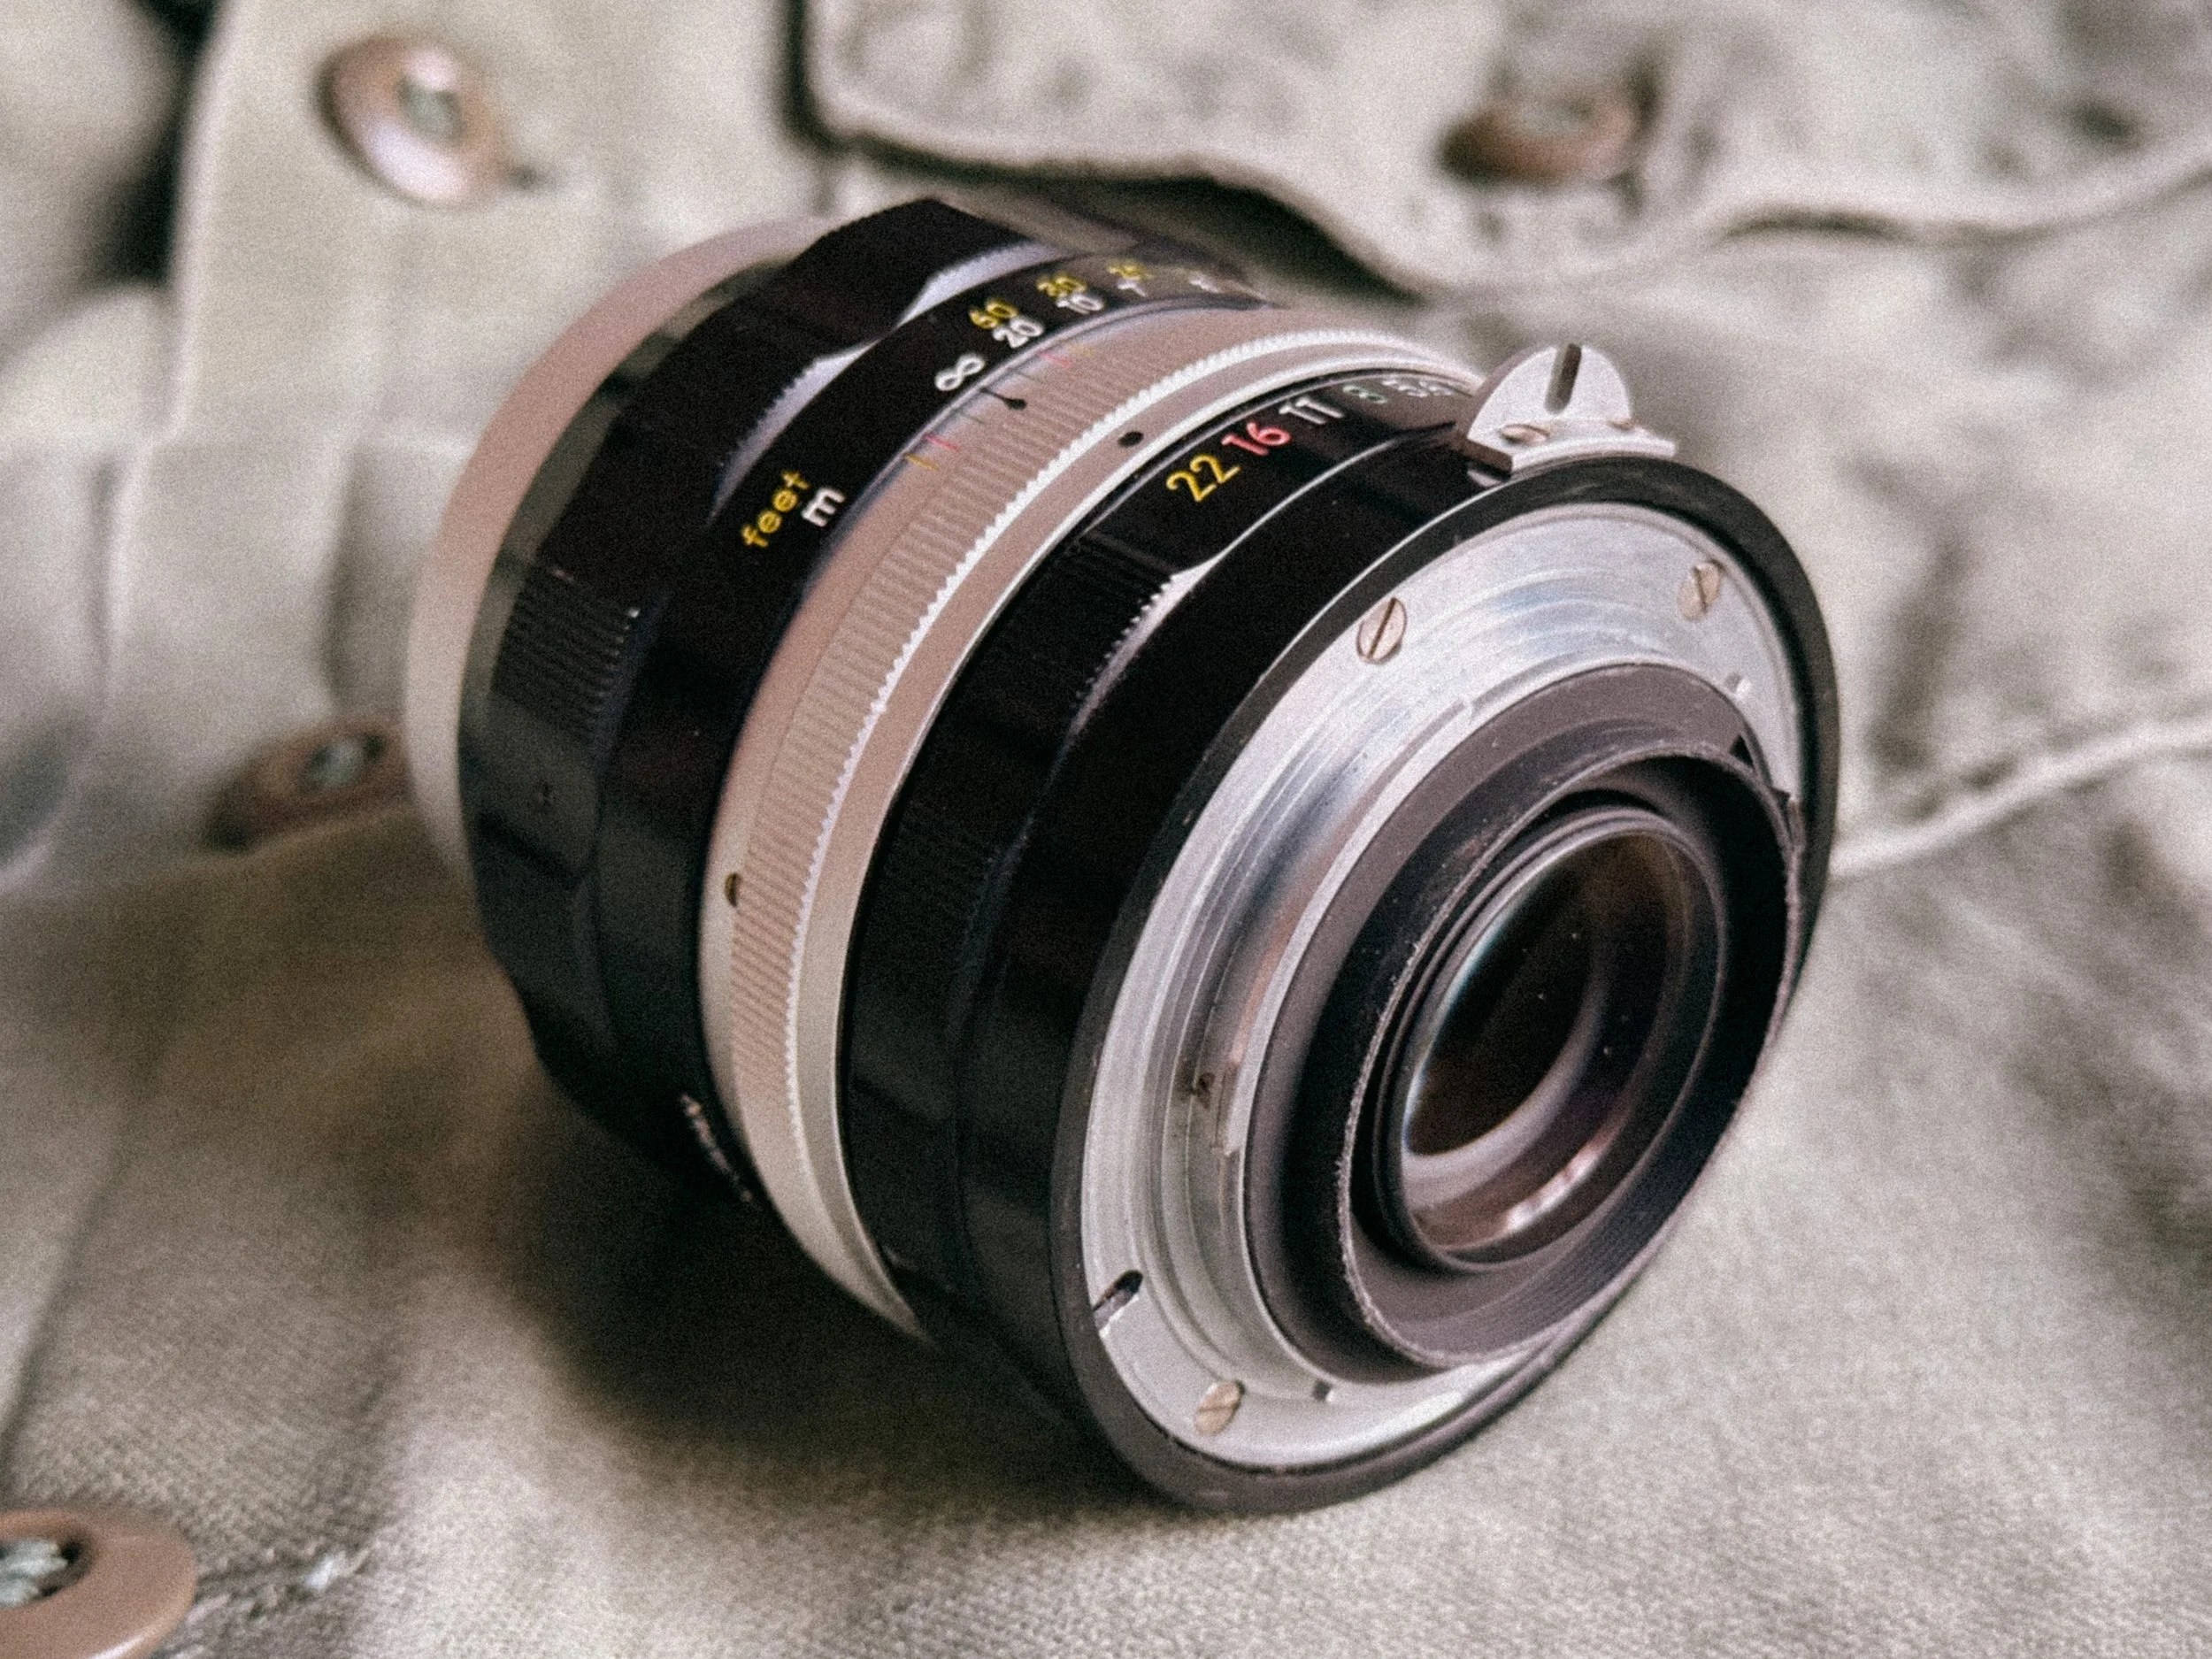
This is arguably one of the greatest portrait lenses ever made by any manufacturer. It has the rare ability to render portraits that look soft and sharp at the same time, I don’t know exactly what or how they did it, but this glass is truly exceptional. Before the later "Gauss" design, this early Pre-AI version used a Sonnar design that produces a dreamlike, creamy bokeh that other lenses simply cannot replicate. If you want that iconic "Afghan Girl" look, this lens is mandatory.
The Nikkor Alphabet
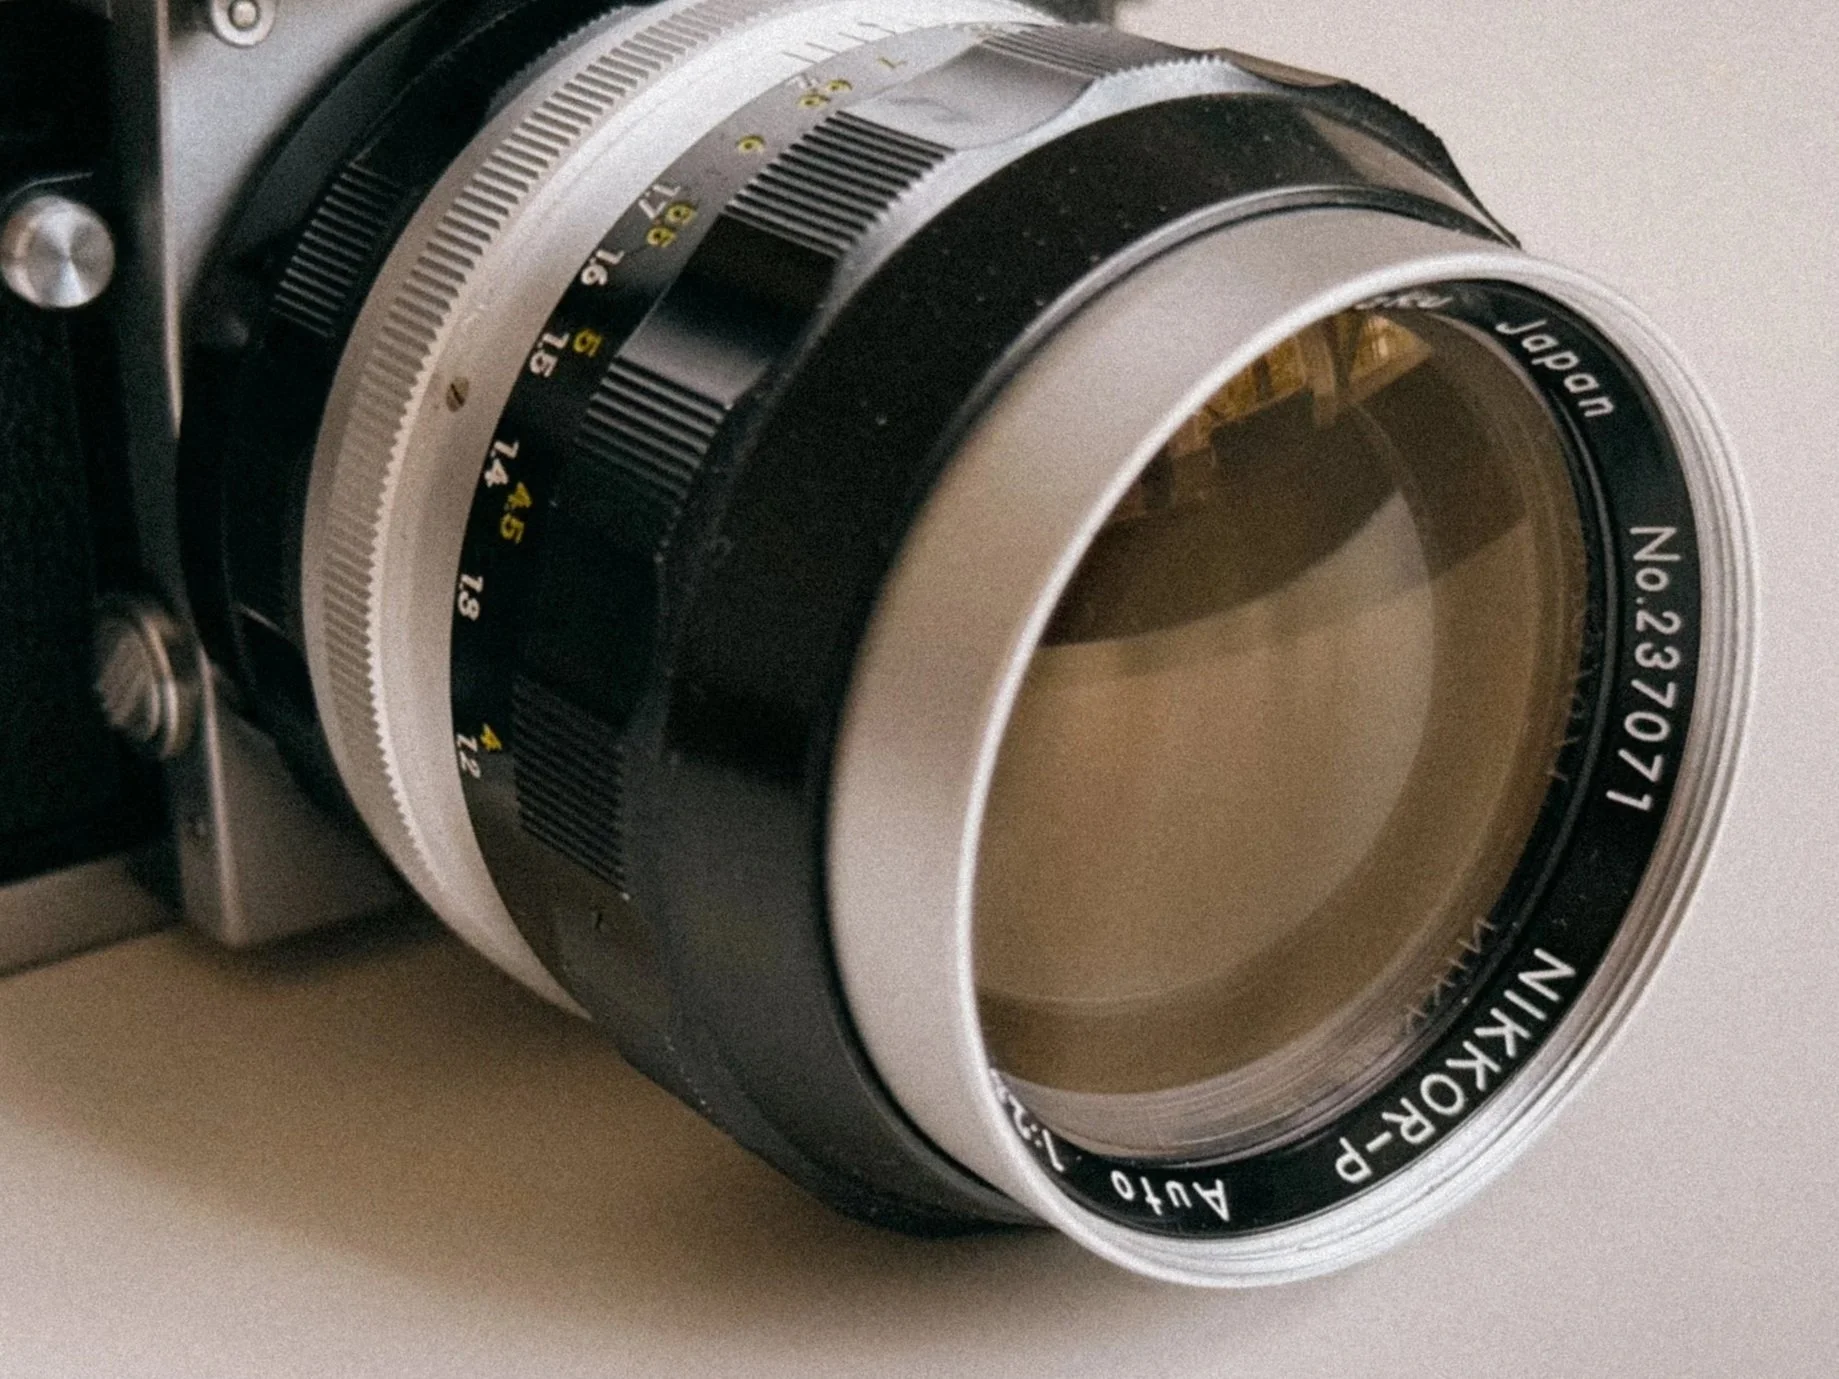
Nikkor-P Close up showing part of the Nikkor Naming Philosophy
When you look at a vintage Pre-AI lens, you’ll notice a letter right after the "Nikkor" name (e.g., Nikkor-S). This isn’t just branding; it tells you exactly how many glass elements are inside the lens. Nikon used a system based on Latin and Greek prefixes for numbers.
Knowing this helps you understand the complexity, and often the rendering character, of the lens you are holding.
| Letter | Origin (Latin/Greek) | Elements | Example |
|---|---|---|---|
| U | Unus | 1 | Ultra-rare optics |
| B | Bini | 2 | Early tele-converters |
| T | Tres | 3 | Nikkor-T 10.5cm f/4 |
| Q | Quatuor | 4 | Nikkor-Q 135mm f/3.5 |
| P | Pente | 5 | Nikkor-P 105mm f/2.5 |
| H | Hex | 6 | Nikkor-H 28mm f/3.5 |
| S | Septem | 7 | Nikkor-S 50mm f/1.4 |
| O | Octo | 8 | Nikkor-O 35mm f/2 |
| N | Novem | 9 | Nikkor-N 24mm f/2.8 |
| D | Decem | 10 | Nikkor-D 15mm f/5.6 |
The "C"
Later Pre-AI lenses often have a "·C" after the letter (e.g., Nikkor-S·C). The "C" stands for Coating (specifically Multicoating).
Non-C lenses: Single-coated. They produce more flare and have a "lower contrast" vintage look, perfect for artistic, dreamy shots.
C lenses: Multicoated. They handle backlight much better, have higher contrast, and richer colors.
What does "Auto" mean on Vintage Nikkors?
Don’t get it confused: "Auto" on these lenses has nothing to do with Autofocus.
Back in the day, it stood for Automatic Diaphragm. Before this tech, the more you closed your aperture, the darker your viewfinder became. Trying to focus at f/11 was like looking through sunglasses at midnight.
The "Auto" feature changed the game: it keeps the lens wide open for a bright, clear focus and only "snaps" down to your chosen aperture the millisecond you hit the shutter. It’s the mechanical soul of the Nikon F system.
Nikon F Buying Guide & Service: Keeping it Alive
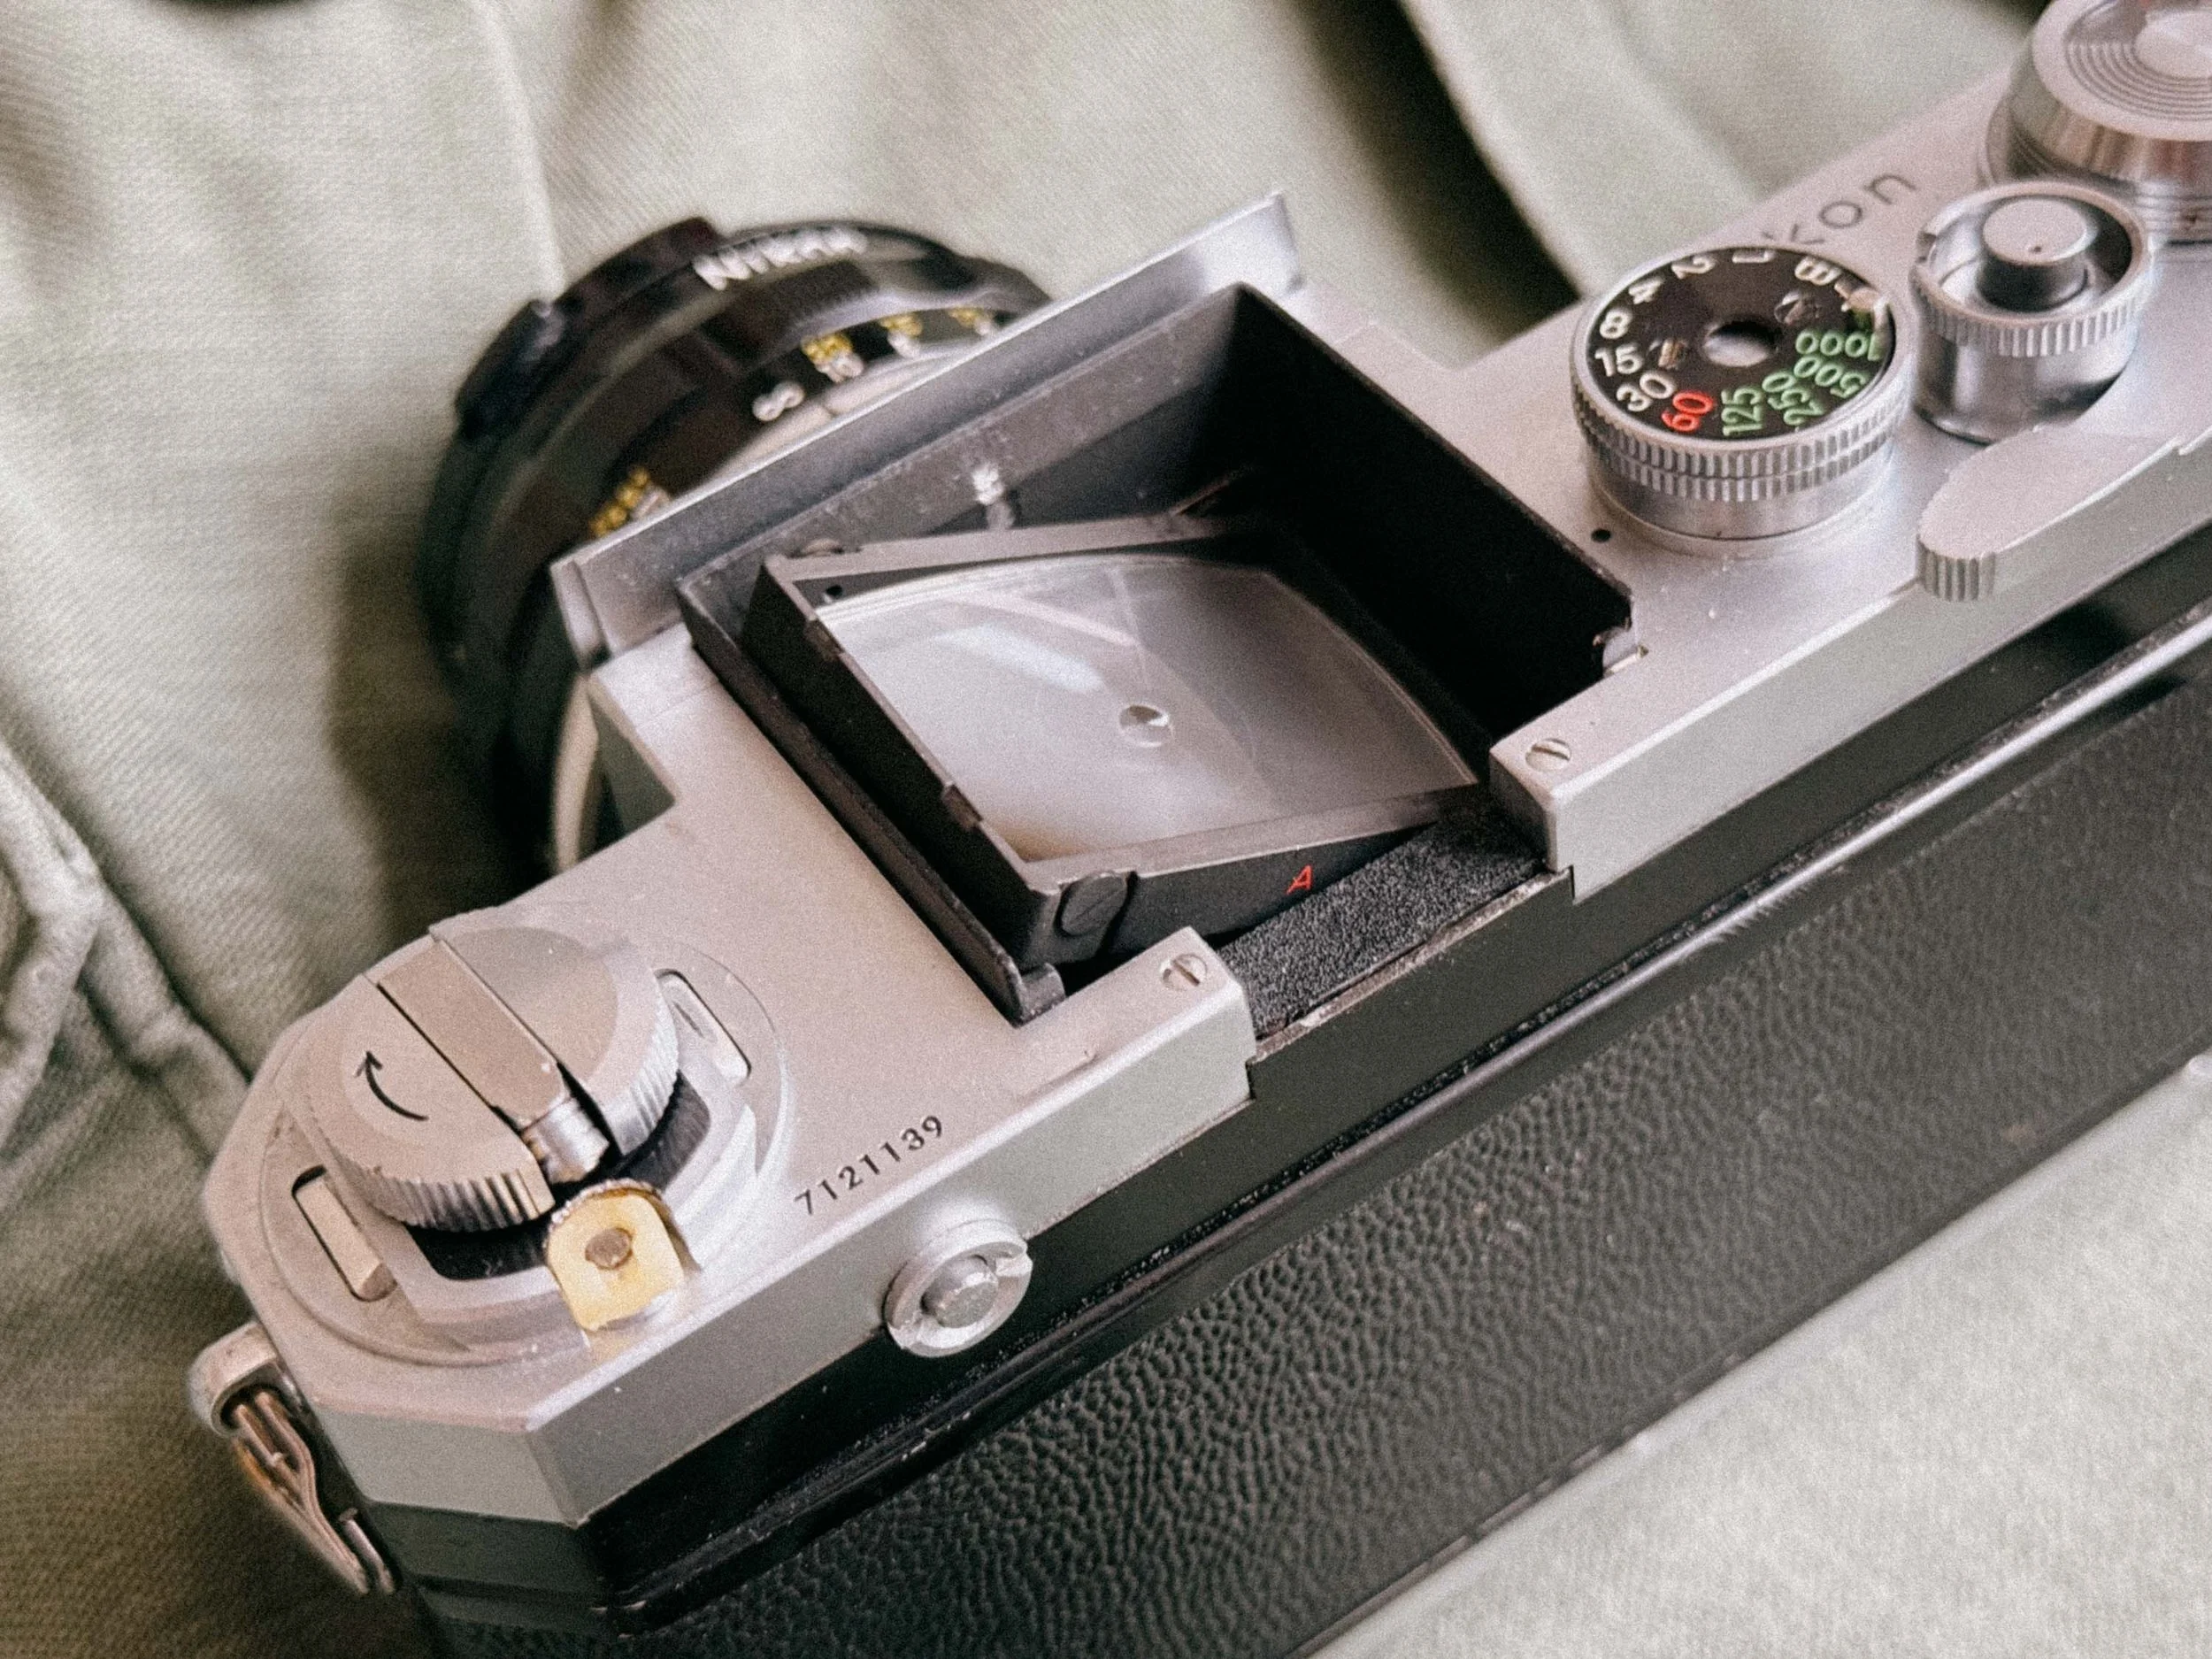
A little cleaning goes a long way!
In 2026, buying a Nikon F is a bit of a gamble if you don't know what to look for. These cameras are around sixty years old; they’ve seen things. To ensure your "new" camera doesn't end up as a very heavy desk ornament, here is an inspection list.
1. The Viewfinder: Desilvering & "The Gutter"
Look through the finder. Do you see a dark horizontal line or "clouds" at the bottom? That’s desilvering (prism rot).
The Inspection: Look for dark horizontal lines, "black snow," or cloudy patches at the bottom of the viewfinder. Be warned that these prisms frequently suffer from de-silvering, a permanent darkening or "clouding" of the optical glass. This is caused by the original internal foam seals deteriorating over 60 years and chemically attacking the silver coating. It’s essentially irreparable and the main reason why clean "Eye-Level" prisms now cost more than the camera bodies themselves.
If you find a clean one, service it immediately. Whether you DIY or send it to a professional like Hoffmann, the old foam must be removed and replaced with modern, stable materials. If you leave the original foam inside, it’s not a matter of if the prism will rot, but when.
2. The Focusing Screen Condition
The Nikon F has interchangeable screens, which is great, but they are often scratched from decades of improper cleaning.
A scratched Focusing Screen won't affect your final photo, but it will drive you crazy while focusing. Check for cleaning marks or scratches. If it's too bad, the good news is you can swap it out in seconds. Clean ones are still not cheap though.
3. The Titanium Shutter: Look for "Ripples"
Inspect the shutter curtains. The Nikon F uses titanium foil. It’s incredibly tough, but look for:
Wrinkles/Capping: If the curtains look like crumpled foil or don't open fully at 1/1000s, the camera needs a specialist.
Pinholes: Hold the open camera (without a lens) up to a light and look for tiny stars in the shutter. Titanium is better than cloth, but not invincible.
4. Slow Speeds & "The Sticky Mirror"
Fire the camera at 1 second. If it sounds more like 3 seconds, or if the mirror stays up for a moment before clicking back down, the lubricants have turned into glue. This is the #1 sign that a CLA (Clean, Lubricate, Adjust) is overdue.
5. The Photomic Meter: Dead, Jumping, or "Lying"?
In 2026, finding a working meter is tough because the original 1.35V mercury batteries are banned. (See the FAQ below for the best modern battery solutions) Many shooters simply use the Photomic finder for its aesthetics and use a smartphone metering app or a tiny shoe-mounted light meter (like the small Keks meter) for exposure. But if you want the "true" 1960s experience, a calibrated internal meter is unmatched.
6. The "Impact" Check: Dents and Bends
Because the Nikon F is made of thick brass, it takes a lot of force to dent it.
Watch for "Hits": Check the corners of the top plate and the baseplate for deep dents. If a camera has fallen hard enough to dent brass, the internal prism might be cracked, or worse, the lens mount might be slightly bent out of parallel.
Maintenance & CLA: Why It’s Essential

Freshly serviced Nikon F
I can’t stress enough how well-built these vintage Nikkor lenses and bodies are. We are talking about 60-year-old brass and glass that can still operate with the precision of a Swiss watch. But time is an enemy even a Nikon cannot defeat alone.
The Specialist: Foto Kamera Service Hoffmann
If you are in Central Europe, there is one name every Nikon F shooter needs: Foto Kamera Service Hoffmann (Stuttgart). Henry Hoffmann is one of the few left who can properly service these machines.
The Photomic "Brain Surgery": They can recalibrate your dead Photomic finder from the old 1.35V mercury standard to modern 1.5V batteries.
Optical Rescue: They can deep-clean your 105mm Sonnar or 35mm Nikkor-O to remove "vintage haze" and restore the whole lens. (They had to completely renew the helicoid threads on my 28mm 2.0)
A professional CLA doesn't just "fix" the camera; it changes the experience. The shutter sound changes fand the focus rings regain that buttery, weighted resistance that makes shooting a Nikon F so addictive.
Nikon F Frequently Asked Questions (FAQ)
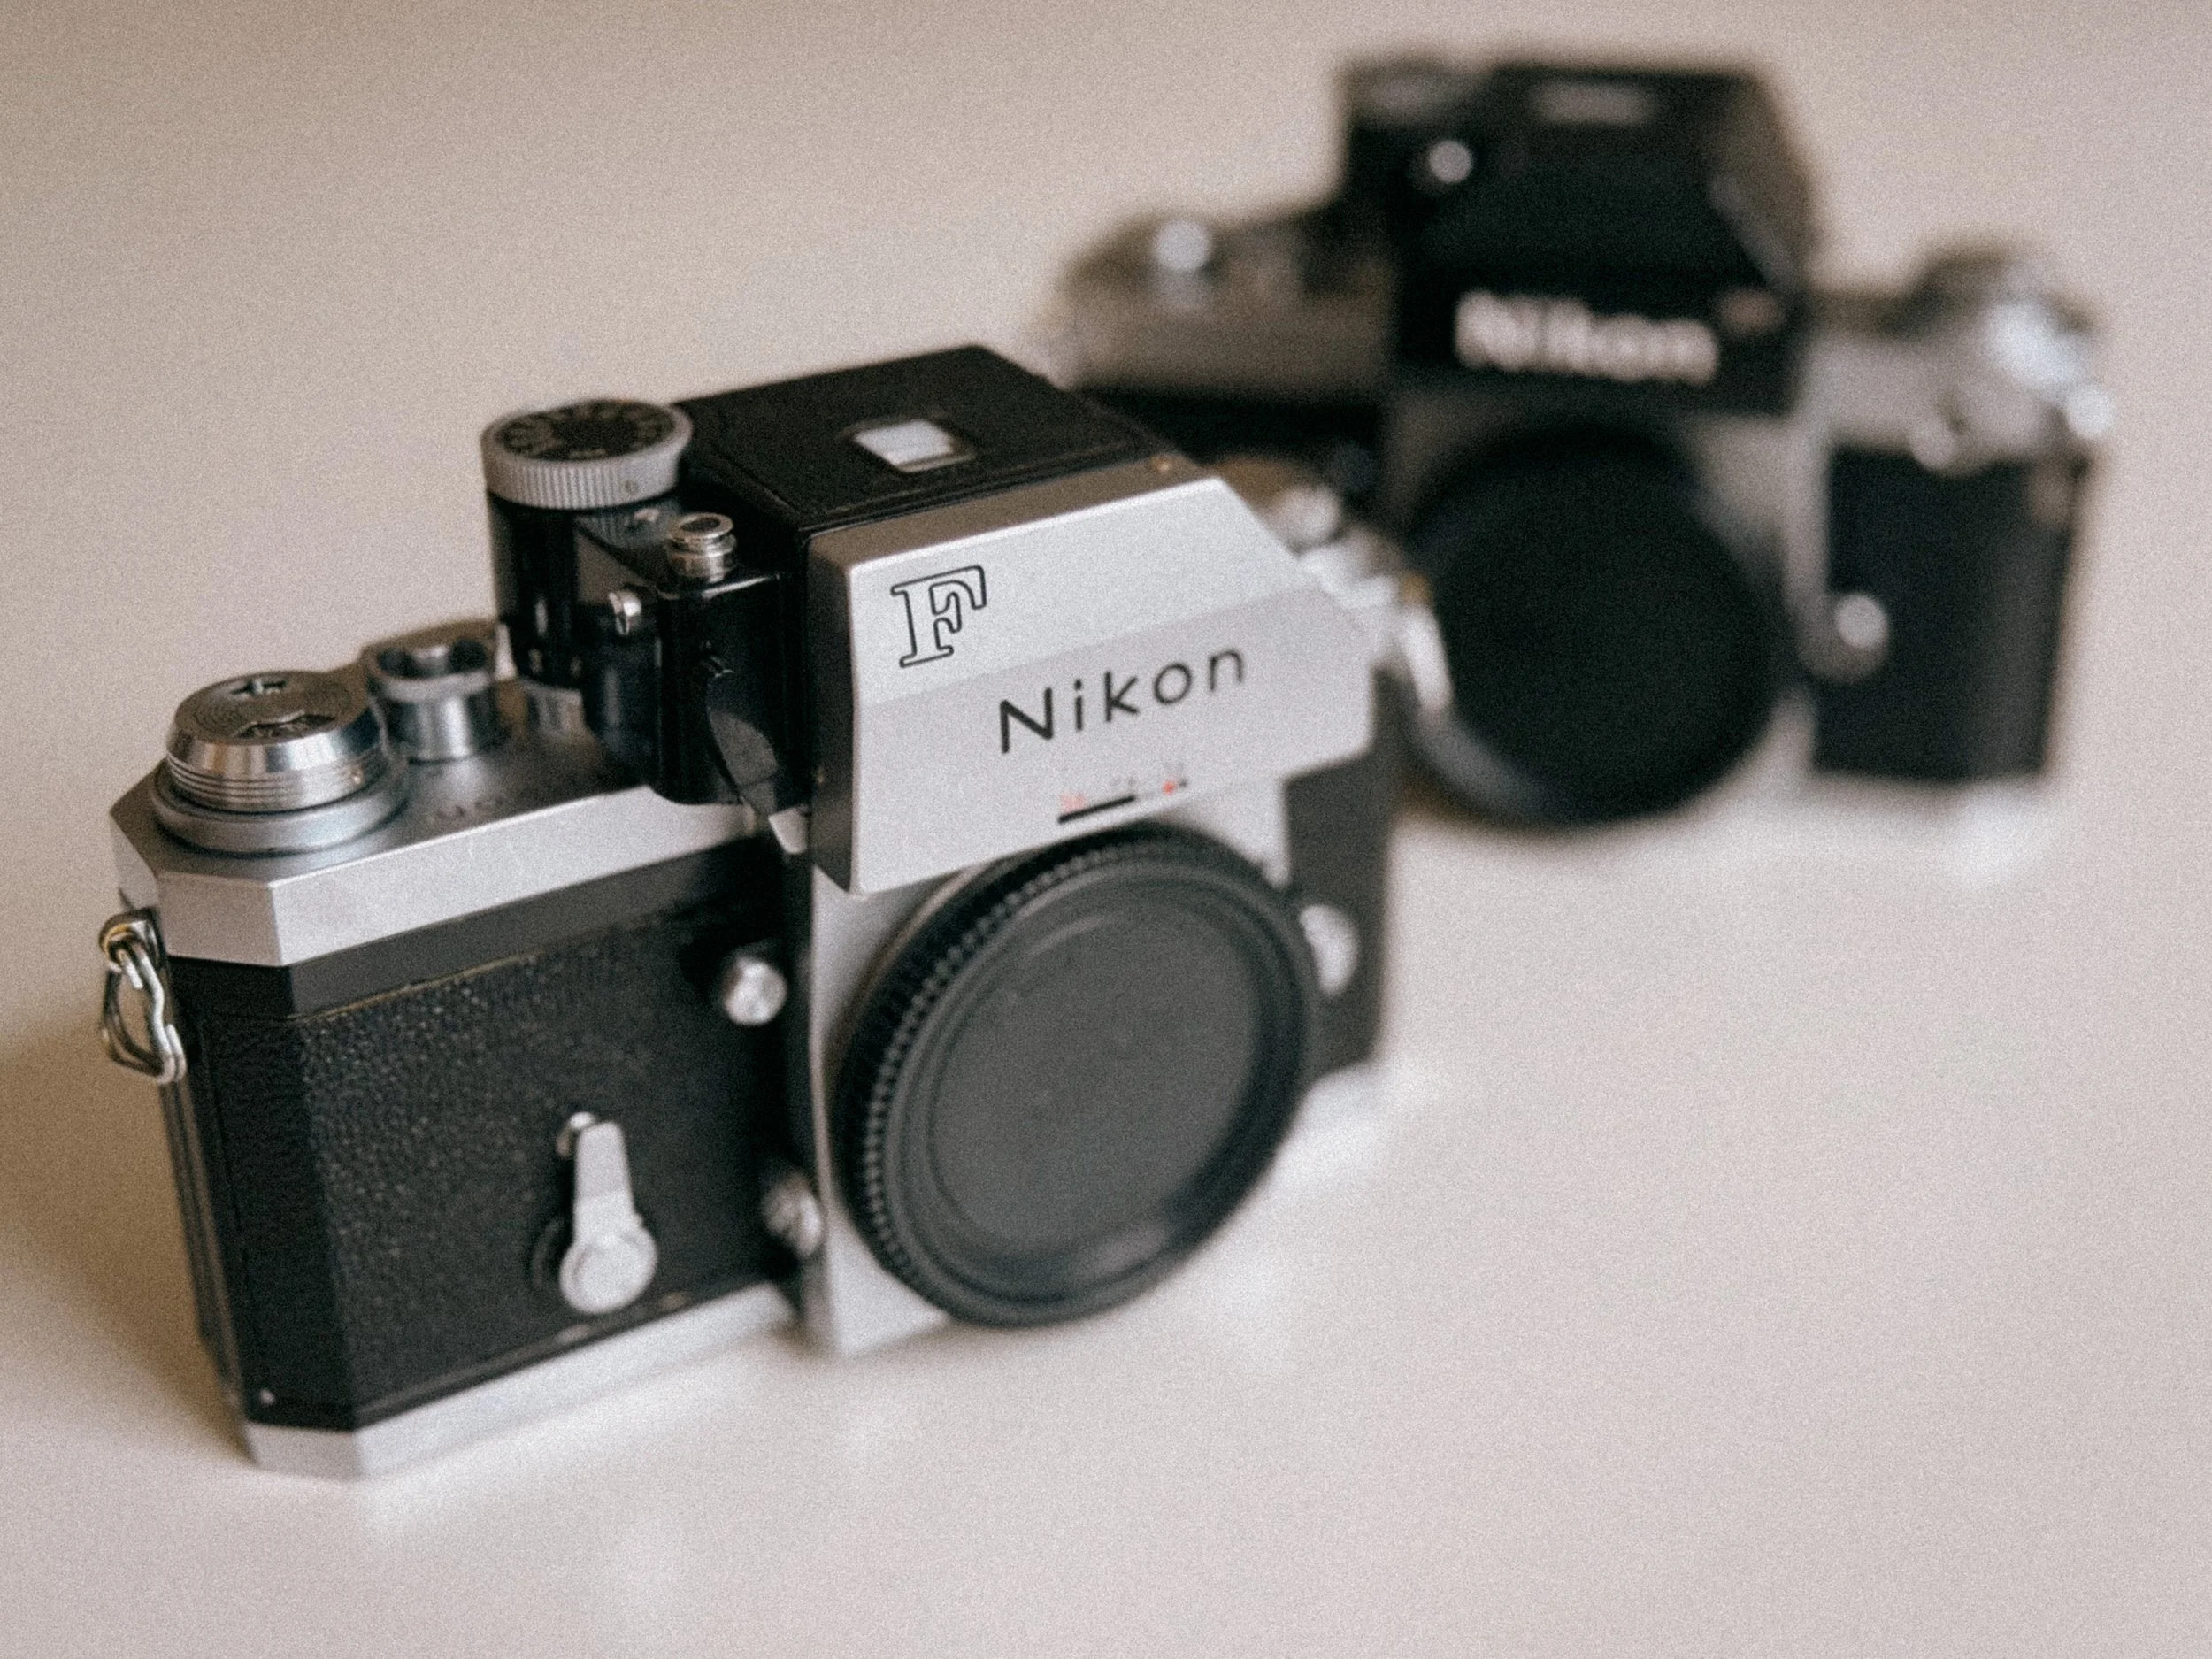
Nikon F or F2 - Which is better? Not an easy question.
1. Can I use modern Nikon lenses on a vintage Nikon F?
The short answer: No, not safely. Most modern Nikon lenses (G-type or E-type) lack an aperture ring, meaning they will only shoot at their smallest aperture (usually f/22). More importantly, never try to force a modern "AF-S" or "G" lens onto a Pre-AI body without checking clearance; you risk damaging the indexing pin of the Photomic finder. Stick to Pre-AI (Non-AI) or AI/AI-s lenses with the "rabbit ears" (coupling prong).
2. How do I power the Nikon F light meter without Mercury batteries?
Since 1.35V mercury batteries are banned, you have three professional options:
The WeinCell MRB625: A zinc-air battery that gives the correct 1.35V but only lasts 3–6 months.
The MR-9 Adapter: A physical adapter with a built-in voltage dropper that lets you use standard 386 silver-oxide batteries.
Professional Recalibration: Have a specialist like Kameraservice Hoffmann recalibrate the internal circuitry to accept modern 1.55V silver-oxide batteries permanently.
3. What is the difference between a Nikon F "Apollo" and a standard model?
The "Apollo" is the nickname for the very last production run of the Nikon F (early 70s). It features plastic-tipped self-timer and advance levers (similar to the Nikon F2). These are highly sought after in 2026 because they are generally "younger" and often in better mechanical condition than early 60s models.
4. Is the Nikon F shutter made of titanium?
Yes. Unlike many contemporaries that used silk or cloth, the Nikon F uses titanium foil shutter curtains. This makes them incredibly durable and resistant. If your curtains look slightly "crinkled," don't panic, as long as the speeds are accurate, a few ripples are normal for 60-year-old titanium.
5. Why is the "Eye-Level" prism more expensive than the metered Photomic finder?
It’s pure supply and demand. The plain Eye-Level prism gives the Nikon F its iconic, triangular silhouette. They are rarer, they don't have electronic parts that fail, and they are much lighter. In 2026, a mint-condition plain prism can cost as much as a full camera body with a Photomic finder.
6. My Nikon F shutter sounds "metallic" or "clunky." Is it broken?
Probably not. The Nikon F has a very distinct, mechanical "clack." However, if you hear a metallic "zing" or a slow, dragging sound on speeds below 1/30s, the internal dampening foams and lubricants have dried out. This is a clear sign you need a CLA (Clean, Lubricate, Adjust) to prevent long-term mechanical wear.
7. Can I adapt my vintage Nikkor Pre-AI lenses to my Mirrorless camera?
Absolutely! This is why these lenses are rising in price. Whether you shoot Sony, Canon R, or Nikon Z, a simple $20 adapter lets you use these legendary Nikkors. Their "imperfect" vintage rendering is the perfect balance to the "too clinical" look of modern digital sensors.
Final Verdict: Is the Original Nikon F Still Worth It?
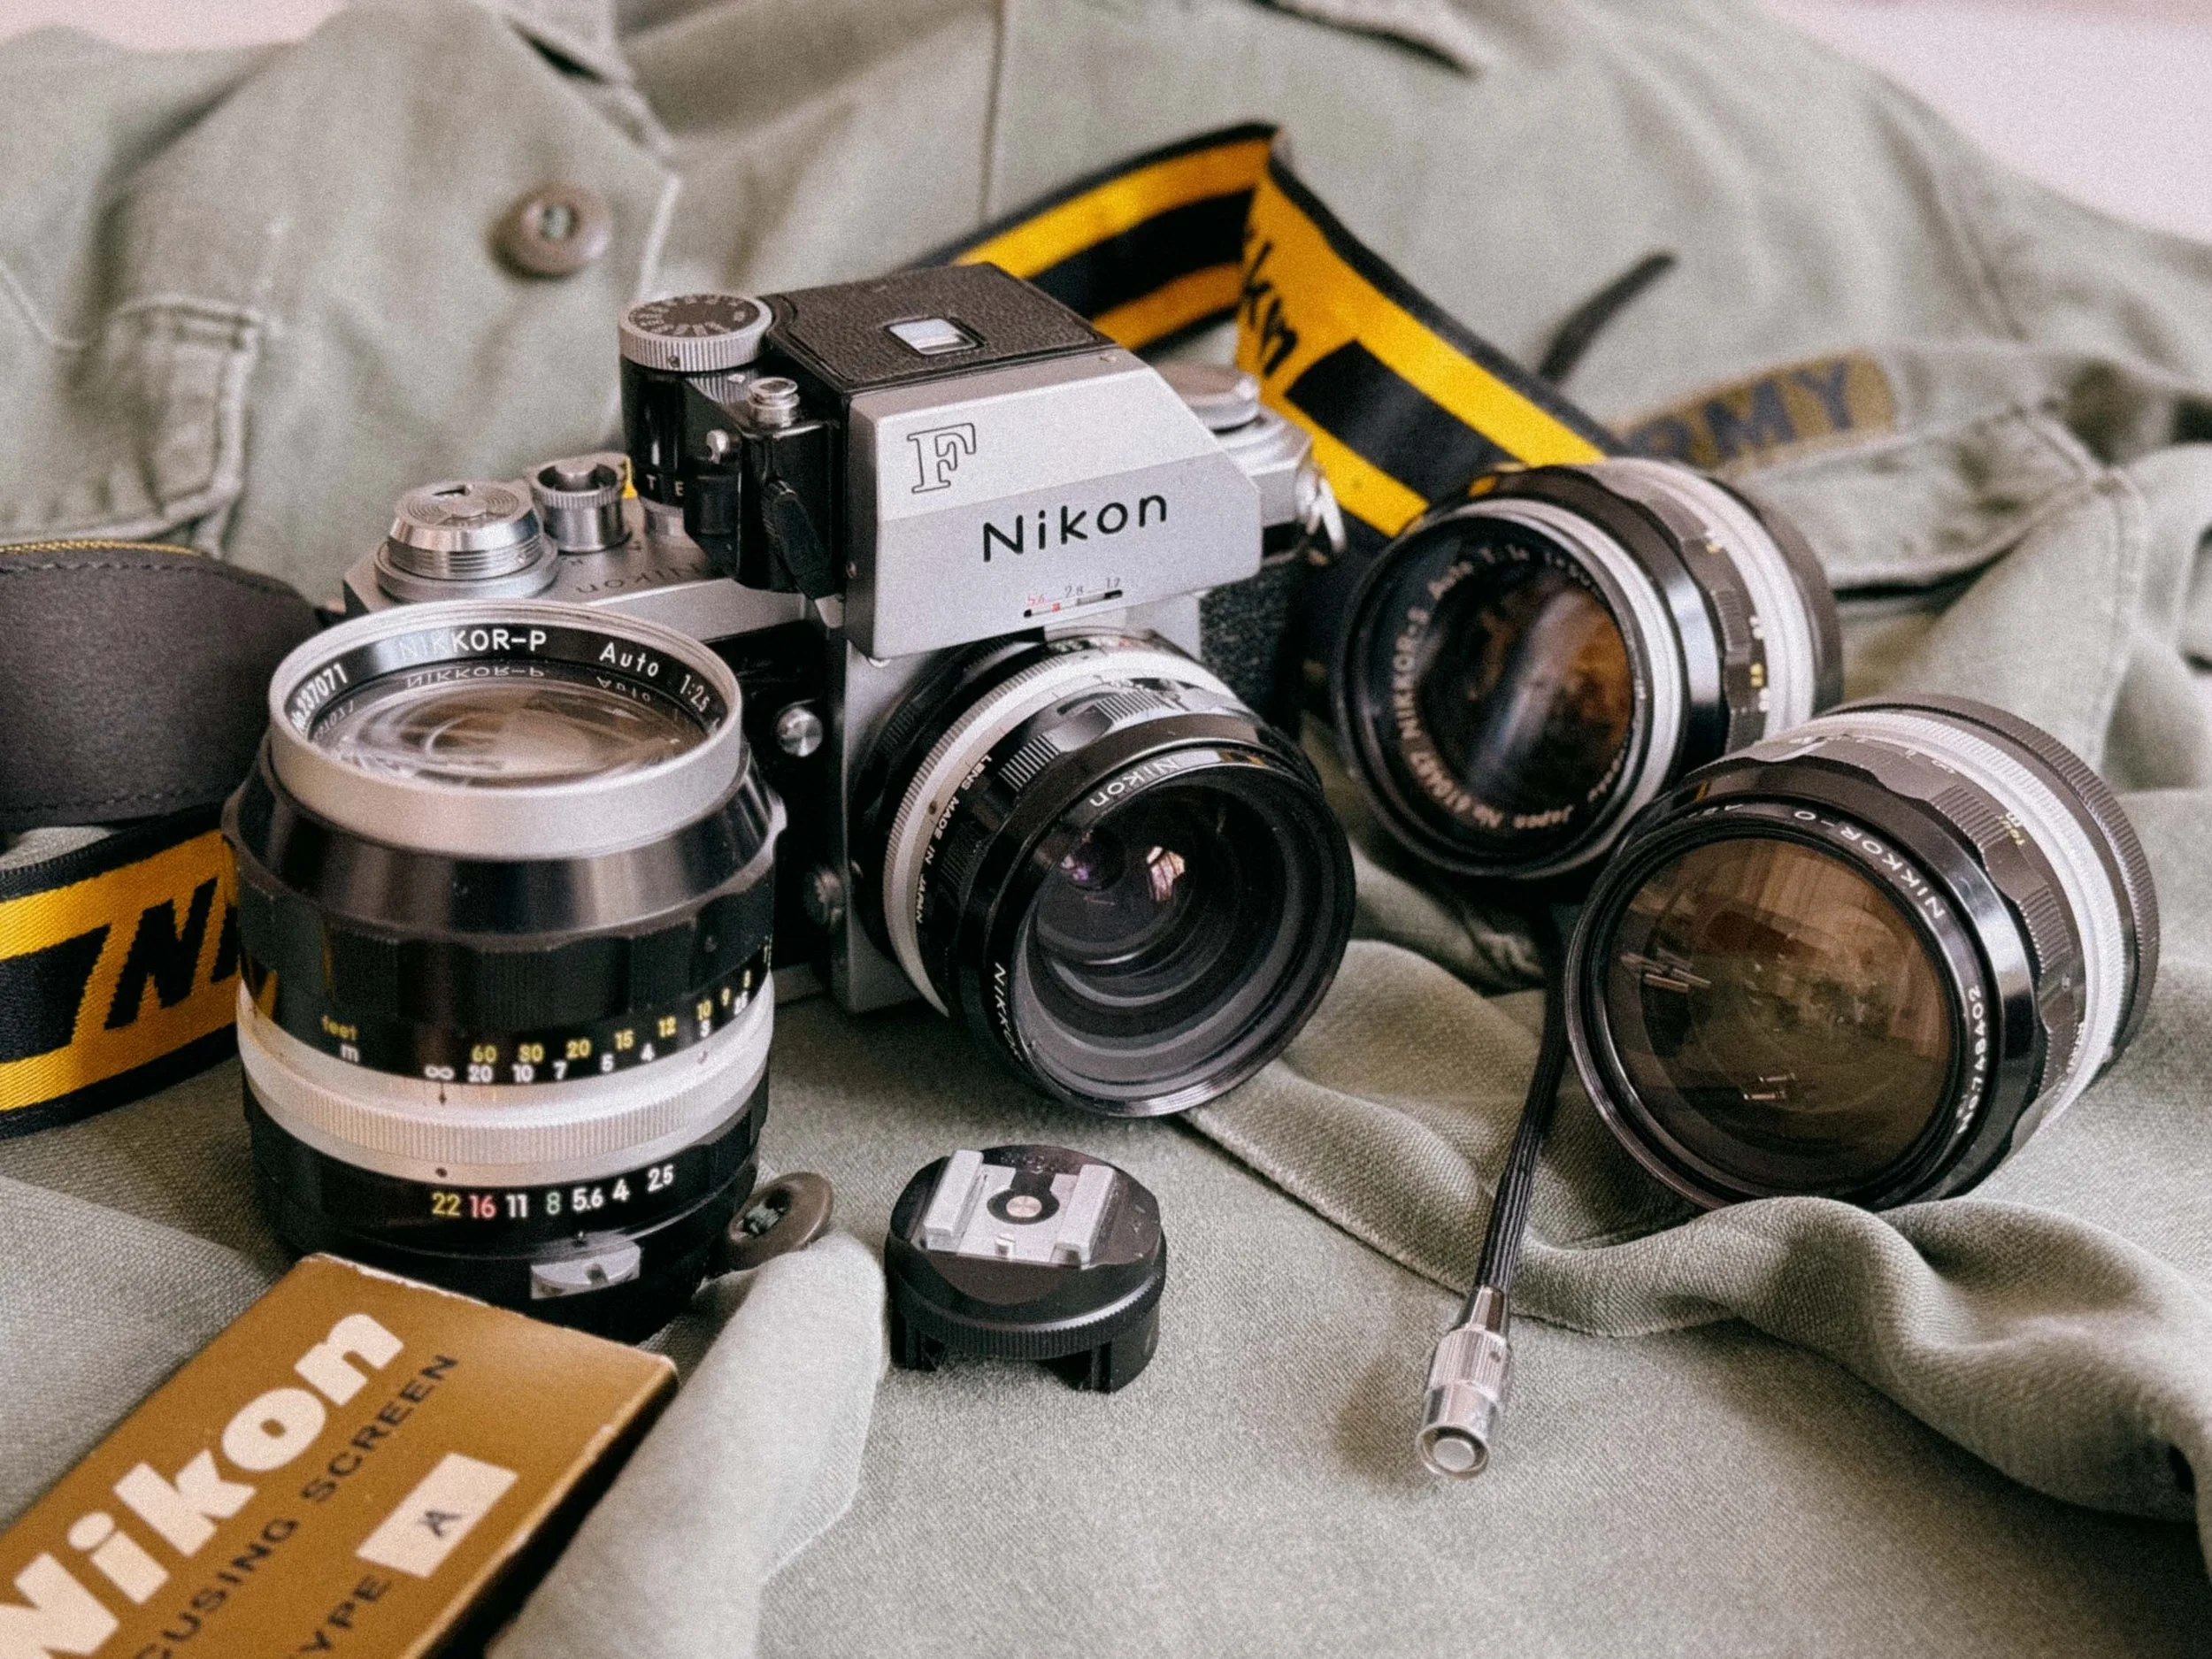
My Nikon F Gear
Today we are surrounded by technology that is designed to be obsolete in three years. The Nikon F is the exact opposite. It is a middle finger to the "disposable" era. It doesn’t have autofocus, it doesn’t have auto exposure, and it certainly won’t help you post to social media.
So, why should you buy one?
Because shooting a Nikon F is a physical experience. You feel the weight of the brass, you hear the mechanical precision of the shutter, and you get to use those legendary Nikkor lenses that are built better than anything on the market today. It’s a camera that demands your respect and your attention. It’s very satisfying to use something that has just as much relevance nowadays as it had when it was introduced almost 70 years ago.
Is it for everyone?
Probably not. It’s heavy, bulky, some say it’s ugly. But it's satisfying and a humbling experience to shoot it. I love it.
Where to buy a Nikon F or F2?
I can only recommend Nikon Classics. Warranty included!
The Bottom Line
The Nikon F is more than just a camera; it’s a time machine. It connects you to the history of photography in a way few other cameras can. If you find a clean body, buy it. If you find a broken one, send it to Hoffmann and they will fix it. In a world of plastic and pixels, the Nikon F remains the heavy weight king.
Nikon F & Nikkor Glass: Full Image Gallery


Going Deeper: The Nikon F Rabbit Hole
While this guide covers the essentials for shooting a Nikon F in 2026, the history of this system is vast. I’ve tried to sum up the knowledge I feel is most important for a modern shooter, but there is so much more to discover. If you’re ready to dive even deeper, these legendary pages are the best places to start:
Nikon's Official F-System Chronicle: A must-read directly from the manufacturer. Absolutely check it out!
Photography in Malaysia (mir.com.my): The absolute encyclopedia of the Nikon F system.
Camera Quest: Great pool of info the Nikon F
Richard de Stoutz: A stunning visual database for identifying specific serial numbers and production changes.
Peter Russel: The ultimate guide on how to clean and adjust the finders.
Downloads
The Nikon F is first modula SLR systems ever made. Original Nikon F manuals remain a great resource for photographers who want to learn how the system works in detail, from interchangeable viewfinders and focusing screens to exposure metering and motor drive compatibility.
Whether you are trying to learn more about the Photomic finder system, or simply love the old school look, i gathered some for you.
Manuals: Original Nikon F instruction manuals covering operation, film loading, exposure metering, and system overview.
→ (link)
Service Manuals: Technical repair and maintenance documentation used by Nikon technicians, including mechanical diagrams and adjustment procedures.
→ (link)
Brochures: Official Nikon marketing materials and product brochures showcasing the F2 system at launch, including specifications and professional positioning.
→ (link)
Enjoyed this? You might also like:
If you found this article helpful, check out my other deep dives into the world of expired emulsions and color recovery:
Mamiya M645 Review (2026): The Best Entry into Medium Format?
FPP Retrochrome 400 Review: Shooting High-Speed Surplus Slide Film
Nikon F2 Review (2026): Is This the Best Mechanical 35mm Camera?
422 Meters of Frozen Gold: The Expired Ektachrome Heist Part I
422 Meters of Frozen Gold: The Expired Ektachrome Heist Part II
Embrace the Blues: Why Ektachrome shifts cooler and how to handle it
Minolta SR-101 (SRT 101) Review: The Ultimate Mechanical SLR in 2026?
Image Credits:
Nikon S2:
Nikon S2 by Katrin Gilger, licensed under CC BY 2.0.
Focusing Screens:
Excerpt from the original Nikon F Instruction Manual (Copyright: Nikon Corporation). Screenshot retrieved from: https://old-cameras.com/2024/04/nikon-f-instruction-manual/4/

Hasselblad Flextight X5 vs. Noritsu HS-1800: Is the 39MP Virtual Drum Scan Worth It?
I wanted to see if I could squeeze every bit of Venice sun out of my expired Ektachrome." Dive into my deep-dive comparison between the legendary Hasselblad Flextight X5 and the industry-standard Noritsu. From technical 39MP specs to a curated map of high-end labs across Europe—this is your guide to gallery-grade film scanning.

Venice on the Hasselblad Flextight - Ektachrome 400
The Hasselblad Flextight X5. Most of us only know this machine from YouTube videos and film photography lore. Many photographers ask: Is Flextight better than Noritsu for medium format? Its promises? Legendary resolution and breathtaking colors. Many photographers ask: Is Flextight better than Noritsu for medium format? So, when my trusted lab, Urban Film Lab, announced they added one of these to their arsenal, I knew I had to put it to the test. And what better way to judge its performance than a head-to-head fight? Let me tell you, i was very excited when i got the WeTransfer link for the files.
We’ll test the Hasselblad Flextight X5 against the Noritsu HS-1800 for medium format film scanning, focusing on resolution, color, and real-world results
Quick Answer: Hasselblad Flextight X5 vs. Noritsu HS-1800 The Hasselblad Flextight X5 is the superior choice for professional archival and gallery prints, offering 39MP resolution, a massive 4.9 Dmax, and 16-bit color depth. However, for social media and standard prints, the Noritsu HS-1800 remains the industry standard due to its speed, excellent highlight recovery, and cost-effectiveness.
Quick Navigation
My Setup: Expired Ektachrome 400 on the Mamiya 645
Before we get into the technical scanner details, you might wonder why I’m doing this (or not). The reason is simple: I’m currently working on a book project about Venice, all shot on expired Ektachrome (what a surprise - if you love expired slide film, you might enjoy this blog), and for selected 6x4,5 slides i wanted to have the option to print them super large. I shot them on my Mamiya 645 with the 80mm f/2.8 lens.
I had two of my favorite Venice positives scanned on the Hasselblad Flextight X5. And, let’s be honest—part of it was just pure curiosity! Since I was already doing the test for my own work, I figured: why not share the experience with you?
What is a Virtual Drum Scanner? (Hasselblad Flextight X5 vs. Flatbed)
Most scanners pull your film through rollers, which is fast but can lead to slight flatness issues. The Hasselblad Flextight X5 is different. It’s a "Virtual Drum" scanner—it magnetically pulls the negative (or positive) into a slight curve, ensuring it stays perfectly flat and equidistant from the lens, without a glass in between. It can scan also pretty much everything. From 35mm, to Medium Format and 4×5.
The Flextight X5 doesn't just rely on its magnetic virtual drum; it uses world-class Rodenstock lenses and a 3x8000 linear CCD. Using Hasselblad’s proprietary FlexColor software, it captures a raw-like 3F file that preserves every highlight detail.
Noritsu HS-1800 Review: Why it's still the Standard for Pro Lab Scans
The Noritsu HS-1800 is the industry standard for a reason, but not because it delivers a "finished" look out of the box. Its real strength is how neutral and flat the files are. It preserves a good amount of information in the highlights and shadows, giving you a lot of post-processing headroom. And to be honest, I have always been more than happy with its results.
While the Noritsu HS-1800 is a CCD-based scanner as well, it excels in productivity. It features highly effective Digital ICE (Infrared Clean) for C-41 color negative film, which the Flextight lacks in its high-end optics path to ensure maximum sharpness.
But how does this professional scanner compare when we throw a machine into the ring that costs as much as a mid-sized car?
A Quick Heads-Up: I’m a photographer, not a scanning technician or a color scientist. This comparison is based on my personal workflow and what I see with my own eyes. I’m sharing my experience with these scans to help you decide which service fits your project. If you want to dive deep into the hardcore technical specs of virtual drum scanning, I highly recommend checking out these resources.
Flextight X5 Technical Specs: Resolution, DPI, and Dmax 4.9 Explained
| Feature | Hasselblad Flextight X5 | Noritsu HS-1800 |
|---|---|---|
| Scanning Principle | Virtual Drum (Magnetic Curve) | Roller Transport (Flat) |
| Optical Resolution (120) | 3200 DPI | ~2400 - 3000 DPI |
| Effective Pixels (6x4.5) | 7311 x 5321 px | ~4800 x 3500 px |
| Total Megapixels | ~38.9 MP | ~16.8 MP |
| Color Depth | 16-bit tiff | 16-bit tiff 8-bit jpeg |
| Color Space | Adobe RGB (1998) | sRGB (Standard) |
| Dynamic Range (Dmax) | 4.9 | ~3.6 - 3.9 |
| File Size (TIFF) | ~234 MB | ~50 - 100 MB |
| Lens Optics | Rodenstock Magnagon | Noritsu Industrial Zoom |
| Best Used For | Gallery Prints & Archiving | Social Media & Daily Work |
- The 8000 dpi Resolution: On 35mm film, 8000 dpi is almost microscopic. While the Noritsu is great for standard prints, the Flextight lets you crop into a frame and still see the grain with zero distortion, thanks to the Rodenstock optics.
- The Dmax (4.9): This is impressive. A Dmax of 4.9 means the scanner can "see" through the densest parts of your film. It pulls detail out of pitch-black shadows in an Ektachrome slide that would simply be a black blob on any other machine.
- Virtual Drum vs. Roller Transport: The Flextight doesn't use glass and pulls the negative into a perfect curve. This ensures edge-to-edge sharpness that a roller-based system can't always guarantee.
Setup: Expired Ektachrome on Mamiya 645
As the slides were still at the lab, two days after the order, a download link appeared in my inbox.
The data arrived as uncompressed 16-bit TIFF files, each one a massive 7311 x 5321 pixels and weighing in at a hefty 234 MB. .
Side-by-Side: Flextight X5 vs. Noritsu HS-1800 Image Quality


Flextight X5 vs. Noritsu HS-1800: Color & Dynamic Range Comparison
You’ll instantly notice that the Noritsu and the Flextight don’t just differ in sharpness and dynamic range—they differ in color too. I was quite surprised about that! Is it the machine? Or the person behind it? The truth is: It’s both. While the Flextight’s optics and 16-bit depth provide a more 'true-to-life' color rendition of the actual slide, every scan is an interpretation as both are operated by a human being. Another benefit is that the 16 bit are a dream for editing! Even though i never felt that the 8 bit jpegs of the Noritsu were not sufficient.
But there’s more to it
The Hasselblad Flextight shows more saturated, "deeper" colors. Look at the red reflections in the water and the texture of the brick walls. It could be due to its impressive dynamic range. Instead of artificially brightening the scene, it squeezes every bit of information out of your slide.
The Noritsu scan is noticeably brighter and has a "washed-out" or flatter look. Either the software profile or the operator has intentionally lifted the shadows to ensure you don’t lose any information in the dark areas. While the facades might look a bit "milky" compared to the Flextight.
Take a close look at the lamps above the balcony. In the Flextight scan, the light is precisely contained and rendered with sharp edges. In the Noritsu scan, the bright areas tend to "bloom" or bleed into each other slightly.
Zoomed in on a small sign on the brickwork. The Flextight just seems sharper overall. I also applied some sharpening to the final two frames, just to see how the files would take it.
Bottom Line: Is the Flextight worth it?
To be honest, looking at the results, the difference wasn't as "mind-blowing" as some internet forums might lead you to believe.
It’s impressive to see that the Flextight was able to pull out even more info than the Noritsu already did—especially in those dense Venice shadows—but it also makes you appreciate the Noritsu even more. At first glance, the Noritsu is surprisingly close to the high-end Hasselblad. It really solidifies the Noritsu HS-1800 as the "standard" for a reason. This all changes if you want to print big as following chart shows.
With a native resolution of 7311 x 5321 pixels at 3200 DPI, a single 6x4.5 frame from the Flextight gives you roughly 39 Megapixels of clean, Rodenstock-sharp data. For my Venice prints, this means I can print at A2 size with 300 DPI without any upscaling – something the Noritsu simply can’t reach.
Best Scanner for Large Prints? Max Print Sizes for 6x4.5 Medium Format
| Print Quality | DPI | Hasselblad X5 (39 MP) | Noritsu (17 MP) |
|---|---|---|---|
| High-End (Gallery) | 300 DPI | 61.9 x 45.1 cm (A2) | 40.6 x 29.8 cm (A3) |
| Very Good | 240 DPI | 77.4 x 56.3 cm | 50.8 x 37.2 cm |
| Good (Poster) | 150 DPI | 123.8 x 90.1 cm | 81.3 x 59.5 cm |
| Native Resolution | Pixel | 7311 x 5321 px | 4800 x 3515 px |
The numbers don't lie: While the Noritsu is a fantastic for daily shooting, the Hasselblad X5 delivers more than double the megapixels (39 MP vs. 17 MP) and a significantly higher Dmax of 4.9, which is crucial for recovering detail from the dense shadows of expired Ektachrome.
Urban Film Lab Review: Why I Trust One Lab with My Projects
While there are other high-end services in Germany—there’s a specific reason I stick with Urban Film Lab for my entire work.
The "Auto-Scan" Trap
Many large-scale archiving providers offer different tiers, often distinguishing between "Auto-Scan" and "Manual-Scan." If you’re paying for a Flextight X5, an Auto-Scan makes zero sense. You choose the Flextight because you want absolute, manual control over the histogram, the black points, and the legendary sharpness of the Rodenstock optics. In short, i want Tobias Urban, who treats every frame like a piece of art, not as a number in a queue.
Everything in One House: From Kodak Gold to Flextight
The biggest advantage for me is having everything in one hand. Whether I’m sending in the 20 rolls of Kodak Gold 200 from our summer holidays for standard 35mm Noritsu scans, or my Ektachrome Venice slides for the Flextight X5:
Consistency: I know exactly how Tobias handles the chemistry and the scanners.
Reliability: In all the years I’ve been sending my work here, I’ve never received the wrong scans and not a single negative has ever been lost. That is priceless.
Peace of Mind: Knowing that the person developing your film is the same one doing the high-end scan ensures that the vision remains consistent from the darkroom to the digital file.
How to Order Hasselblad Flextight Scans at Urban Film Lab
Having worked with other labs, I love the process Tobias and his wife have built. Here is how you get your film onto their Flextight X5:
Visit the Store: Go to the Urban Film Lab Store and navigate to the Scans section.
Select Flextight: Choose the Flextight option. You’ll find all typical film formats (35mm, 120 Medium Format up to 6x17, and 4x5 Large Format).
Choose TIFF (Crucial!): Make sure to select TIFF as your output format.
Note: While the Flextight produces a raw .3f file, this format requires Hasselblad’s dedicated FlexColor software, which only runs on older systems. By choosing TIFF, you get a massive 16-bit file that is ready for Lightroom or Photoshop while preserving all the dynamic range.
Send your Film: Complete the checkout. There’s no need to print out extra PDFs or fill out complicated forms. Just send your film via post with your order number.
The Scan: Once your film arrives, Tobias handles the rest. After the job is done, you’ll receive a download link (and your negatives back via mail). Easy!
High-End Film Scanning: FAQ
Is a drum scan better than a Noritsu scan? A virtual drum scan (Flextight) offers higher dynamic range (Dmax) and better edge-to-edge sharpness for large prints. However, for social media and standard prints, the Noritsu HS-1800 is faster and more cost-effective.
What is Dmax in film scanning? Dmax measures the scanner's ability to record detail in the densest parts of the film (shadows in negatives, highlights in slides). The Flextight X5’s Dmax of 4.9 is among the highest in the industry.
Should I get 16-bit or 8-bit TIFF scans? For professional work and color grading, 16-bit TIFFs are great as they provide millions of more color gradations, preventing "banding" during post-processing.
Where to get Hasselblad Flextight Scans in Europe (UK, Spain, Italy & Portugal)
While Urban Film Lab is my top choice, I know not everyone is living in Germany or wants to ship precious negatives all over Europe. If you are looking for that legendary Hasselblad Flextight X5 quality closer to home, these are the most prestigious labs offering dedicated high-end scanning services:
Southern Europe (Italy)
| Country | Lab Name | Location | Link |
|---|---|---|---|
| Italy | Yes We Scan | Milan | Visit Lab |
| Italy | Soluzioni Arte | Rome | Visit Lab |
Western Europe & UK
| Country | Lab Name | Location | Link |
|---|---|---|---|
| France | Emulsion Lab | Paris | Visit Lab |
| UK | Lucid Imaging | Cardiff | Visit Lab |
| UK | Rapid Eye | London | Visit Lab |
My Personal Takeaway
The Noritsu will remain the go to for my work. It’s fast, reliable, and the quality is fantastic for everything I do. Also its files are not gigantic in size.
However, for your absolute best shots, your bangers, or your own large print/gallery projects, the Hasselblad tier at Urban Film Lab is the perfect safety net to ensure you've captured every single grain of detail. I will absolutely continue to get re-scans on the Flextight. So its not either or. It’s both. And to answer the question; Is the Flextight X5 worth it? Yes. It is.
Final Verdict: Is the Flextight X5 better than the Noritsu?
If your goal is maximum detail for gallery-grade prints or recovering shadows from dense slides (like expired Ektachrome), the Hasselblad Flextight X5 is the best film scanner for medium format.
However, for daily shooting and high-volume projects, the Noritsu HS-1800 offers the best balance of quality and price. For my Venice book, I’ll be using both: Noritsu for the edit, and Flextight for the final "bangers."
Full Disclosure: I am not affiliated with any of the labs mentioned above (except for being a very happy long-term customer of Urban Film Lab). I don't receive commissions or free scans for these mentions. My goal is simply to provide a reliable map for the analog community to ensure your best frames get the scan quality they deserve.
Enjoyed this? You might also like:
If you found this article helpful, check out my other deep dives into the world of expired emulsions and color recovery:
Nikon F2 Review (2026): Is This the Best Mechanical 35mm Camera?
Nikon F Review (2026): Shooting the Indestructible 35mm Legend
422 Meters of Frozen Gold: The Expired Ektachrome Heist Part I
422 Meters of Frozen Gold: The Expired Ektachrome Heist Part II
Embrace the Blues: Why Ektachrome shifts cooler and how to handle it
Minolta SR-101 (SRT 101) Review: The Ultimate Mechanical SLR in 2026?
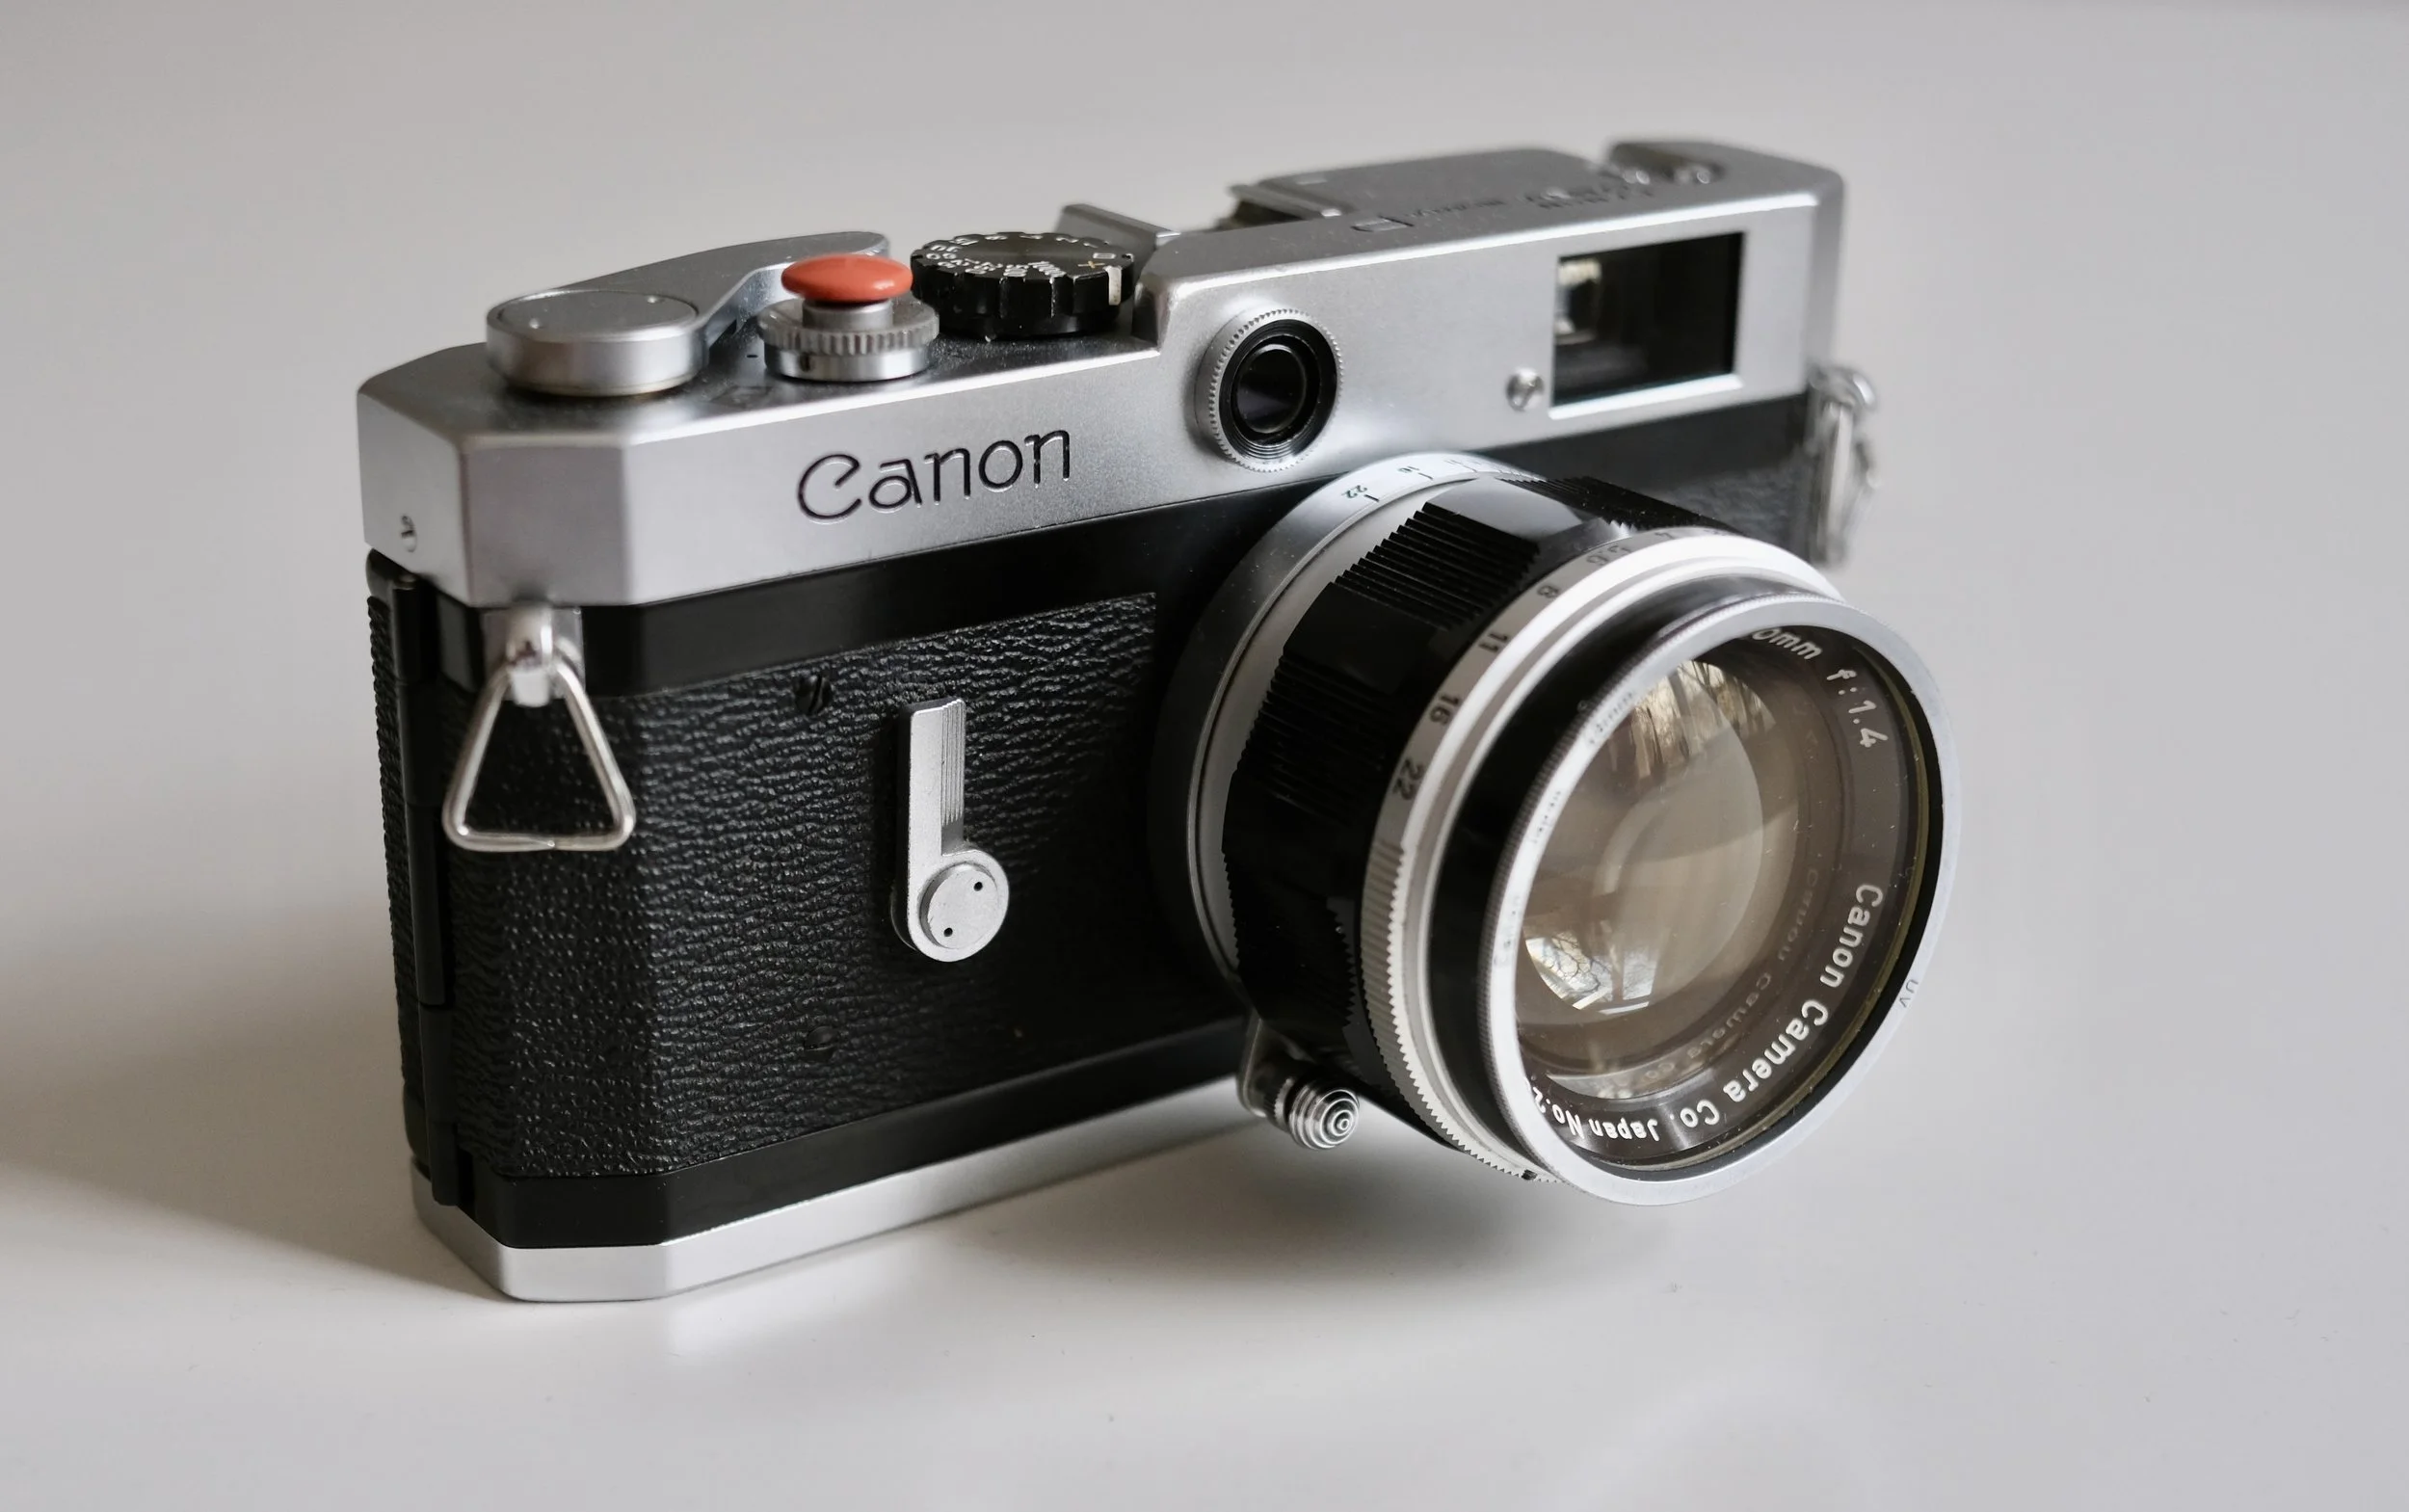
Canon P Review: The Best Value LTM Rangefinder?
Is the Canon P the ultimate "budget Leica"? With its stunning 1:1 viewfinder and robust mechanical build, this 1959 classic remains a powerhouse for film photographers in 2026. I dive deep into its specs, the "wrinkled shutter" myth, and the best LTM lenses for this vintage masterpiece.
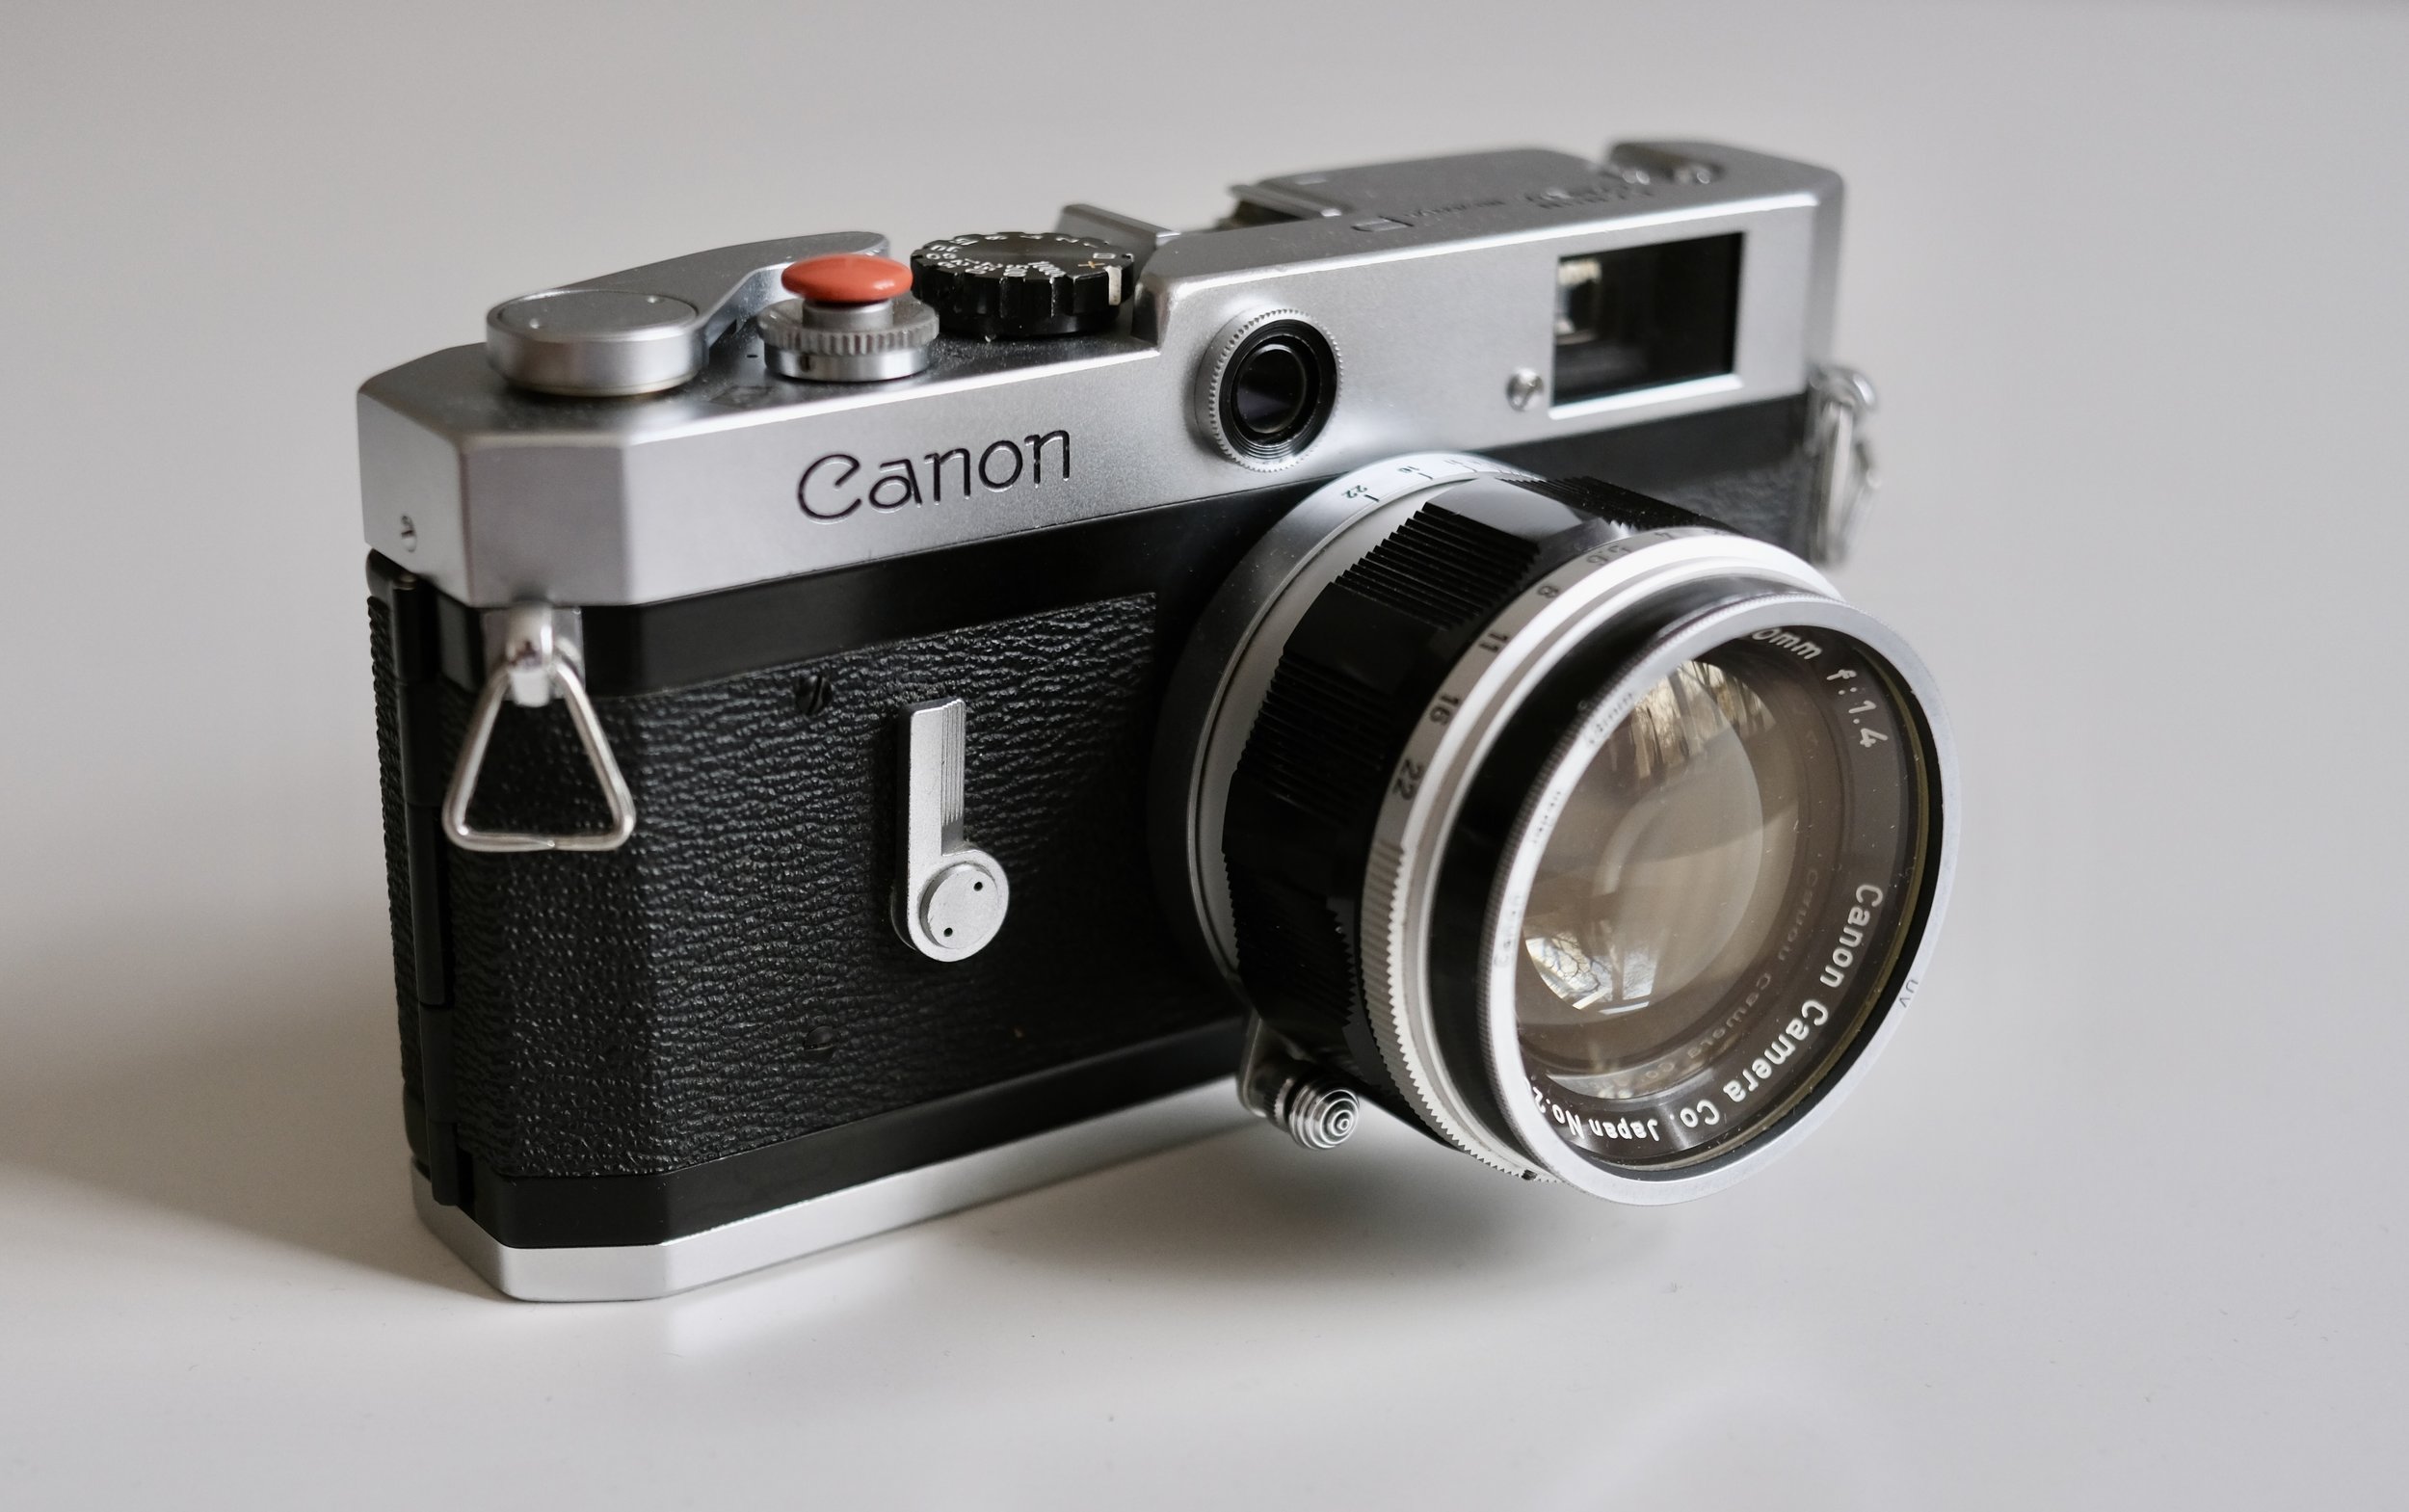
Clean looks
The Canon P is a fully mechanical 35mm rangefinder camera using the Leica M39 (LTM) screw mount. It is widely considered one of the best value vintage rangefinders, especially for 50mm shooting. While it offers excellent build quality and a bright 1:1 viewfinder, it lacks a built-in light meter and is less convenient for wide-angle use—especially for glasses wearers.
Canon P vs. Leica: The History of the Populaire
The Canon P (Populaire), released in 1959, is often overshadowed by its more famous German cousins or its own successor, the Canon 7. But in the world of vintage rangefinders, the "P" is arguably the peak of usable, mechanical design. It’s a tool that feels solid, looks understated, and stays out of your way.
Canons history goes way back to the 30s. Almost every Leica design got a copy from Canon. Like the Kwanon (the prototype that started it all) or the early Canon II, III, and IV series, which were heavily inspired by the Leica III screwmount cameras.
Canon P Technical Specifications & Features
| Feature | Specification |
|---|---|
| Camera Type | 35mm Rangefinder Camera |
| Lens Mount | LTM (Leica Thread Mount) / M39 |
| Viewfinder | 1:1 Magnification (Life-size) |
| Framelines | 35mm, 50mm, 100mm (Permanent) |
| Shutter Type | Stainless steel foil, focal plane shutter |
| Shutter Speeds | 1s to 1/1000s + Bulb (X-sync at 1/55s) |
| Flash Sync | PC-Socket (Side-mounted) |
| Film Loading | Modern swing-back door |
| Rewind | Integrated fold-out crank |
| Weight | ~650g (Body only) |
| Battery | None (Fully mechanical) |
Canon P – Pros
Extremely robust and reliable (built like a tank classic rangefinder)
huge lens selection with LTM/M39 mount
Bright, large viewfinder for its era
Fully mechanical - no battery required
Relatively affordable entry into rangefinder systems
Canon P – Cons
No built-in light meter (external meter needed or sunny 16)
Limited frame line flexibility compared to later systems
Viewfinder is not ideal for glasses wearers
Cold shoe (requires sync cable for flash)
Design & Handling: Where Canon Out-Engineered the Competition
When you look at this almost 70-year-old camera, it looks surprisingly modern. It represents the moment where Canon stopped just "copying" Leica designs and started out-engineering the competition. While Leica stayed focused on their specific M-system philosophy, Canon integrated features into the P that were far ahead of their time. Many see the Canon P as the best mechanical Leica M2 or Leica M3 alternative due to its 1:1 finder and build quality.
Modern Ergonomics
The Canon P already features the now-normal way to load film: a regular door that is locked from the bottom. Generally speaking, it feels super sturdy and well-built—a dense, brass-and-steel machine with zero "flex." Also it looks just so sleek and stylish.
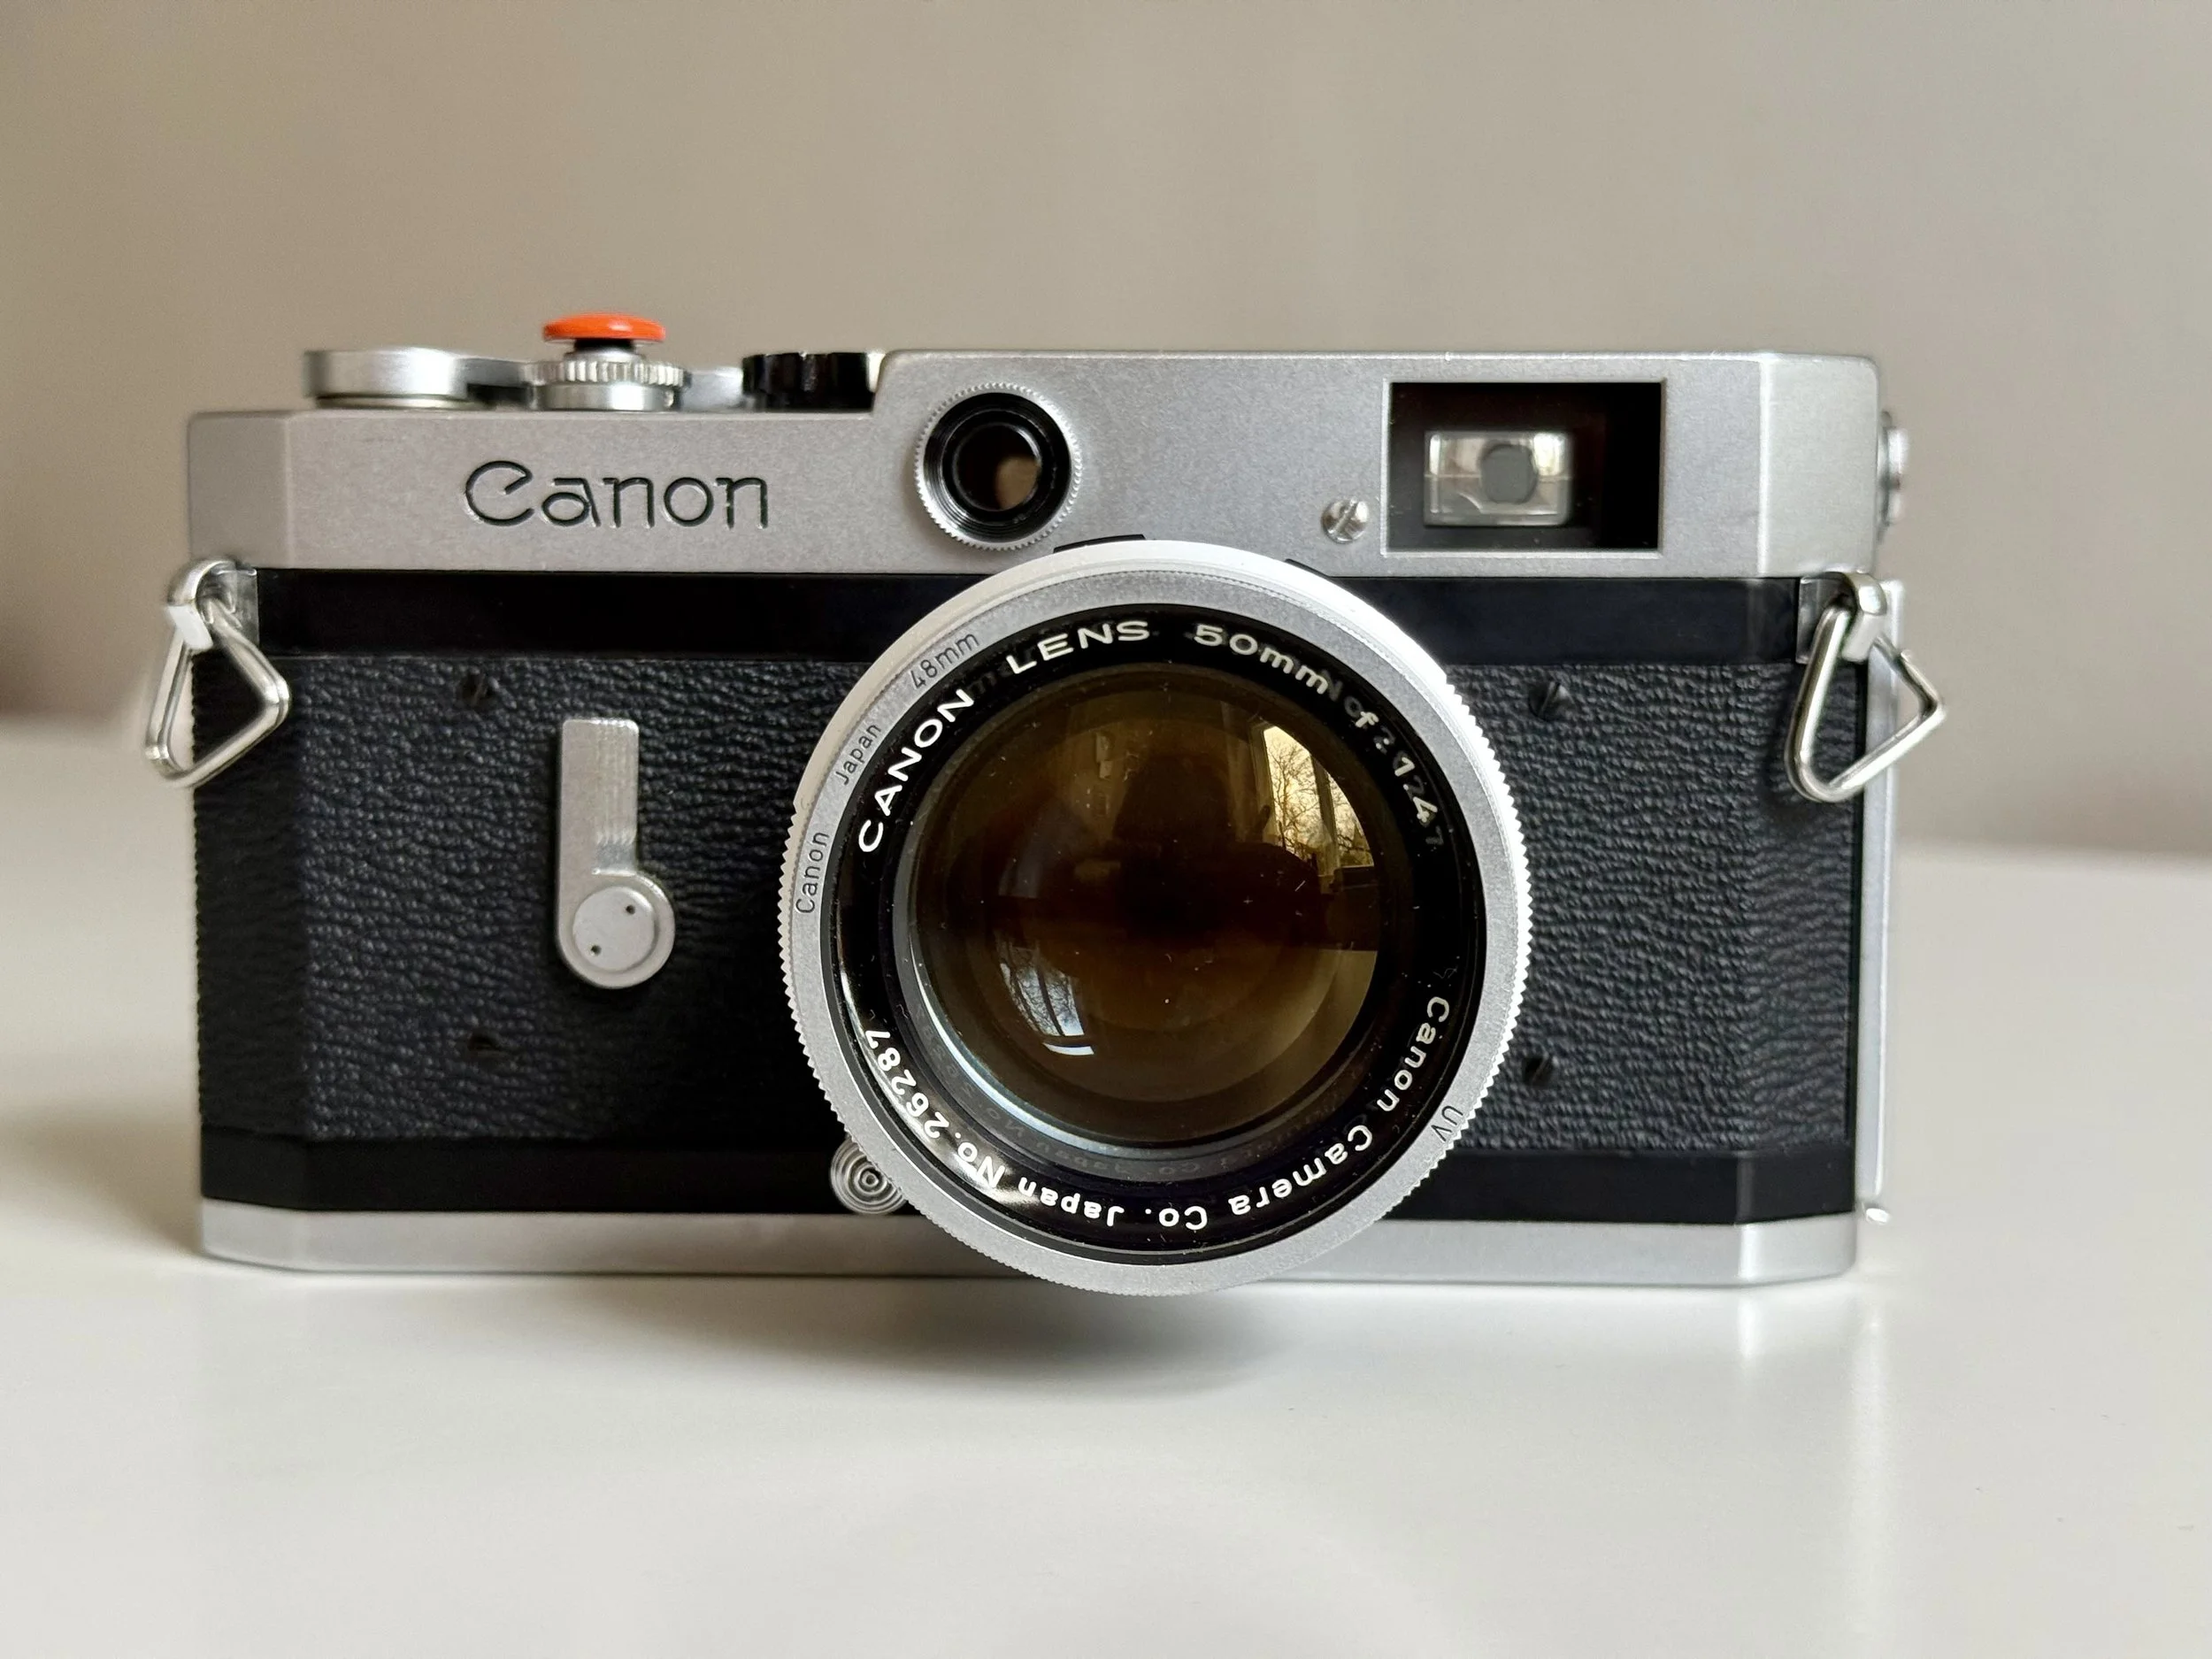
Canon P Close Up
Other cool features
The Integrated Viewfinder: Unlike the Leica screwmount cameras (which had separate windows for focusing and framing), the Canon P combined everything into one massive, bright 1:1 window.
The Rewind Crank: While Leica users were still fiddling with slow rewind knobs, Canon introduced a fold-out crank, making the process significantly faster and more intuitive.
The Metal Shutter: A bold move away from traditional rubberized cloth. By using stainless steel, Canon proved they were willing to innovate on a structural level to ensure durability.
Unlike many other cameras of its age, the Canon P Rangefinder Camera doesn't rely on foam light seals, reducing the risk of light leaks.
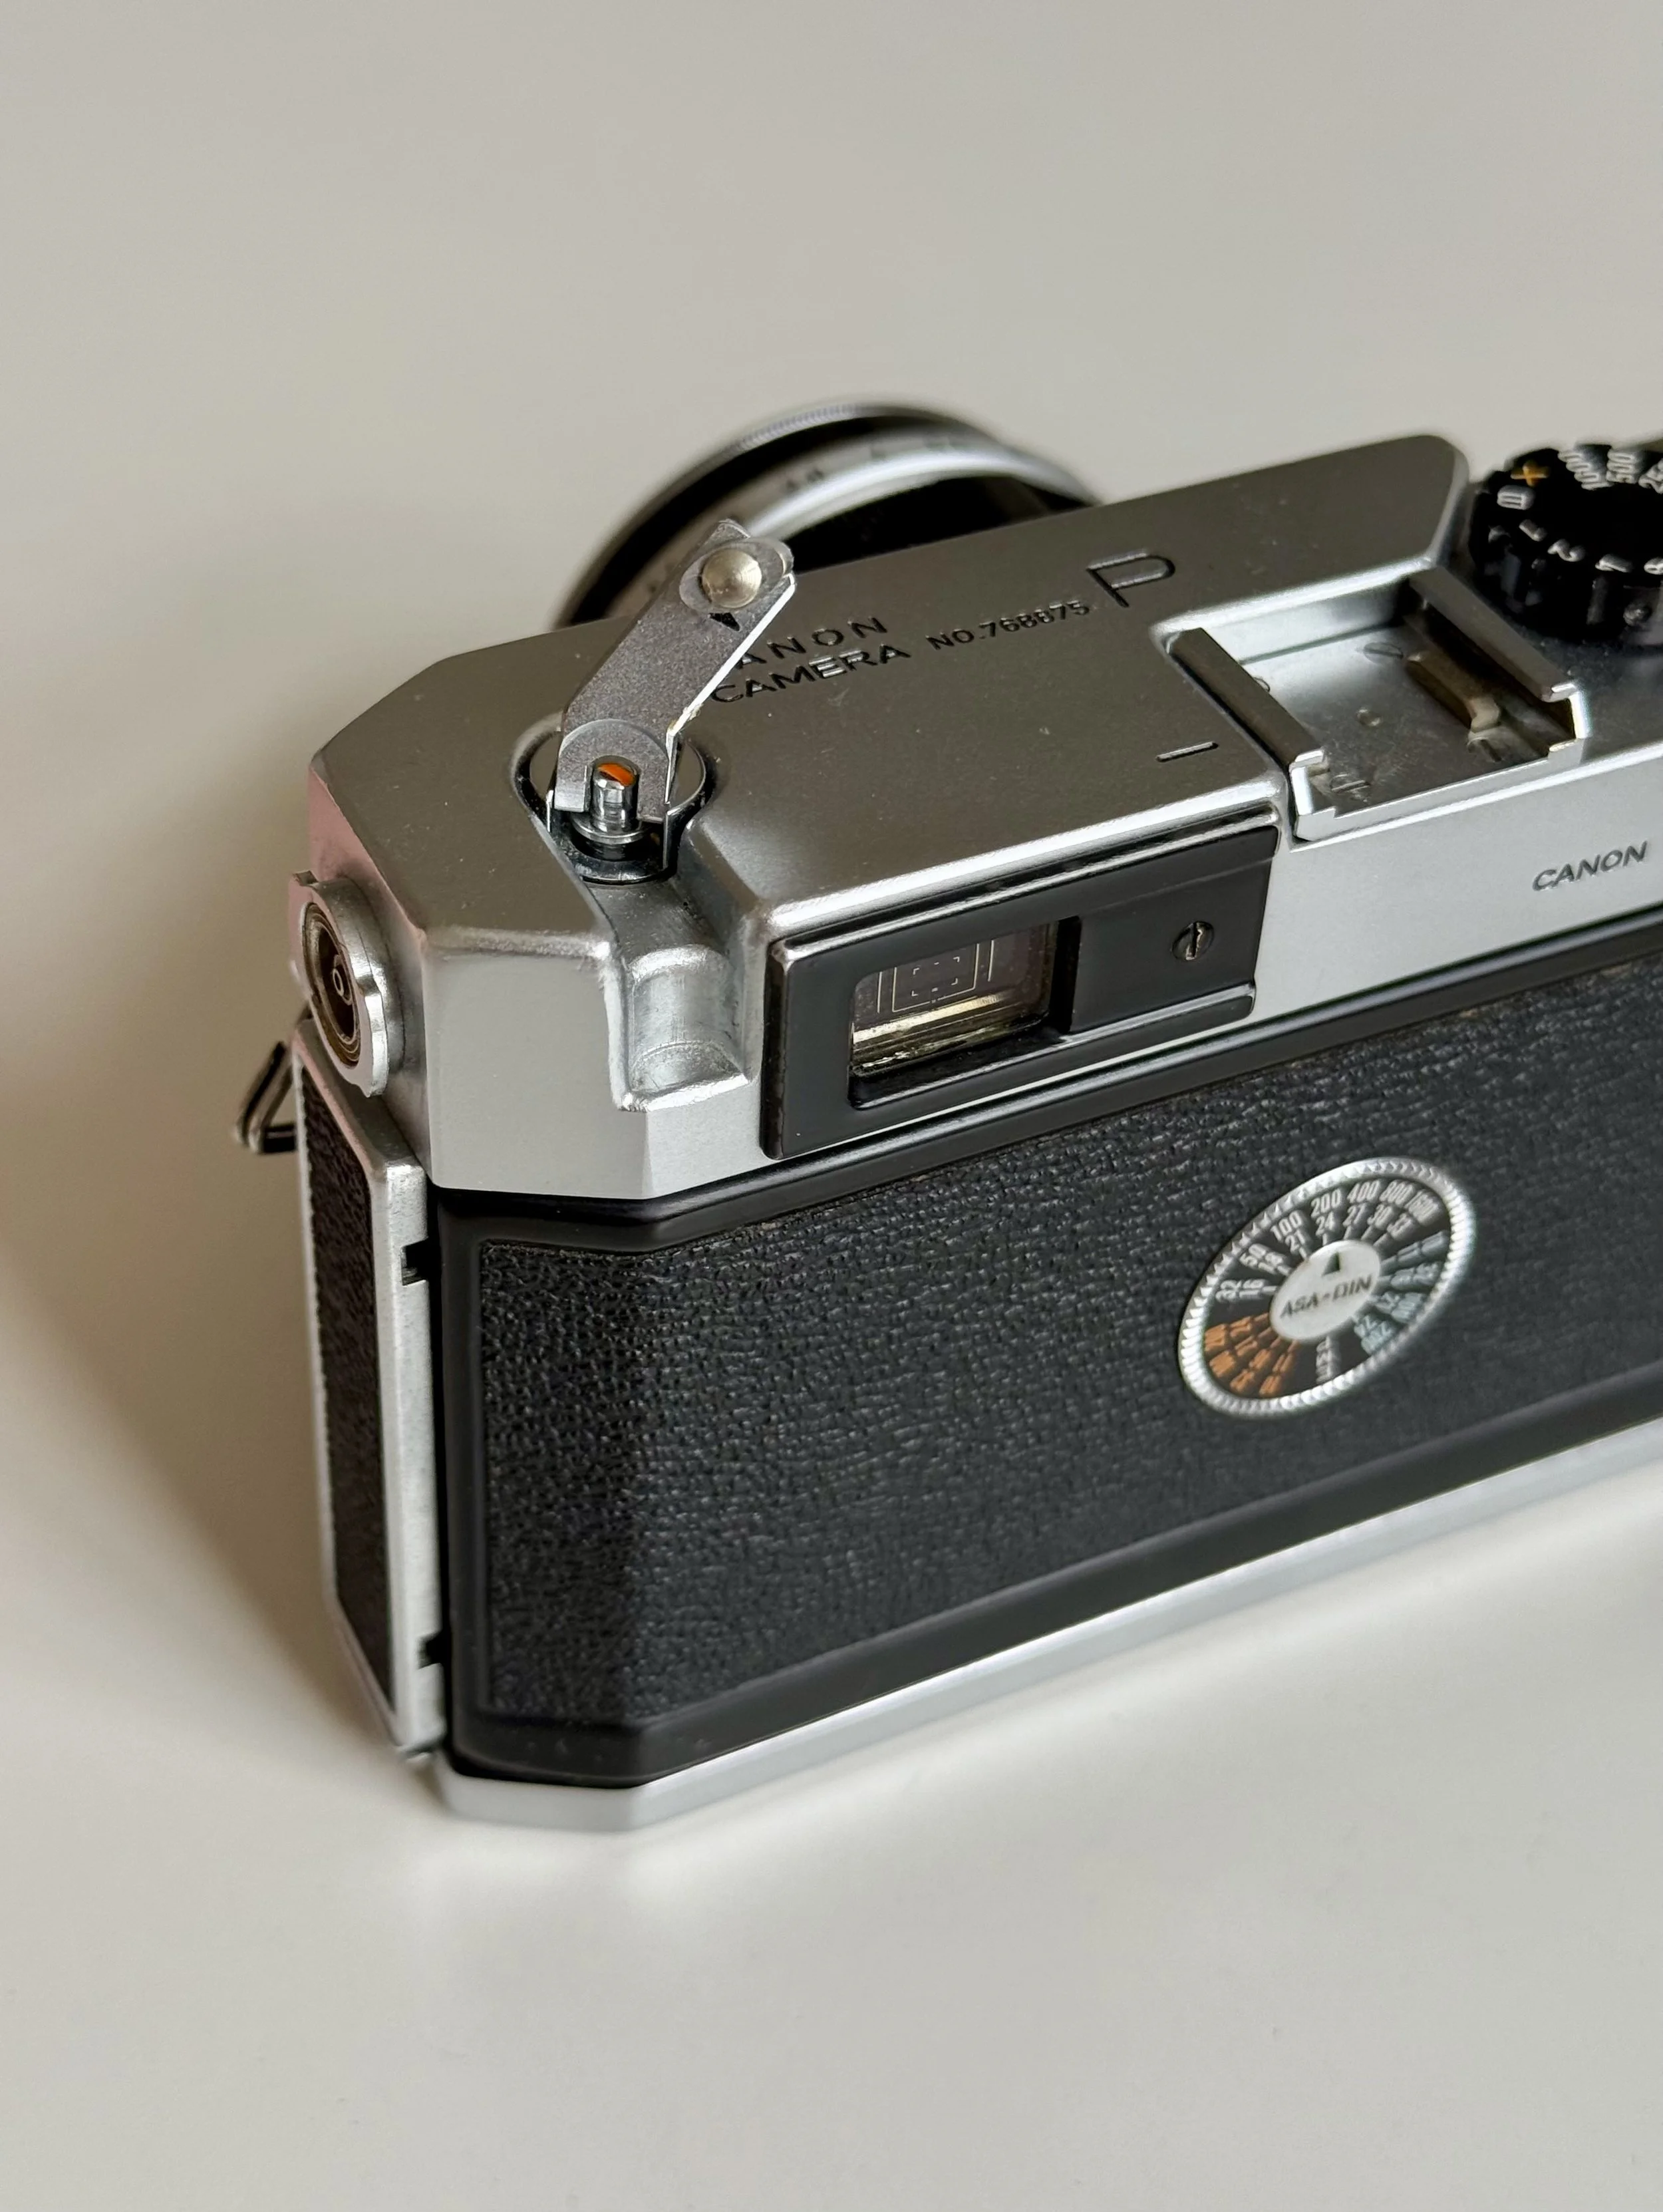
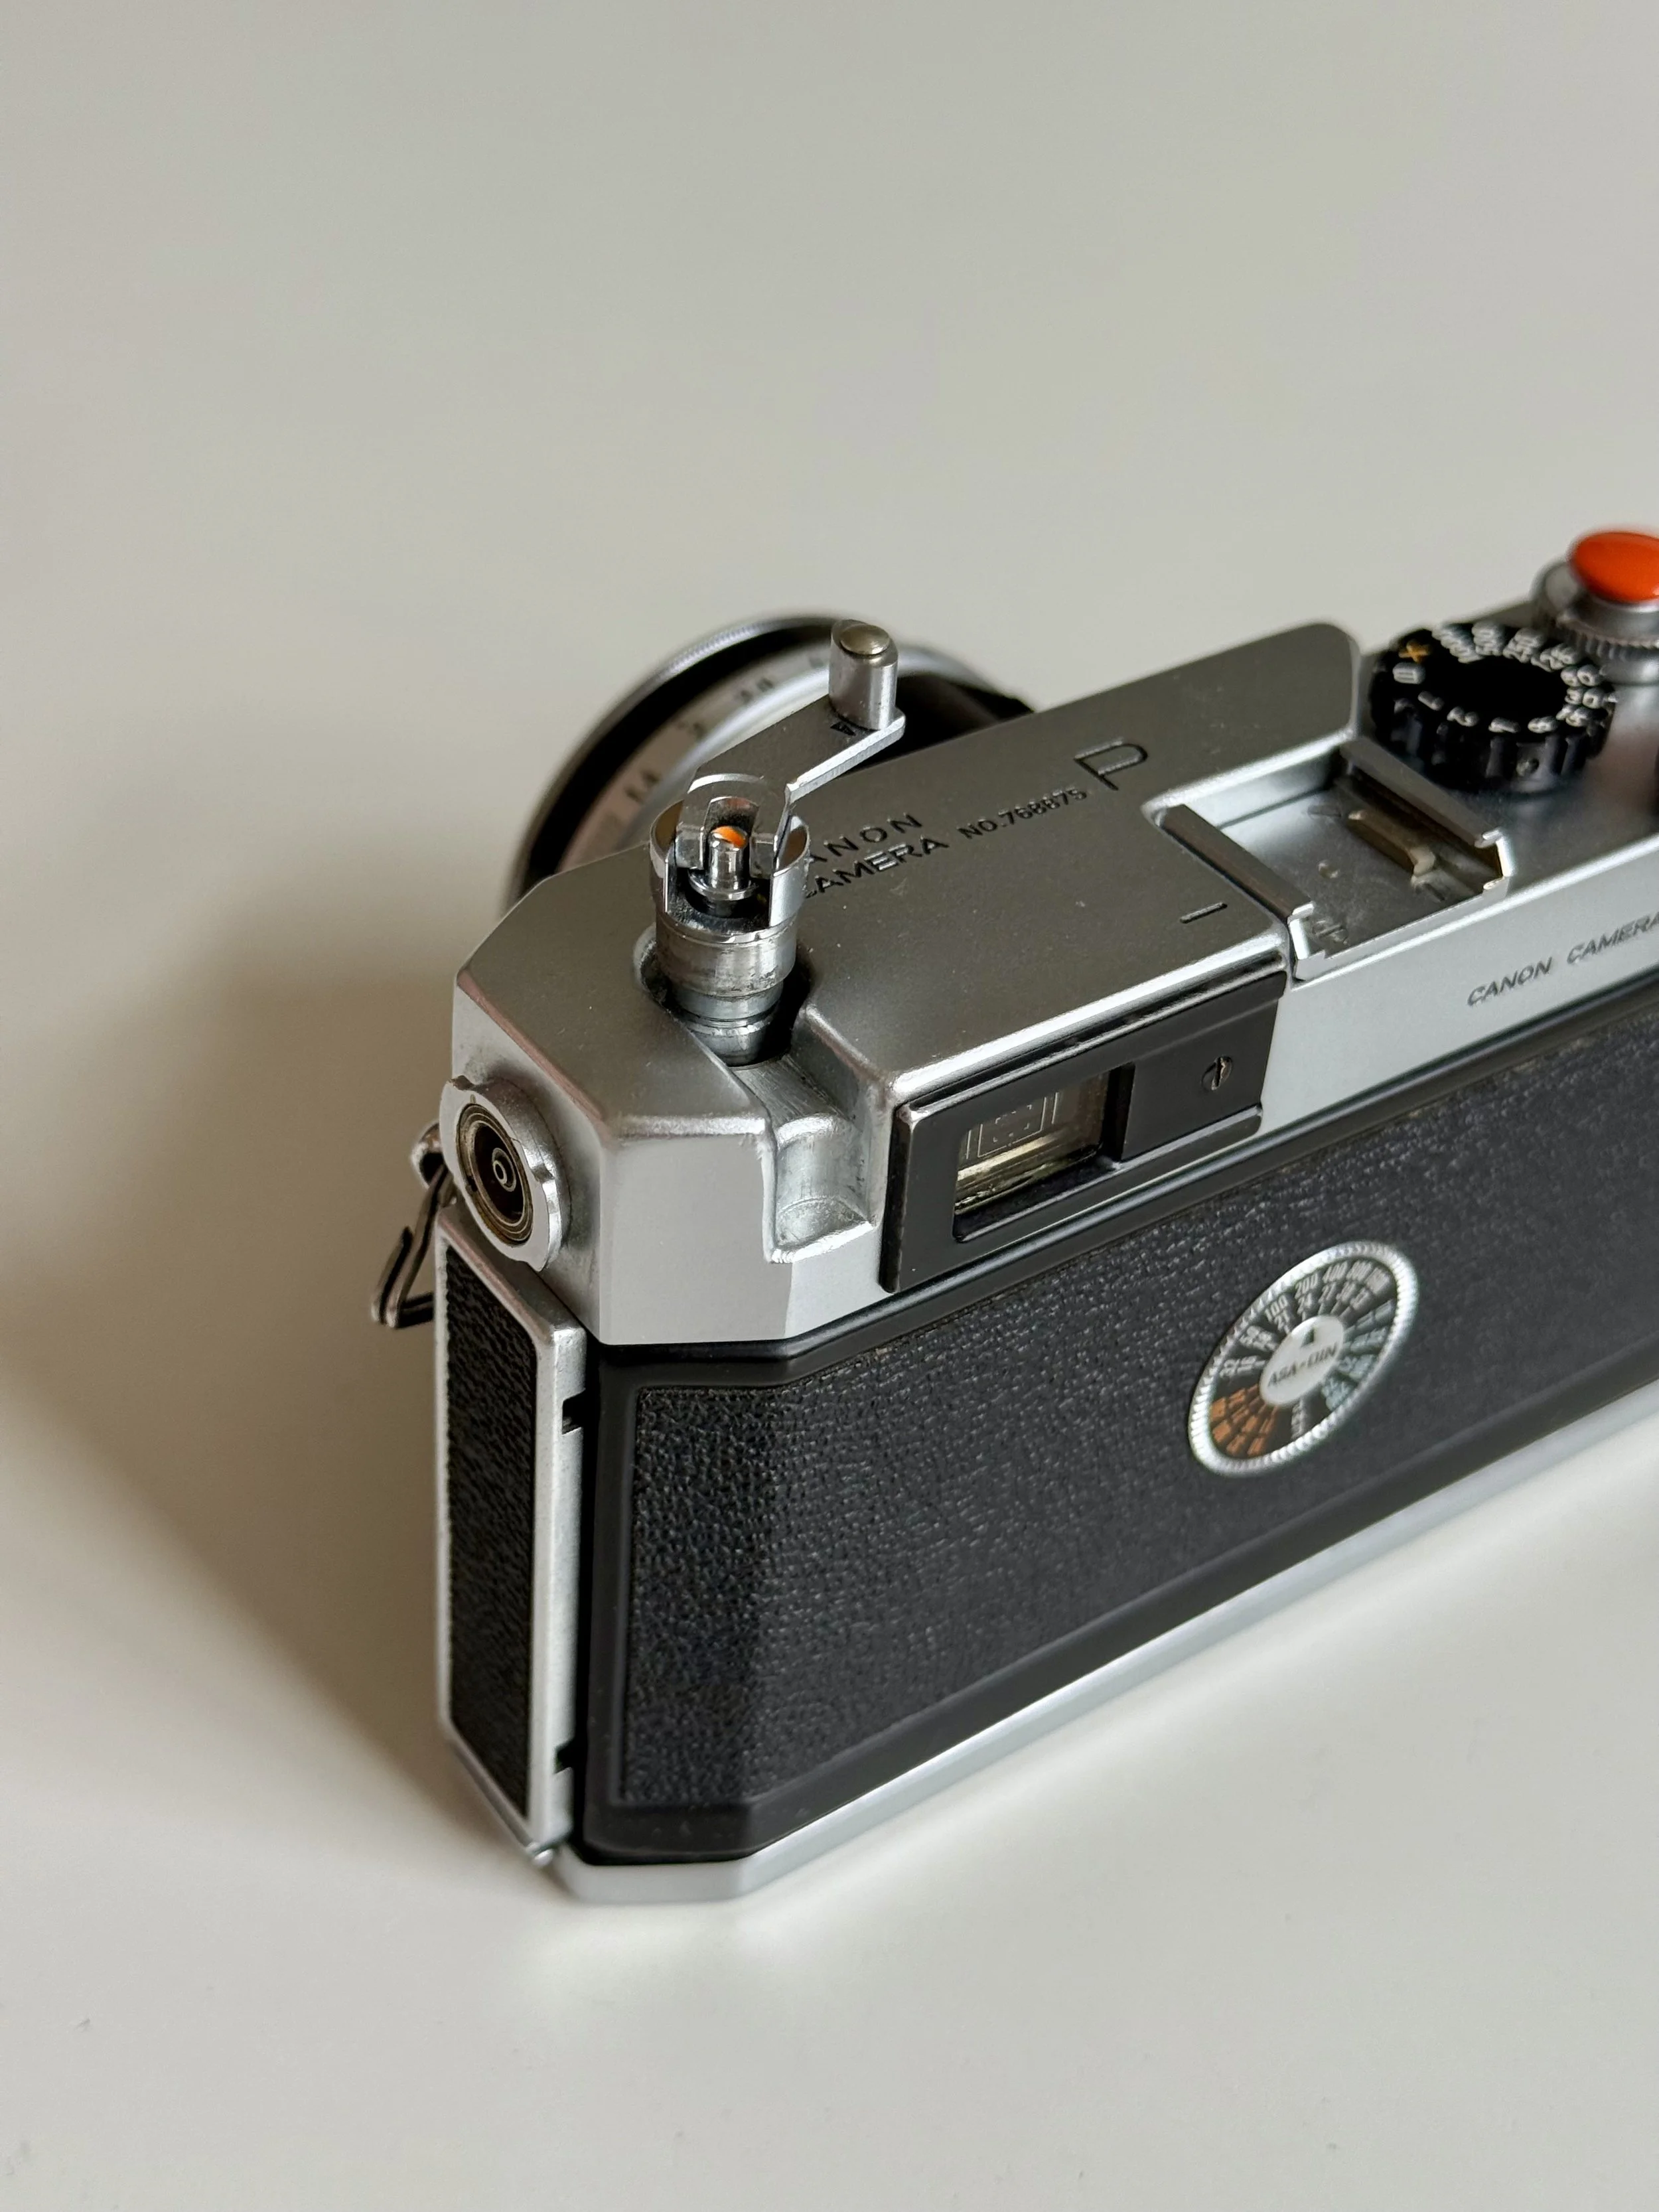
Viewfinder & Framelines: Common Issues
The Canon P is famous for its 1:1 parallax corrected viewfinder, but in daily use, it’s a game of compromises. The camera features permanent, automatic parallax corrected bright lines for accurate framing for 35mm, 50mm, and 100mm all visible at once. With its decent effective base length, focusing the 50mm f/1.4 wide open is consistently accurate.
You can keep both eyes open while shooting. Your left eye sees the world as it is, and your right eye sees the same world but with bright-line frames floating in mid-air.
Situational Awareness: This is a massive advantage for street photography. You aren't "blind" on one side. You can see a person walking into your frame before they even hit the 50mm lines. It makes the camera feel like an extension of your vision rather than a box in front of your face. Keep in mind this applies only if you are right eye dominant.
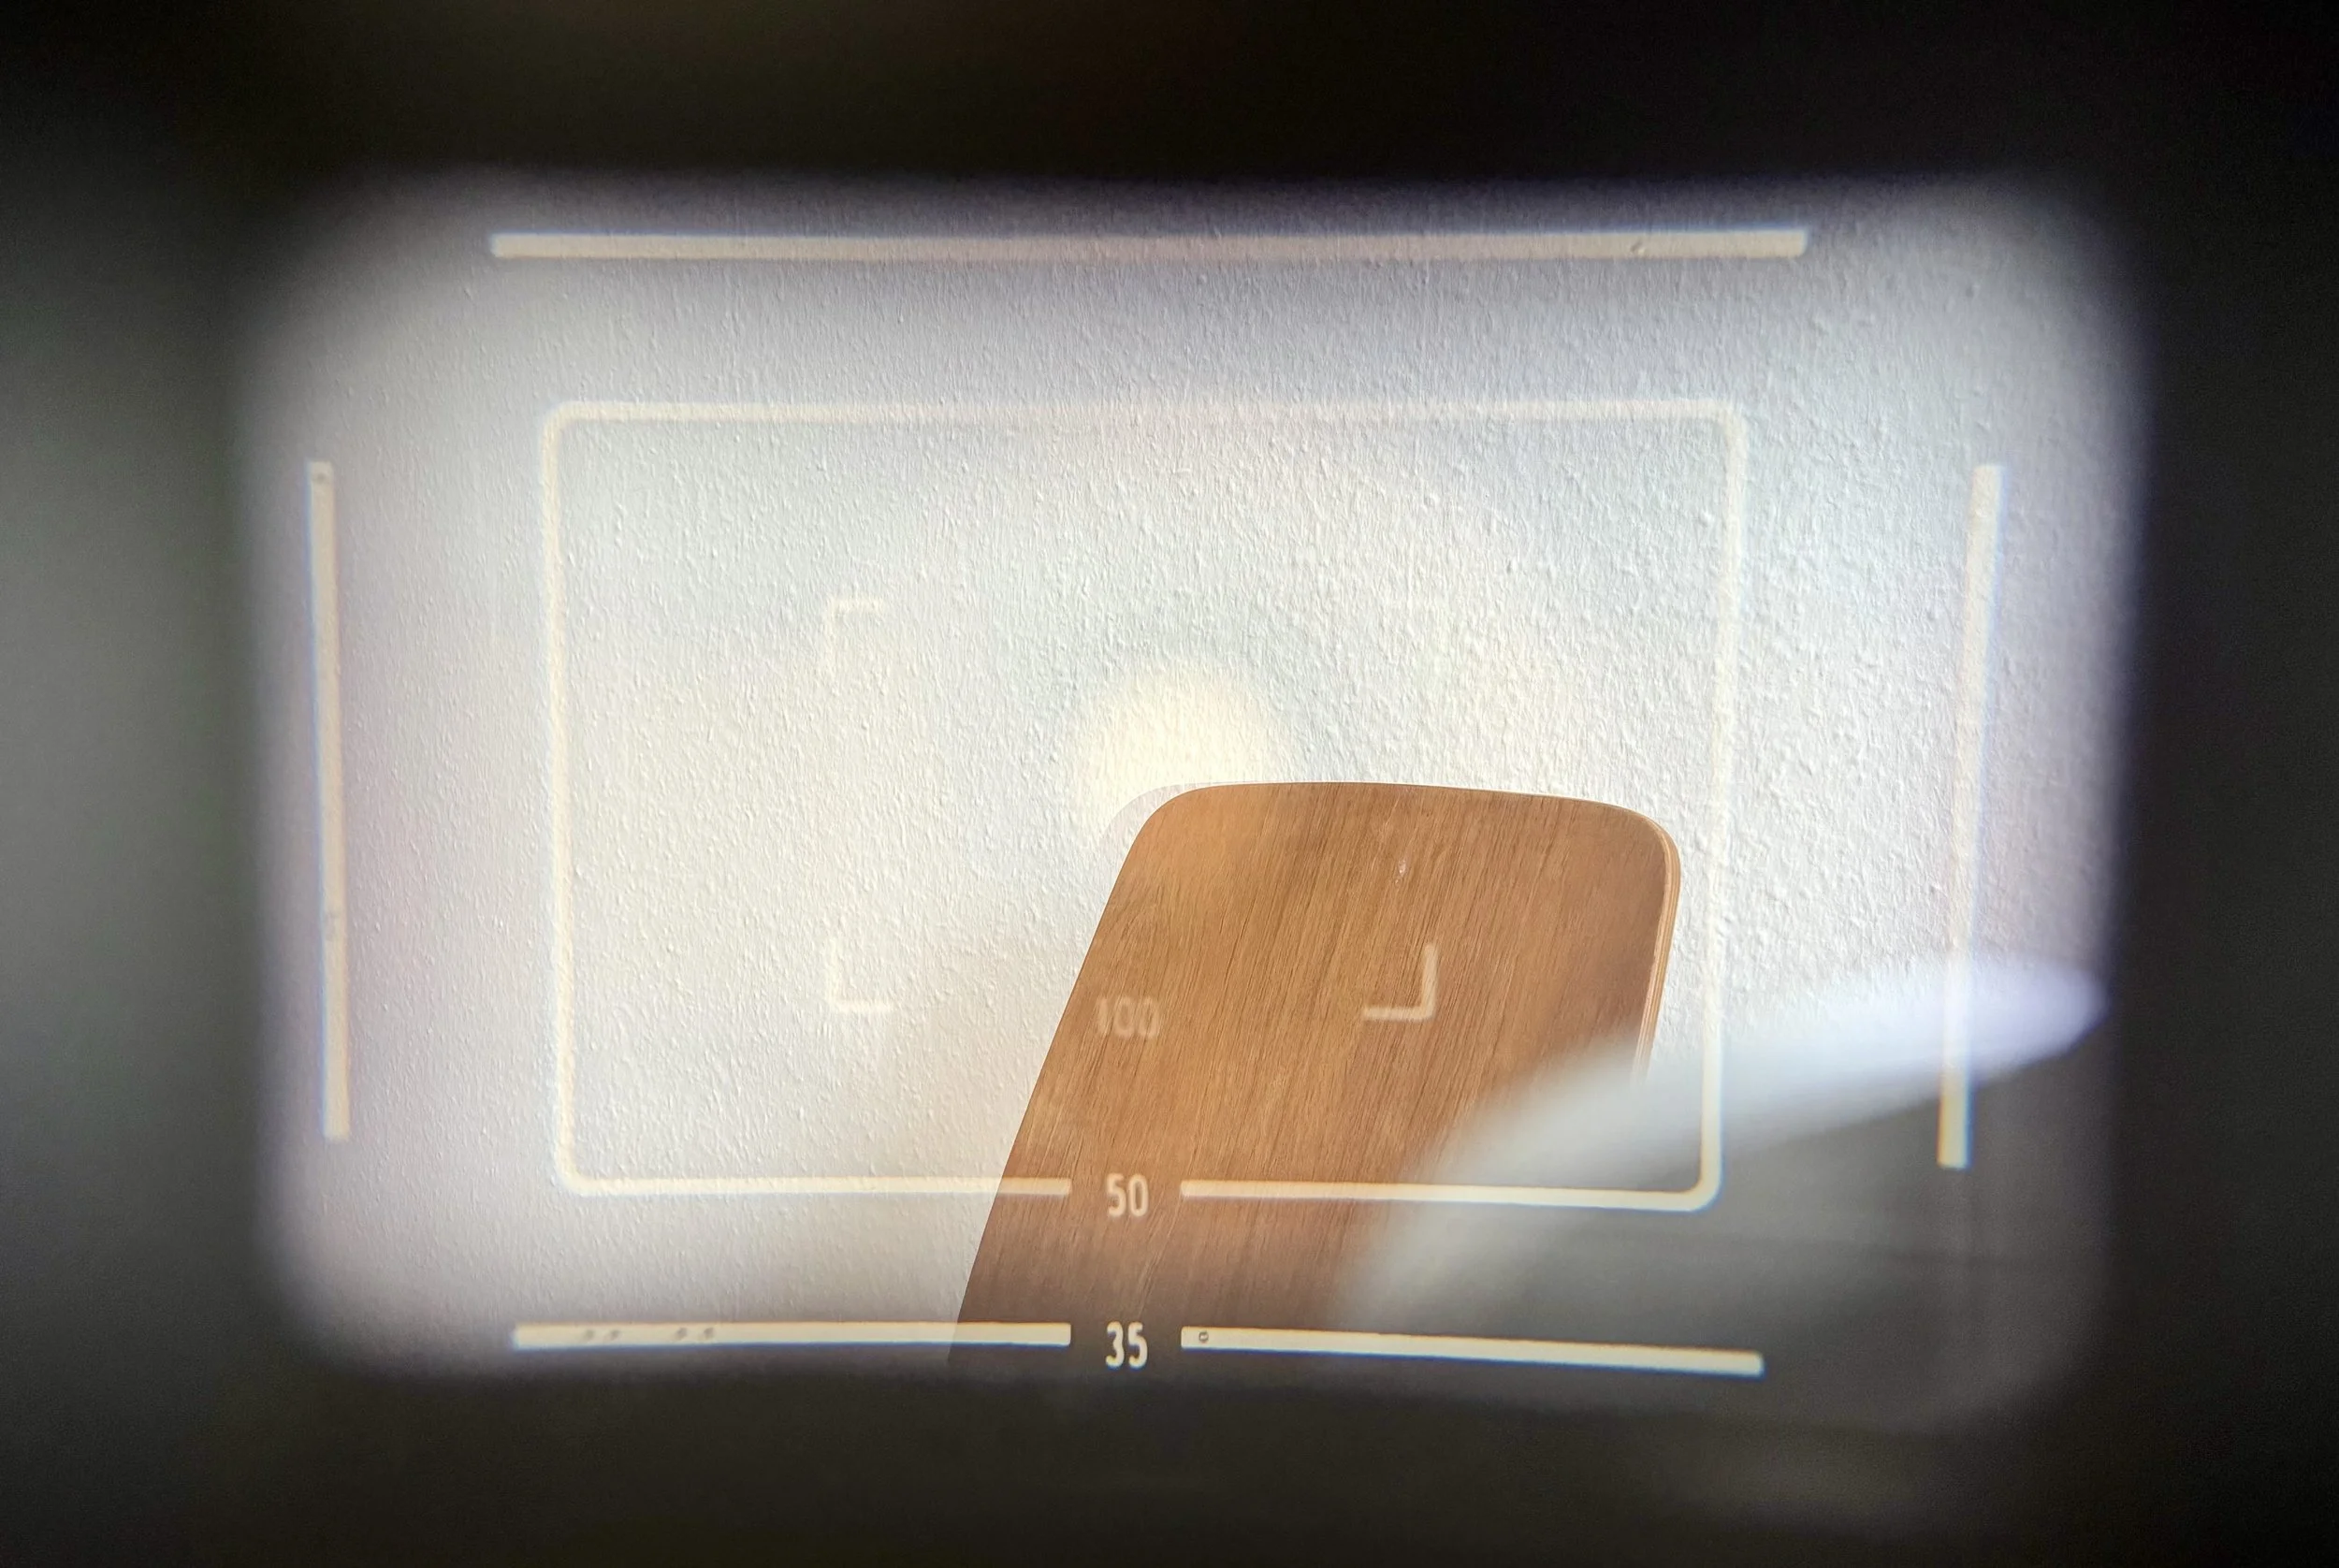
Canon P Viewfinder - Round Rangefinder patch
The "Cluttered" Advantage
While some photographers find the triple-frame layout a bit cluttered compared to a Leica M2, it has a hidden benefit. I’ve found that the 100mm lines are a great help for composing when using a 50mm lens. They act as a central reference point, helping you center your subject or align the horizon more precisely than a single 50mm box would.
The Reality of Shooting with Glasses
Here is a word of caution if you, like me, wear glasses: The 35mm experience is tough. Because the viewfinder is 1:1 (life-size), the 35mm frame lines are pushed very far out towards the edges of the window.
The Glasses Struggle: To be honest, as a glasses wearer, I simply cannot see the 35mm lines. I find myself "hunting" for the corners by tilting my head, which defeats the purpose of a fast rangefinder.
My Solution: I’ve settled on using the Canon P almost exclusively as a 50mm camera. For 50mm and 100mm, the view is spectacular and comfortable, but if 35mm is your main focal length and you wear glasses, you might struggle.
The Stainless Steel Shutter: Built for Longevity
Most cameras from the 1950s used rubberized cloth for their shutters. These are quiet, but they have a fatal flaw: if you leave your camera without a lens cap in the sun, the lens acts as a magnifying glass and can burn a hole right through the cloth in seconds.
Canon’s solution for the Canon P was a stainless steel foil shutter.
The "Wrinkle" Myth
Canon P Shutter
If you search for a Canon P today, you will almost certainly see photos of shutters that look like crumpled tin foil. This is known as the "wrinkled shutter" phenomenon.
How it happens: Over decades, the thin metal foil loses some of its tension, or someone accidentally touched it while loading film.
Does it matter? In 99% of cases: No. As long as the foil is light-tight (no pinholes) and the shutter speeds are accurate, those wrinkles are purely cosmetic. In fact, finding a perfectly smooth Canon P shutter is rare and usually comes with a heavy price premium that doesn't improve your photos one bit.
The Best LTM Lenses for the Canon P (M39 Mount)
The Canon P uses the LTM (Leica Thread Mount), also known as M39. This gives you access to a vast ecosystem of vintage lenses from Canon, Leica, and Voigtländer. However, the market has changed. You can still get a lot of lenses, but prices are going through the roof pretty quickly as more people rediscover film.
Canon P: Lens Compatibility
It allows the use of all LTM/M39 Lenses.
The Sweet Spot: 50mm Gems

Canon 50mm f:1.4 LTM aka the Japanese Summilux
If you are looking for value, 50mm lenses are still the most affordable entry point.
The Canon 50mm f/1.4 LTM: Often called the "Japanese Summilux," this lens is legendary for its rendering and speed.
The Canon 50mm f/1.8 LTM: A bit smaller and more compact, but just as capable. Both are amazing lenses that feel great in the hand and deliver super nice, characterful pictures without breaking the bank (yet).
A Warning: Watch the Rear Element
While the M39 screw mount is universal, the Canon P's internal design is not. You need to be extremely cautious with certain wide-angle lenses, such as the Russian Jupiter-12 (35mm) or any other lenses with a large, protruding rear element.
Because of the way the light baffles and the metal shutter are positioned in the Canon P, these lenses can physically hit the internals.
The Risk: You will either damage the lens, the camera's shutter, or both.
My Advice: Always check the compatibility of vintage wide-angle glass before you try to screw it onto your Canon P.
Wide angle Options for the Canon P
Voigtländer Color-Skopar 35mm f2.5
35mm f2.8 Canon LTM
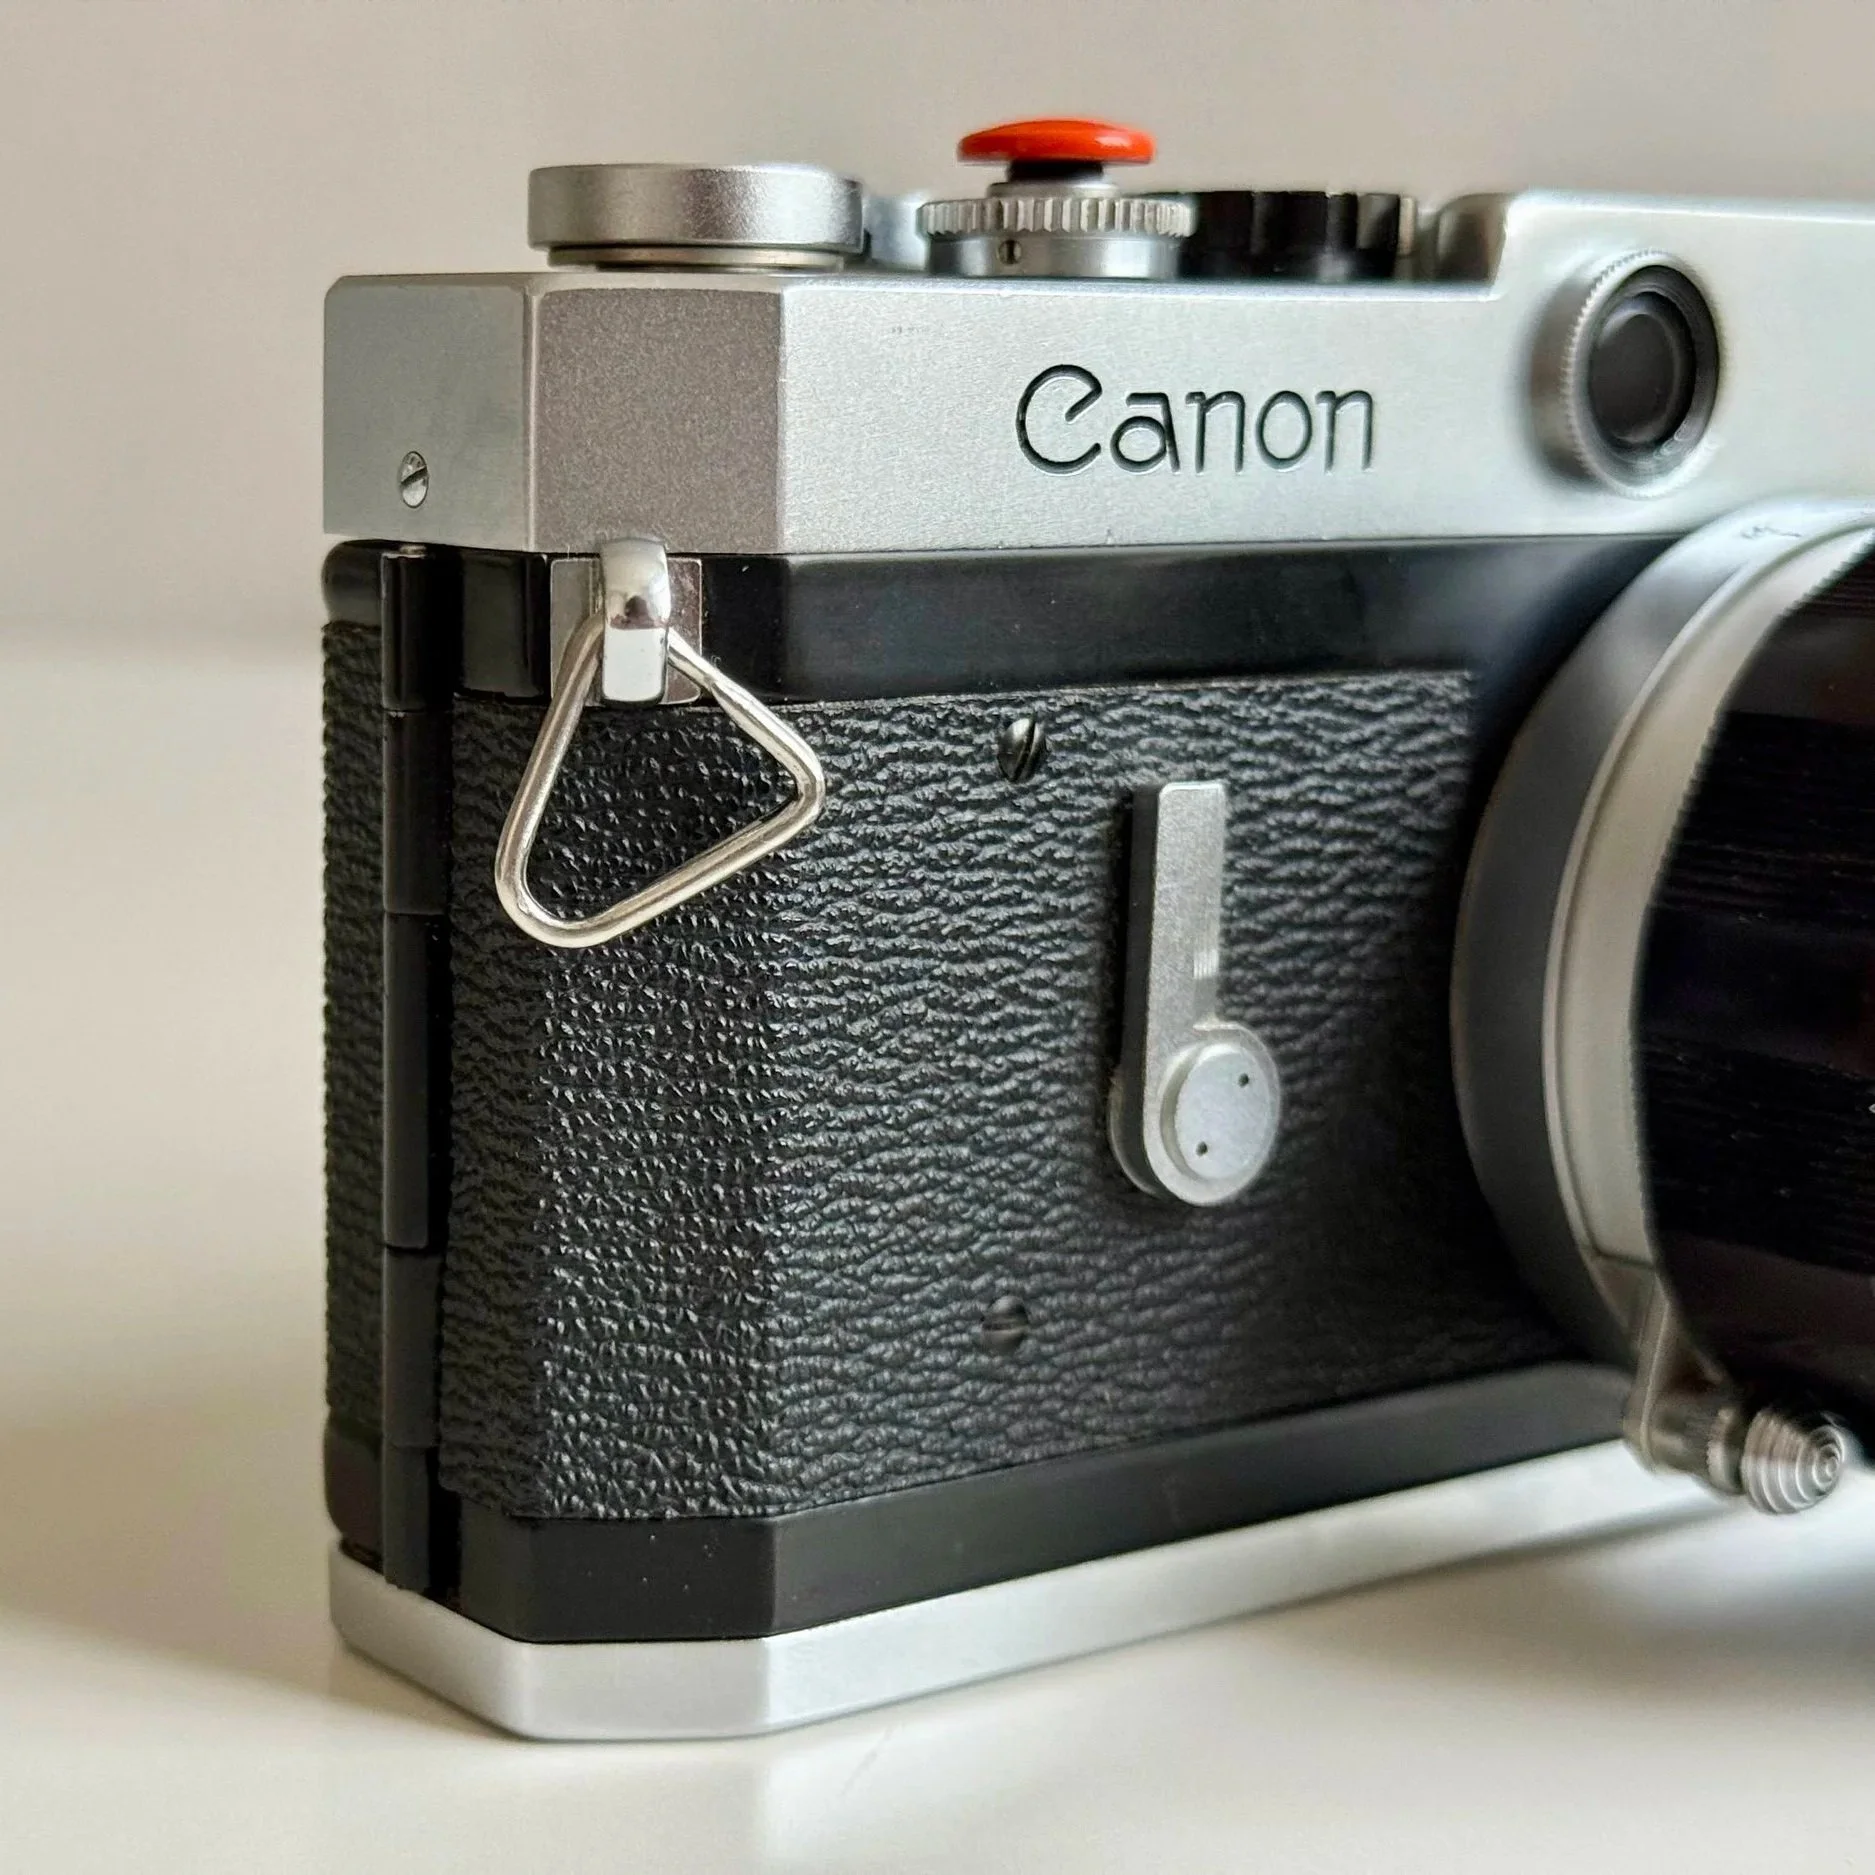
Self timer included
The Pure Experience: No Battery, No Problem
The Canon P is a fully mechanical beast. There is no built-in light meter, which might scare off beginners, but it’s actually one of its greatest strengths.
Embracing Sunny 16
Without a meter, you are forced to actually learn the light. I’ve found that using this camera with the "Sunny 16" rule feels incredibly organic. You start to see the light before you even lift the camera to your eye. And since it requires no batteries, you never have to worry about a dead cell ruining your day. It’s just you, the film, and the mechanics.
Flash Photography: The Godox Combo
While it’s a vintage camera, it plays surprisingly well with modern gear. The Canon P rangefinder camera features a cold shoe (for external light meters, viewfienders and flashes) but luckily also has a PC-sync socket on the side. So if you want to use a flash, you will have to use a cable to connect the camera to the flash. I often use it with the IM30 and a sync cable. It’s a small, powerful, and stylish combo that turns this 1950s rangefinder into a capable tool for film flash photography.
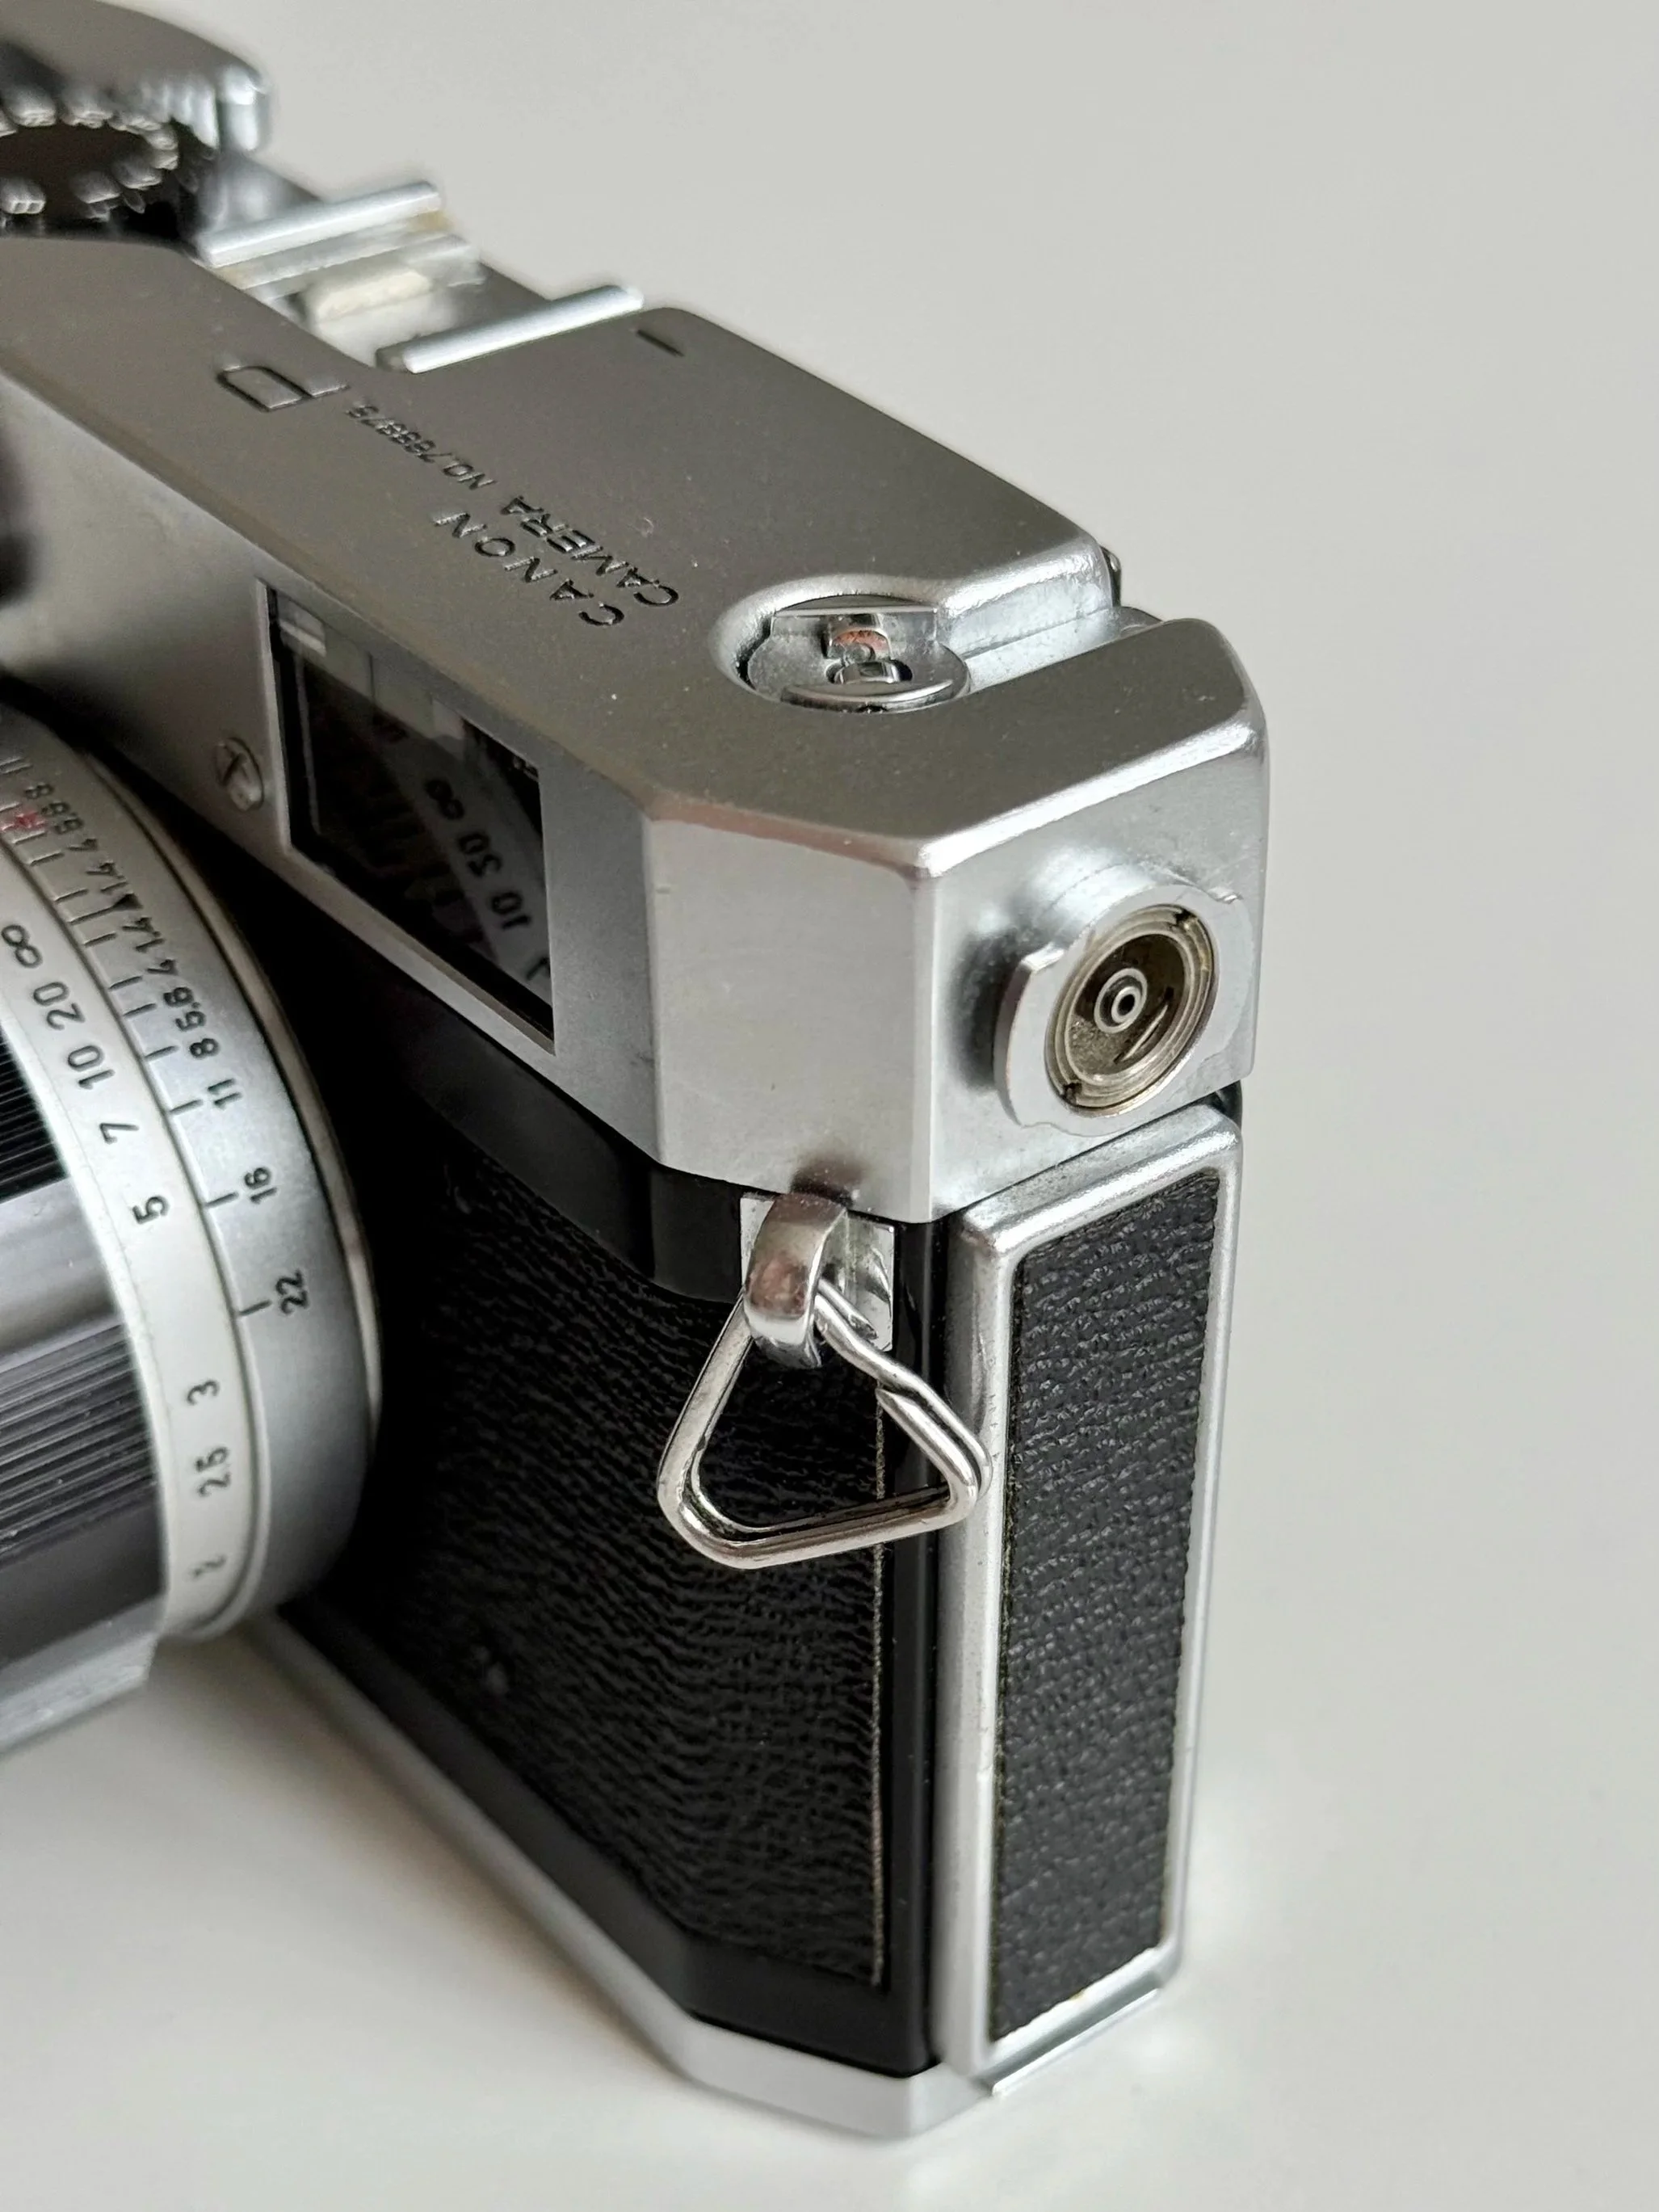
Canon P PC Port
Who is the Canon P for?
I genuinely like the Canon P for its simplicity. It’s a tool that has forced me to adapt, and I’ve accepted it as a strict 50mm shooter due to the fact that I wear glasses. It’s a compromise I’m willing to make for that incredible 1:1 view.
When comparing the Canon P vs. Leica M2, the most striking difference is the 1:1 magnification of the viewfinder. While the Leica has a higher effective base length, the Canon P’s ability to shoot with both eyes open makes it a superb street photography tool. Pair it with a Voigtländer VC Meter II on the cold shoe, and you have a setup that rivals much more expensive M39 rangefinder systems.
Canon P: Rangefinder Adjustment
One thing to note: the rangefinder is a mechanical heart that works exactly as it should, and unlike some other systems, it can be adjusted very easily if it ever goes out of alignment.
Pro Tip: If you want a dedicated blog post on how to calibrate the Canon P rangefinder yourself, just let me know in the comments!
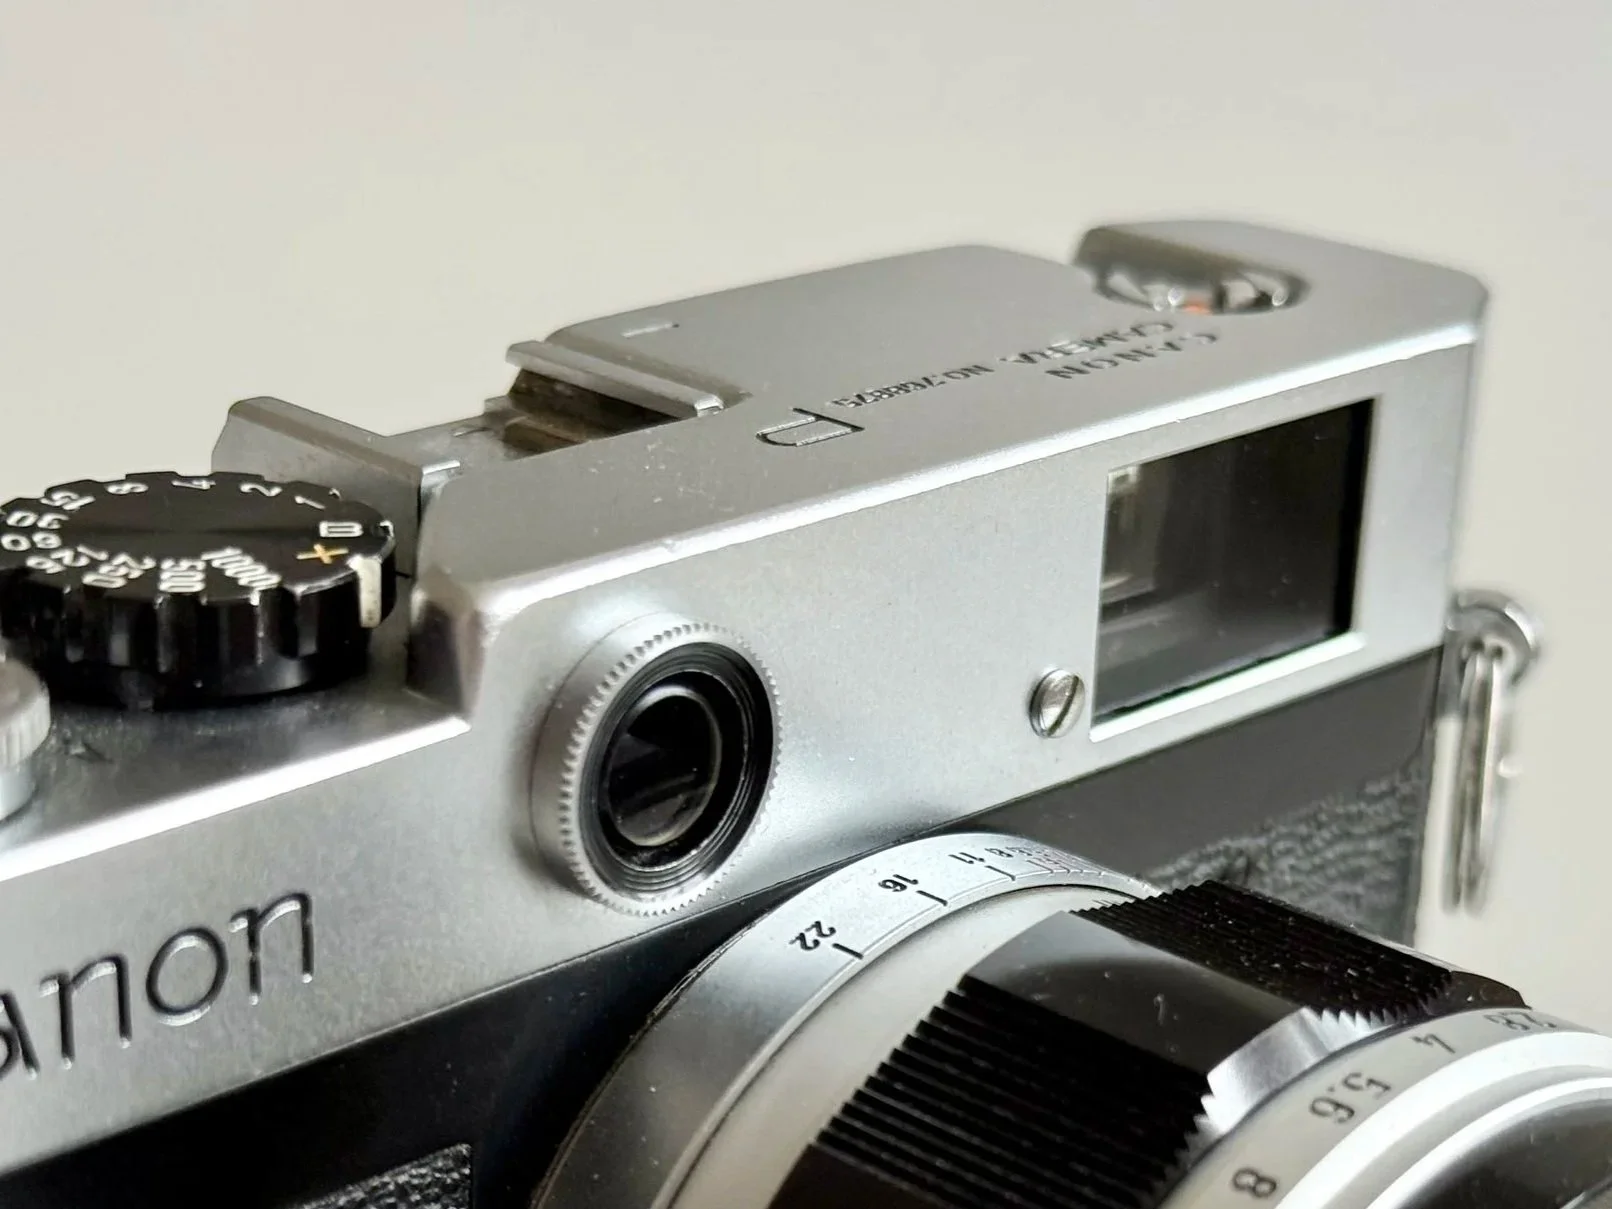
The rounded nut and screw grant access to the adjustment of the rangefinder
Final thoughts: Is it still worth it in 2026?
The Canon P is a great travel camera and perfect for documenting your life in a tactile, organic way. But to be honest, it has its drawbacks. For professional shootings, I still prefer an SLR such as my Nikon F or F2. The ability to judge the exact composition through the lens and switch between different focal lengths more easily is hard to beat.
But for everything else? The Canon P rangefinder camera is a mechanical masterpiece that reminds me why I started shooting film in the first place. It’s not always about perfection; it’s about the experience. Get one while you can.
Who is the Canon P for?
The Canon P is best suited for photographers who want a simple, fully mechanical 35mm rangefinder without any electronic dependencies. It is ideal for shooters who primarily use 50mm lenses and value a bright, uncluttered viewfinder over automation or modern convenience features.
It is not a camera for beginners expecting built-in metering or fast wide-angle framing. Instead, it is for deliberate shooters who enjoy manual exposure, zone focusing, and a slower, more intentional way of working.
Canon P Rangefinder: Frequently Asked Questions
Is the Canon P a good beginner rangefinder? Yes, it’s one of the most robust mechanical cameras ever made. However, since it lacks a light meter, you should be comfortable using the Sunny 16 rule or an external light meter app.
Does the wrinkled shutter affect image quality? In 99% of cases, no. The stainless steel shutter is light-tight even with wrinkles. It’s a purely cosmetic issue common in vintage Canon rangefinders.
Can I use Leica lenses on a Canon P? You can use any Leica Thread Mount (LTM / M39) lenses. You cannot use Leica M-mount lenses, as they will not fit the screw mount.
Is the Canon P better than the Canon 7? The Canon P is preferred by many for its cleaner, more classic design and the lack of a (often dead) selenium meter, making it look sleeker.
Beyond the Rangefinder: The SLR Journey
"As much as I love the Canon P, as many i felt the need for the precision and modularity of a professional SLR. This led me straight to the legendary Nikon F.
If you're curious how the mechanical soul of the Canon P compares to the 'tank-like' reliability of the early Nikon system, check out my full Nikon F Review and 2026 Buying Guide here. It might just be the perfect companion to your LTM kit.
Canon P Sample Images


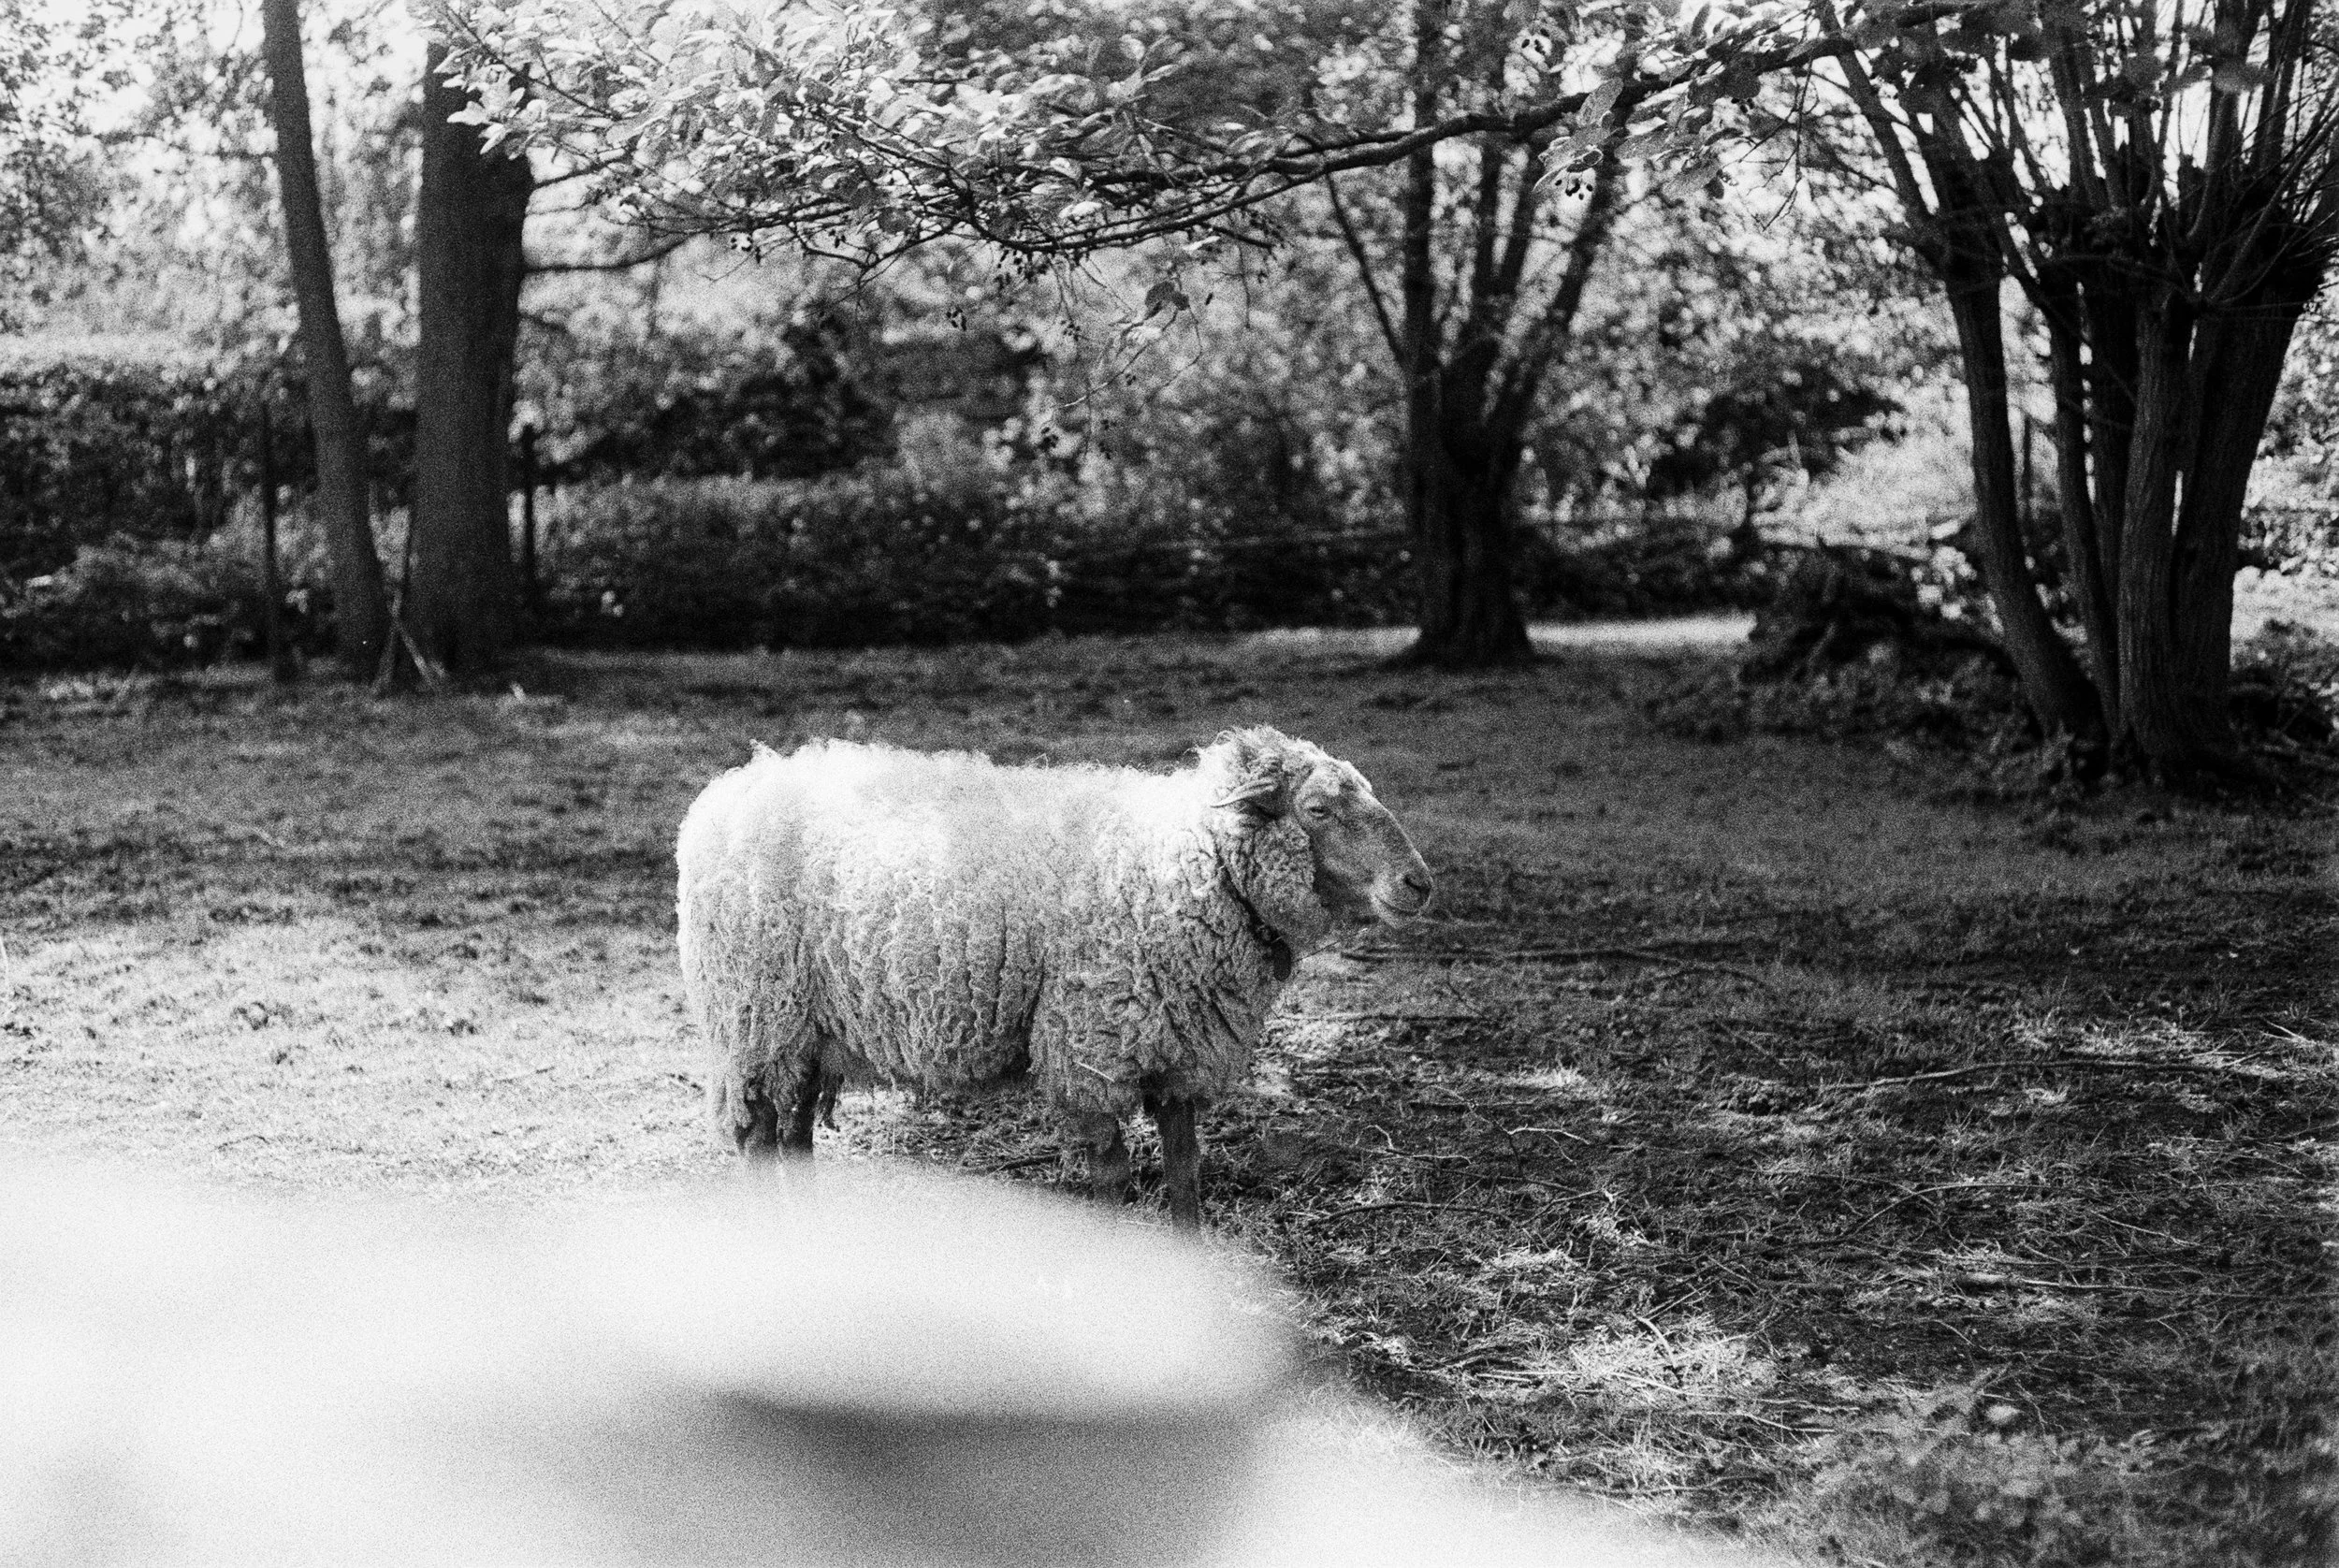
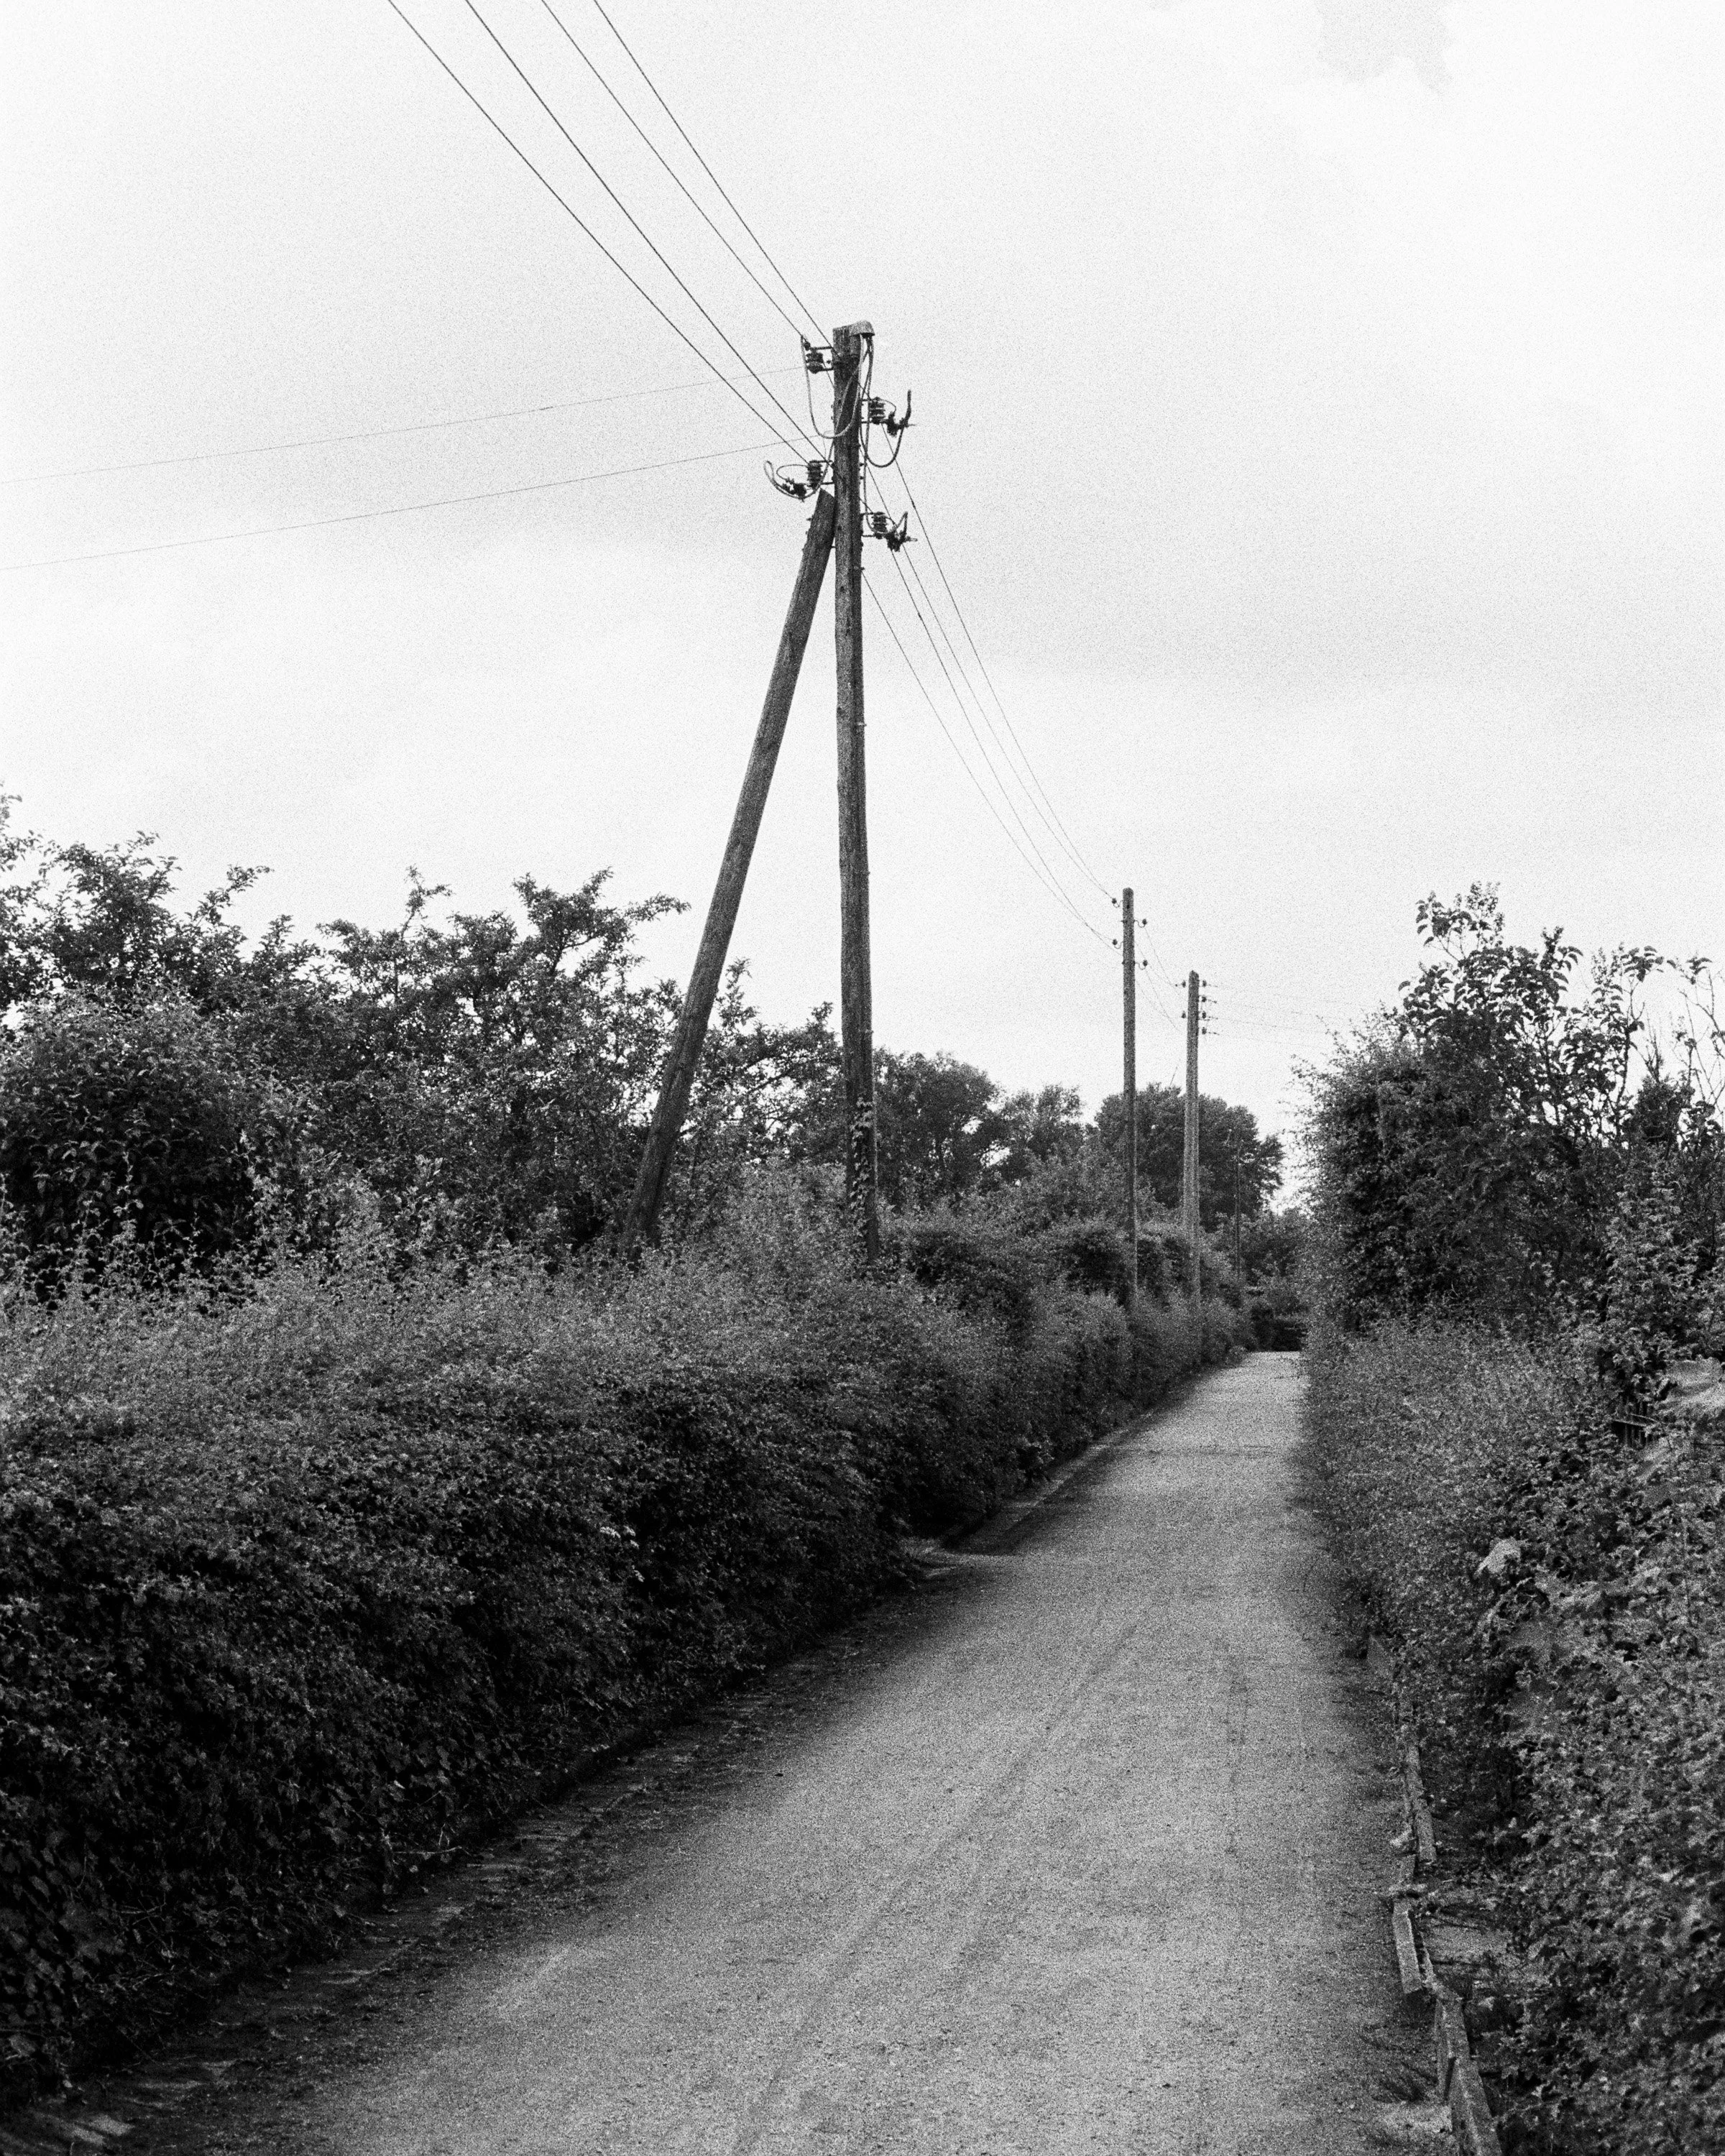

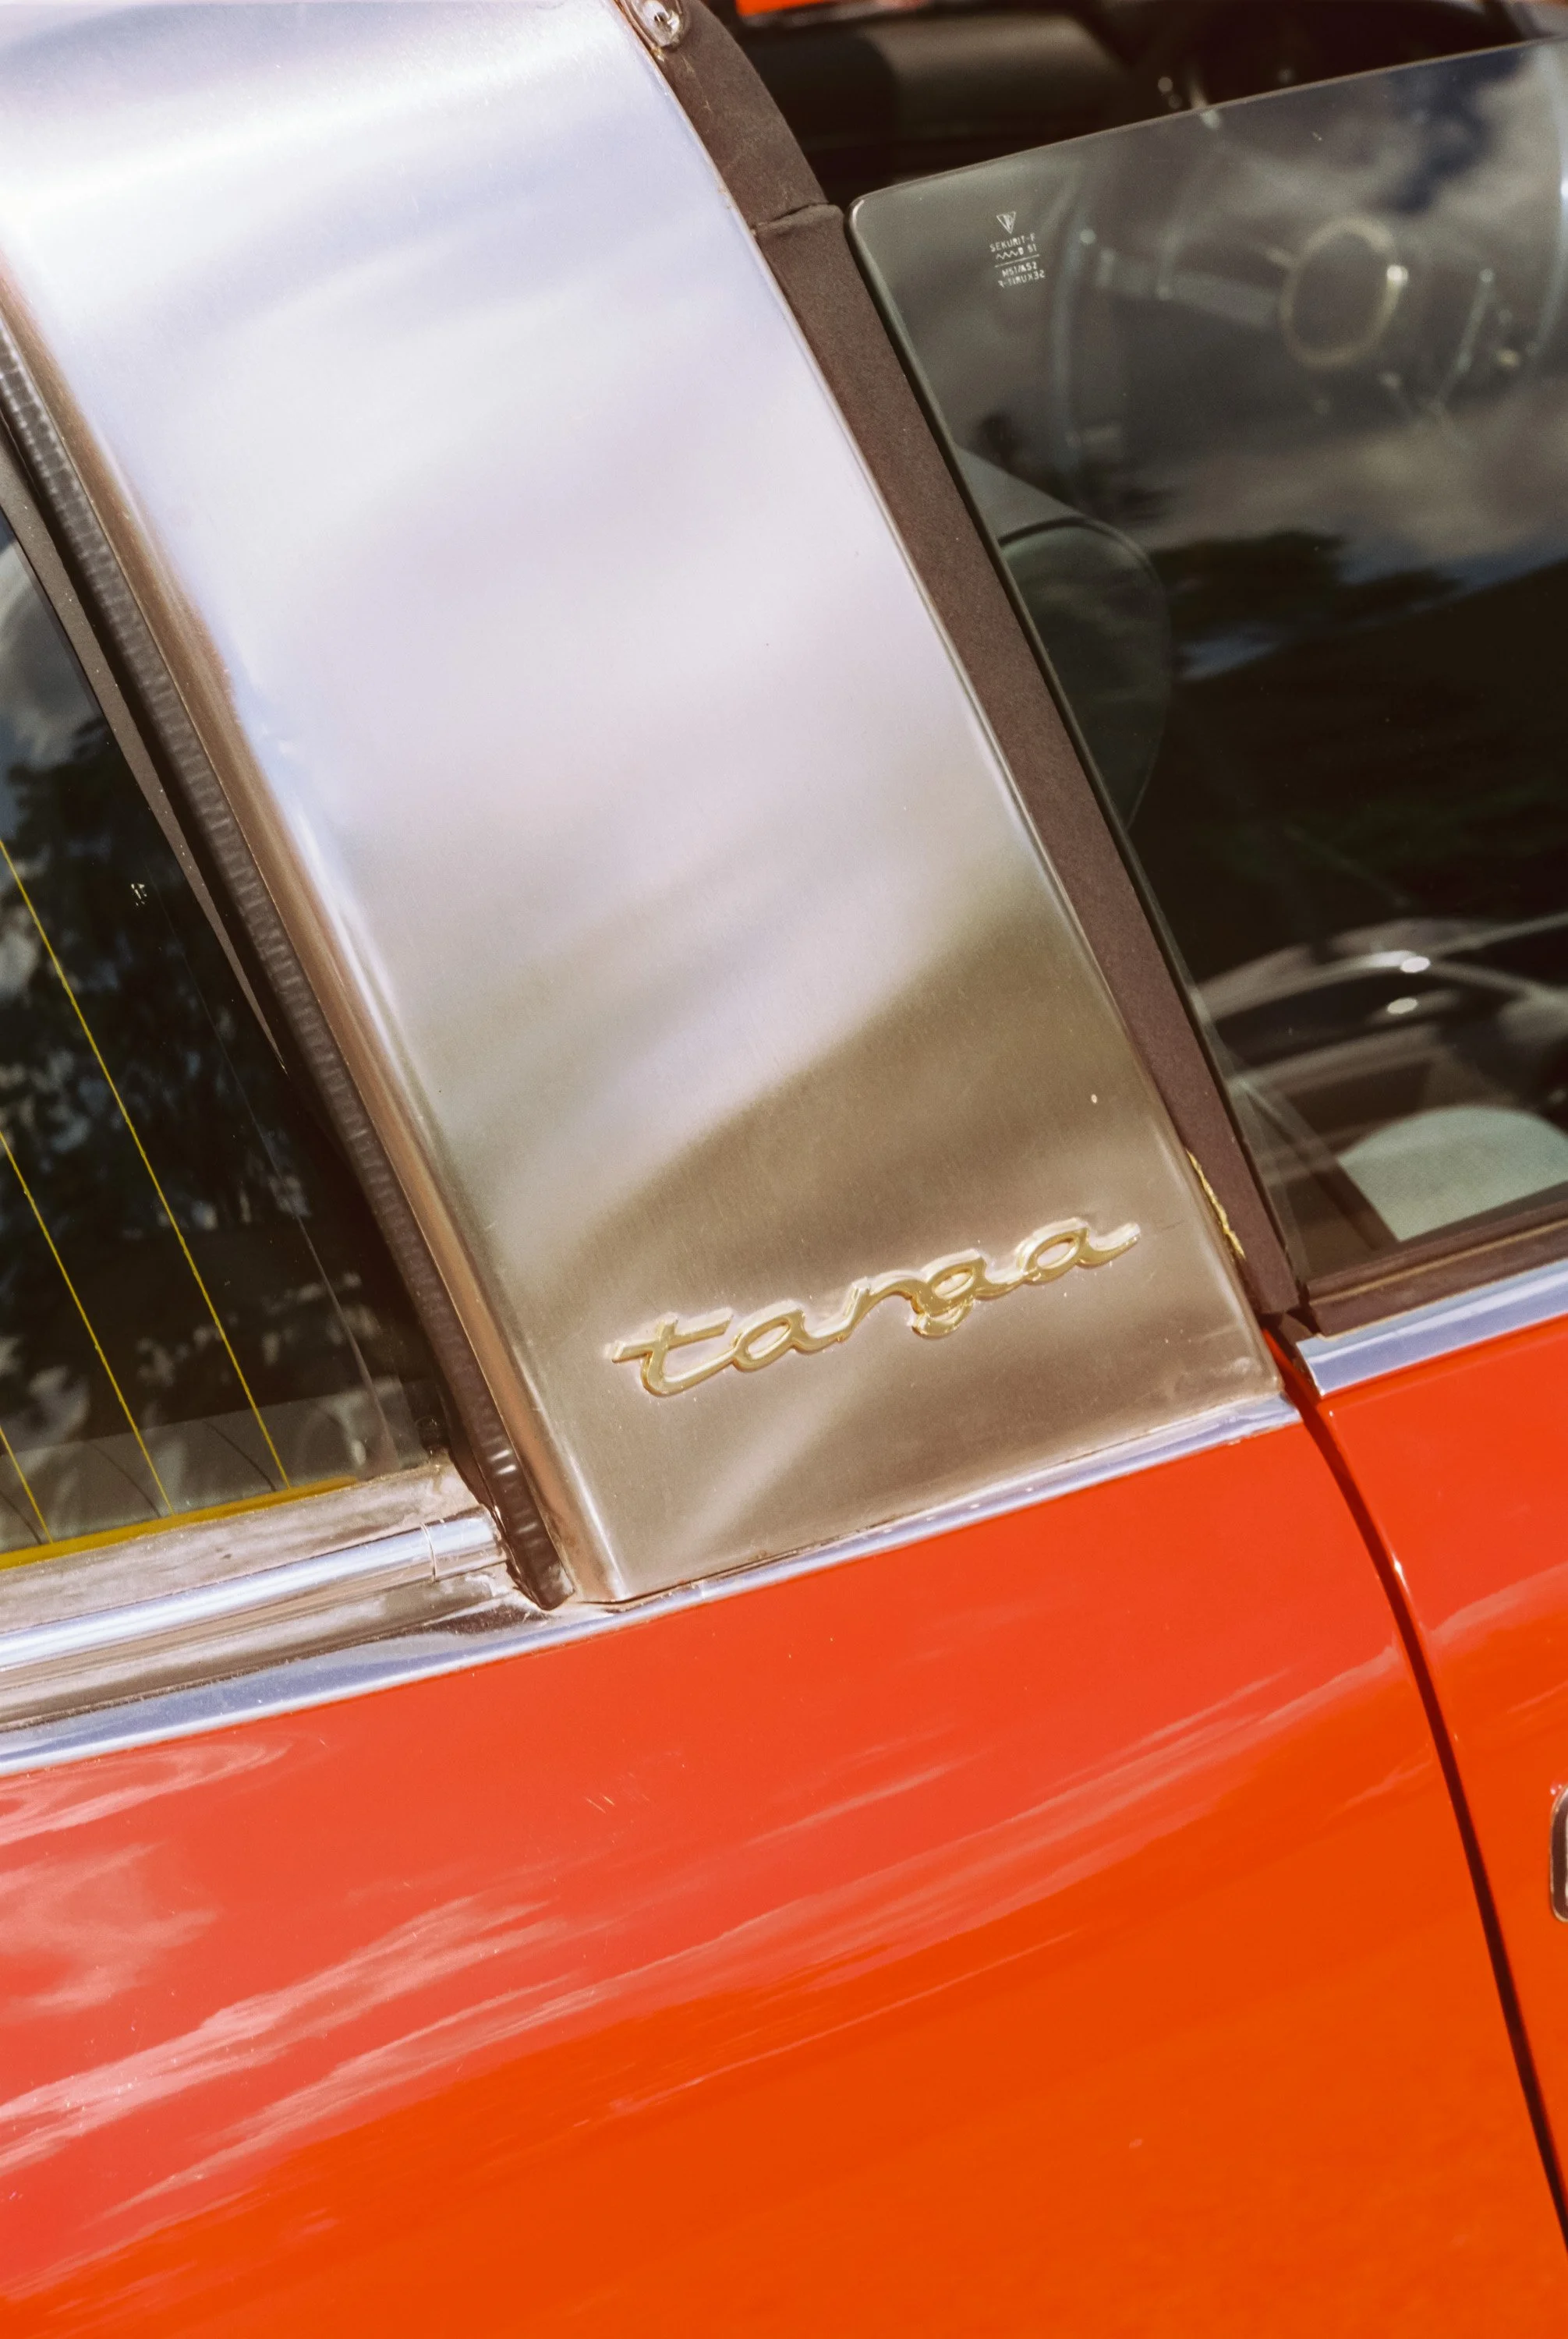


Enjoyed this? You might also like:
If you found this article helpful, check out my other deep dives into the world of expired emulsions and color recovery:
Nikon F2 Review (2026): Is This the Best Mechanical 35mm Camera?
422 Meters of Frozen Gold: The Expired Ektachrome Heist Part I
422 Meters of Frozen Gold: The Expired Ektachrome Heist Part II
Embrace the Blues: Why Ektachrome shifts cooler and how to handle it
Minolta SR-101 (SRT 101) Review: The Ultimate Mechanical SLR in 2026?

422 Meters of Frozen Gold: The Expired Ektachrome Heist Part II
The scans are in! After rescuing 422 meters of 20-year-old Ektachrome, I finally hit the streets of Osnabrück to see if "Frozen Gold" is real or just a myth. From ISO tests to the legendary Retrochrome connection—here is the verdict on my biggest film heist yet.

Burnt Bananas - I love the first frame on a roll
The Moment of Truth
It’s the moment every film photographer both loves and fears: receiving the "Your scans are ready" email. After the long journey of sourcing 422 meters of expired Ektachrome, respooling it into DIY canisters, and carefully metering my test rolls, the results from Urbanfilmlab finally landed in my inbox. Was the "frozen for 20 years" claim true? Or did I just spend weeks of work on a heap of yellow-tinted plastic? Let's dive into the frames.
New here? Here is part I of the story.
The Setup
Before we look at the frames, a quick disclaimer: these aren't meant to be "fine art" gallery pieces. These are just test shots, quickly snapped but with exact metering, to obtain a baseline and understand the limits of the emulsion. I left my Canon P (full review here) Rangfinder at home and took my trusty Nikon F2 and paired it with the 35mm f/2 Nikkor (Non-AI). I love this combo. So, bear with me—these shots were all about the data, not the composition!
First Impressions
As I suspected in Part I, this batch of E400 looks and behaves remarkably like the legendary FPP Retrochrome. The moment I opened the first files, that familiar aesthetic hit me. The colors aren't "clean" like a fresh roll of E100. Well, actually, it’s not even close. There’s a wonderful, gritty, yellowish warmth. The highlights have a slight glow, and the grain is—as expected for a 400-speed slide film—prominent but organic. It doesn't look like "broken" film; it looks like a memory. After talking to Tobi from Urbanfilmlab, we are certain that this is 100% the same emulsion. Not only that, but it seems to have been stored in the exact same manner.


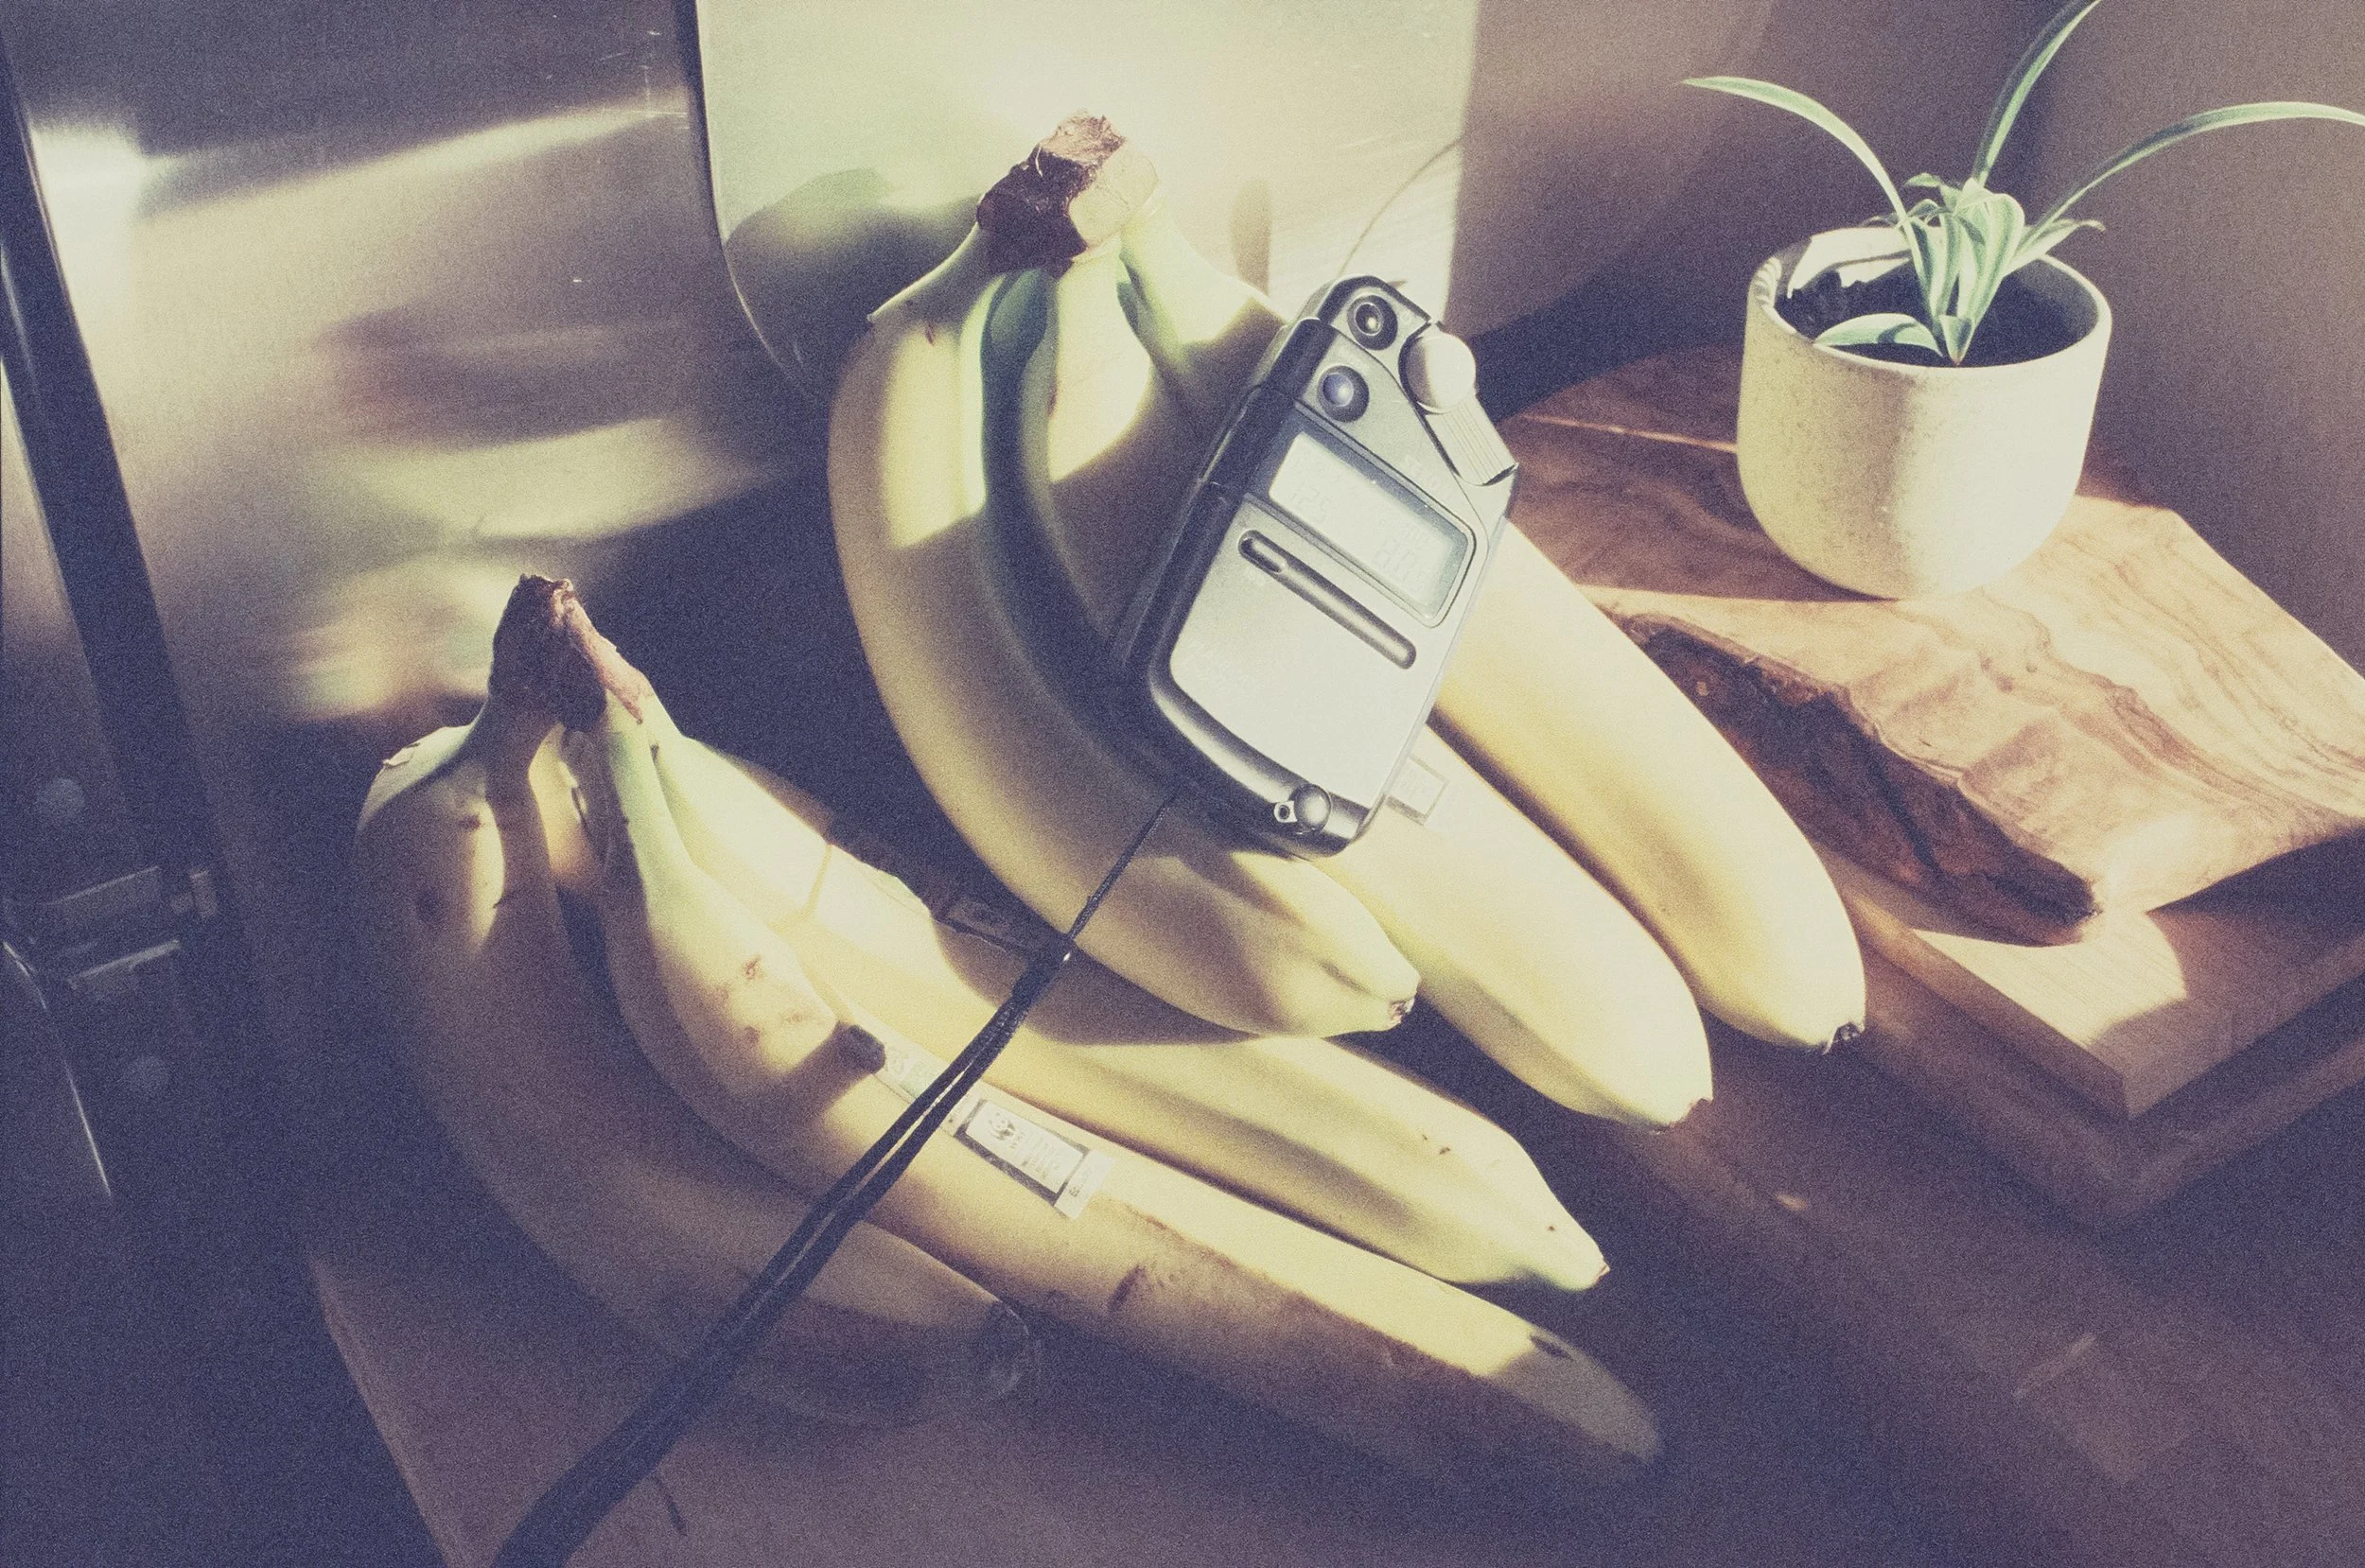
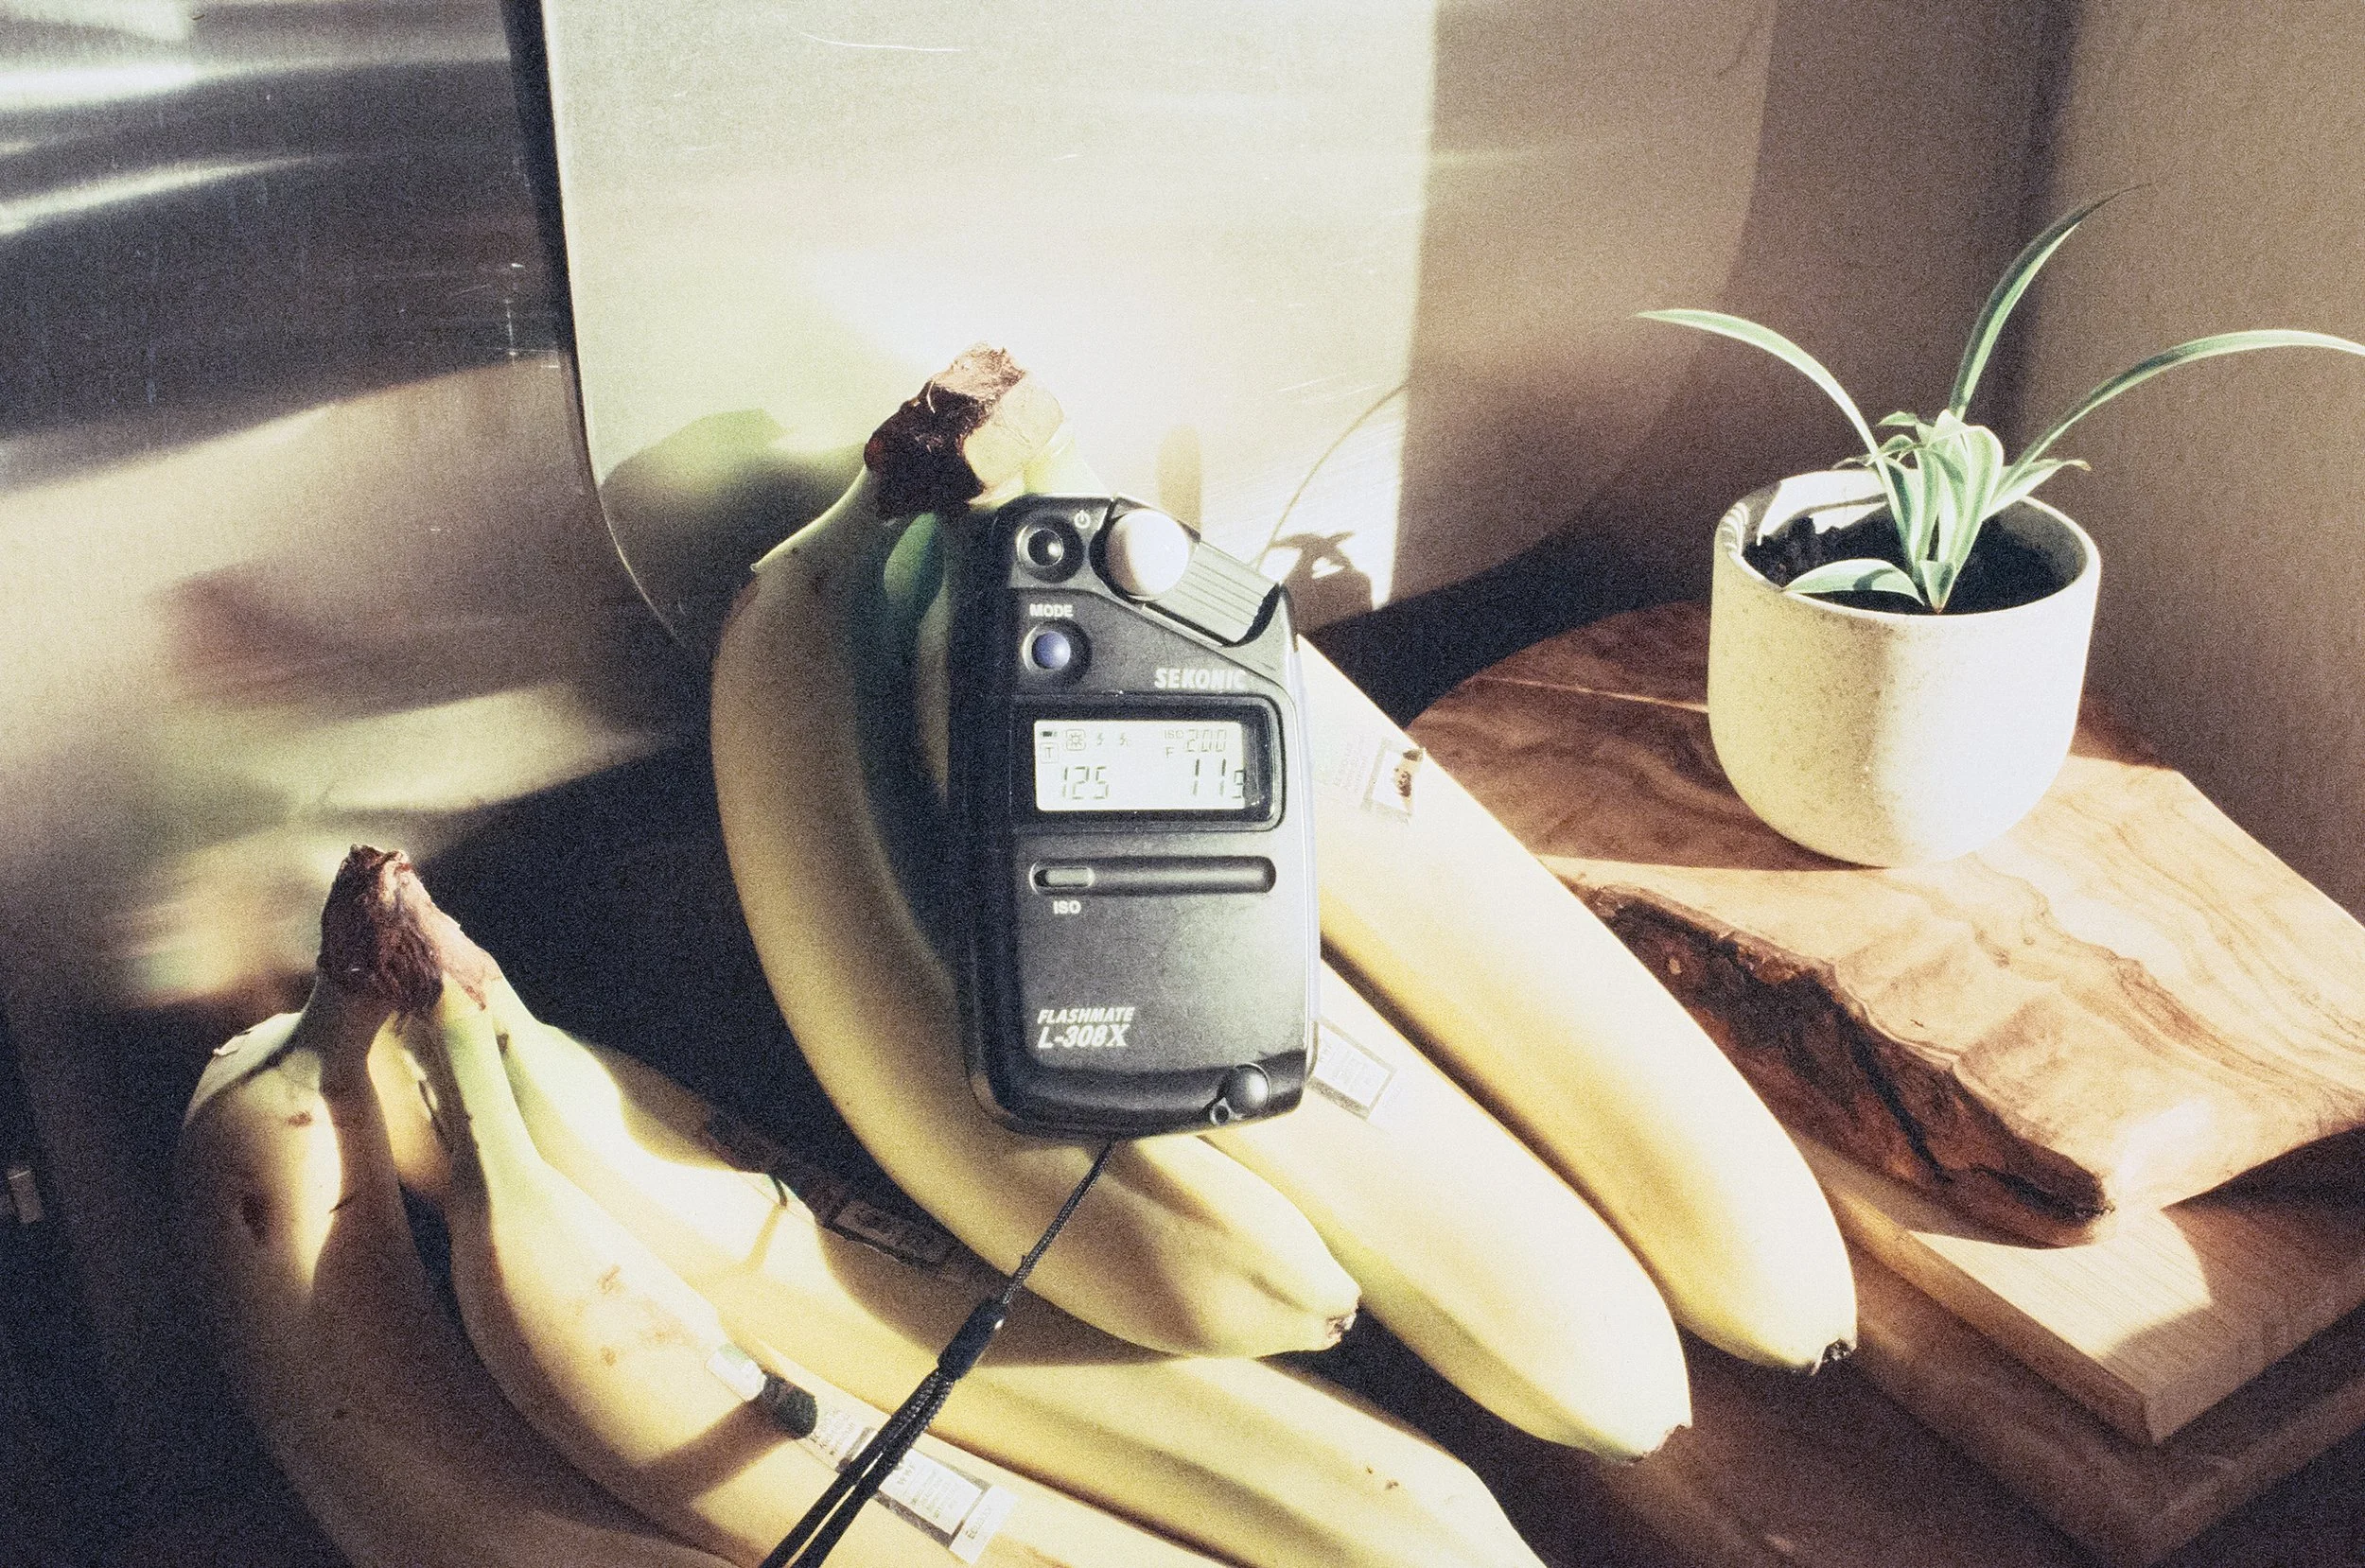
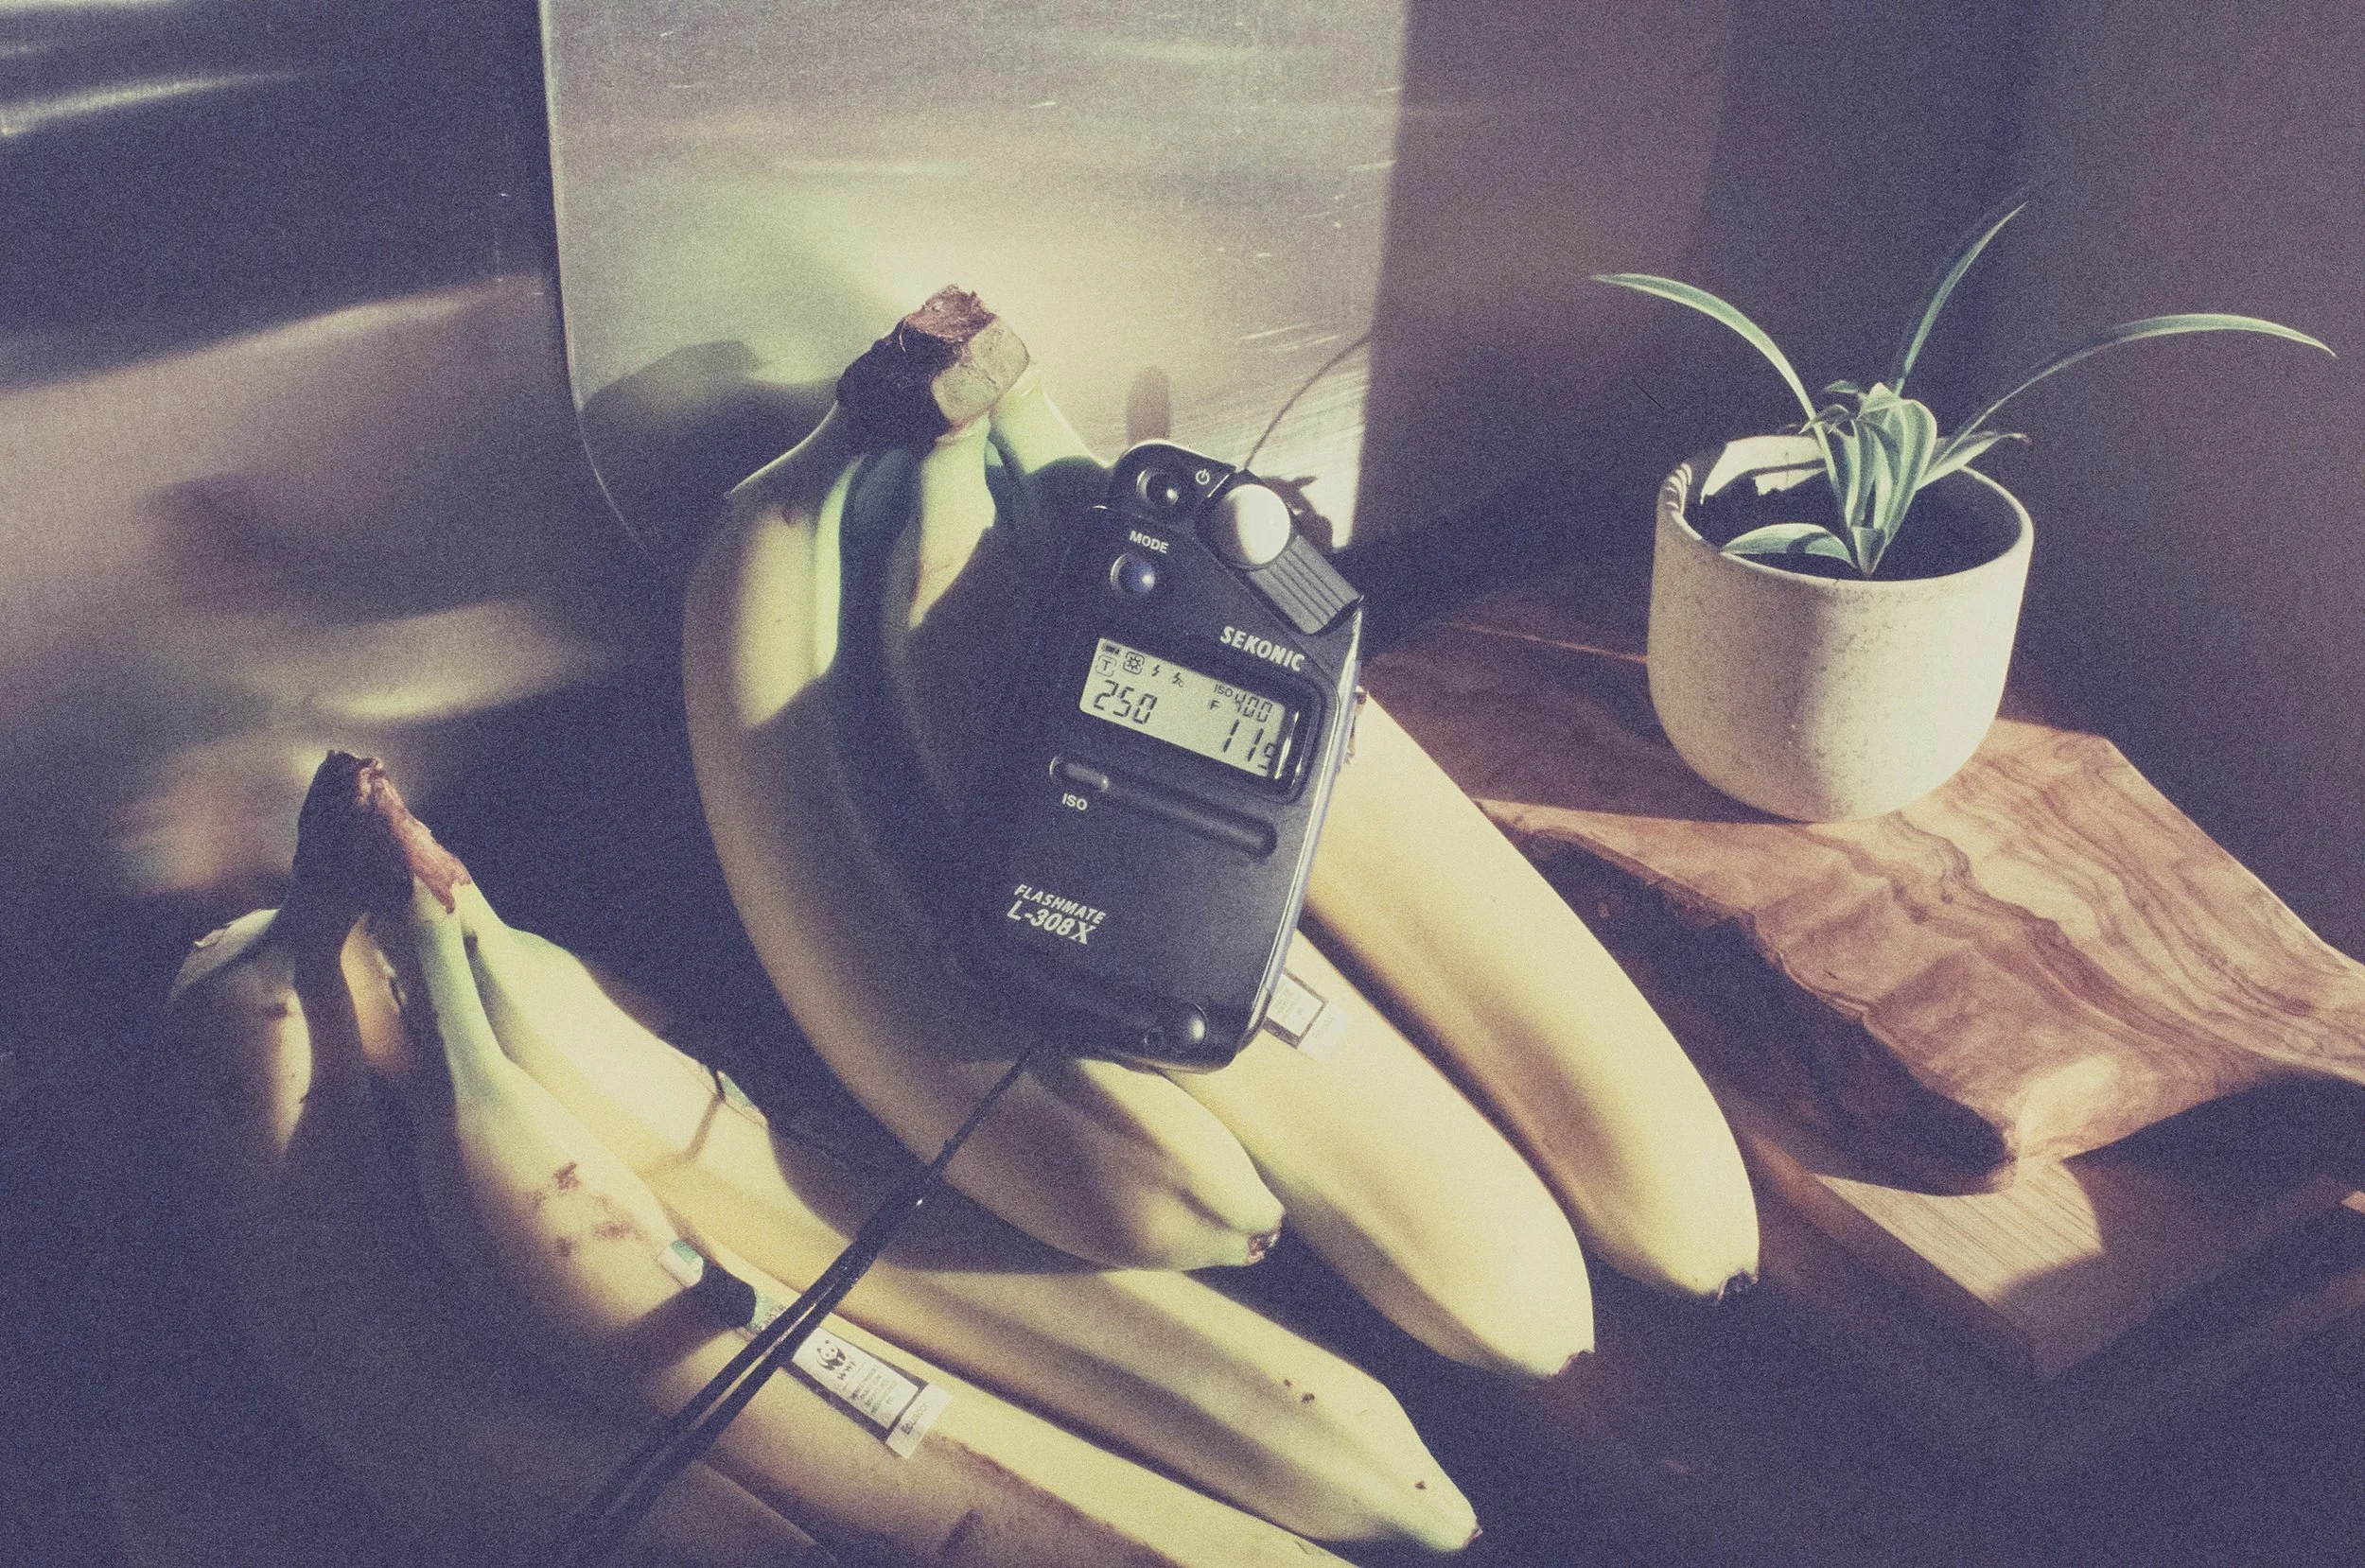
Finding the Sweet Spot: ISO 400, 200, or 100?
I shot my test rolls at various speeds to see how the emulsion held up over two decades.
At ISO 400: This is where the film feels the most "correct." The highlights on the sun-drenched buildings are crisp and hold all the detail. However, shadow detail is minimal—the darker sections of the street and the roofs turn into a deep, moody abyss.
At ISO 200: You gain a bit more information in the shadows, but you pay for it immediately in the highlights. The bright white walls are already on the verge of "clipping" (burning out).
At ISO 100: This is where the 20 years of age really show. The highlights are completely blown out, losing all detail. Still, it's impressive that the film holds itself together so well after all this time!
The Color Cast Even though the film was frozen, it’s still 20-year-old E-6 chemistry. Naturally, the frames came back with that characteristic Retrochrome shift we all know and love (if not, what the hell are you doing here?) from FPP’s Retrochrome 400.
If you’ve read my previous post on Ektachrome Blue Cast Correction, you know I’m not a fan of "perfect" digital-looking scans. I want the projected Ektachrome look. The same goes for Retrochrome. The scans have a specific look, but the best part is that you can easily "correct" it without losing that vintage feel.
A deep dive on how to edit Ektachrome can be found here.


An Advice on metering
If there is one thing you need when shooting slide film—especially the expired stuff—it’s a metering method you know, trust, and stick with. For me, that’s the Sekonic L-308X.
Slide film is notorious for its narrow dynamic range. Unlike color negative film, where you can "meter for the shadows" and let the highlights fall where they may, slide film requires a more surgical approach.
Metering for the Highlights is my advice. I typically stick with the base ISO and use incident mode (pointing the Lumisphere toward the camera from the subject's position) metering specifically for the highlights.
In the comparison images above, you can see the results of three different approaches:
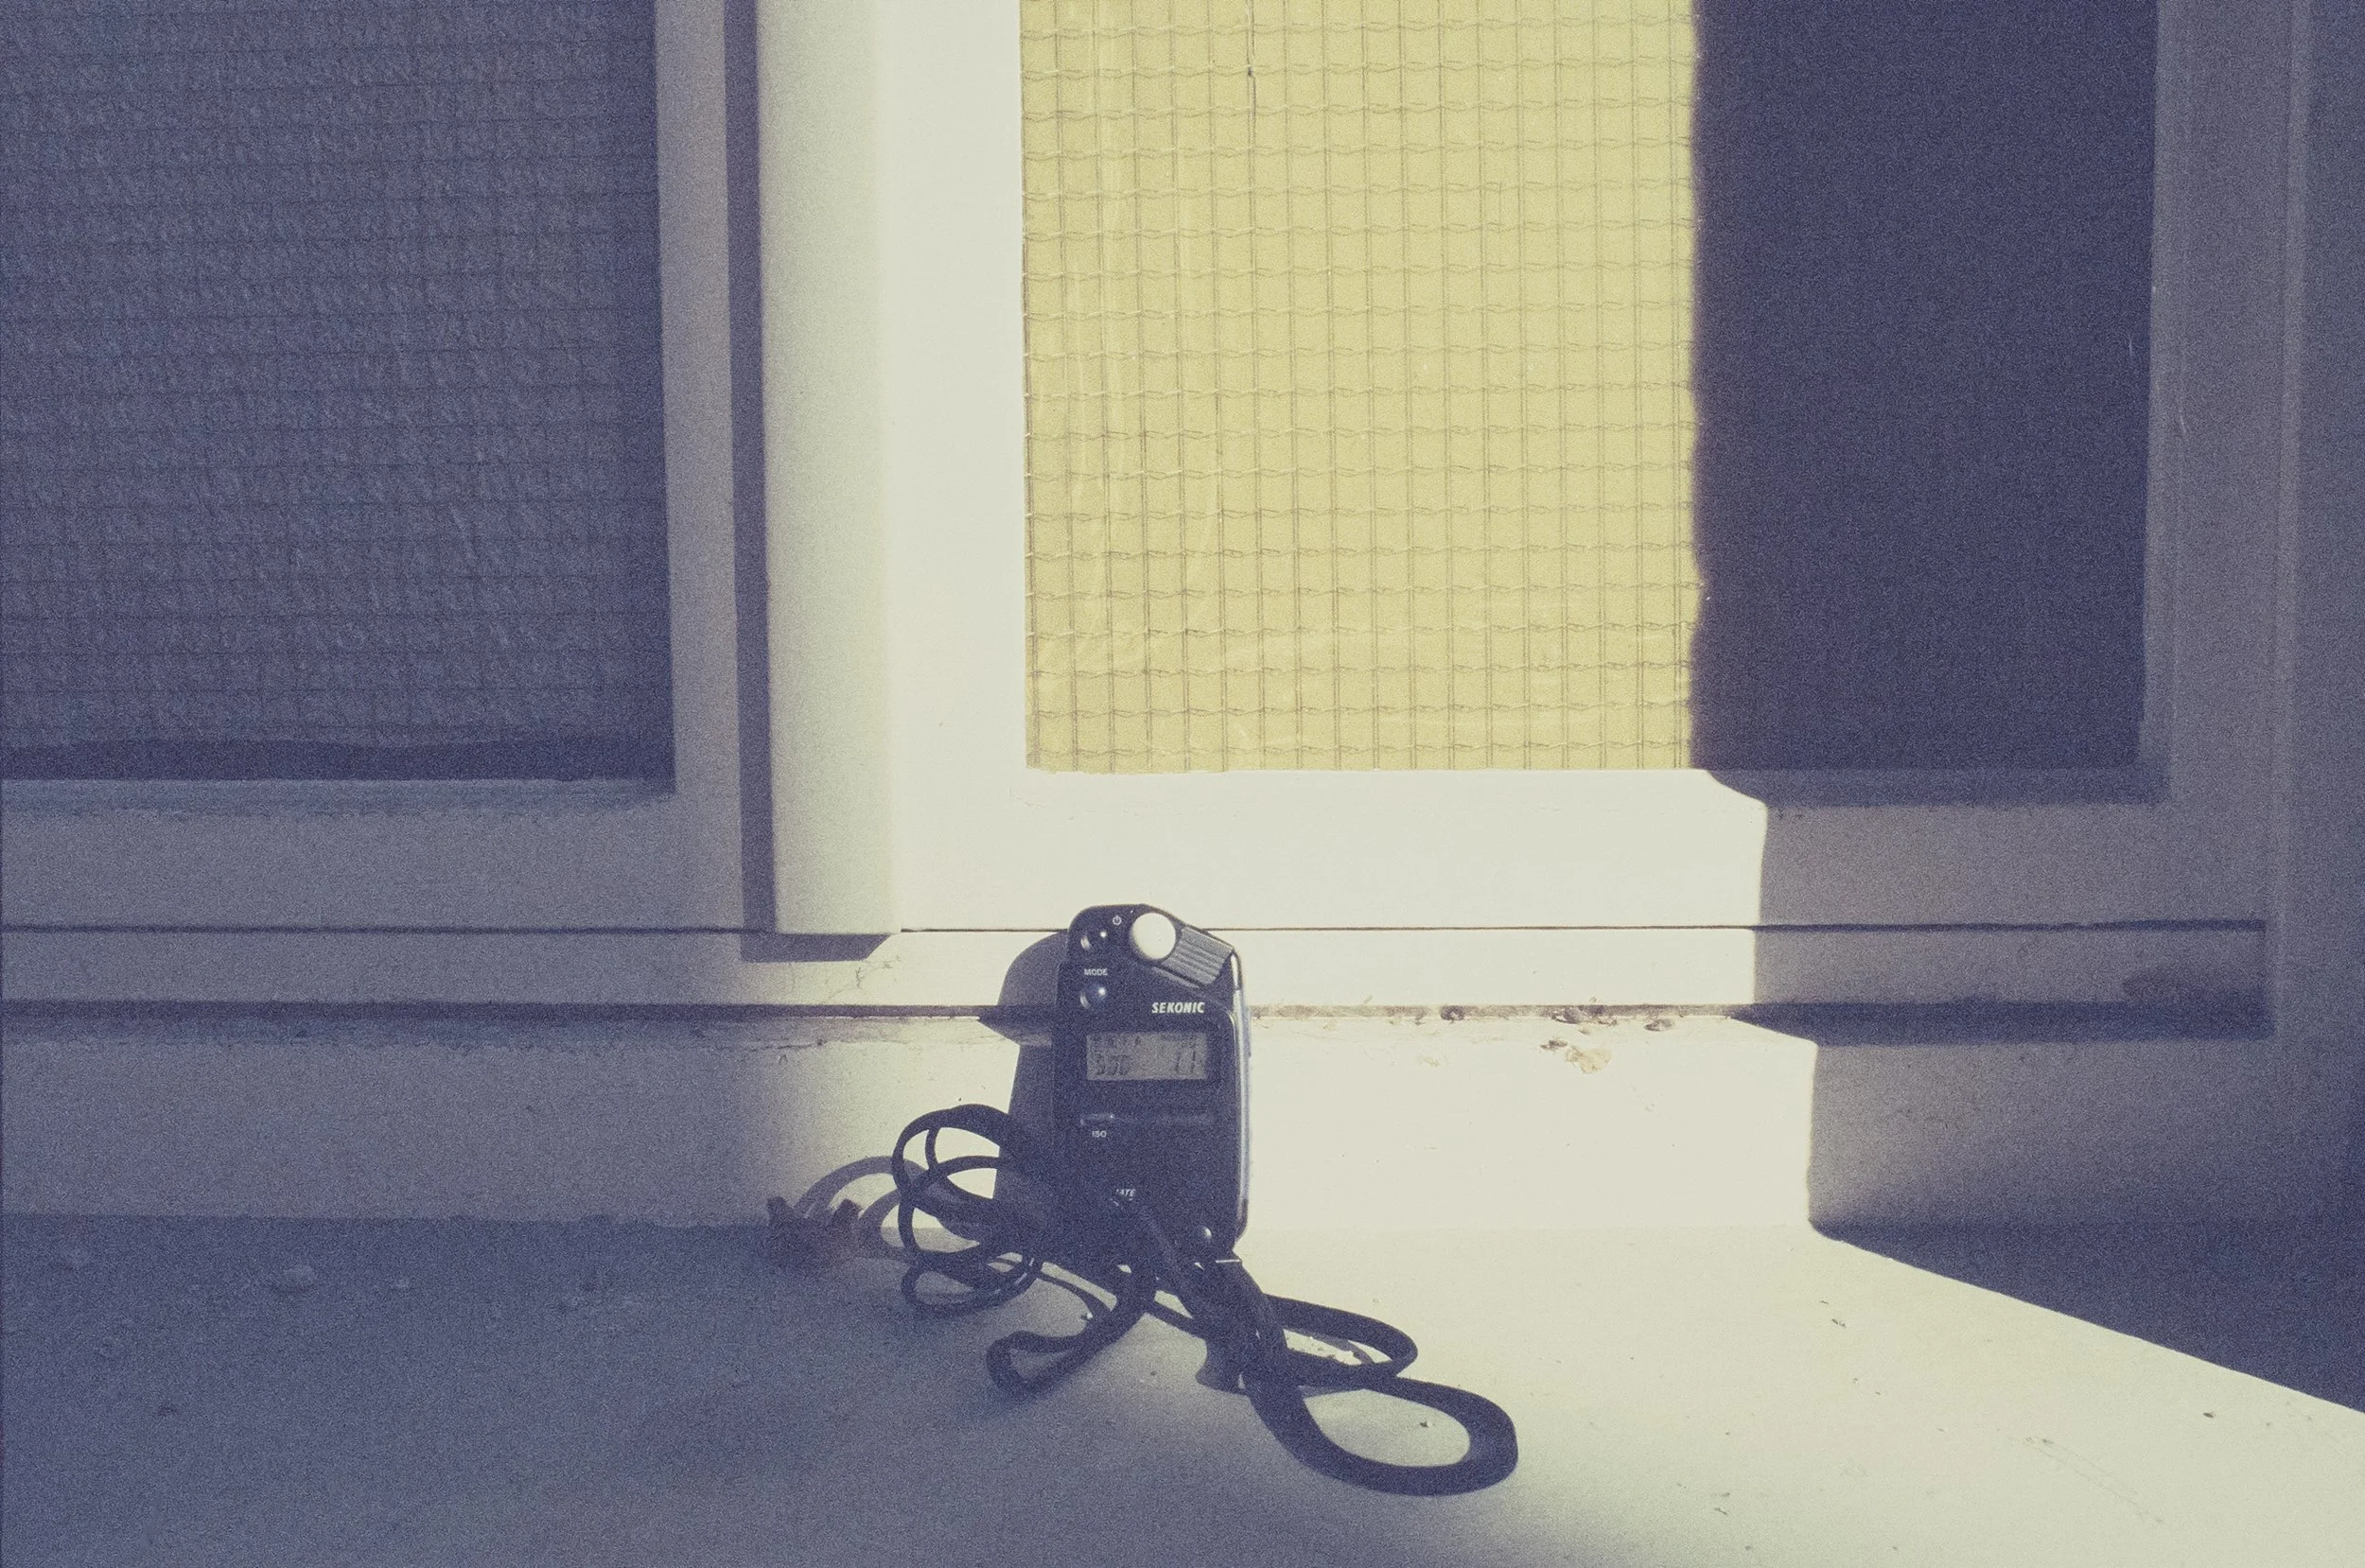


Metered for the Highlights: The colors are saturated, and the bright facades are perfectly preserved. This is my preferred method.
Metered for the Midtones: A balanced (the lightmeter thought otherwise) look, but you risk losing that highlight information.
Metered for the Shadows: The image falls apart. The highlights blow out, and the film's age starts to show in a messy way.
Was it worth the Heist?
Absolutely. This isn't just about the money saved; it’s about the unique character of this specific batch. I love Retrochrome and was already settling on the thought that I would never shoot it again once my stock ran dry. I am stoked to now shoot this rare film stock more freely. It lives up to its name. It’s grainy, it’s moody, and it has a personality that modern emulsions simply can’t replicate. I still have 88 rolls left in the freezer—88 opportunities to capture the world through various lenses. Stay tuned for more series shot on this 422-meter treasure.

Embrace the Blues: Why Ektachrome shifts cooler and how to handle it
The King is dead, long live the King! Ektachrome is back, but many are struggling with the notorious blue cast in their scans. In this logbook, we explore why the projector lies, why the scanner fails, and how to reclaim that warm, cinematic 'National Geographic' glow for your analog slide film.
Yes, that’s Ektachrome - Portugal
The king is dead, long live the king!
We all know Ektachrome. It’s one of the last slide films out there. We already buried it way back, but it was brought back by Kodak in 2017. Just like in the Middle Ages: The king is dead, long live the king.
It’s not only the last slide film Kodak is currently manufacturing; it can also be considered Kodachrome’s far cousin and, therefore, probably one of the closest things if you are after the Kodachrome look. But unlike Kodachrome, it tends to lean cooler. At least that’s what we hear. But honestly, have you ever shot Kodachrome and Ektachrome side by side and looked at them how they were intended to be looked at – via projection? Yeah, I figured. Me neither.
A little bit of history
When slide film (also known as reversal film) was invented by Kodak with the introduction of Kodachrome in 1935, its main purpose was to be viewed via projection. This allowed photographers to skip the expensive and often lower-quality color prints of that era. As revolutionary as it was, Kodak realized as early as the 1940s that they needed a more accessible alternative.


The original Kodachrome required an incredibly complex development process—eventually refined into the famous 14-bath K-14 process—where color couplers had to be added to the individual layers during development. This was practically impossible for small labs or home use. In response, Kodak introduced Ektachrome in 1946. Unlike its predecessor, Ektachrome had the color couplers already incorporated into the film emulsion, making the development process significantly faster and, more importantly, "consumer-friendly" enough for local labs.
The Ektachrome process and look
Modern Ektachrome is developed in E-6 chemistry. While still more involved than developing negative films in C-41, it yields high contrast and incredibly rich colors! However, it also has very little exposure latitude (compared to negative film)—it doesn't forgive mistakes. Interestingly its the slide film with largest dynamic range out there. 5 stops to be exact. According to the datasheet provided by Kodak.
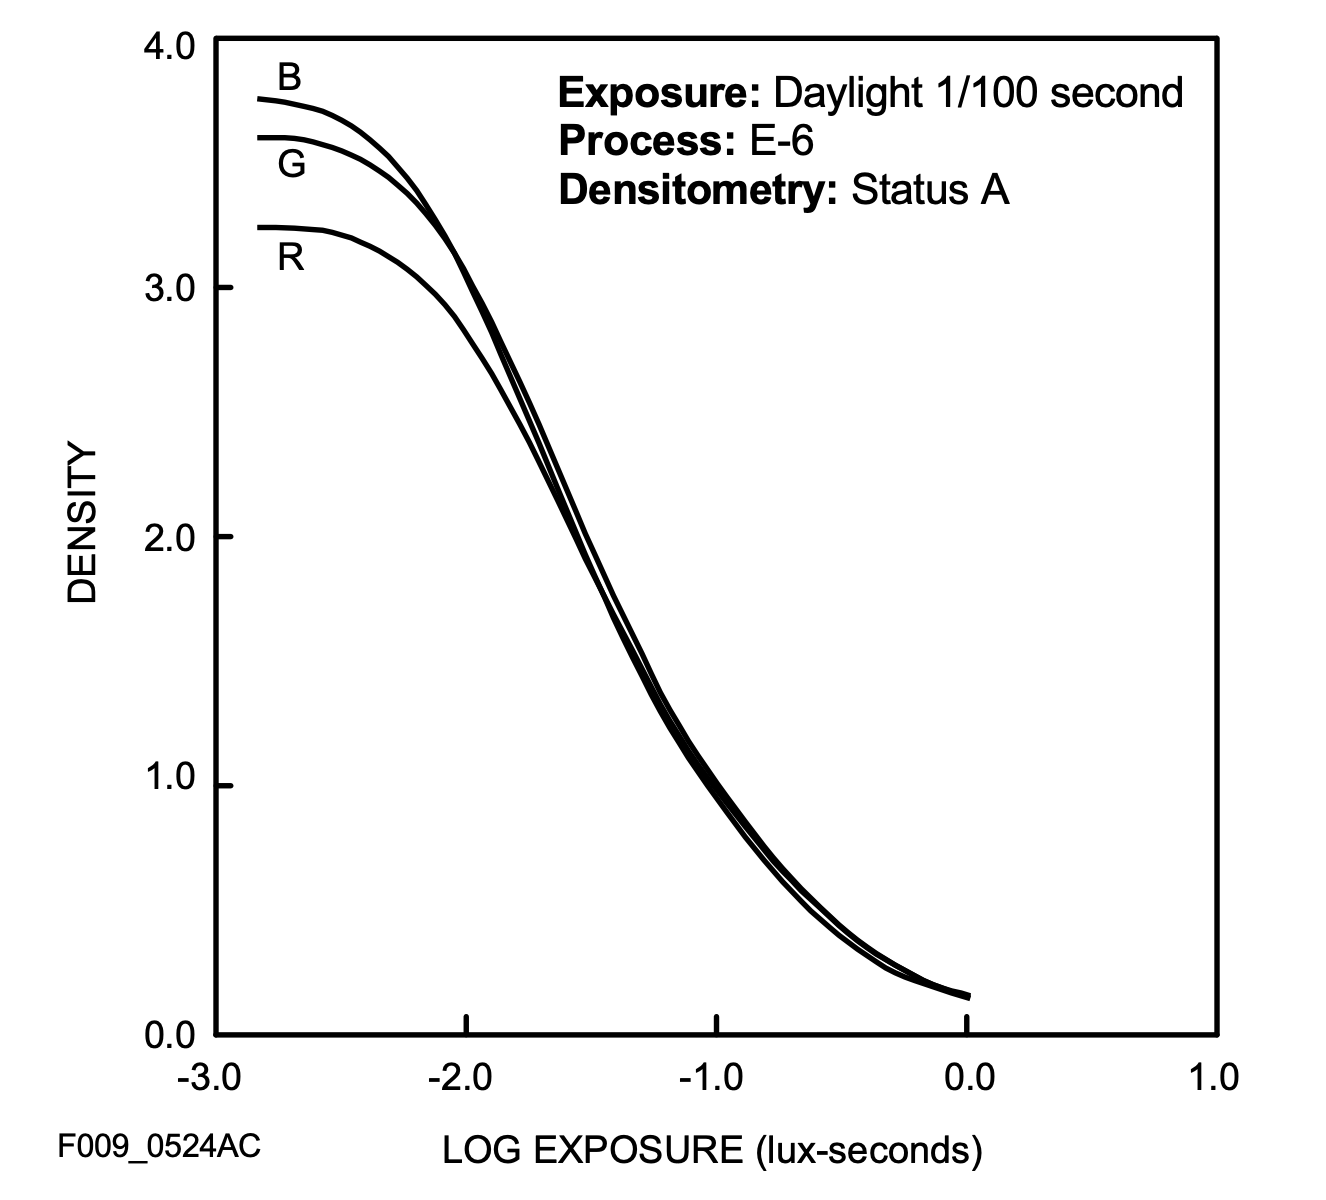
Comparing this to Velvia 100`s datasheet, E100 offer two stops more of latitude!
Reading forums and Reddit threads, many people are disappointed when they receive their scans back. More often than not, the scans appear too blue. Interestingly, this is rarely the case when the slides are projected. On a light table or screen, they appear well-balanced and neutral with high sharpness, deep blacks, and vibrant colors. Quite the opposite of what a lot of scans look like.
A bit more blue than i remember the scene to have in reality - Italy
Why is it so blue?
The technical reality is: Slide film is daylight balanced for 5500K. But unlike negative film, it has a "memory" like an elephant. It doesn't forgive. If you shoot in the shadows, at high elevation or under a clear blue sky, the film picks up a high amount of UV light and blue spill. While our brain compensates for this in real life, Ektachrome simply records it.

The typical blue shift - Splügen 1400 m a.s.l.
Also, the shooting location on our beautiful planet will make a drastic difference (Hollywood is where it is for a reason). Here are two unedited snap shots from the same day, same lab and the same 35mm roll. It’s not hard to tell Germany and Spain apart:

Kodak Ektachrome - Germany

Kodak Ektachrome - Spain
The Scan process
And then there is the scanner. Most lab scanners (looking at you, Frontier and Noritsu) were designed for negative film. But lets ask an expert: Tobias Urban from Urbanfilmlab:
Scanner Type: Which scanner do you use and why?
“Slide film tends to look better when scanned with the Noritsu compared to the Frontier, due to its neutral colors, higher dynamic range, and improved shadow detail. The Frontier, on the other hand, works better with negative film as it has its own unique aesthetic.”
Color Cast: How do you handle the typical color tint that comes with Ektachrome?
“To color-correct slide film, especially Kodak Ektachrome, I use the built-in correction channels the scanner itself offers: Cyan, Magenta, and Yellow. However, generally speaking, there is not a whole lot of wiggle room without shifting the colors or ending up with a very unnatural-looking image.
If you want to warm up the look of Ektachrome, it is a good idea to do this right away when taking the picture. You can use a light warming/bronzing filter, such as an 81B. It will provide a slightly warmer result at the moment of exposing the film.”
Exposure Latitude: Ektachrome has a narrow dynamic range. Can you recover details in the shadows or highlights if the exposure is not 100% on point?
“Slide film has a super narrow exposure latitude, with Ektachrome clocking in at around 5 stops of dynamic range (for comparison, Fujichrome Velvia 100 has 3 stops). Blown-out highlights, such as parts of the sky, are almost impossible to recover. If you drop the exposure during the scanning process, those overexposed areas turn flat and yellow, which simply does not look good.
Shadows are easier to recover, especially with the Noritsu. Of course, this is nowhere near the possibilities that negative film offers, but it is still better than you might think.”
Thanks Tobias for the behind the scenes info! If you don’t know Urbanfilmlab, go and check them out! Great scans and more important great human beings.
The Bulb
Most importantly, the light source in scanners is not color-balanced the way a projector's bulb is. Projector bulbs are actually a whole lot warmer than daylight, typically ranging from 3200K to 3500K. This results in the warm, glowing slides we remember from projections. So, there you have it: we actually need to edit our scans in order to make them look the way they were intended to be seen. Or you camera scan yourself with a warmer light like the Cinestill CS-Lite SpectraCOLOR. (I am not affiliated with them in any way.)
Handling the shift
So, how do we get that "projector-esque" warmth back without losing the Ektachrome soul?
The goal - nice warm colors
1. Analog Correction (The Filter Way)
If you want to fix it “in-camera”, look for an 81A or 81B warming filter as suggested by Tobias. It’s a subtle amber tint that counteracts the blue cast in shadows. It gives the film that slightly golden "National Geographic" glow.
2. The Digital Darkroom
If you want your pictures to look as if they were projected, you guessed it: the best way is to actually get yourself a projector and try to match the digital image to the projected one. Depending on how cool your scans are, a simple adjustment of the color temperature will do the trick, as you can see here:mo


Using the Tonecurves
For more severe cases and nailing skin tones, I recommend using individual RGB curves for adjustment. Let’s have a look at how I edited this image:

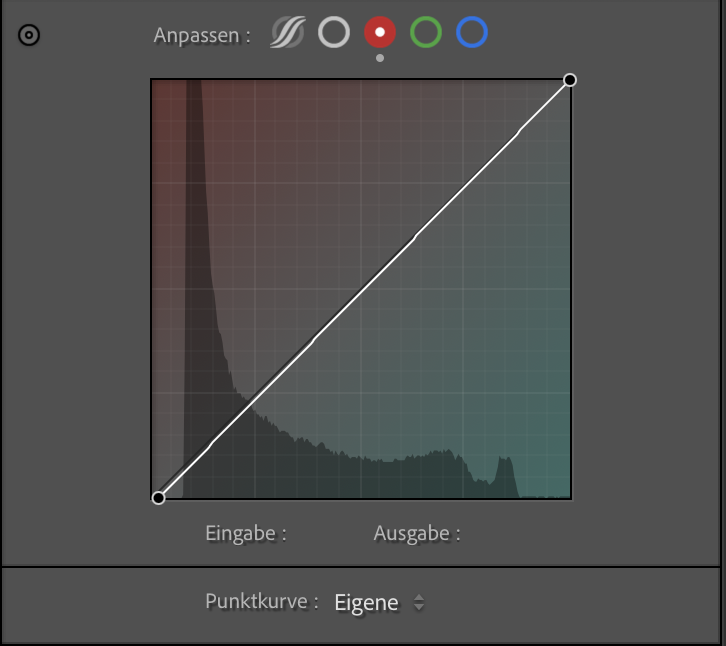

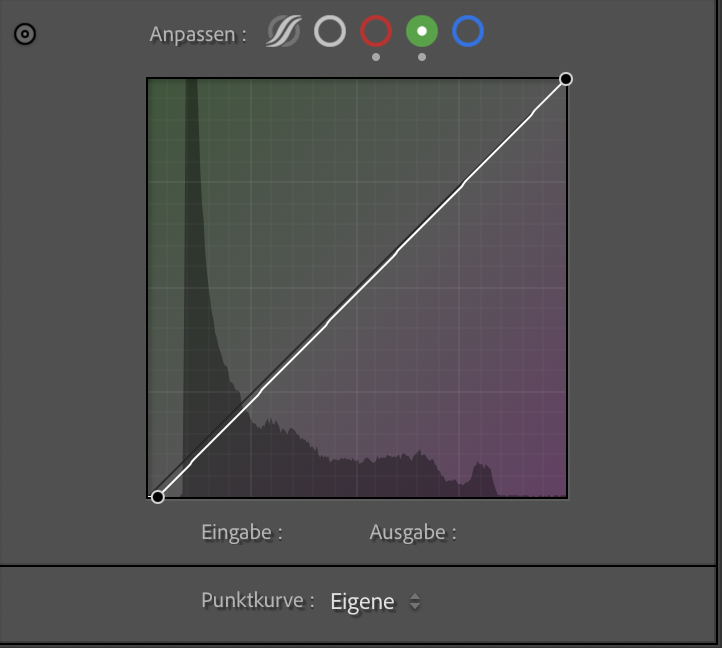


Straight lab scan - Image 1
The shadows were too red - add a touch of cyan - Image 2 & 3
Adding some magenta to the shadows - Image 4 & 5
Stretching the histogram for richer blacks - Image 6 & 7
Increased exposure and added a tad of warmth - Image 8 & 9
As you can see, the little adjustments add up, making the image look more true to life and natural.
Embrace the Blues
But here’s my take: Maybe the blue isn't the enemy. Here are some pictures of uncorrected lab scans. Ektachrome’s cooler color palette fits the rainy, rough Berlin aesthetic much better than any other film would have. Another thing it excels at is night photography (no resiprocity corrections needed for exposures beyond 10 seconds!), artificial light, and sunsets, as you can see in the following pictures.


Enjoyed this? You might also like:
Further reading and resources on Ektachrome
Analogcafe - Ektachrome Review
Casual Photophile - Six Months with Kodaks new Ektachrome
Dacaf Journal - Kodak Ektachrome 100 Review
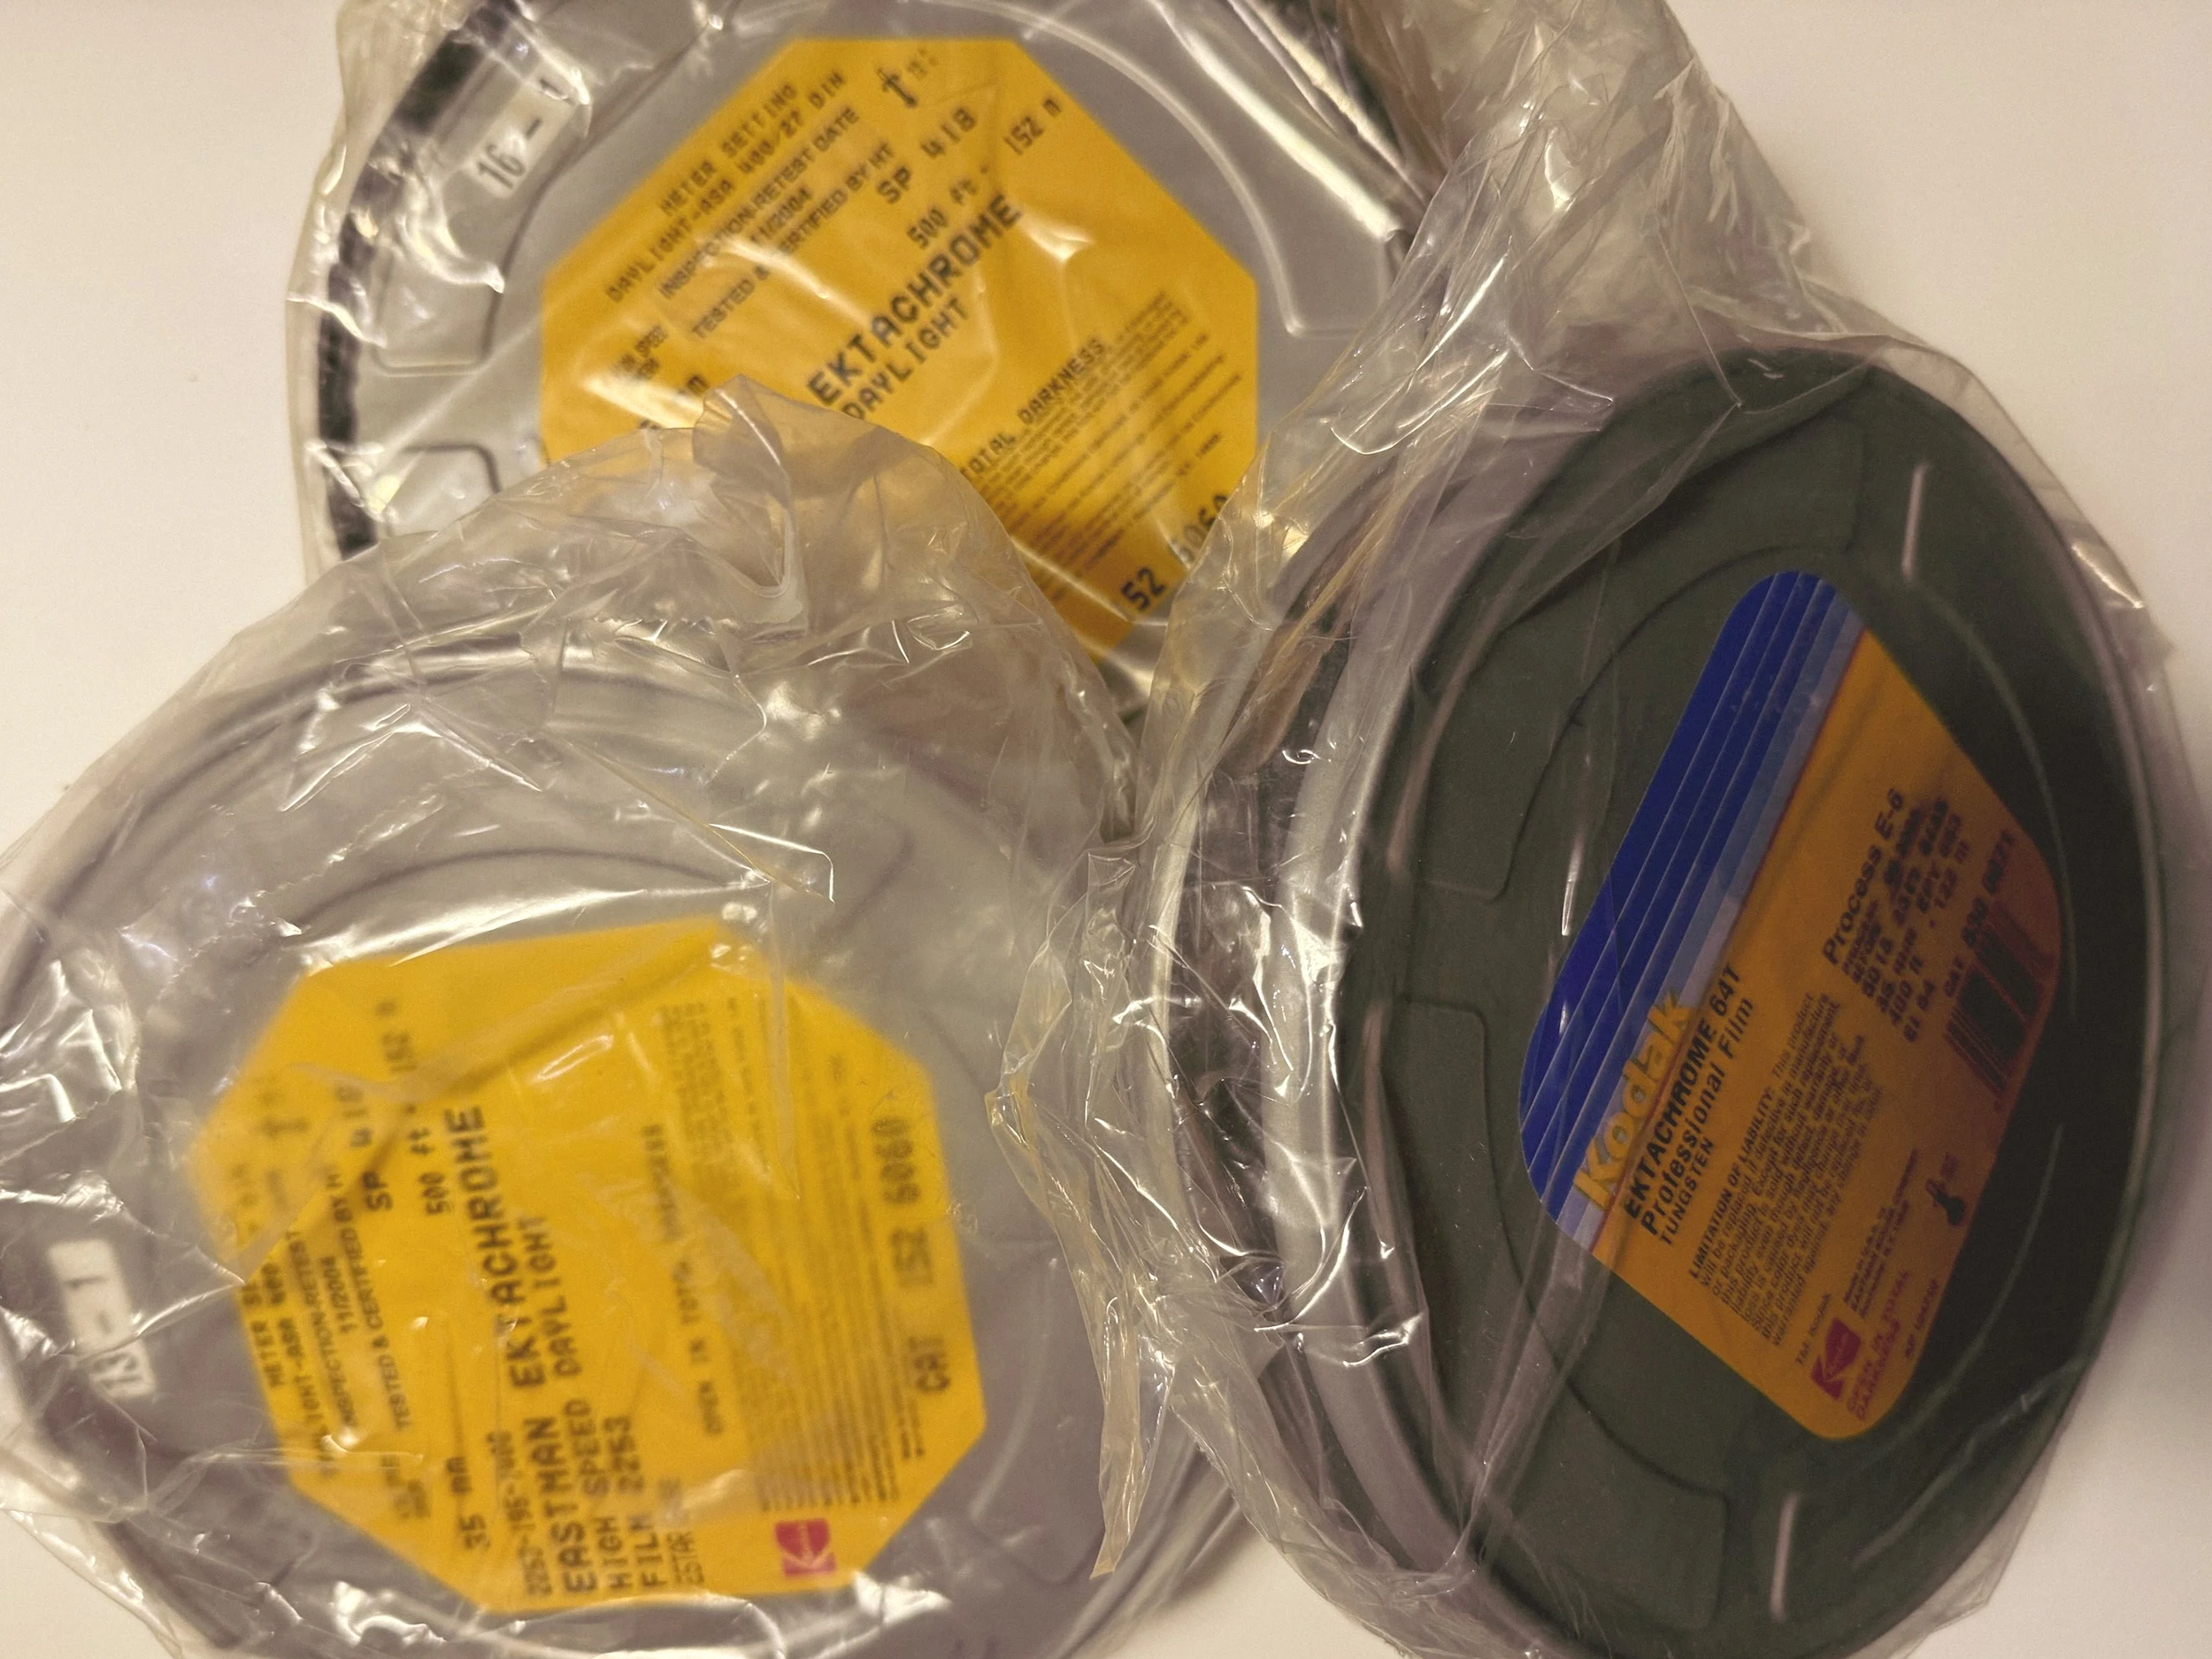
422 Meters of Frozen Gold: The Expired Ektachrome Heist Part I
From a suspicious eBay find to 2kg of frozen gold: The story of securing 422 meters of rare, expired Kodak Ektachrome 400. From bulk loading, custom stickers, and the thrill of the analog hunt.
By Benedikt Schlereth.
Reels of Kodak Ektachrome 400 and 64T
422 Meters of Frozen Gold: The Expired Ektachrome Heist
It was a regular workday—might have been Monday or Tuesday, I don’t remember exactly—when three rolls of Ektachrome popped up in my saved search on eBay Kleinanzeigen. No price, no details. Was this a scam? It looked a bit like it, but as a film enthusiast, I just had to write to him. The seller actually replied, and I figured, why not have a call? Just to be sure.
The Discovery: Half a Kilometer of Rare Slide Film
As it turned out, he was selling two reels of Ektachrome E400 (expired in 2004) and one reel of 64T (expired in 2005). That is almost half a kilometer of rare slide film!
Here is the kicker: He claimed the rolls had been in his possession for 20 years and, even better, had been stored in the freezer for the entire period. (But there was a catch: no shipping, only personal pickup.
The Logistics: From Stuttgart to Berlin and Osnabrück
Since I personally don’t know how to respool film to 35mm reels, I instantly asked a colleague if he would be in. Luckily, he not only knows how to respool, he also has a neat Reflex Lab Auto Bulk Film Loader (I have no affiliation with them, it’s just a great tool).
Sounds too good to be true, right? Well, not yet. As I live in Osnabrück, the seller was near Stuttgart, and my buddy is in Berlin. It was quite an undertaking. After a lot of phone calls and begging, another film photography geek from Stuttgart picked them up and shipped them to Berlin.
Is it FPP Retrochrome?
My buddy in Berlin started respooling the E400 and discovered that the film’s emulsion side was yellow. This sounded familiar to me, as I was lucky enough to get some rolls of the last FPP Retrochrome batch.
Side note: I absolutely love that film! If you want to see why, check out my Portugal beach shots here.
The emulsion was yellow too. Was it actually the same film? I would have to wait till i had it in my own hands.
2kg of Adrenaline: 90 Rolls of Analog Joy
Two weeks later, a package arrived at my doorstep. Film—and lots of it. 2 kilos to be exact, or in other terms: 90 rolls with 33 shots each. Believe me when I say that it was quite the endorphin rush.
Film - lots of it
The film is definitely stiffer and more yellow than modern Kodak Ektachrome 100. In direct comparison, it looks and feels just like FPP Retrochrome. I instantly shoved a roll into my trusty Nikon F2.
The Final Touch: Custom 35mm Film Canister Stickers
Of course, the canisters had to look the part. Since we reused everything from Kodak Gold and Portra to Ilford HP5, dropping these off without a clear note at a lab would be a disaster. It would likely lead to some funky cross-processing instead of the aspired E-6 process.
So, stickers are a must to let the lab know exactly what’s inside—but let’s be honest, it’s also because they simply look cool!
Designing Vintage-Inspired Labels
I jumped into Adobe InDesign to create my own take on vintage Kodak Ektachrome labels. It’s a very easy DIY project if you use a program that allows for exact dimensions. For 35mm canisters, I used:
Short side: 36mm
Long side: 75mm
I’m pretty happy with how they turned out. There’s something incredibly satisfying about seeing 90 rolls of film lined up with matching, custom-designed labels. It transforms a DIY bulk-load project into something that feels professional and unique.
If you are wondering, they were printed using Avery Mutliporpuse Removable Labels Type 1 on my regulard home use printer.
Vintage looking custom film canister stickers
The Test: Finding the Sweet Spot
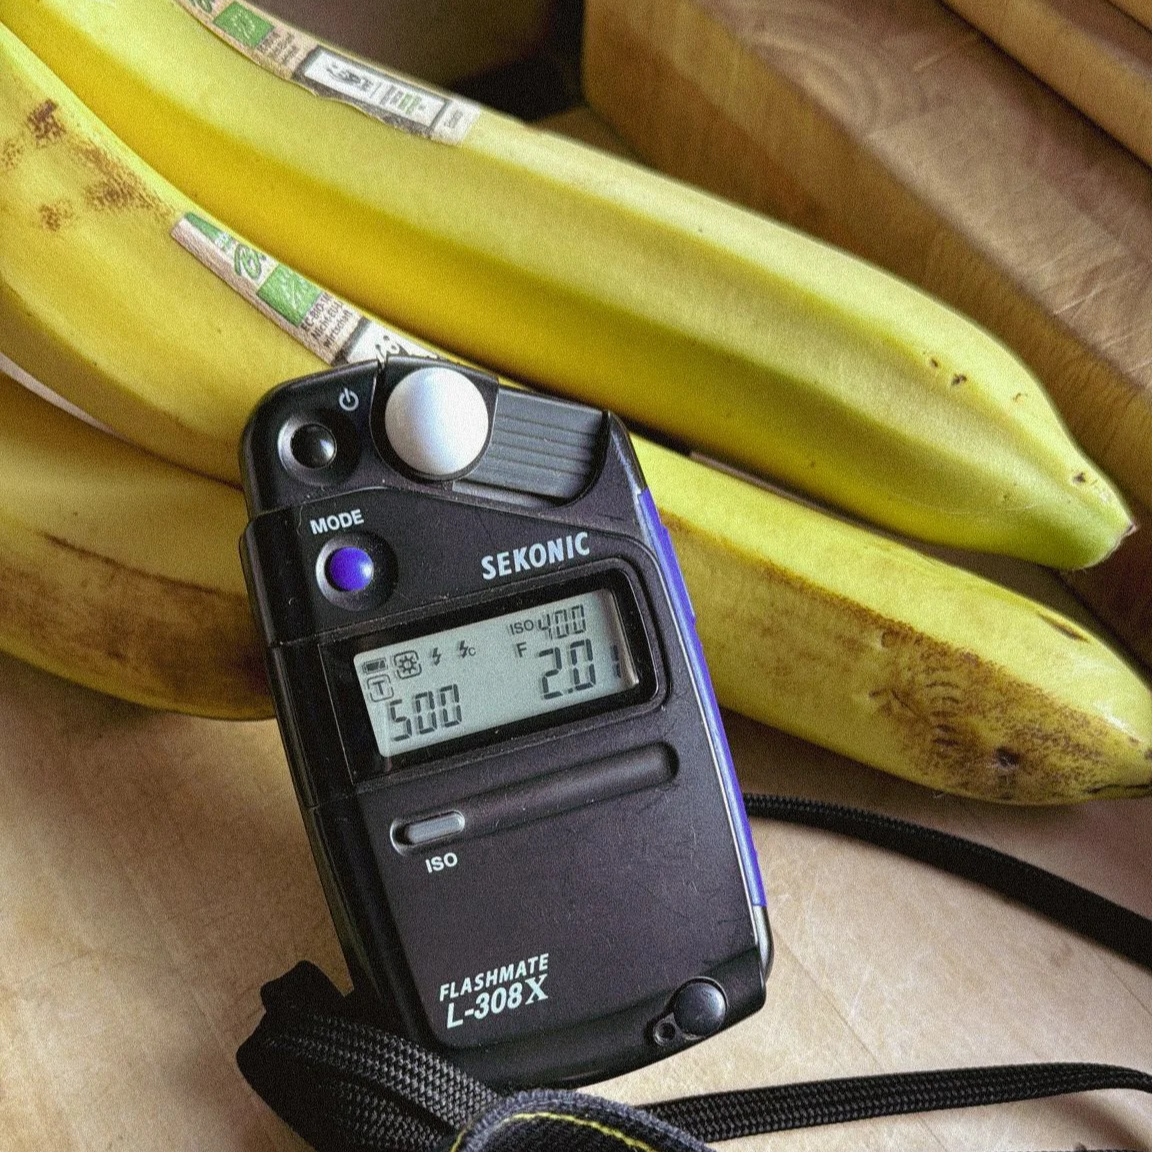
Incident metering with the Sekonic Flashmate L-308X
To find out the ideal ISO of this batch—as we know with slide film, the "overexpose by one stop for each decade" rule hasn't been properly proven—I shot the scenes at ISO 400, 200, and 100. I metered everything with my Sekonic Flashmate L-308.
The roll is now at Urbanfilmlab in Kleve. I cannot wait to get the scans back and show you the results! Then we will know if it performs similar to the FPP Retrochrome. Regarding the looks of the emulsion. They look 100% identical!
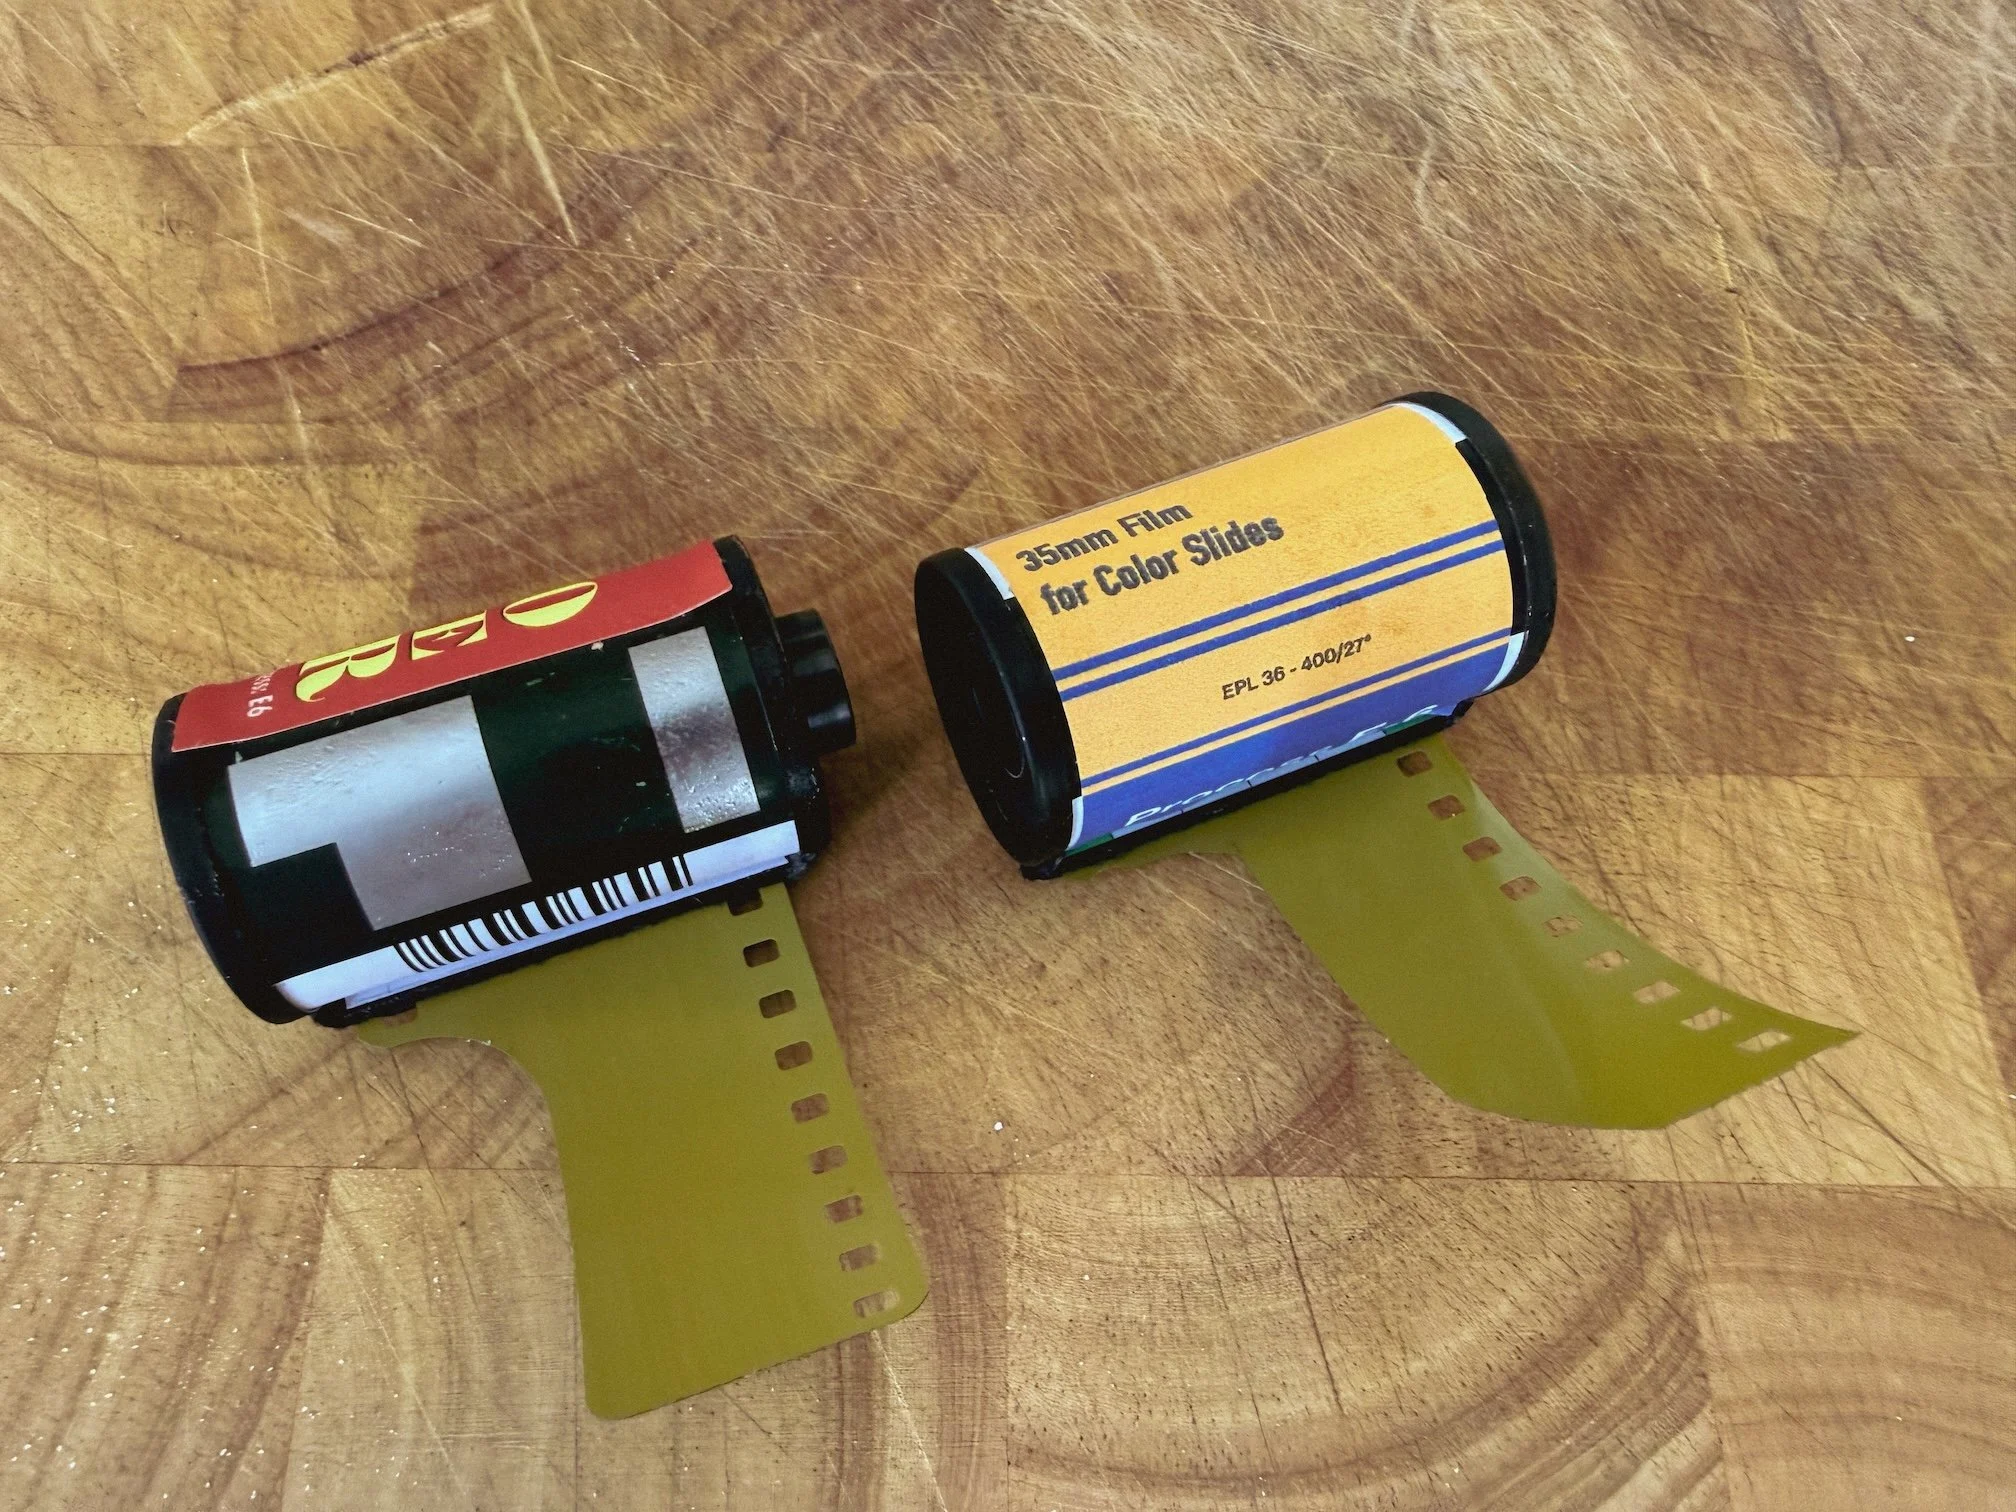
Direct Comparison Retrochrome 400 vs Ektachrome 400
Enjoyed this? You might also like: